2023 NISSAN ARMADA Door lights
[x] Cancel search: Door lightsPage 141 of 604
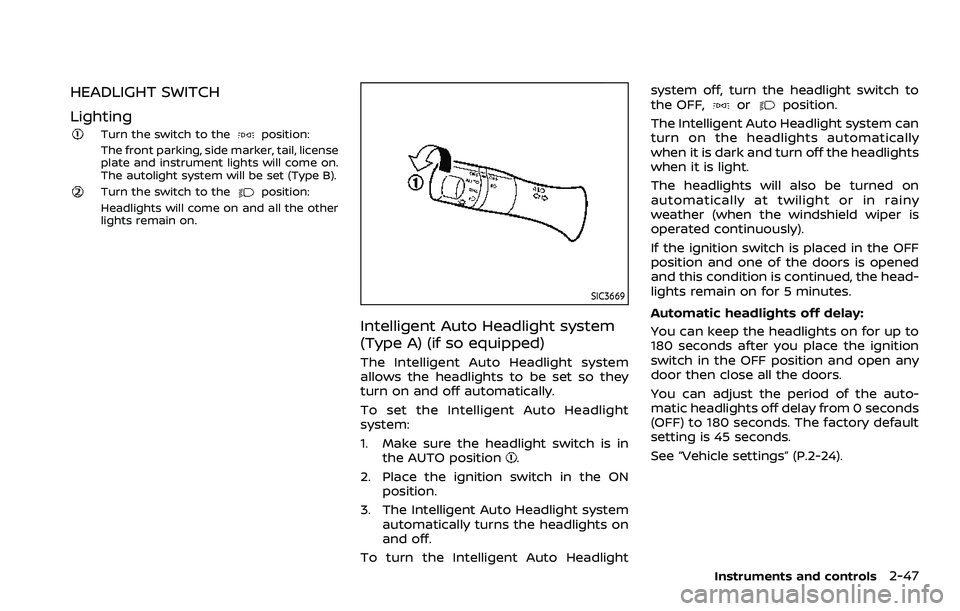
HEADLIGHT SWITCH
Lighting
Turn the switch to theposition:
The front parking, side marker, tail, license
plate and instrument lights will come on.
The autolight system will be set (Type B).
Turn the switch to theposition:
Headlights will come on and all the other
lights remain on.
SIC3669
Intelligent Auto Headlight system
(Type A) (if so equipped)
The Intelligent Auto Headlight system
allows the headlights to be set so they
turn on and off automatically.
To set the Intelligent Auto Headlight
system:
1. Make sure the headlight switch is in the AUTO position
.
2. Place the ignition switch in the ON position.
3. The Intelligent Auto Headlight system automatically turns the headlights on
and off.
To turn the Intelligent Auto Headlight system off, turn the headlight switch to
the OFF,
orposition.
The Intelligent Auto Headlight system can
turn on the headlights automatically
when it is dark and turn off the headlights
when it is light.
The headlights will also be turned on
automatically at twilight or in rainy
weather (when the windshield wiper is
operated continuously).
If the ignition switch is placed in the OFF
position and one of the doors is opened
and this condition is continued, the head-
lights remain on for 5 minutes.
Automatic headlights off delay:
You can keep the headlights on for up to
180 seconds after you place the ignition
switch in the OFF position and open any
door then close all the doors.
You can adjust the period of the auto-
matic headlights off delay from 0 seconds
(OFF) to 180 seconds. The factory default
setting is 45 seconds.
See “Vehicle settings” (P.2-24).
Instruments and controls2-47
Page 142 of 604

2-48Instruments and controls
SIC3784A
Be sure not to put anything on top of
the photo sensorlocated on the top
of the instrument panel. The photo
sensor controls the Intelligent Auto
Headlight system; if it is covered, the
photo sensor reacts as if it is dark and
the headlights will illuminate.
WAC0731X
Autolight system (Type B) (if so
equipped)
The autolight system allows the head-
lights to be set so they turn on and off
automatically.
To set the autolight system:
1. Make sure the headlight switch is in the AUTO position
orposition.
2. Place the ignition switch in the ON position.
3. The autolight system automatically turns the headlights on and off.
To turn the autolight system off, turn the
switch to the
position. The autolight system can turn on the
headlights automatically when it is dark
and turn off the headlights when it is
light.
If the ignition switch is turned to the ON
position when the parking brake is ap-
plied, the headlights remain off.
With the
position selected, the head-
lights turn off when the ignition switch is
placed in the OFF position, the shift lever
is in the P (Park) position, or the parking
brake is applied. (The front parking, tail,
license plate, and instrument lights are
on.)
How to turn off all lights:
With the AUTO position selected, all lights
turn off when the engine is restarted after
the parking brake is applied.
NOTE:
When driving at night, the headlights
remain on and cannot be turned off.
When the vehicle is stopped, the head-
lights can be turned off when the head-
light switch is in the
position.
With the AUTO position selected (head-
lights are on), the headlights will remain
on for 5 minutes when the ignition switch
is placed in the OFF position and one of
the doors is opened.
Page 143 of 604

Automatic headlights off delay:
You can keep the headlights on for up to
180 seconds after you place the ignition
switch in the OFF position and open any
door then close all the doors.
You can adjust the period of the auto-
matic headlights off delay from 0 seconds
(OFF) to 180 seconds. The factory default
setting is 45 seconds.
See “Vehicle settings” (P.2-24).
SIC3784A
Be sure not to put anything on top of
the photo sensorlocated on the top
of the instrument panel. The photo
sensor controls the autolight system; if
it is covered, the photo sensor reacts as
if it is dark and the headlights will
illuminate.
SIC3670
Example
Headlight beam select
To select the low beam, put the lever in
the neutral position as shown.
To select the high beam, push the lever
forward while the switch is in the
position. Pull it back to select the low
beam.
Pulling the lever toward you will flash the
headlight high beam even when the
headlight switch is in the OFF position (if
so equipped).
Instruments and controls2-49
Page 146 of 604

2-52Instruments and controls
If the ambient image sensor is damaged
due to an accident, contact a NISSAN
dealer.
Battery saver system
A chime will sound when the driver side
door is opened with the headlight switch
in the
orposition and the ignition
switch in the OFF or LOCK position.
When the headlight switch is in the
orposition while the ignition switch is in
the ON position, the lights will automati-
cally turn off after a period of time when
the ignition switch has been pushed to
the OFF position.
When the headlight switch remains in the
orposition after the lights auto-
matically turn off, the lights will turn on
when the ignition switch is pushed to the
ON position.
CAUTION
. When you turn on the headlight
switch again after the lights auto-
matically turn off, the lights will
not turn off automatically. Be
sure to turn the headlight switch
to the OFF (if so equipped) or the
AUTO position when you leave
the vehicle for extended periods of time, otherwise the battery will
be discharged.
. Never leave the headlight switch
on when the engine is not run-
ning for extended periods of time
even if the headlights turn off
automatically.
Daytime Running Light (DRL) sys-
tem
The LED Daytime Running Lights (DRL)
automatically illuminate when the engine
is started and the parking brake is
released. The LED DRL operate with the
headlight switch in the OFF (if so
equipped),
, or AUTO (when the head-
lights are off) position. When you turn the
headlight switch to the
position for
full illumination, the LED lights switch
from LED DRL to the park function.
Type A (if so equipped): If the parking
brake is applied before the engine is
started, the LED DRL do not illuminate.
The LED DRL illuminate when the parking
brake is released. This feature will work in
the
, AUTO or OFF position. The LED
DRL will remain on until the ignition
switch is placed in the OFF position.
Type B (if so equipped): If the parking
brake is applied before the engine is
started, the LED DRL do not illuminate. The LED DRL illuminate when the parking
brake is released. This feature will work in
the AUTO or
position. The LED DRL
will remain on until the ignition switch is
placed in the OFF position.
WARNING
When the LED DRL system is active
with the headlight switch in the OFF
position (if so equipped), tail lights
on your vehicle are not on. It is
necessary at dusk to turn on your
headlights. Failure to do so could
cause an accident injuring yourself
and others.
Page 156 of 604
2-62Instruments and controls
(See “42. Rear Door Alert is activated” (P.2-
34).)
CAUTION
.Use power outlet with the engine
running to avoid discharging the
vehicle battery.
. Avoid using power outlet when
the air conditioner, headlights or
rear window defroster is on.
. Before inserting or disconnecting
a plug, be sure the electrical
accessory being used is turned
OFF.
. When not in use, be sure to close
the cap. Do not allow water or any
liquid to contact the outlet.
WAC0620XInstrument panel
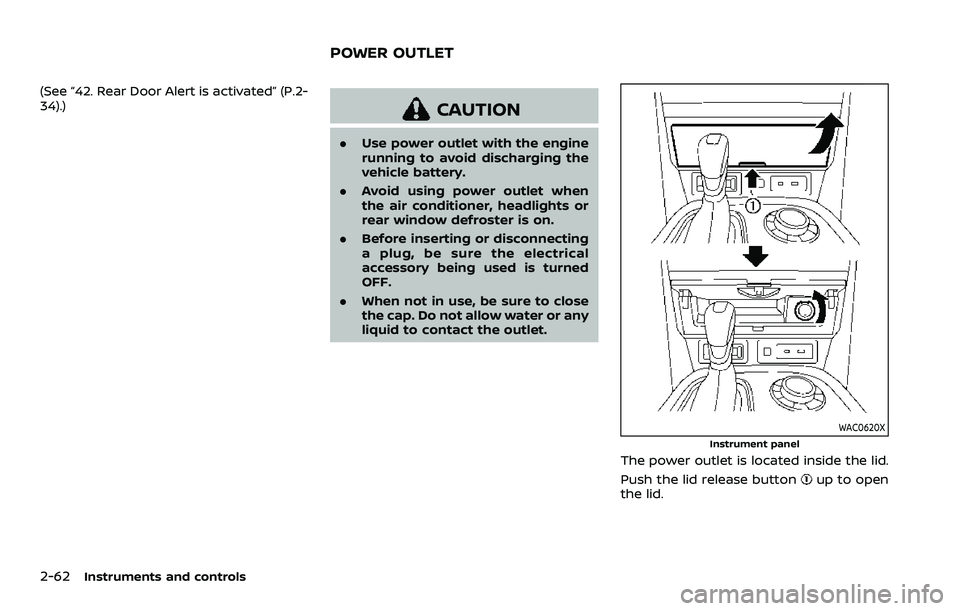
The power outlet is located inside the lid.
Push the lid release button
up to open
the lid.
POWER OUTLET
Page 175 of 604
CAUTION
.Turn off the lights when you leave
the vehicle.
. Do not use the lights for extended
periods of time with the engine
stopped. This could result in a
discharged battery.
JVI0760X
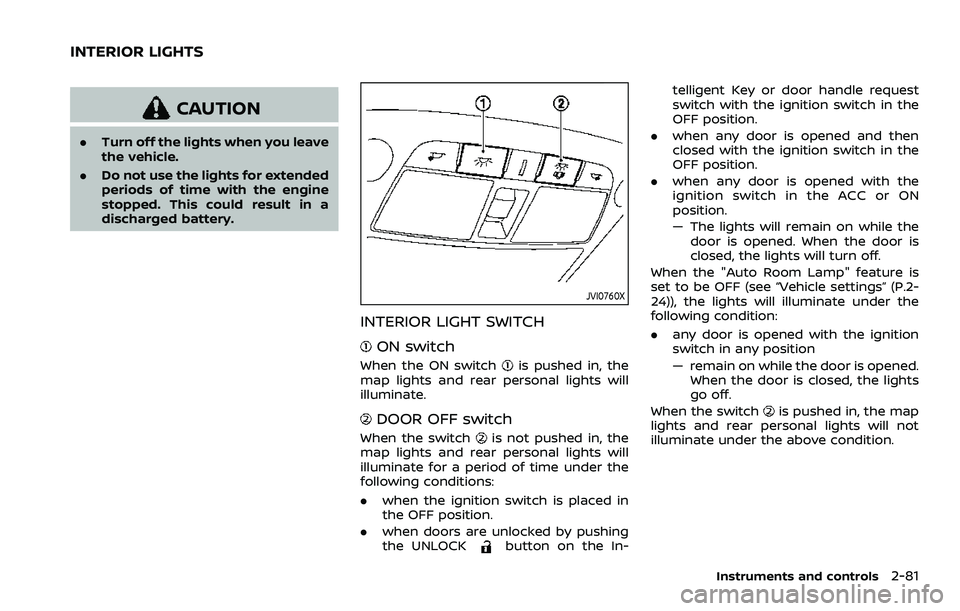
INTERIOR LIGHT SWITCH
ON switch
When the ON switchis pushed in, the
map lights and rear personal lights will
illuminate.
DOOR OFF switch
When the switchis not pushed in, the
map lights and rear personal lights will
illuminate for a period of time under the
following conditions:
. when the ignition switch is placed in
the OFF position.
. when doors are unlocked by pushing
the UNLOCK
button on the In- telligent Key or door handle request
switch with the ignition switch in the
OFF position.
. when any door is opened and then
closed with the ignition switch in the
OFF position.
. when any door is opened with the
ignition switch in the ACC or ON
position.
— The lights will remain on while the
door is opened. When the door is
closed, the lights will turn off.
When the "Auto Room Lamp" feature is
set to be OFF (see “Vehicle settings” (P.2-
24)), the lights will illuminate under the
following condition:
. any door is opened with the ignition
switch in any position
— remain on while the door is opened.
When the door is closed, the lights
go off.
When the switch
is pushed in, the map
lights and rear personal lights will not
illuminate under the above condition.
Instruments and controls2-81
INTERIOR LIGHTS
Page 177 of 604
SIC4448
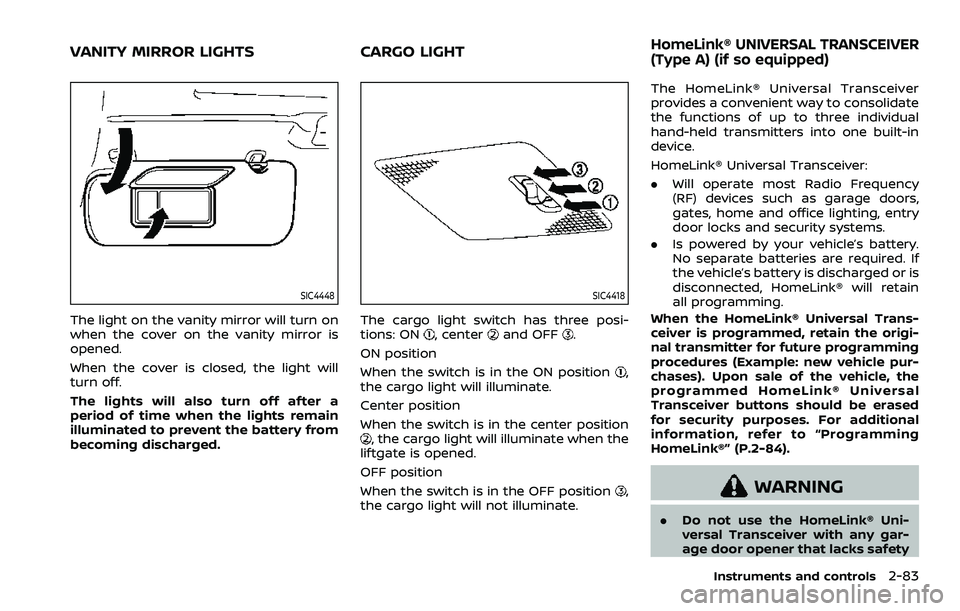
The light on the vanity mirror will turn on
when the cover on the vanity mirror is
opened.
When the cover is closed, the light will
turn off.
The lights will also turn off after a
period of time when the lights remain
illuminated to prevent the battery from
becoming discharged.
SIC4418
The cargo light switch has three posi-
tions: ON, centerand OFF.
ON position
When the switch is in the ON position
,
the cargo light will illuminate.
Center position
When the switch is in the center position
, the cargo light will illuminate when the
liftgate is opened.
OFF position
When the switch is in the OFF position
,
the cargo light will not illuminate. The HomeLink® Universal Transceiver
provides a convenient way to consolidate
the functions of up to three individual
hand-held transmitters into one built-in
device.
HomeLink® Universal Transceiver:
.
Will operate most Radio Frequency
(RF) devices such as garage doors,
gates, home and office lighting, entry
door locks and security systems.
. Is powered by your vehicle’s battery.
No separate batteries are required. If
the vehicle’s battery is discharged or is
disconnected, HomeLink® will retain
all programming.
When the HomeLink® Universal Trans-
ceiver is programmed, retain the origi-
nal transmitter for future programming
procedures (Example: new vehicle pur-
chases). Upon sale of the vehicle, the
programmed HomeLink® Universal
Transceiver buttons should be erased
for security purposes. For additional
information, refer to “Programming
HomeLink®” (P.2-84).WARNING
. Do not use the HomeLink® Uni-
versal Transceiver with any gar-
age door opener that lacks safety
Instruments and controls2-83
VANITY MIRROR LIGHTS CARGO LIGHTHomeLink® UNIVERSAL TRANSCEIVER
(Type A) (if so equipped)
Page 199 of 604
When you carry the Intelligent Key with
you, you can lock or unlock all doors by
pushing the door handle request switch
(driver’s or front passenger’s)
or the
liftgate request switchwithin the range
of operation.
When you lock or unlock the doors or the
liftgate, the hazard indicator will flash and
the horn (or the outside chime) will sound
as a confirmation. For details, see “Setting
hazard indicator and horn mode” (P.3-17).
Welcome light and farewell light
function
When you lock or unlock the doors
including the liftgate, the parking lights,
tail lights, side marker light and the
license plate light will illuminate for a
period of time. The welcome light and
farewell light function can be disabled.
For information about disabling the wel-
come light and farewell light function, it is
recommended you see a NISSAN dealer.
Locking doors
1. Move the shift lever to the P (Park) position, push the ignition switch to
the OFF position and make sure you
carry the Intelligent Key with you.*1
2. Close all the doors.*2 3. Push the door handle request switch
(driver’s or front passenger’s)
or the
liftgate request switchwhile carry-
ing the Intelligent Key with you.*3
4. All the doors will lock.
5. The hazard indicator flashes twice and the outside chime sounds twice.
*1: Doors will lock with the Intelligent Key
while the ignition switch is in the ACC or
ON position.
*2: Doors will not lock with the Intelligent
Key while any door is open.
*3: Doors will not lock by pushing the door
handle request switch with the Intelligent
Key inside the vehicle.
However, when an Intelligent Key is inside
the vehicle, doors can be locked with
another registered Intelligent Key.
NOTE:
Request switches for all doors can be
deactivated when the “Ext. Door Switch”
is turned off in the Vehicle Settings of
the vehicle information display. See
“Vehicle settings” (P.2-24).
CAUTION
. After locking the doors using the
request switch, make sure that
the doors have been securely locked by operating the door
handles.
. When locking the doors using the
request switch, make sure to
have the Intelligent Key in your
possession before operating the
request switch to prevent the
Intelligent Key from being left in
the vehicle.
. The request switch is operational
only when the Intelligent Key has
been detected by the Intelligent
Key system.
Lockout protection:
To prevent the Intelligent Key from being
accidentally locked in the vehicle, lockout
protection is equipped with the Intelligent
Key system.
When the driver’s side door is open, the
doors are locked, and then the Intelligent
Key is put inside the vehicle and all the
doors are closed; the lock will automati-
cally unlock and the door buzzer sounds.
NOTE:
The doors may not lock when the
Intelligent Key is in the same hand that
is operating the request switch to lock
the door. Put the Intelligent Key in a
purse, pocket or your other hand.
Pre-driving checks and adjustments3-11