2023 NISSAN ALTIMA tow
[x] Cancel search: towPage 38 of 644
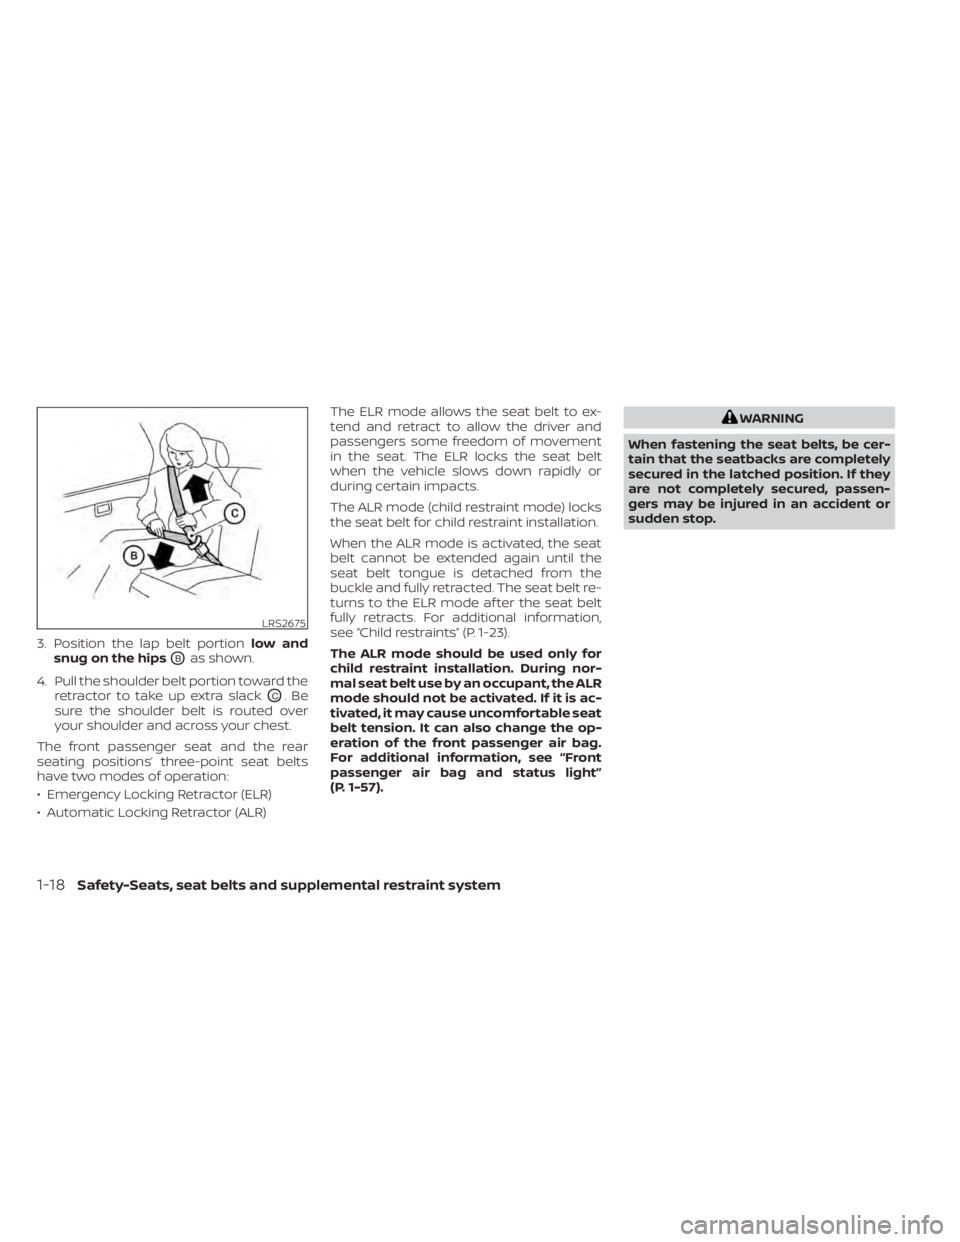
3. Position the lap belt portionlow and
snug on the hips
OBas shown.
4. Pull the shoulder belt portion toward the retractor to take up extra slack
OC.Be
sure the shoulder belt is routed over
your shoulder and across your chest.
The front passenger seat and the rear
seating positions’ three-point seat belts
have two modes of operation:
• Emergency Locking Retractor (ELR)
• Automatic Locking Retractor (ALR) The ELR mode allows the seat belt to ex-
tend and retract to allow the driver and
passengers some freedom of movement
in the seat. The ELR locks the seat belt
when the vehicle slows down rapidly or
during certain impacts.
The ALR mode (child restraint mode) locks
the seat belt for child restraint installation.
When the ALR mode is activated, the seat
belt cannot be extended again until the
seat belt tongue is detached from the
buckle and fully retracted. The seat belt re-
turns to the ELR mode af ter the seat belt
fully retracts. For additional information,
see “Child restraints” (P. 1-23).
The ALR mode should be used only for
child restraint installation. During nor-
mal seat belt use by an occupant, the ALR
mode should not be activated. If it is ac-
tivated, it may cause uncomfortable seat
belt tension. It can also change the op-
eration of the front passenger air bag.
For additional information, see “Front
passenger air bag and status light”
(P. 1-57).
WARNING
When fastening the seat belts, be cer-
tain that the seatbacks are completely
secured in the latched position. If they
are not completely secured, passen-
gers may be injured in an accident or
sudden stop.
LRS2675
1-18Safety-Seats, seat belts and supplemental restraint system
Page 66 of 644
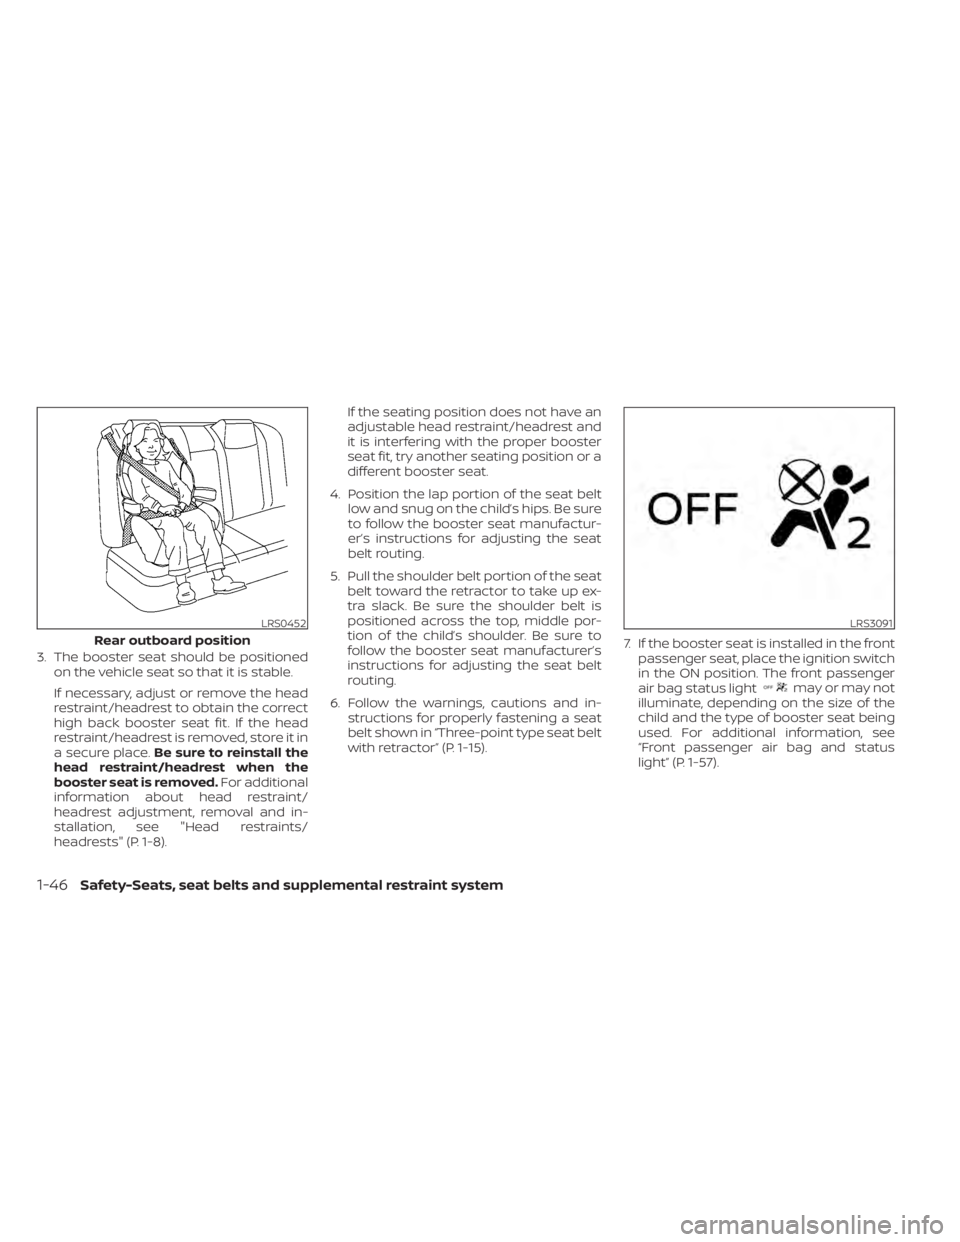
3. The booster seat should be positionedon the vehicle seat so that it is stable.
If necessary, adjust or remove the head
restraint/headrest to obtain the correct
high back booster seat fit. If the head
restraint/headrest is removed, store it in
a secure place. Be sure to reinstall the
head restraint/headrest when the
booster seat is removed. For additional
information about head restraint/
headrest adjustment, removal and in-
stallation, see "Head restraints/
headrests" (P. 1-8). If the seating position does not have an
adjustable head restraint/headrest and
it is interfering with the proper booster
seat fit, try another seating position or a
different booster seat.
4. Position the lap portion of the seat belt low and snug on the child’s hips. Be sure
to follow the booster seat manufactur-
er’s instructions for adjusting the seat
belt routing.
5. Pull the shoulder belt portion of the seat belt toward the retractor to take up ex-
tra slack. Be sure the shoulder belt is
positioned across the top, middle por-
tion of the child’s shoulder. Be sure to
follow the booster seat manufacturer’s
instructions for adjusting the seat belt
routing.
6. Follow the warnings, cautions and in- structions for properly fastening a seat
belt shown in “Three-point type seat belt
with retractor” (P. 1-15). 7. If the booster seat is installed in the front
passenger seat, place the ignition switch
in the ON position. The front passenger
air bag status light
may or may not
illuminate, depending on the size of the
child and the type of booster seat being
used. For additional information, see
“Front passenger air bag and status
light” (P. 1-57).
LRS0452
Rear outboard position
LRS3091
1-46Safety-Seats, seat belts and supplemental restraint system
Page 82 of 644
•Modif ying or tampering with the
front passenger seat may result in
serious personal injury. For example,
do not change the front seats by
placing material on the seat cushion
or by installing additional trim mate-
rial, such as seat covers, on the seat
that are not specifically designed to
assure proper air bag operation. Ad-
ditionally, do not stow any objects
under the front passenger seat or the
seat cushion and seatback. Such ob-
jects may interfere with the proper
operation of the occupant classifica-
tion sensor (weight sensor).
• No unauthorized changes should be
made to any components or wiring
of the seat belt system. This may af-
fect the front air bag system. Tam-
pering with the seat belt system may
result in serious personal injury. •
It is recommended that you visit a
NISSAN dealer for work on and
around the front air bag system. It is
also recommended that you visit a
NISSAN dealer for installation of elec-
trical equipment. The Supplemental
Restraint System (SRS) wiring har-
nesses* should not be modified or
disconnected. Unauthorized electri-
cal test equipment and probing de-
vices should not be used on the air
bag system.
• A cracked windshield should be re-
placed immediately by a qualified re-
pair facility. A cracked windshield
could affect the function of the
supplemental air bag system.
*The SRS wiring harness connectors are
yellow and orange for easy
identification.
When selling your vehicle, we request that
you inform the buyer about the front air
bag system and guide the buyer to the
appropriate sections in this Owner's
Manual.
Front and rear outboard
seat-mounted side-impact
supplemental air bag and
roof-mounted curtain
side-impact and rollover
supplemental air bag systems
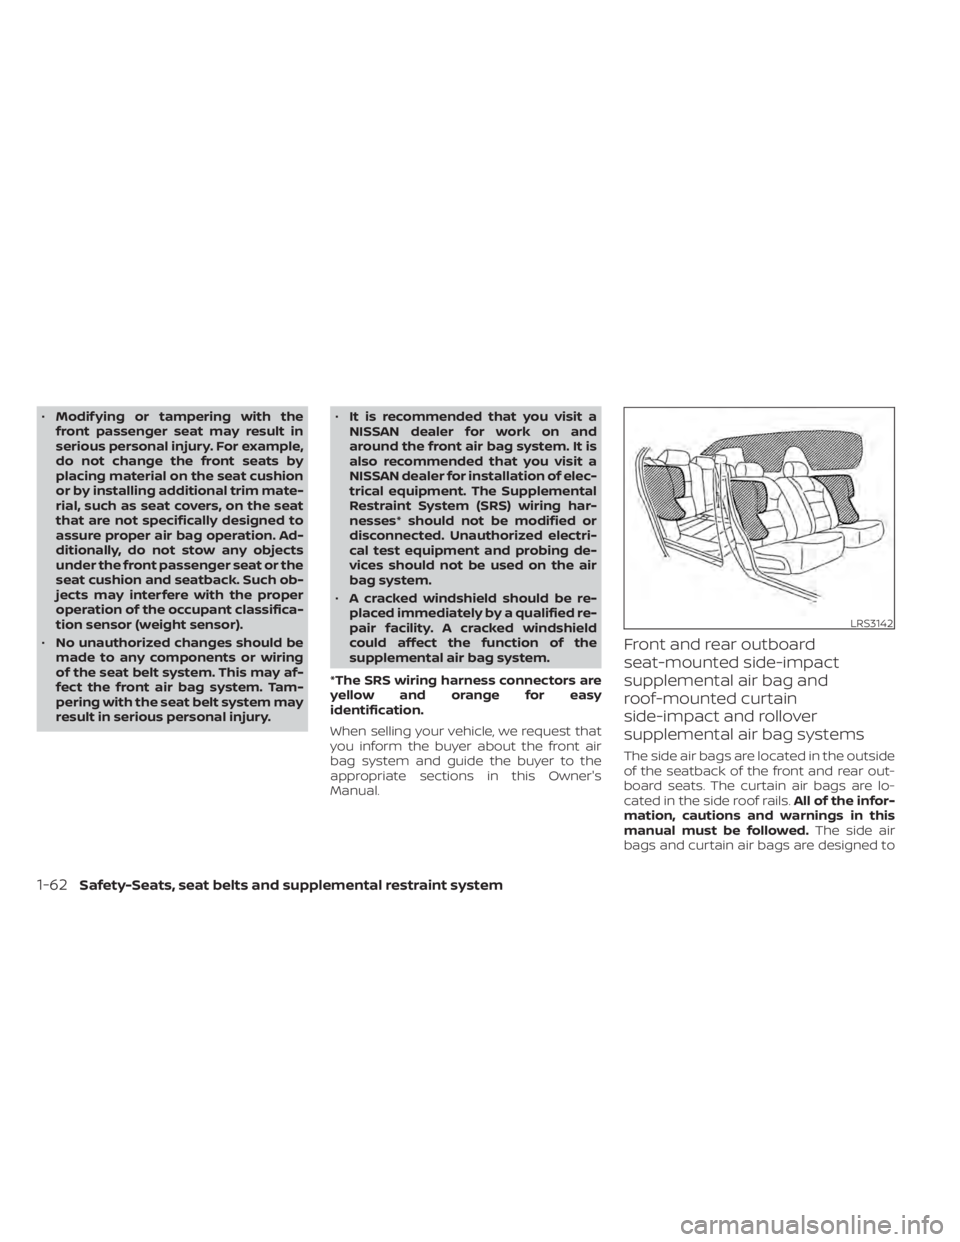
The side air bags are located in the outside
of the seatback of the front and rear out-
board seats. The curtain air bags are lo-
cated in the side roof rails. All of the infor-
mation, cautions and warnings in this
manual must be followed. The side air
bags and curtain air bags are designed to
LRS3142
1-62Safety-Seats, seat belts and supplemental restraint system
Page 100 of 644

CHECKING LIGHTS
With all doors closed, apply the parking
brake, fasten the seat belts and place the
ignition switch in the ON position without
starting the engine. The following lights (if
so equipped) will come on:
,,,,,or
The following lights (if so equipped) come
on briefly and then go off:
or,,,,,or,
If any light fails to come on or operate in a
way other than described, it may indicate a
burned-out bulb and/or a system mal-
function. Have the system checked. It is
recommended that you visit a NISSAN
dealer for this service.
Some indicators and warnings are also dis-
played in the vehicle information display
between the speedometer and tachom-
eter. For additional information, see “Ve-
hicle information display-5 inch (13 cm)
Type A” (P. 2-18) or “Vehicle information
display-7 inch (18 cm) Type B” (P. 2-34).
WARNING/INDICATOR LIGHTS (red)
For additional information on warnings
and indicators, see “Vehicle information
display–5 inch (13 cm) Type A” (P. 2-18) or
“Vehicle information display—7 inch (18cm)
Type B” (P. 2-34).
orBrake warning
light
This light functions for both the parking
brake and the foot brake systems.
Parking brake indicator (if so
equipped)
When the ignition switch is placed in the ON
position, the light comes on when the park-
ing brake is applied.
Low brake fluid warning light
When the ignition switch is placed in the ON
position, the light warns of a low brake fluid
level. If the light comes on while the engine
is running with the parking brake not ap-
plied, stop the vehicle and perform the
following:
1. Check the brake fluid level. Add brakefluid as necessary. For additional infor-
mation, see “Brake fluid” (P. 8-12). 2. If the brake fluid level is correct, have the
warning system checked. It is recom-
mended that you visit a NISSAN dealer
for this service.
WARNING
• Your brake system may not be work-
ing properly if the warning light is on.
Driving could be dangerous. If you
judge it to be safe, drive carefully to
the nearest service station for re-
pairs. Otherwise, have your vehicle
towed because driving it could be
dangerous.
• Pressing the brake pedal with the en-
gine stopped and/or a low brake
fluid level may increase your stop-
ping distance and braking will re-
quire greater pedal effort as well as
pedal travel.
• If the brake fluid level is below the
MINIMUM or MIN mark on the brake
fluid reservoir, do not drive until the
brake system has been checked. It is
recommended that you visit a
NISSAN dealer for this service.
2-10Instruments and controls
Page 105 of 644

CAUTION
• The TPMS is not a substitute for the
regular tire pressure check. Be sure
to check the tire pressure regularly.
• If the vehicle is being driven at
speeds of less than 16 mph (25 km/h),
the TPMS may not operate correctly.
• Be sure to install the specified size of
tires to the four wheels correctly.
Malfunction Indicator Light
(MIL)
If this indicator light comes on steady or
blinks while the engine is running, it may
indicate a potential emission control
malfunction.
The MIL may also come on steady if the
fuel-filler cap is loose or missing, or if the
vehicle runs out of fuel. Check to make sure
the fuel-filler cap is installed and closed
tightly, and that the vehicle has at least 3
gallons (11.4 liters) of fuel in the fuel tank.
Af ter a few driving trips, the
light
should turn off if no other potential emis-
sion control system malfunction exists. If this indicator light comes on steady for 20
seconds and then blinks for 10 seconds
when the engine is not running, it indicates
that the vehicle is not ready for an emission
control system inspection/maintenance
test. For additional information, see “Readi-
ness for Inspection/Maintenance (I/M) test”
(P. 10-24).
Operation
The MIL will come on in one of two ways:
• MIL on steady — An emission control sys-
tem malfunction has been detected.
Check the fuel-filler cap if the Loose Fuel
Cap warning appears in the vehicle infor-
mation display. If the fuel-filler cap is loose
or missing, tighten or install the cap and
continue to drive the vehicle. The
light should turn off af ter a few driving
trips. If thelight does not turn off
af ter a few driving trips, have the vehicle
inspected. It is recommended that you
visit a NISSAN dealer for this service. You
do not need to have your vehicle towed
to the dealer.
• MIL blinking — An engine misfire has been detected which may damage the emis-
sion control system. To reduce or avoid
emission control system damage:– do not drive at speeds above 45 mph (72 km/h). – avoid hard acceleration or
deceleration.
– avoid steep uphill grades.
– if possible, reduce the amount of cargo being hauled or towed.
The MIL may stop blinking and come on
steady. Have the vehicle inspected. It is rec-
ommended that you visit a NISSAN dealer
for this service. You do not need to have
your vehicle towed to the dealer.
CAUTION
Continued vehicle operation without
having the emission control system
checked and repaired as necessary
could lead to poor driveability, reduced
fuel economy, and possible damage to
the emission control system.
Master warning light
When the ignition is in the ON position, the
master warning light illuminates if any of
the following are displayed on the vehicle
information display.
• No key warning
• Low windshield-washer fluid warning
• Door open warning (when stopped)
• Trunk open warning
Instruments and controls2-15
Page 121 of 644

Release Parking Brake
This warning appears when the parking
brake is set and the vehicle is driven.
Shif t to Park
This warning appears when the ignition
switch is in the AUTO ACC or OFF position
and the shif t lever is not in the P (Park)
position. Also, a chime sounds when the
ignition switch is in the AUTO ACC or OFF
position.
If this warning appears, move the shif t lever
to the P (Park) position and start the engine.
Shipping Mode On Push Storage Fuse
This warning may appear if the extended
storage switch is not pushed in. When this
warning appears, push in the extended
storage switch to turn off the warning. For
additional information, see “Extended stor-
age switch” (P. 2-70).
Tire Pressure Low - Add Air
This warning appears when the low tire
pressure warning light in the meter illumi-
nates and low tire pressure is detected. The
warning appears each time the ignition
switch is placed in the ON position as long
as the low tire pressure warning light re-mains illuminated. If this warning appears,
stop the vehicle and adjust the tire pres-
sures of all four tires to the recommended
COLD tire pressure shown on the Tire and
Loading Information label. For additional
information, see “Low tire pressure warning
light” (P. 2-13) and “Tire Pressure Monitoring
System (TPMS)” (P. 5-5).
Transmission Shif t Position
indicator
This indicator shows the transmission shif t
position.
Service CVT
This warning appears when there is a
problem with the CVT system. If this
warning appears, have the system
checked. It is recommended that you visit a
NISSAN dealer for this service.
CVT hot Power reduced
This transmission has a high fluid tem-
perature protection mode. If the fluid tem-
perature becomes too high (for example,
climbing steep grades in high tempera-
tures with heavy loads, such as when tow-
ing a trailer), engine power and, under
some conditions, vehicle speed will be de-
creased automatically to reduce thechance of transmission damage. Vehicle
speed can be controlled with the accelera-
tor pedal, but the engine and vehicle speed
may be reduced.
WARNING
When the high fluid temperature pro-
tection mode operation occurs, vehicle
speed may be gradually reduced. The
reduced speed may be lower than
other traffic, which could increase the
chance of a collision. Be especially
careful when driving. If necessary, pull
to the side of the road at a safe place
and allow the transmission to return to
normal operation; or have it repaired if
necessary.
CVT (AT) Malfunction Service now
This warning appears when there is a
problem with the CVT system. If this
warning comes on, have the system
checked. It is recommended that you visit a
NISSAN dealer for this service.
CVT (AT) Stop the vehicle
This message appears 30 seconds before
the vehicle is shut down due to an above
normal operating transmission tempera-
ture. The Malfunction Indicator Light (MIL)
Instruments and controls2-31
Page 122 of 644
and malfunction warning (red) will illumi-
nate. Have the system checked. It is recom-
mended that you visit a NISSAN dealer im-
mediately for this service.
Engine Stalled: Stop safely
This message appears 30 seconds before
the vehicle is shut down due to an above
normal operating exhaust temperature.
The Malfunction Indicator Light (MIL) and
malfunction warning (red) will illuminate.
Have the system checked. It is recom-
mended that you visit a NISSAN dealer im-
mediately for this service.
Engine Malfunction Power reduced
Service now
This warning appears when the engine is
not operating under normal conditions. If
this warning appears, have the system
checked. It is recommended that you visit a
NISSAN dealer for this service.
Engine Malfunction Service now
This warning appears when there is a
problem with the engine. If this warning
appears, have the system checked. It is rec-
ommended that you visit a NISSAN dealer
for this service.
Engine hot Power reduced
This engine has a high fluid temperature
protection mode. If the fluid temperature
becomes too high (for example, climbing
steep grades in high temperatures with
heavy loads, such as when towing a trailer),
engine power and, under some conditions,
vehicle speed will be decreased automati-
cally to reduce the chance of engine dam-
age. Vehicle speed can be controlled with
the accelerator pedal, but the engine and
vehicle speed may be reduced.
WARNING
When the high fluid temperature pro-
tection mode operation occurs, vehicle
speed may be gradually reduced. The
reduced speed may be lower than
other traffic, which could increase the
chance of a collision. Be especially
careful when driving. If necessary, pull
to the side of the road at a safe place
and allow the engine to return to nor-
mal operation; or have it repaired if
necessary.
Automatic Emergency
Braking (AEB) with
Pedestrian Detection
emergency warning
indicator
This indicator appears along, with an au-
dible warning, when the system detects
the possibility of a forward collision.
For additional information, see “Automatic
Emergency Braking (AEB) with Pedestrian
Detection” (P. 5-135).
Blind Spot Warning (BSW)
indicator
This indicator appears when the BSW sys-
tem is engaged.
For additional information, see “Blind Spot
Warning (BSW)” (P. 5-46).
Cruise control indicator
This indicator shows the cruise control sys-
tem status.
When cruise control is activated, a green
circle will appear to indicate it is set. The
vehicle information display will also display
the speed the cruise control was set at. If
you accelerate past the set speed, the
speed will blink until you either cancel
cruise control or go back to the set speed. If
2-32Instruments and controls
Page 138 of 644
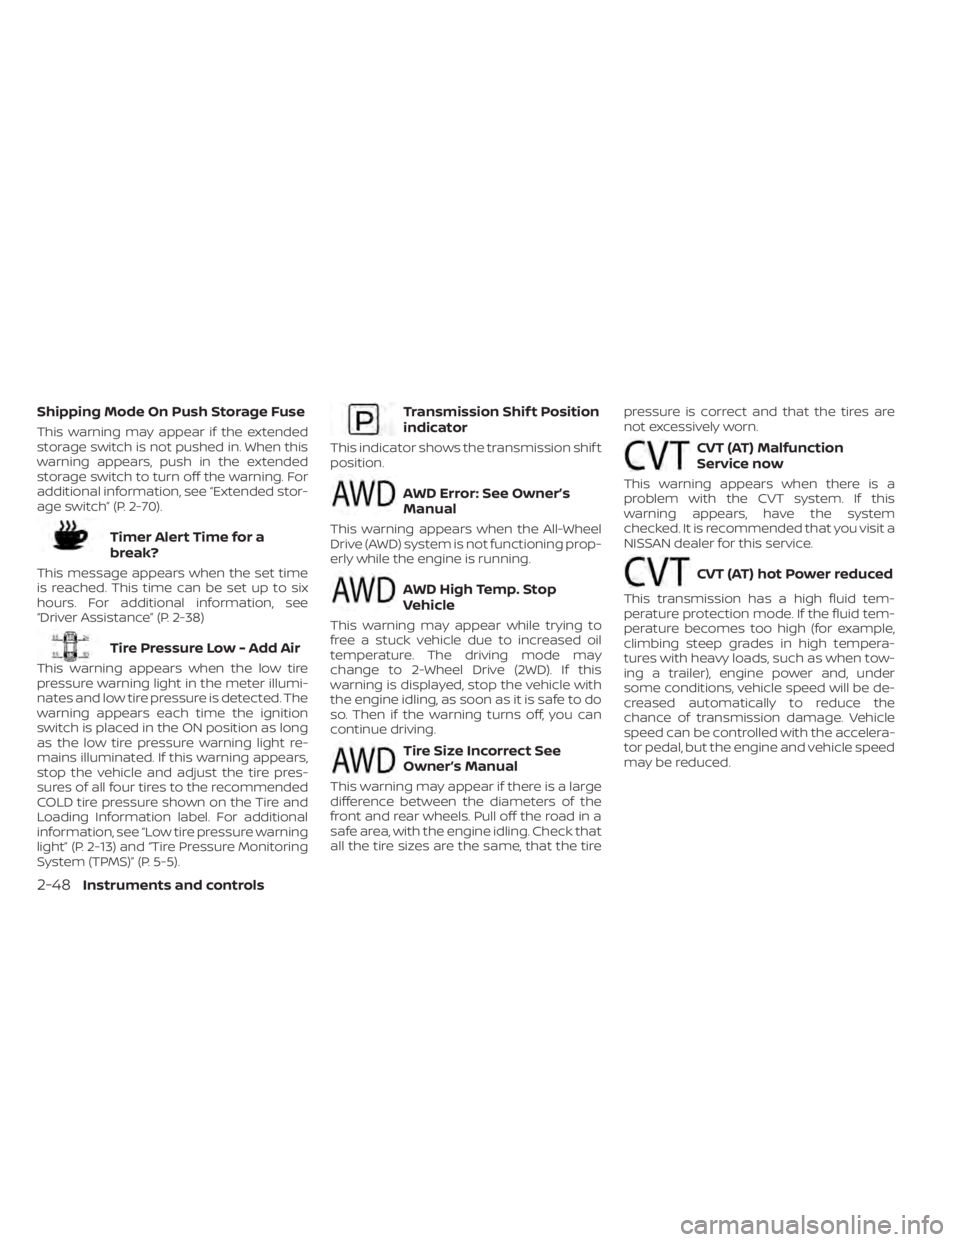
Shipping Mode On Push Storage Fuse
This warning may appear if the extended
storage switch is not pushed in. When this
warning appears, push in the extended
storage switch to turn off the warning. For
additional information, see “Extended stor-
age switch” (P. 2-70).
Timer Alert Time for a
break?
This message appears when the set time
is reached. This time can be set up to six
hours. For additional information, see
“Driver Assistance” (P. 2-38)
Tire Pressure Low - Add Air
This warning appears when the low tire
pressure warning light in the meter illumi-
nates and low tire pressure is detected. The
warning appears each time the ignition
switch is placed in the ON position as long
as the low tire pressure warning light re-
mains illuminated. If this warning appears,
stop the vehicle and adjust the tire pres-
sures of all four tires to the recommended
COLD tire pressure shown on the Tire and
Loading Information label. For additional
information, see “Low tire pressure warning
light” (P. 2-13) and “Tire Pressure Monitoring
System (TPMS)” (P. 5-5).
Transmission Shif t Position
indicator
This indicator shows the transmission shif t
position.
AWD Error: See Owner’s
Manual
This warning appears when the All-Wheel
Drive (AWD) system is not functioning prop-
erly while the engine is running.
AWD High Temp. Stop
Vehicle
This warning may appear while trying to
free a stuck vehicle due to increased oil
temperature. The driving mode may
change to 2-Wheel Drive (2WD). If this
warning is displayed, stop the vehicle with
the engine idling, as soon as it is safe to do
so. Then if the warning turns off, you can
continue driving.
Tire Size Incorrect See
Owner’s Manual
This warning may appear if there is a large
difference between the diameters of the
front and rear wheels. Pull off the road in a
safe area, with the engine idling. Check that
all the tire sizes are the same, that the tirepressure is correct and that the tires are
not excessively worn.
CVT (AT) Malfunction
Service now
This warning appears when there is a
problem with the CVT system. If this
warning appears, have the system
checked. It is recommended that you visit a
NISSAN dealer for this service.
CVT (AT) hot Power reduced
This transmission has a high fluid tem-
perature protection mode. If the fluid tem-
perature becomes too high (for example,
climbing steep grades in high tempera-
tures with heavy loads, such as when tow-
ing a trailer), engine power and, under
some conditions, vehicle speed will be de-
creased automatically to reduce the
chance of transmission damage. Vehicle
speed can be controlled with the accelera-
tor pedal, but the engine and vehicle speed
may be reduced.
2-48Instruments and controls