2023 NISSAN ALTIMA seat adjustment
[x] Cancel search: seat adjustmentPage 199 of 644
•Closely supervise children when they
are around cars to prevent them
from playing and becoming locked in
the trunk where they could be seri-
ously injured. Keep the car locked,
with the rear seatback and trunk lid
securely latched when not in use, and
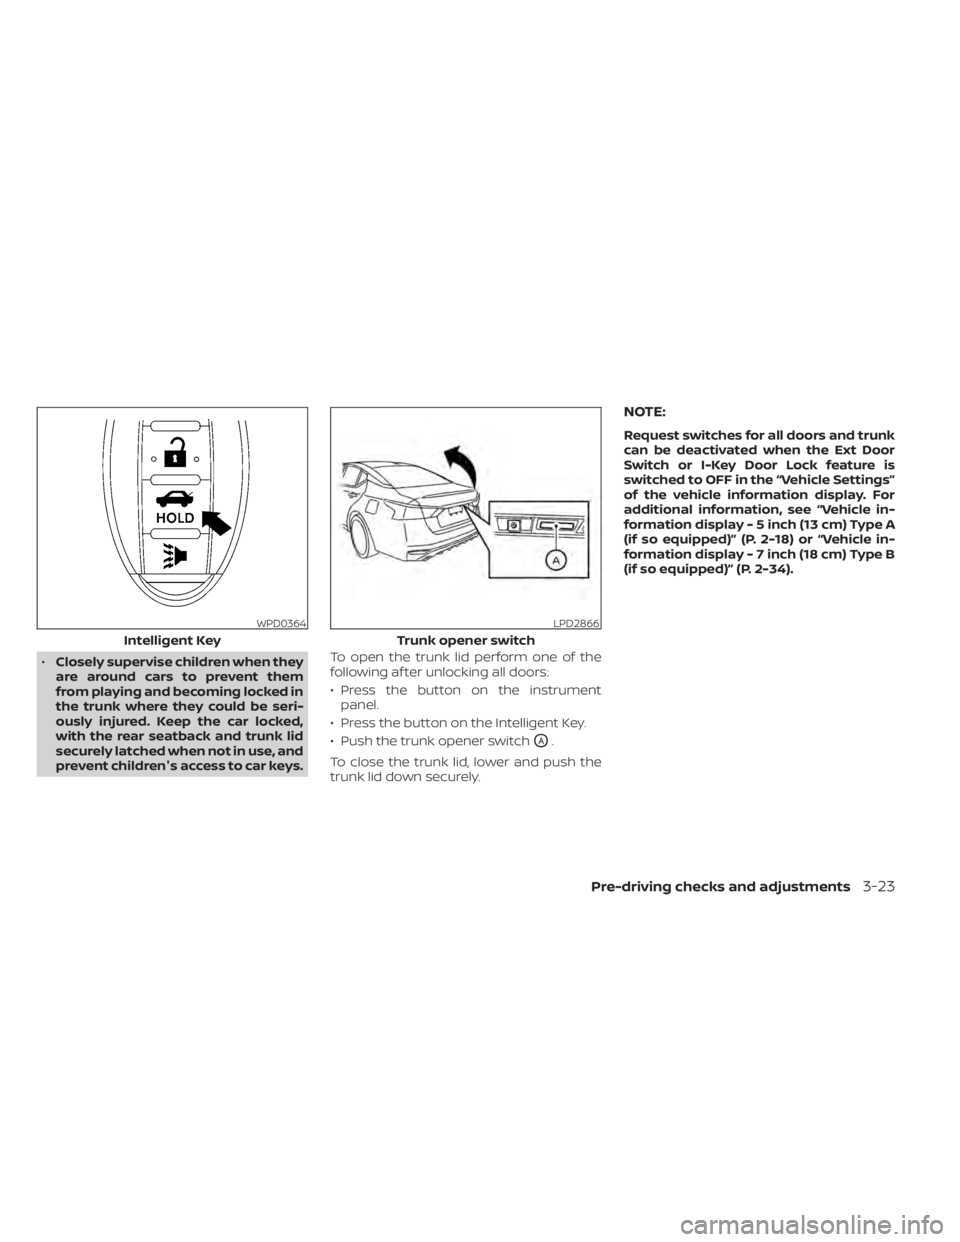
prevent children's access to car keys. To open the trunk lid perform one of the
following af ter unlocking all doors:
• Press the button on the instrument
panel.
• Press the button on the Intelligent Key.
• Push the trunk opener switch
OA.
To close the trunk lid, lower and push the
trunk lid down securely.
NOTE:
Request switches for all doors and trunk
can be deactivated when the Ext Door
Switch or I-Key Door Lock feature is
switched to OFF in the “Vehicle Settings”
of the vehicle information display. For
additional information, see “Vehicle in-
formation display - 5 inch (13 cm) Type A
(if so equipped)” (P. 2-18) or “Vehicle in-
formation display - 7 inch (18 cm) Type B
(if so equipped)” (P. 2-34).
WPD0364
Intelligent Key
LPD2866
Trunk opener switch
Pre-driving checks and adjustments3-23
Page 200 of 644
INTERIOR TRUNK LID RELEASE
WARNING
Closely supervise children when they
are around cars to prevent them from
playing and becoming locked in the
trunk where they could be seriously in-
jured. Keep the car locked, with the rear
seatback and trunk lid securely latched
when not in use, and prevent children's
access to car keys. The interior trunk lid release mechanism
provides a means of escape for children
and adults in the event they become
locked inside the trunk.
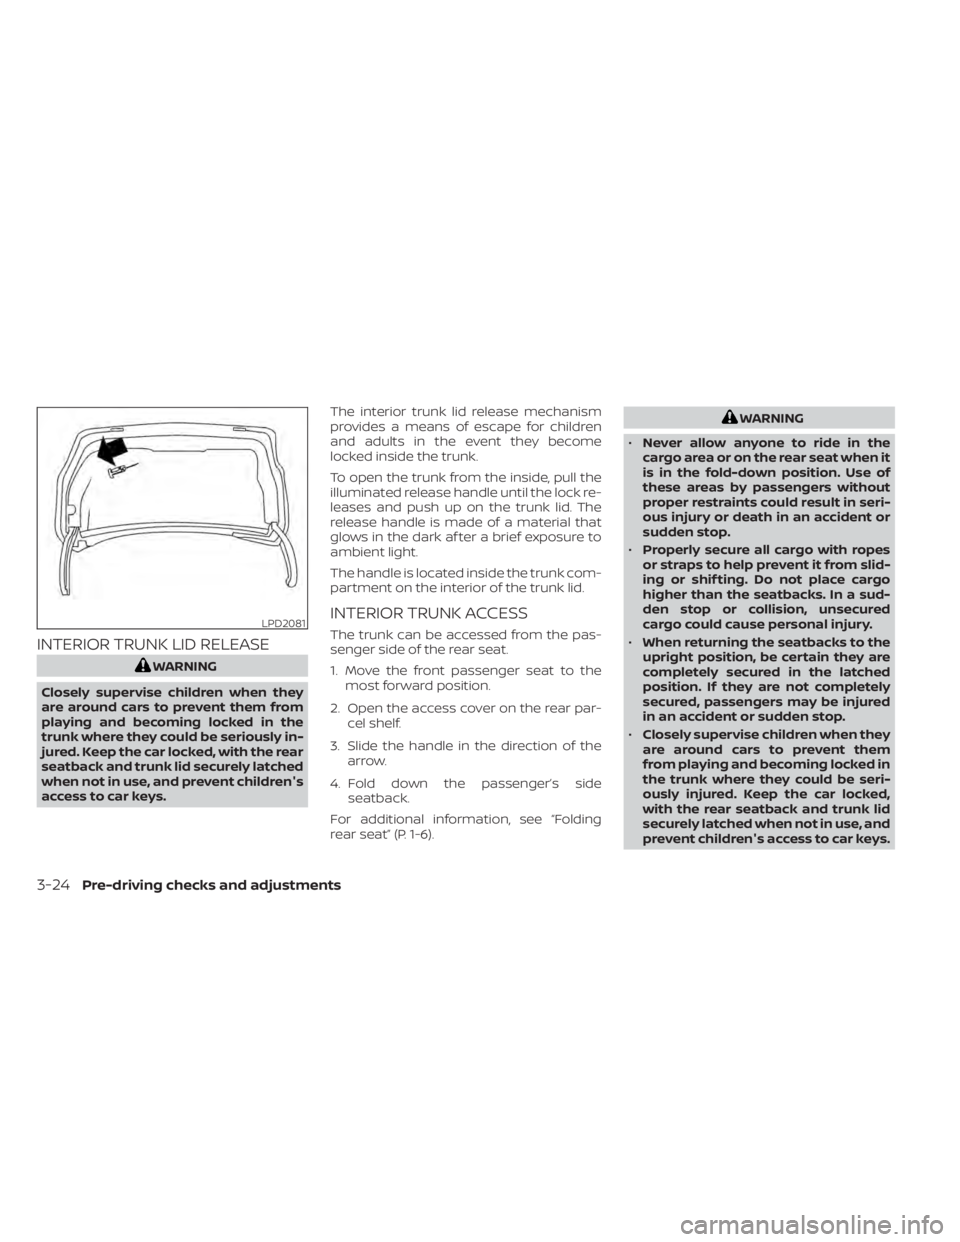
To open the trunk from the inside, pull the
illuminated release handle until the lock re-
leases and push up on the trunk lid. The
release handle is made of a material that
glows in the dark af ter a brief exposure to
ambient light.
The handle is located inside the trunk com-
partment on the interior of the trunk lid.
INTERIOR TRUNK ACCESS
The trunk can be accessed from the pas-
senger side of the rear seat.
1. Move the front passenger seat to the
most forward position.
2. Open the access cover on the rear par- cel shelf.
3. Slide the handle in the direction of the arrow.
4. Fold down the passenger’s side seatback.
For additional information, see “Folding
rear seat” (P. 1-6).
WARNING
• Never allow anyone to ride in the
cargo area or on the rear seat when it
is in the fold-down position. Use of
these areas by passengers without
proper restraints could result in seri-
ous injury or death in an accident or
sudden stop.
• Properly secure all cargo with ropes
or straps to help prevent it from slid-
ing or shif ting. Do not place cargo
higher than the seatbacks. In a sud-
den stop or collision, unsecured
cargo could cause personal injury.
• When returning the seatbacks to the
upright position, be certain they are
completely secured in the latched
position. If they are not completely
secured, passengers may be injured
in an accident or sudden stop.
• Closely supervise children when they
are around cars to prevent them
from playing and becoming locked in
the trunk where they could be seri-
ously injured. Keep the car locked,
with the rear seatback and trunk lid
securely latched when not in use, and
prevent children's access to car keys.
LPD2081
3-24Pre-driving checks and adjustments
Page 203 of 644
3. Press the OK button on the steeringwheel for about 1 second to turn off the
Loose Fuel Cap warning af ter tightening
the fuel-filler cap.WARNING
• Do not adjust the steering wheel
while driving. You could lose control
of your vehicle and cause an
accident.
• Do not adjust the steering wheel any
closer to you than is necessary for
proper steering operation and com-
fort. The driver's air bag inflates with
great force. If you are unrestrained,
leaning forward, sitting sideways or
out of position in any way, you are at
greater risk of injury or death in a
crash. You may also receive serious
or fatal injuries from the air bag if you
are up against it when it inflates. Al-
ways sit back against the seatback
and as far away as practical from the
steering wheel. Always use the seat
belts.
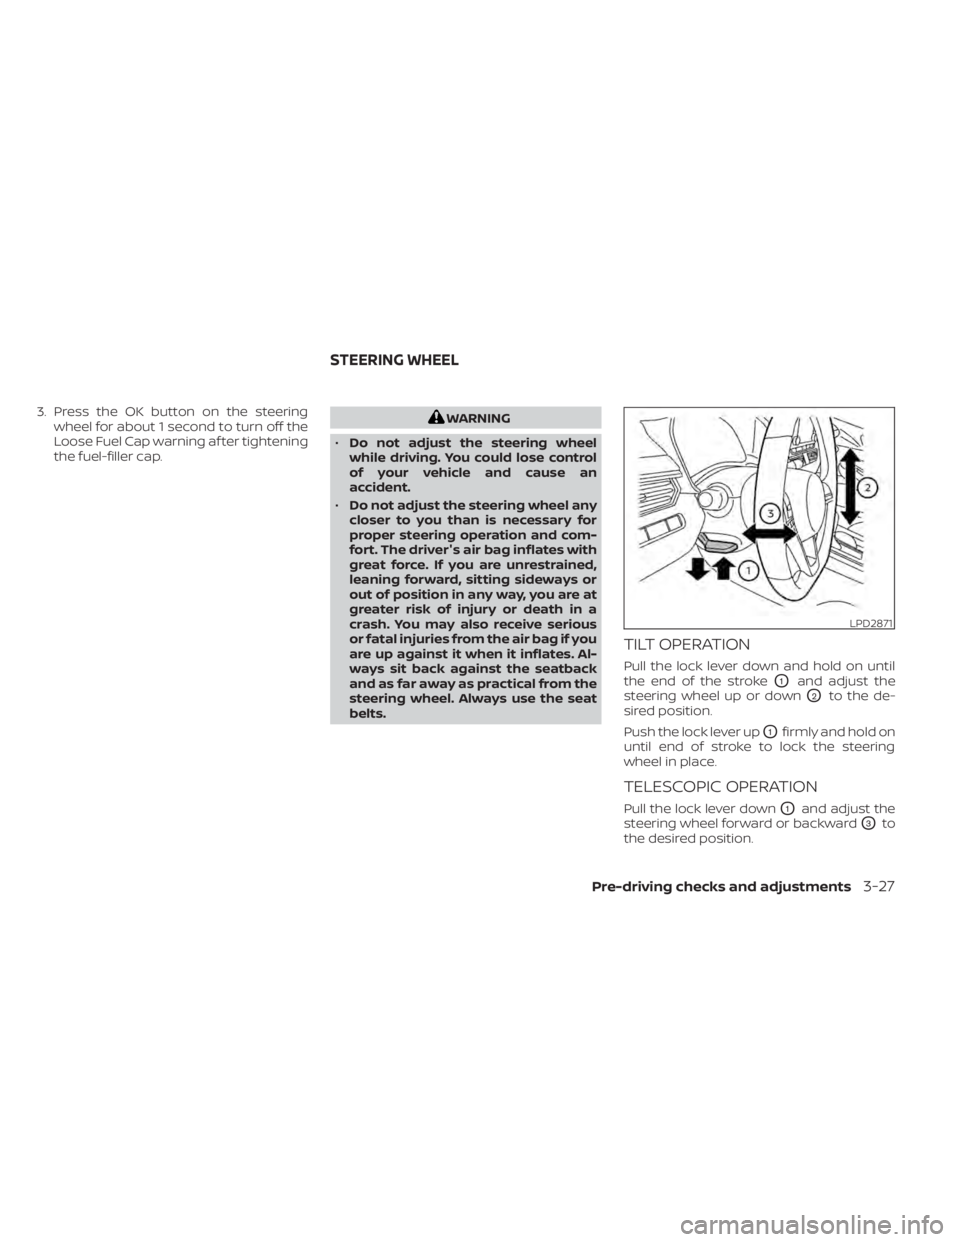
TILT OPERATION
Pull the lock lever down and hold on until
the end of the stroke
O1and adjust the
steering wheel up or down
O2to the de-
sired position.
Push the lock lever up
O1firmly and hold on
until end of stroke to lock the steering
wheel in place.
TELESCOPIC OPERATION
Pull the lock lever downO1and adjust the
steering wheel forward or backward
O3to
the desired position.
LPD2871
STEERING WHEEL
Pre-driving checks and adjustments3-27
Page 207 of 644
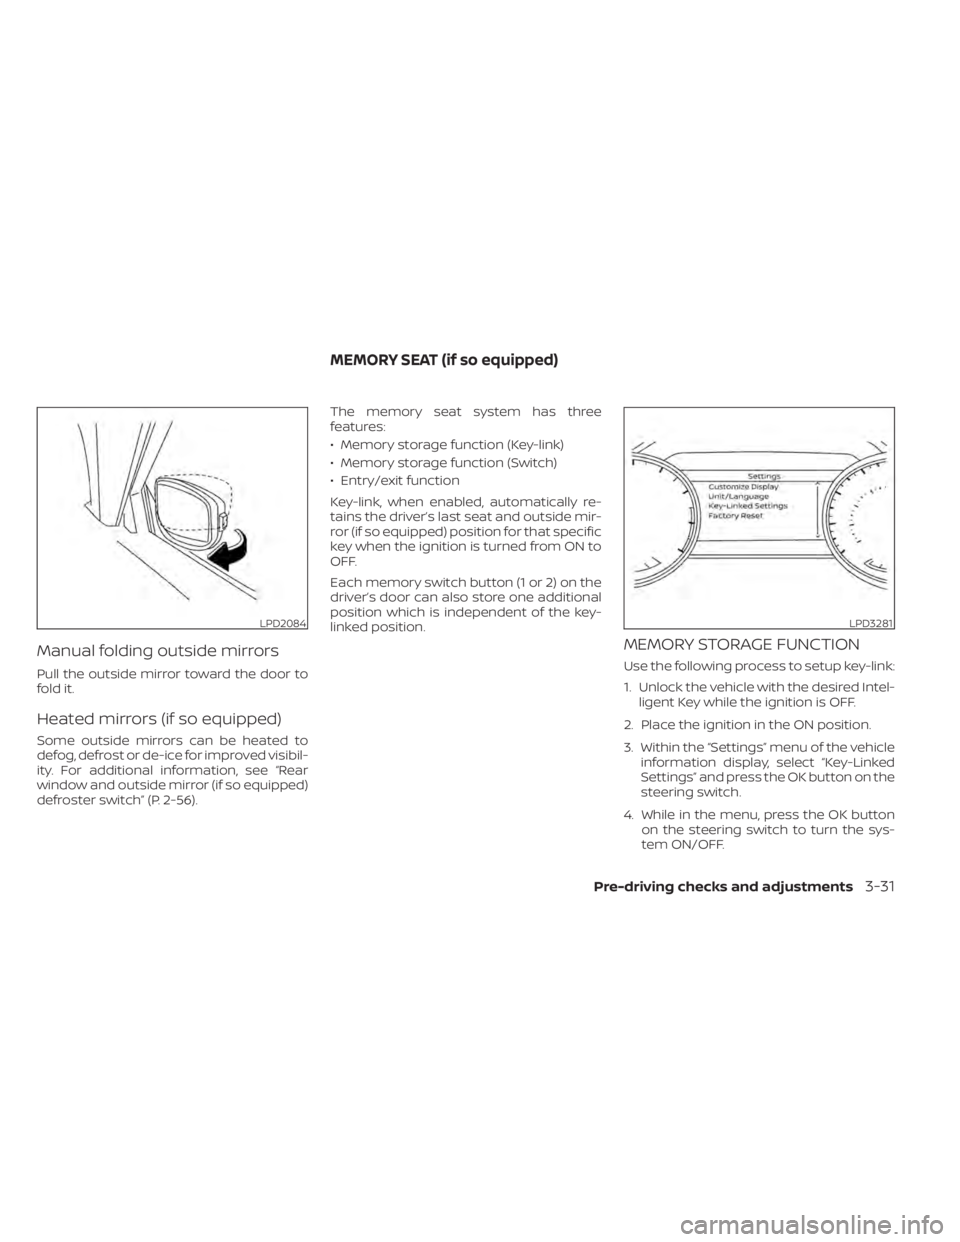
Manual folding outside mirrors
Pull the outside mirror toward the door to
fold it.
Heated mirrors (if so equipped)
Some outside mirrors can be heated to
defog, defrost or de-ice for improved visibil-
ity. For additional information, see “Rear
window and outside mirror (if so equipped)
defroster switch” (P. 2-56).The memory seat system has three
features:
• Memory storage function (Key-link)
• Memory storage function (Switch)
• Entry/exit function
Key-link, when enabled, automatically re-
tains the driver’s last seat and outside mir-
ror (if so equipped) position for that specific
key when the ignition is turned from ON to
OFF.
Each memory switch button (1 or 2) on the
driver’s door can also store one additional
position which is independent of the key-
linked position.
MEMORY STORAGE FUNCTION
Use the following process to setup key-link:
1. Unlock the vehicle with the desired Intel-
ligent Key while the ignition is OFF.
2. Place the ignition in the ON position.
3. Within the “Settings” menu of the vehicle information display, select “Key-Linked
Settings” and press the OK button on the
steering switch.
4. While in the menu, press the OK button on the steering switch to turn the sys-
tem ON/OFF.
LPD2084LPD3281
MEMORY SEAT (if so equipped)
Pre-driving checks and adjustments3-31
Page 208 of 644
Once step 4 is completed, every time the
ignition is switched from ON to OFF, the
memory positions of the driver’s seat and
outside mirror (if so equipped) are linked to
the Intelligent Key.
Follow the same procedure if you want
to link the 2nd, 3rd or 4th Intelligent Key.
NOTE:
If new memory positions are set prior to
turning the ignition from ON to OFF, the
previously linked memory positions for
the respective key will be overwritten by
new positions.
Recalling Intelligent Key memory
positions
If the “Key-Linked Settings” are enabled in
the vehicle information display for that par-
ticular key, every time you enter the vehicle
the driver’s seat and outside mirrors (if so
equipped) will automatically move to the
driver’s last position of the respective Intel-
ligent Key.
NOTE:
The key-linked memory positions can be
different from the positions stored in the
memory switch (1 or 2).
MEMORY STORAGE FUNCTION
(switch)
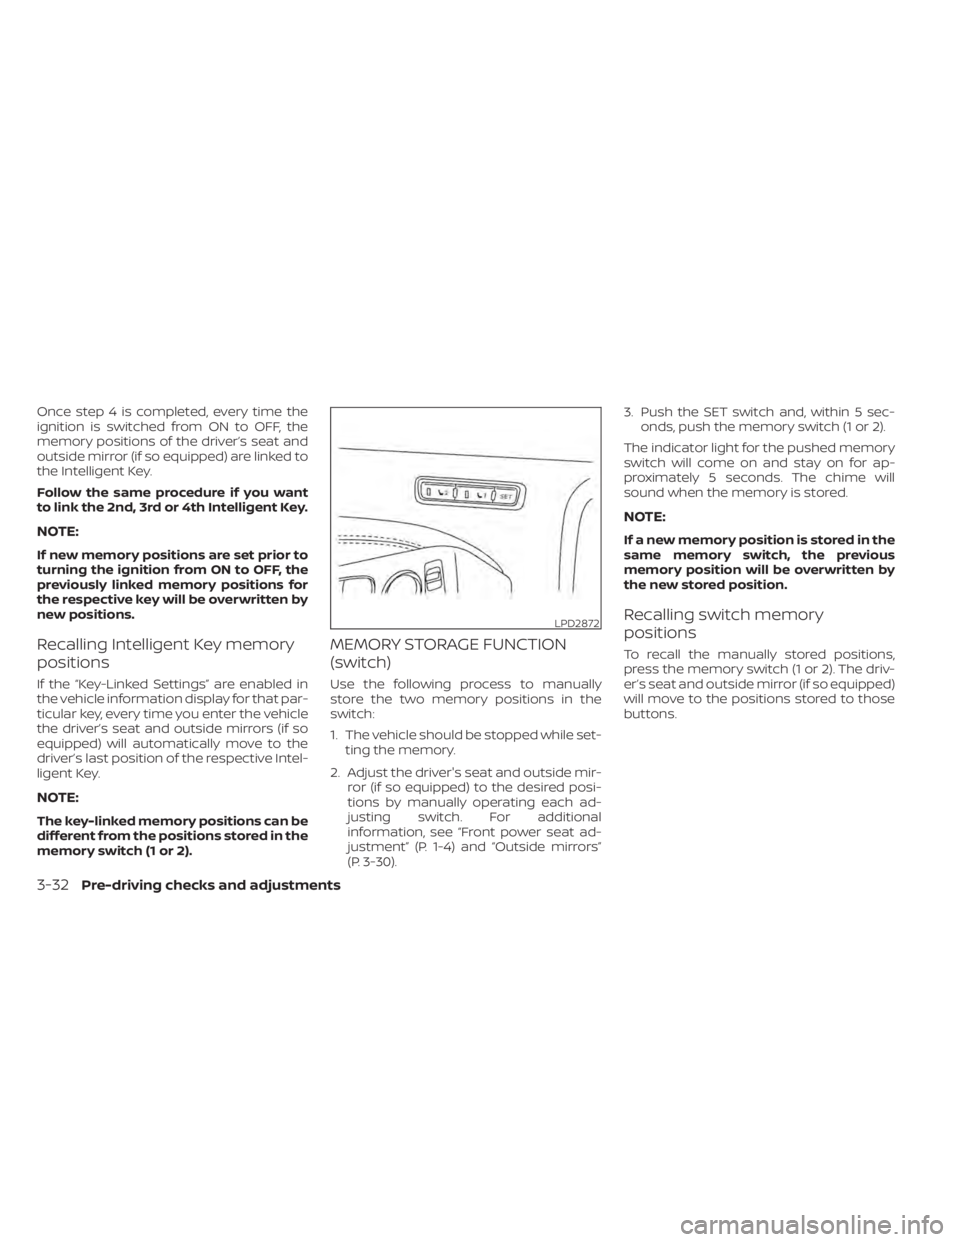
Use the following process to manually
store the two memory positions in the
switch:
1. The vehicle should be stopped while set-ting the memory.
2. Adjust the driver's seat and outside mir- ror (if so equipped) to the desired posi-
tions by manually operating each ad-
justing switch. For additional
information, see “Front power seat ad-
justment” (P. 1-4) and “Outside mirrors”
(P. 3-30). 3. Push the SET switch and, within 5 sec-
onds, push the memory switch (1 or 2).
The indicator light for the pushed memory
switch will come on and stay on for ap-
proximately 5 seconds. The chime will
sound when the memory is stored.
NOTE:
If a new memory position is stored in the
same memory switch, the previous
memory position will be overwritten by
the new stored position.
Recalling switch memory
positions
To recall the manually stored positions,
press the memory switch (1 or 2). The driv-
er’s seat and outside mirror (if so equipped)
will move to the positions stored to those
buttons.
LPD2872
3-32Pre-driving checks and adjustments
Page 209 of 644
ENTRY/EXIT FUNCTION
This system is designed so that the driver's
seat will automatically move when the shif t
lever is in the P (Park) position. This allows
the driver to easily get in and out of the
driver’s seat.
The driver’s seat will slide backward:
• When the driver's door is opened and theignition switch is in the OFF position.
• When the ignition switch is turned from ACC to OFF with the driver’s door open.
The driver’s seat will return to the previous
position:
• When the ignition switch is turned to ACC or ON while the shif t lever is in the P (Park)
position.
The entry/exit function can be adjusted or
canceled through the “Vehicle Settings” in
the vehicle information display by perform-
ing the following:
• Switch the Exit Seat Slide from ON to OFF.
SYSTEM OPERATION
The memory seat system will not work or
will stop operating under the following
conditions:
• When the vehicle speed is above 4 mph (7 km/h).
• When any of the memory switches are pushed while the memory seat is
operating.
• When the switch for the driver’s seat and steering column is pushed while the
memory seat is operating.
• When the seat has already been moved to the memorized position.
• When no seat position is stored in the memory switch.
• When the shif t lever is moved from P (Park) to any other position.
The memory seat system can be adjusted
and canceled. It is recommended you visit
a NISSAN dealer for this service.
Pre-driving checks and adjustments3-33
Page 564 of 644
Brakes:Check that the brakes do not pull
the vehicle to one side when applied.
Continuously Variable Transmission
(CVT) P (Park) position mechanism: On a
fairly steep hill check that the vehicle is held
securely with the shif t lever in the P (Park)
position without applying any brakes.
Parking brake: Check the parking brake
operation regularly. The vehicle should be
securely held on a fairly steep hill with only
the parking brake applied. If the parking
brake needs adjustment, it is recom-
mended that you visit a NISSAN dealer for
this service.
Seats: Check seat position controls such
as seat adjusters, seatback recliner, etc., to
ensure they operate smoothly and all
latches lock securely in every position.
Check that the head restraints/headrests
move up and down smoothly and the locks
(if so equipped) hold securely in all latched
positions.
Seat belts: Check that all parts of the seat
belt system (for example, buckles, anchors,
adjusters and retractors) operate properly
and smoothly, and are installed securely.
Check the belt webbing for cuts, fraying,
wear or damage. Steering wheel:
Check for changes in the
steering system, such as excessive free
play, hard steering or strange noises.
Warning lights and chimes: Make sure all
warning lights and chimes are operating
properly.
Windshield defroster: Check that the air
comes out of the defroster outlets properly
and in sufficient quantity when operating
the heater or air conditioner.
Windshield wiper and washer*: Check
that the wipers and washer operate prop-
erly and that the wipers do not streak.
Under the hood and vehicle
The maintenance items listed here should
be checked periodically (for example, each
time you check the engine oil or refuel).
Battery*: This vehicle is equipped with a
sealed maintenance free battery. It is rec-
ommended that you visit a NISSAN dealer
for service.
NOTE:
Care should be taken to avoid situations
that can lead to potential battery dis-
charge and potential no-start conditions
such as:
1. Installation or extended use of elec- tronic accessories that consume bat-
tery power when the engine is not
running (Phone chargers, GPS, DVD
players, etc.).
2. Vehicle is not driven regularly and/or only driven short distances.
In these cases, the battery may need to
be charged to maintain battery health.
Brake fluid level*: Make sure that the brake
fluid level is between the MAX and MIN lines
on the reservoir.
Engine coolant level*: Check the coolant
level when the engine is cold.
Engine drive belts*: Make sure the drive
belts are not frayed, worn, cracked or oily.
Engine oil level*: Check the level af ter
parking the vehicle on a level spot and
turning off the engine. Wait more than 15
minutes for the oil to drain back into the oil
pan.
9-4Maintenance and schedules
Page 629 of 644
Starting the engine............5-16Engine Block Heater.............5-186Engine coolant temperature gauge. . . .2-6Event Data recorders........10-24, 10-25Exhaust gas (Carbon monoxide)......5-4Explanation of maintenance items.....9-2Explanation of scheduled maintenance
items.......................9-5Extended storage switch..........2-70Eyeglass case.................2-73
F
F.M.V.S.S. certification label.........10-13Flashers (See hazard warning flasher
switch)......................6-2Flat tire...................6-3, 6-4Floor mat positioning aid...........7-6Fluid
Brake fluid..................8-12Capacities and recommended
fuel/lubricants...............10-2Continuously Variable Transmission (CVT)
fluid......................8-12Engine coolant................8-5Engine oil...................8-7Windshield-washer fluid.........8-13Fog light switch................2-63Front air bag system (See supplemental
restraint system)...............1-54Front power seat adjustment........1-4Front seats....................1-2Front-door pocket...............2-71
FuelCapacities and recommended
fuel/lubricants
...............10-2Fuel economy...............5-168Fuel gauge..................2-7Fuel octane rating.............10-6Fuel recommendation..........10-4Fuel-filler door and cap..........3-25Fuel-filler door lock opener lever. . . .3-25Loose fuel cap warning......2-30, 2-46Fuel efficient driving tips..........5-167Fuel gauge....................2-7Fuel-filler door.................3-25Fuses.......................8-21Fusible links..................8-22
G
Garage door opener, HomeLink® Universal
Transceiver............2-81, 2-83, 2-84Gas cap.....................3-25GaugeEngine coolant temperature gauge. . .2-6Fuel gauge..................2-7Speedometer................2-4Tachometer................ .2-6Trip odometer................2-5General maintenance.............9-2Glove box....................2-72Glove box lock.................2-72
H
Hands-free phone system, Bluetooth®. .4-67Hazard warning flasher switch........6-2Head restraints.................1-8Headlight and turn signal switch.....2-57Headlight control switch...........2-57Headlights...................8-25Heated seat switches............2-64Heated steering wheel............2-65Heater
Heater and air conditioner
controls
................4-33, 4-41Heater operation..........4-34, 4-42Hill start assist system...........5-178HomeLink® Universal
Transceiver............2-81, 2-83, 2-84Hood.......................3-22Horn...................... .2-64
I
Ignition switch
Push-button ignition switch.......5-13Immobilizer system..........2-54, 5-16Important vehicle information label. . .10-13In-cabin microfilter..............8-18Increasing fuel economy..........5-168IndicatorNISSAN Intelligent Key® battery discharge
indicator
...................5-15Inside automatic anti-glare mirror. . . .3-29Instrument brightness control.......2-62
11-3