2023 NISSAN ALTIMA oil
[x] Cancel search: oilPage 312 of 644
NISSAN VEHICLE IMMOBILIZER
SYSTEM
The NISSAN Vehicle Immobilizer System
will not allow the engine to start without
the use of the registered key.
If the engine fails to start using a registered
key (for example, when interference is
caused by another registered key, an auto-
mated toll road device or automatic pay-
ment device on the key ring), restart the
engine using the following procedure:
1. Leave the ignition switch in the ON posi-tion for approximately 5 seconds.
2. Place the ignition switch in the OFF or LOCK position, and wait approximately
10 seconds.
3. Repeat steps 1 and 2.
4. Restart the engine while holding the de- vice (which may have caused the inter-
ference) separate from the registered
key.
If the no start condition re-occurs, NISSAN
recommends placing the registered key on
a separate key ring to avoid interference
from other devices. • Make sure the area around the vehicle is
clear.
• Check fluid levels such as engine oil, cool- ant, brake fluid, and windshield-washer
fluid as frequently as possible, or at least
whenever you refuel.
• Check that all windows and lights are clean.
• Visually inspect tires for their appearance and condition. Also check tires for proper
inflation.
• Lock all doors.
• Position seat and adjust headrests/head restraints.
• Adjust inside and outside mirrors.
• Fasten seat belts and ask all passengers to do likewise.
• Check the operation of warning lights when the ignition switch is pushed to the
ON position. For additional information,
see “Warning lights, indicator lights and
audible reminders” (P. 2-9). 1. Apply the parking brake.
2. Move the shif t lever to P (Park) or N (Neu-
tral). P (Park) is recommended.
The starter is designed not to operate
if the shif t lever is in any of the driving
positions.
3. Push the ignition switch to the ON posi- tion. Depress the brake pedal and push
the ignition switch to start the engine.
To start the engine immediately, push
and release the ignition switch while de-
pressing the brake pedal with the igni-
tion switch in any position.
• If the engine is very hard to start in extremely cold weather or when re-
starting, depress the accelerator
pedal a little (approximately 1/3 to the
floor) and while holding, crank the en-
gine. Release the accelerator pedal
when the engine starts.
• If the engine is very hard to start be- cause it is flooded, depress the accel-
erator pedal all the way to the floor
and hold it. Push the ignition switch to
the ON position to start cranking the
engine. Af ter 5 or 6 seconds, stop
cranking by pushing the ignition
switch to the LOCK position. Af ter
BEFORE STARTING THE ENGINE STARTING THE ENGINE
5-16Starting and driving
Page 416 of 644
If the steering wheel is not operated or the
driver takes his/her hands off the steering
wheel for a period of time, the warning
O1
appears in the vehicle information display.
If the driver does not operate the steering
wheel af ter the warning has been dis-
played, an audible alert sounds and the
warning flashes in the vehicle information
display, followed by a quick brake applica-
tion to request the driver to take control of
the vehicle again.
If the driver still does not respond, the Pro-
PILOT Assist turns on the hazard flasher
and slows the vehicle to a complete stop.
The driver can cancel the deceleration at
any time by steering, braking, accelerating,
or operating the ProPILOT Assist switch.
WARNING
Steering Assist is not a system for
hands-free driving. Always keep your
hands on the steering wheel and drive
your vehicle safely. Failure to do so
could cause a collision resulting in seri-
ous personal injury or death.
NOTE:
If the driver lightly touches (instead of
firmly grips) the steering wheel, the
steering torque sensor may not detect
the driver’s hand(s) on the wheel and a
sequence of warnings may occur. When
the driver holds and operates the steer-
ing wheel again, the warnings turn off.
Steering Assist limitations
WARNING
• In the following situations, the cam-
era may not detect lane markers cor-
rectly or may detect lane markers in-
correctly and the Steering Assist may
not operate properly:
– When driving on roads where
there are multiple parallel lane
markers, lane markers that are
faded or not painted clearly, non-
standard lane markers, or lane
markers covered with water, dirt,
snow, etc.
– When driving on roads with dis-
continued lane markers
– When driving on roads with a wid-
ening or narrowing lane width –
When driving on roads where
there are multiple lanes or unclear
lane markers due to road
construction
– When driving on roads where
there are sharply contrasting ob-
jects, such as shadows, snow, wa-
ter, wheel ruts, seams, or lines re-
maining af ter road repairs (the
Steering Assist could detect these
items as lane markers)
– When driving on roads where the
traveling lane merges or
separates
• Do not use the Steering Assist under
the following conditions because the
system may not properly detect lane
markers. Doing so could cause a loss
of vehicle control and result in an ac-
cident.
– During bad weather (rain, fog,
snow, dust, etc.)
– When rain, snow, sand, etc., is
thrown up by the wheels of other
vehicles
– When dirt, oil, ice, snow, water, or
another object adheres to the
camera unit
5-120Starting and driving
Page 464 of 644
7.Avoid Idling
• Shutting off your engine when safe for stops exceeding 30–60 seconds saves
fuel and reduces emissions.
8. Buy an Automated Pass for Toll Roads
• Automated passes permit drivers to use special lanes to maintain cruising
speed through the toll and avoid stop-
ping and starting.
9. Winter Warm Up
• Limit idling time to minimize impact to fuel economy.
• Vehicles typically need no more than 30 seconds of idling at start-up to ef-
fectively circulate the engine oil before
driving.
• Your vehicle will reach its ideal operat- ing temperature more quickly while
driving versus idling.
10. Keeping your Vehicle Cool
• Park your vehicle in a covered parking area or in the shade whenever
possible.
• When entering a hot vehicle, opening the windows will help to reduce the
inside temperature faster, resulting in
reduced demand on your A/C system. • Keep your engine tuned up.
• Follow the recommended scheduled
maintenance.
• Keep the tires inflated to the correct pres- sure. Low tire pressure increases tire
wear and lowers fuel economy.
• Keep the wheels in correct alignment. Im- proper alignment increases tire wear and
lowers fuel economy.
• Use the recommended viscosity engine oil. For additional information, see “Engine
oil and oil filter recommendations”
(P. 10-7).
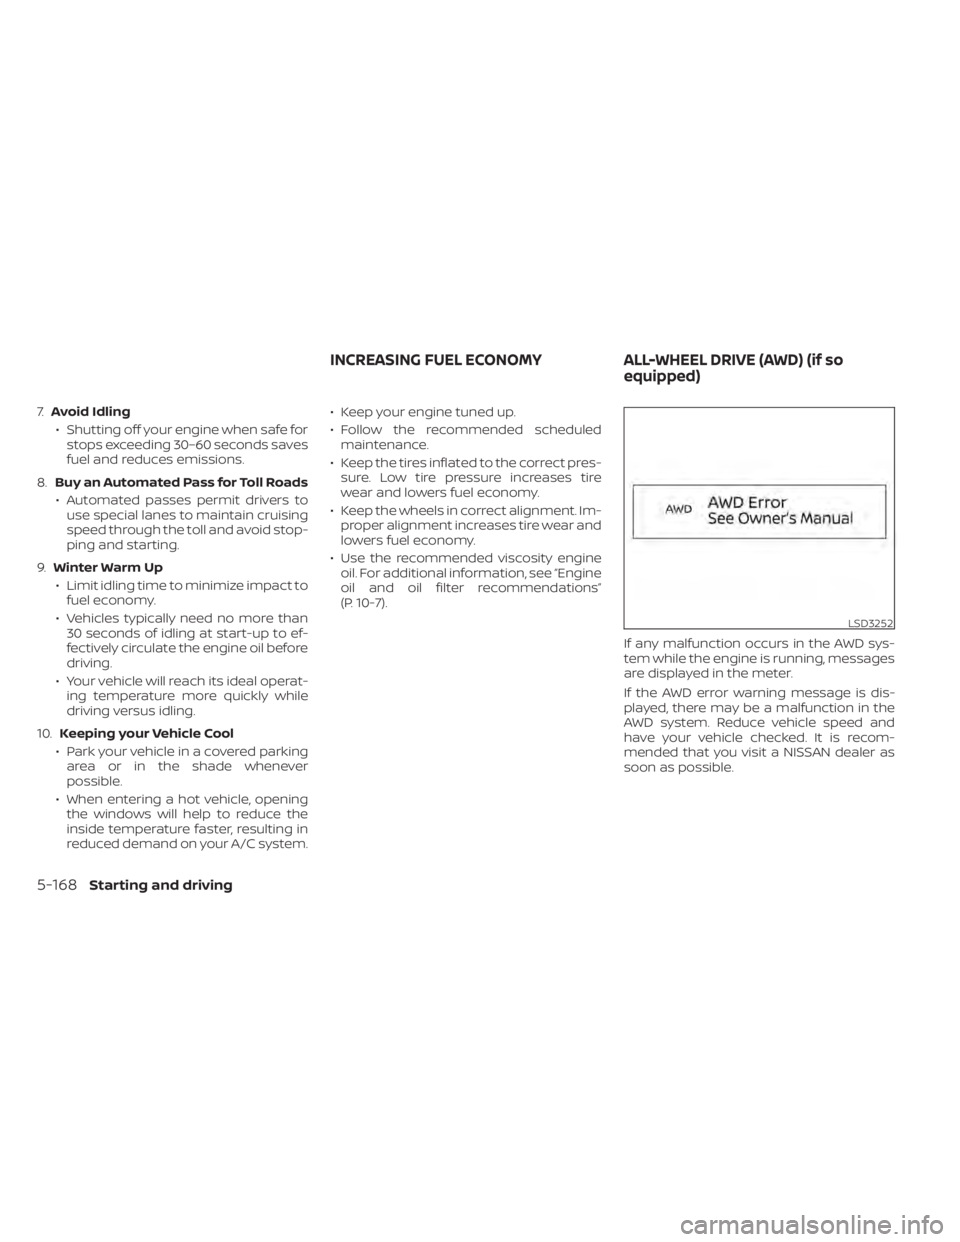
If any malfunction occurs in the AWD sys-
tem while the engine is running, messages
are displayed in the meter.
If the AWD error warning message is dis-
played, there may be a malfunction in the
AWD system. Reduce vehicle speed and
have your vehicle checked. It is recom-
mended that you visit a NISSAN dealer as
soon as possible.
LSD3252
INCREASING FUEL ECONOMYALL-WHEEL DRIVE (AWD) (if so
equipped)
5-168Starting and driving
Page 465 of 644
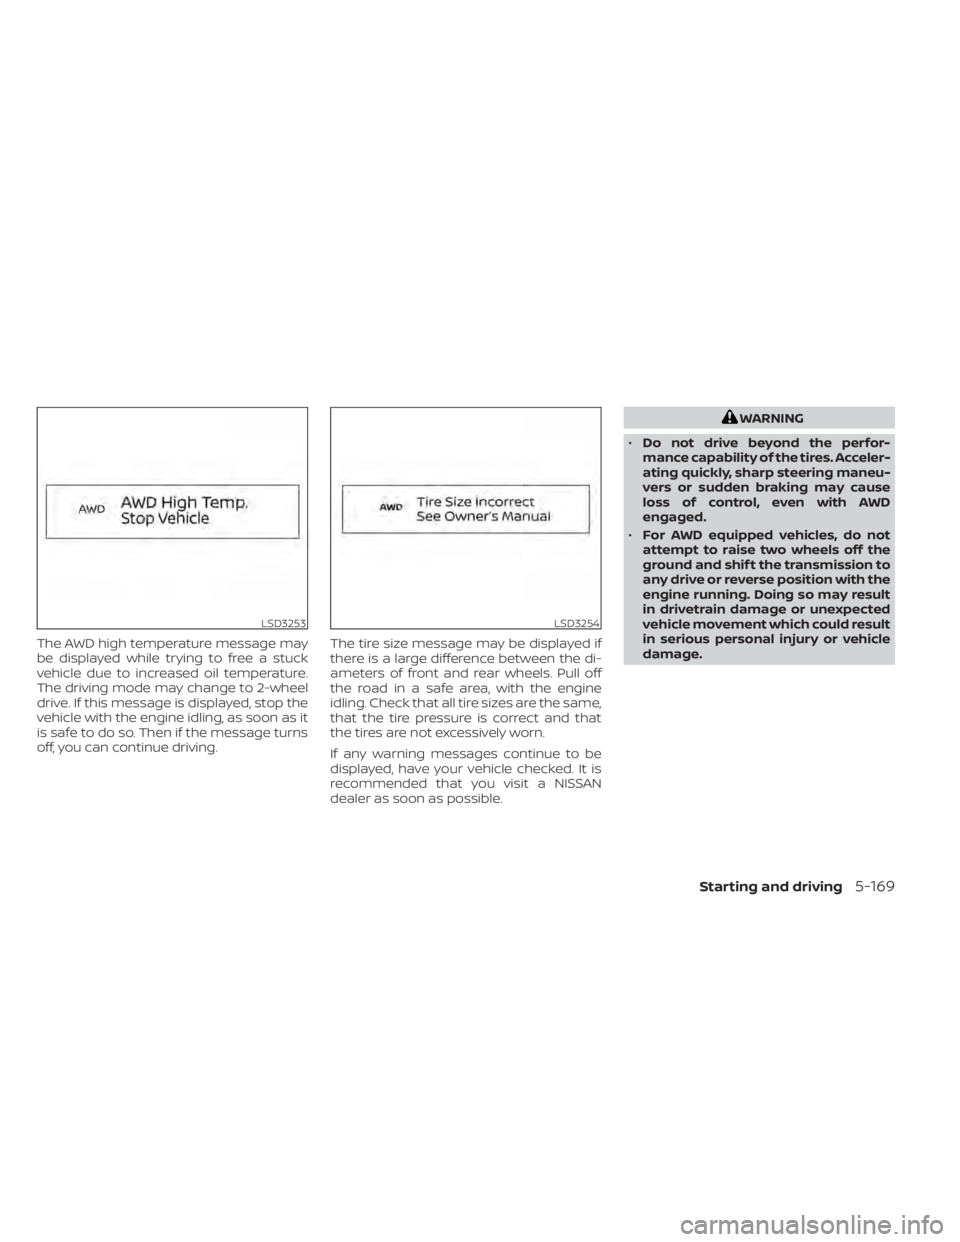
The AWD high temperature message may
be displayed while trying to free a stuck
vehicle due to increased oil temperature.
The driving mode may change to 2-wheel
drive. If this message is displayed, stop the
vehicle with the engine idling, as soon as it
is safe to do so. Then if the message turns
off, you can continue driving.The tire size message may be displayed if
there is a large difference between the di-
ameters of front and rear wheels. Pull off
the road in a safe area, with the engine
idling. Check that all tire sizes are the same,
that the tire pressure is correct and that
the tires are not excessively worn.
If any warning messages continue to be
displayed, have your vehicle checked. It is
recommended that you visit a NISSAN
dealer as soon as possible.
WARNING
• Do not drive beyond the perfor-
mance capability of the tires. Acceler-
ating quickly, sharp steering maneu-
vers or sudden braking may cause
loss of control, even with AWD
engaged.
• For AWD equipped vehicles, do not
attempt to raise two wheels off the
ground and shif t the transmission to
any drive or reverse position with the
engine running. Doing so may result
in drivetrain damage or unexpected
vehicle movement which could result
in serious personal injury or vehicle
damage.
LSD3253LSD3254
Starting and driving5-169
Page 494 of 644
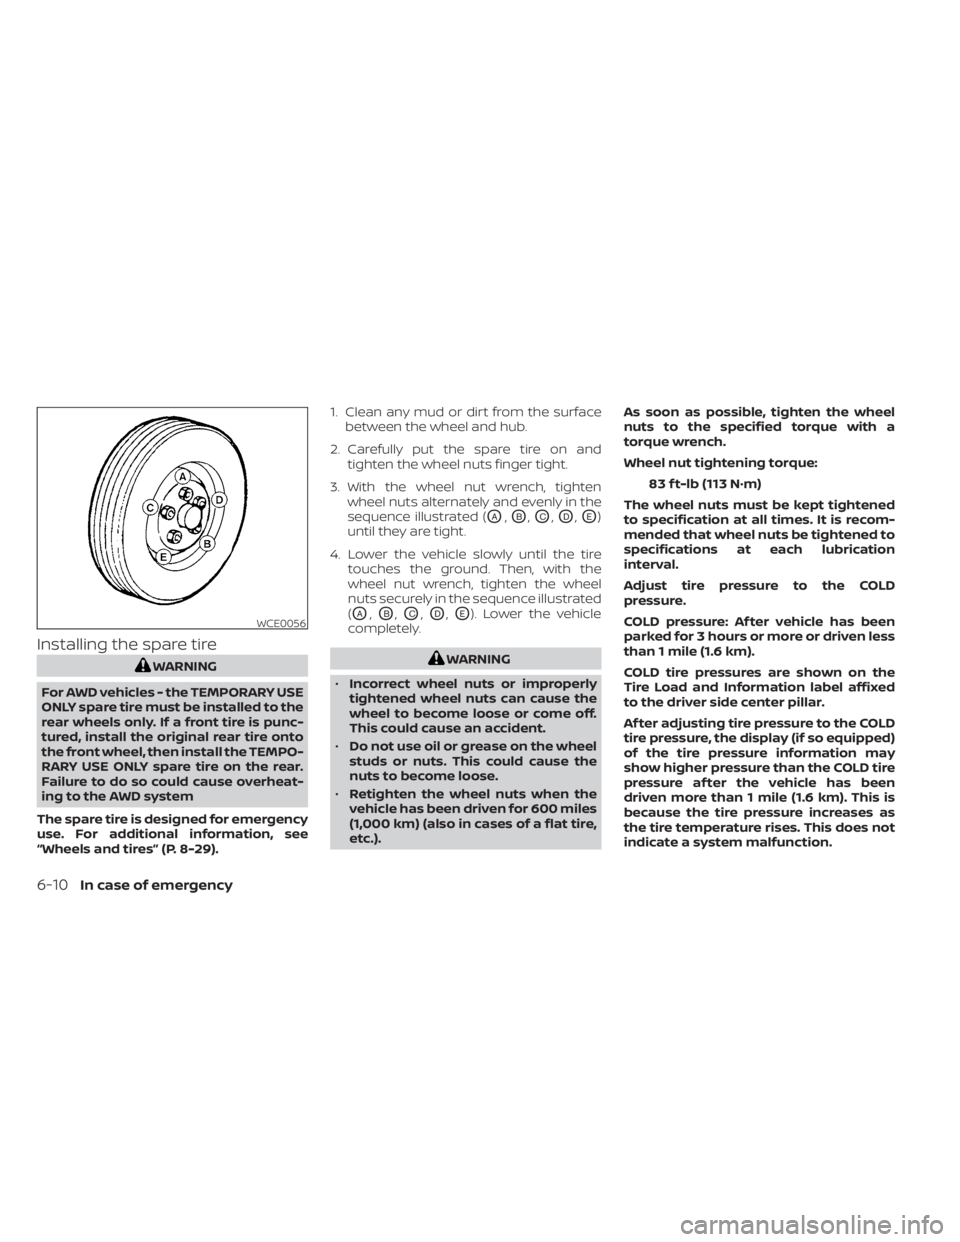
Installing the spare tire
WARNING
For AWD vehicles - the TEMPORARY USE
ONLY spare tire must be installed to the
rear wheels only. If a front tire is punc-
tured, install the original rear tire onto
the front wheel, then install the TEMPO-
RARY USE ONLY spare tire on the rear.
Failure to do so could cause overheat-
ing to the AWD system
The spare tire is designed for emergency
use. For additional information, see
“Wheels and tires” (P. 8-29). 1. Clean any mud or dirt from the surface
between the wheel and hub.
2. Carefully put the spare tire on and tighten the wheel nuts finger tight.
3. With the wheel nut wrench, tighten wheel nuts alternately and evenly in the
sequence illustrated (
OA,OB,OC,OD,OE)
until they are tight.
4. Lower the vehicle slowly until the tire touches the ground. Then, with the
wheel nut wrench, tighten the wheel
nuts securely in the sequence illustrated
(
OA,OB,OC,OD,OE). Lower the vehicle
completely.
WARNING
• Incorrect wheel nuts or improperly
tightened wheel nuts can cause the
wheel to become loose or come off.
This could cause an accident.
• Do not use oil or grease on the wheel
studs or nuts. This could cause the
nuts to become loose.
• Retighten the wheel nuts when the
vehicle has been driven for 600 miles
(1,000 km) (also in cases of a flat tire,
etc.). As soon as possible, tighten the wheel
nuts to the specified torque with a
torque wrench.
Wheel nut tightening torque:
83 f t-lb (113 N·m)
The wheel nuts must be kept tightened
to specification at all times. It is recom-
mended that wheel nuts be tightened to
specifications at each lubrication
interval.
Adjust tire pressure to the COLD
pressure.
COLD pressure: Af ter vehicle has been
parked for 3 hours or more or driven less
than 1 mile (1.6 km).
COLD tire pressures are shown on the
Tire Load and Information label affixed
to the driver side center pillar.
Af ter adjusting tire pressure to the COLD
tire pressure, the display (if so equipped)
of the tire pressure information may
show higher pressure than the COLD tire
pressure af ter the vehicle has been
driven more than 1 mile (1.6 km). This is
because the tire pressure increases as
the tire temperature rises. This does not
indicate a system malfunction.
WCE0056
6-10In case of emergency
Page 511 of 644
WAXING
Regular waxing protects the paint surface
and helps retain new vehicle appearance.
Polishing is recommended to remove
built-up wax residue and to avoid a weath-
ered appearance before re-applying wax.
It is recommended that you visit a NISSAN
dealer to assist you in choosing the proper
product.
• Wax your vehicle only af ter a thoroughwashing. Follow the instructions supplied
with the wax.
• Do not use a wax containing any abra- sives, cutting compounds or cleaners
that may damage the vehicle finish.
Machine compounding or aggressive pol-
ishing on a base coat/clear coat paint fin-
ish may dull the finish or leave swirl marks.
REMOVING SPOTS
Remove tar and oil spots, industrial dust,
insects, and tree sap as quickly as possible
from the surface of the paint to avoid last-
ing damage or staining. Special cleaning
products are available at a NISSAN dealer
or any automotive accessory store. It is
recommended that you visit a NISSAN
dealer for these products.
UNDERBODY
In areas where road salt is used in winter, it
is necessary to clean the underbody regu-
larly in order to prevent dirt and salt from
building up and causing the acceleration of
corrosion on the underbody and suspen-
sion. Before the winter period and again in
the spring, the underseal must be checked
and, if necessary, re-treated.
GLASS
When cleaning the rear window, it may be
easier to clean if the high-mounted stop
light is removed first.
Be careful when removing the high-
mounted stop light to reduce the risk of
damaging the high-mounted stop light
wires.
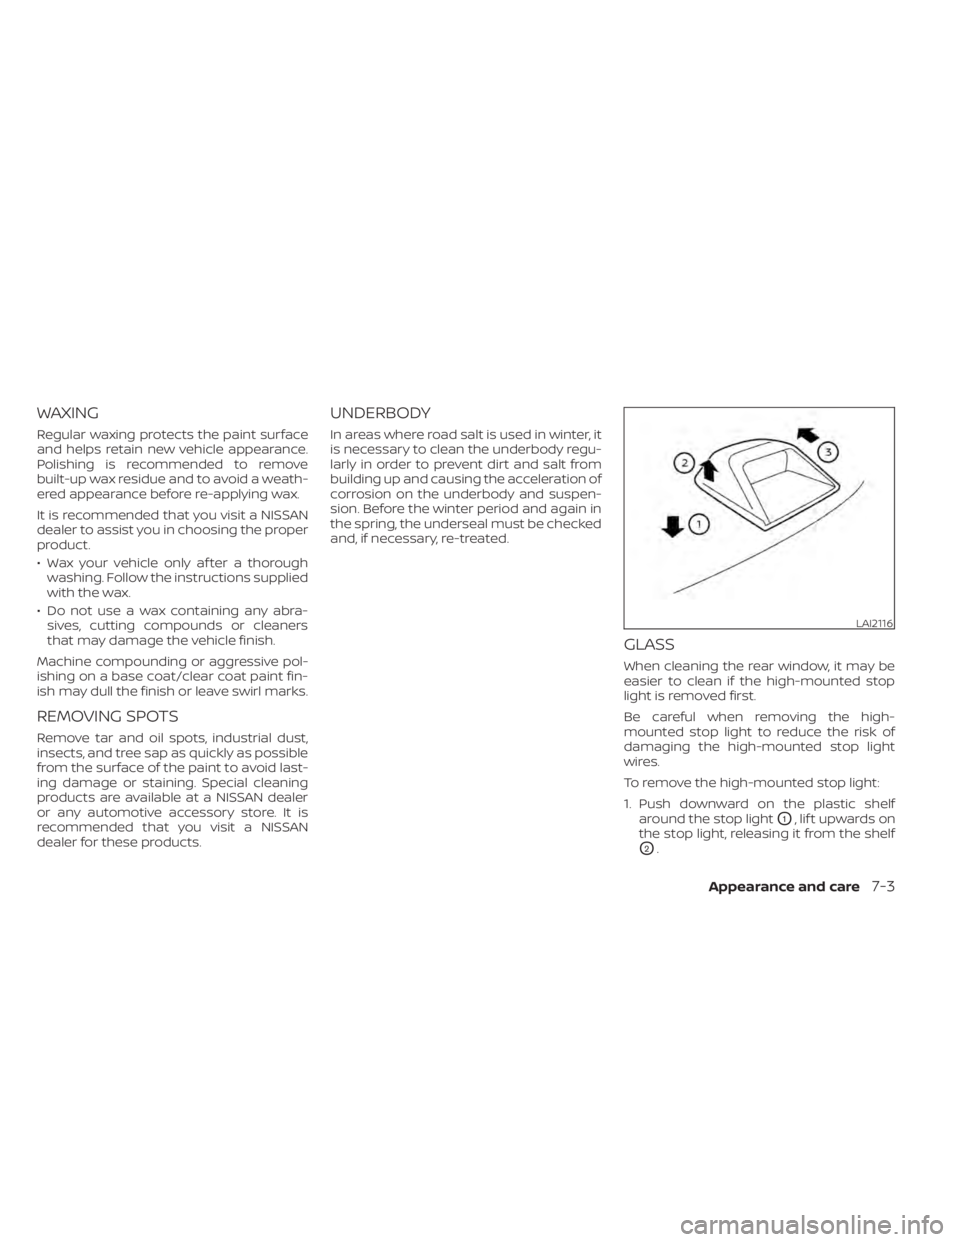
To remove the high-mounted stop light:
1. Push downward on the plastic shelf around the stop light
O1,liftupwardson
the stop light, releasing it from the shelf
O2.
LAI2116
Appearance and care7-3
Page 512 of 644
2. Once it is released from the shelf, gentlypull the stop light towards the rear seat-
back
O3.
The high-mounted stop light must be
properly reinstalled before driving your
vehicle.
Use glass cleaner to remove smoke and
dust film from the glass surfaces. It is nor-
mal for glass to become coated with a film
af ter the vehicle is parked in the hot sun.
Glass cleaner and a sof t cloth will easily
remove this film.
To reinstall the high-mounted stop light,
reverse steps
O3, thenO2.
CAUTION
When cleaning the inside of the win-
dows, do not use sharp-edged tools,
abrasive cleaners or chlorine-based
disinfectant cleaners. They could dam-
age the electrical conductors, radio an-
tenna elements or rear window defog-
ger elements.
ALUMINUM ALLOY WHEELS (if so
equipped)
Wash the wheels regularly with a sponge
dampened in a mild soap solution, espe-
cially during winter months in areas where
road salt is used. If not removed, road salt
can discolor the wheels.
CAUTION
Follow the directions below to avoid
staining or discoloring the wheels:
• Do not use a cleaner that uses strong
acid or alkali contents to clean the
wheels.
• Do not apply wheel cleaners to the
wheels when they are hot. The wheel
temperature should be the same as
ambient temperature.
• Rinse the wheel to completely re-
move the cleaner within 15 minutes
af ter the cleaner is applied.
CHROME PARTS
Clean all chrome parts regularly with a
non-abrasive chrome polish to maintain
the finish.
TIRE DRESSINGS
NISSAN does not recommend the use of
tire dressings. Tire manufacturers apply a
coating to the tires to help reduce discolor-
ation of the rubber. If a tire dressing is ap-
plied to the tires, it may react with the coat-
ing and form a compound. This compound
may come off the tire while driving and
stain the vehicle paint.
If you choose to use a tire dressing, take the
following precautions:
• Use a water-based tire dressing. The coating on the tire dissolves more easily
than with an oil-based tire dressing.
• Apply a light coat of tire dressing to help prevent it from entering the tire tread/
grooves (where it would be difficult to
remove).
• Wipe off excess tire dressing using a dry towel. Make sure the tire dressing is com-
pletely removed from the tire
tread/grooves.
• Allow the tire dressing to dry as recom- mended by the tire dressing
manufacturer.
7-4Appearance and care
Page 513 of 644
Occasionally remove loose dust from the
interior trim, plastic parts and seats using a
vacuum cleaner or sof t bristled brush. Wipe
the vinyl and leather (if so equipped) sur-
faces with a clean, sof t cloth dampened in
mild soap solution, then wipe clean with a
dry, sof t cloth.
Regular care and cleaning is required in
order to maintain the appearance of the
leather (if so equipped).
Before using any fabric protector, read the
manufacturer's recommendations. Some
fabric protectors contain chemicals that
may stain or bleach the seat material.
Use a cloth dampened only with water to
clean the meter and gauge lens.
WARNING
Do not use water or acidic cleaners (hot
steam cleaners) on the seat. This can
damage the seat or occupant classifi-
cation sensor. This can also affect the
operation of the air bag system and re-
sult in serious personal injury.
CAUTION
• Never use benzine, thinner or any
similar material.
• Small dirt particles can be abrasive
and damaging to leather surfaces
and should be removed promptly. Do
not use saddle soap, car waxes, pol-
ishes, oils, cleaning fluids, solvents,
detergents or ammonia-based
cleaners as they may damage the
leather's natural finish.
• Never use fabric protectors unless
recommended by the manufacturer.
• Do not use glass or plastic cleaner on
meter or gauge lens covers. It may
damage the lens cover.
• Never use chloride solutions for
cleaning aluminum decoratives (if so
equipped), damage may occur.AIR FRESHENERS
Most air fresheners use a solvent that
could affect the vehicle interior. If you use
an air freshener, take the following
precautions:
• Hanging-type air fresheners can cause permanent discoloration when they con-
tact vehicle interior surfaces. Place the air
freshener in a location that allows it to
hang free and not contact an interior
surface.
• Liquid-type air fresheners typically clip on the vents. These products can cause im-
mediate damage and discoloration
when spilled on interior surfaces.
Carefully read and follow the manufactur-
er's instructions before using the air
fresheners.
CLEANING INTERIOR
Appearance and care7-5