2023 NISSAN ALTIMA lock
[x] Cancel search: lockPage 54 of 644
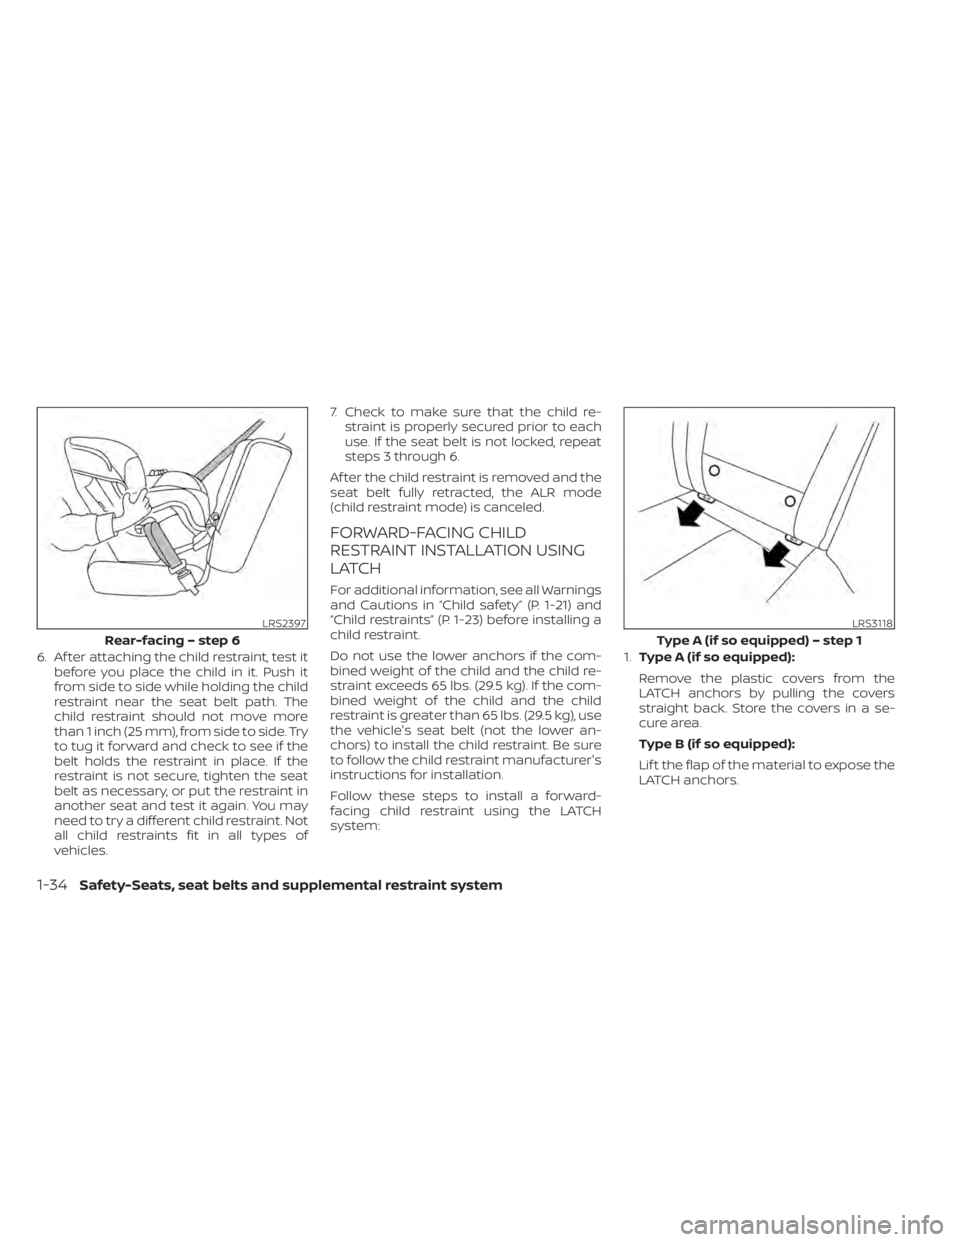
6. Af ter attaching the child restraint, test itbefore you place the child in it. Push it
from side to side while holding the child
restraint near the seat belt path. The
child restraint should not move more
than 1 inch (25 mm), from side to side. Try
to tug it forward and check to see if the
belt holds the restraint in place. If the
restraint is not secure, tighten the seat
belt as necessary, or put the restraint in
another seat and test it again. You may
need to try a different child restraint. Not
all child restraints fit in all types of
vehicles. 7. Check to make sure that the child re-
straint is properly secured prior to each
use. If the seat belt is not locked, repeat
steps 3 through 6.
Af ter the child restraint is removed and the
seat belt fully retracted, the ALR mode
(child restraint mode) is canceled.
FORWARD-FACING CHILD
RESTRAINT INSTALLATION USING
LATCH
For additional information, see all Warnings
and Cautions in “Child safety” (P. 1-21) and
“Child restraints” (P. 1-23) before installing a
child restraint.
Do not use the lower anchors if the com-
bined weight of the child and the child re-
straint exceeds 65 lbs. (29.5 kg). If the com-
bined weight of the child and the child
restraint is greater than 65 lbs. (29.5 kg), use
the vehicle's seat belt (not the lower an-
chors) to install the child restraint. Be sure
to follow the child restraint manufacturer's
instructions for installation.
Follow these steps to install a forward-
facing child restraint using the LATCH
system: 1.
Type A (if so equipped):
Remove the plastic covers from the
LATCH anchors by pulling the covers
straight back. Store the covers in a se-
cure area.
Type B (if so equipped):
Lif t the flap of the material to expose the
LATCH anchors.
LRS2397
Rear-facing – step 6
LRS3118
Type A (if so equipped) – step 1
1-34Safety-Seats, seat belts and supplemental restraint system
Page 58 of 644
WARNING
Child restraint anchorages are de-
signed to withstand only those loads
imposed by correctly fitted child re-
straints. Under no circumstances are
they to be used to attach adult seat
belts, or other items or equipment to
the vehicle. Doing so could damage the
child restraint anchorages. The child
restraint will not be properly installed
using the damaged anchorage, and a
child could be seriously injured or killed
in a collision.FORWARD-FACING CHILD
RESTRAINT INSTALLATION USING
THE SEAT BELTS
WARNING
The three-point seat belt with Auto-
matic Locking Retractor (ALR) must be
used when installing a child restraint.
Failure to use the ALR mode will result
in the child restraint not being properly
secured. The restraint could tip over or
be loose and cause injury to a child in a
sudden stop or collision. Also, it can
change the operation of the front pas-
senger air bag. For additional informa-
tion, see “Front passenger air bag and
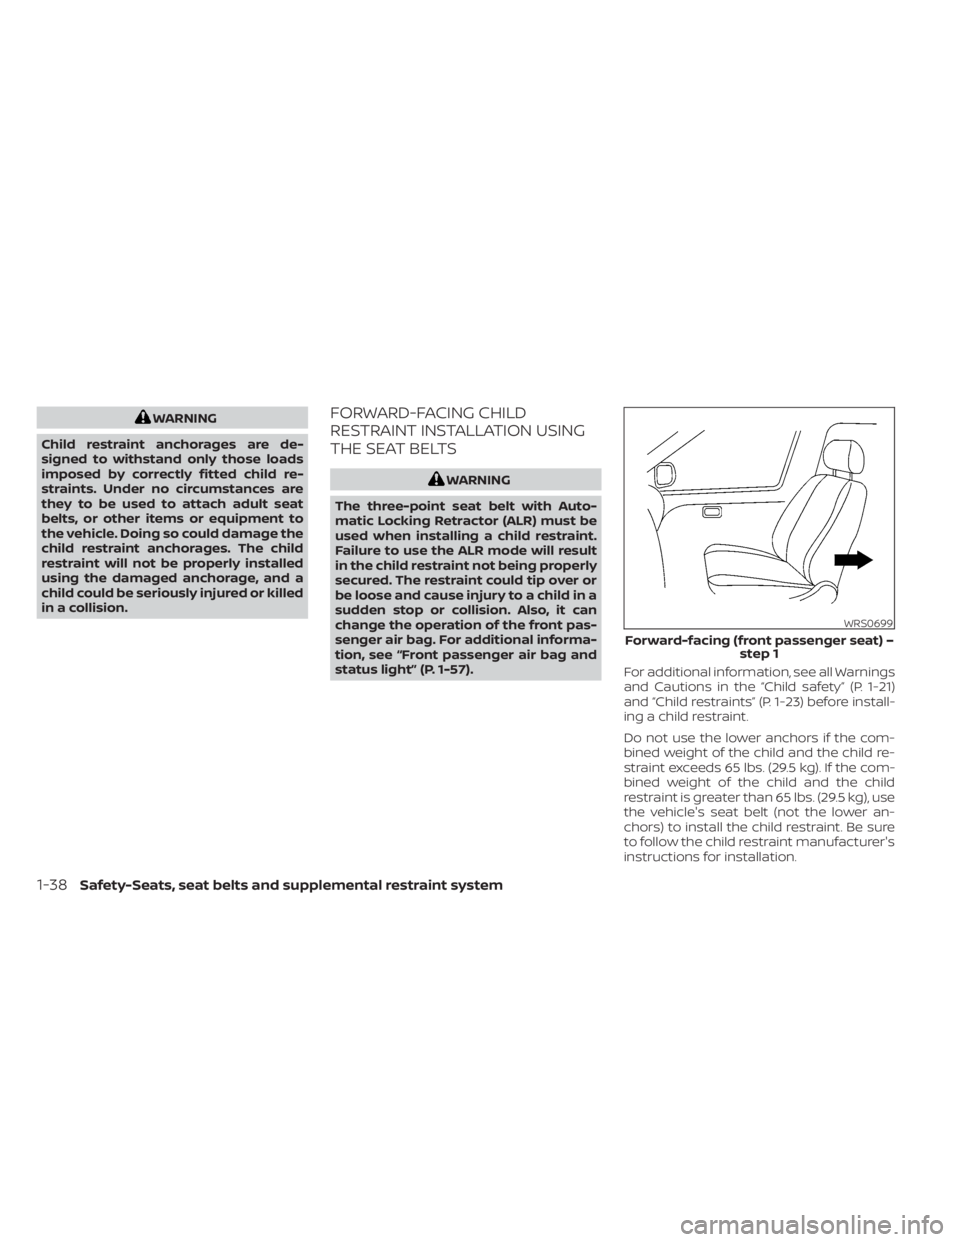
status light” (P. 1-57). For additional information, see all Warnings
and Cautions in the “Child safety” (P. 1-21)
and “Child restraints” (P. 1-23) before install-
ing a child restraint.
Do not use the lower anchors if the com-
bined weight of the child and the child re-
straint exceeds 65 lbs. (29.5 kg). If the com-
bined weight of the child and the child
restraint is greater than 65 lbs. (29.5 kg), use
the vehicle's seat belt (not the lower an-
chors) to install the child restraint. Be sure
to follow the child restraint manufacturer's
instructions for installation.
WRS0699
Forward-facing (front passenger seat) –
step 1
1-38Safety-Seats, seat belts and supplemental restraint system
Page 61 of 644
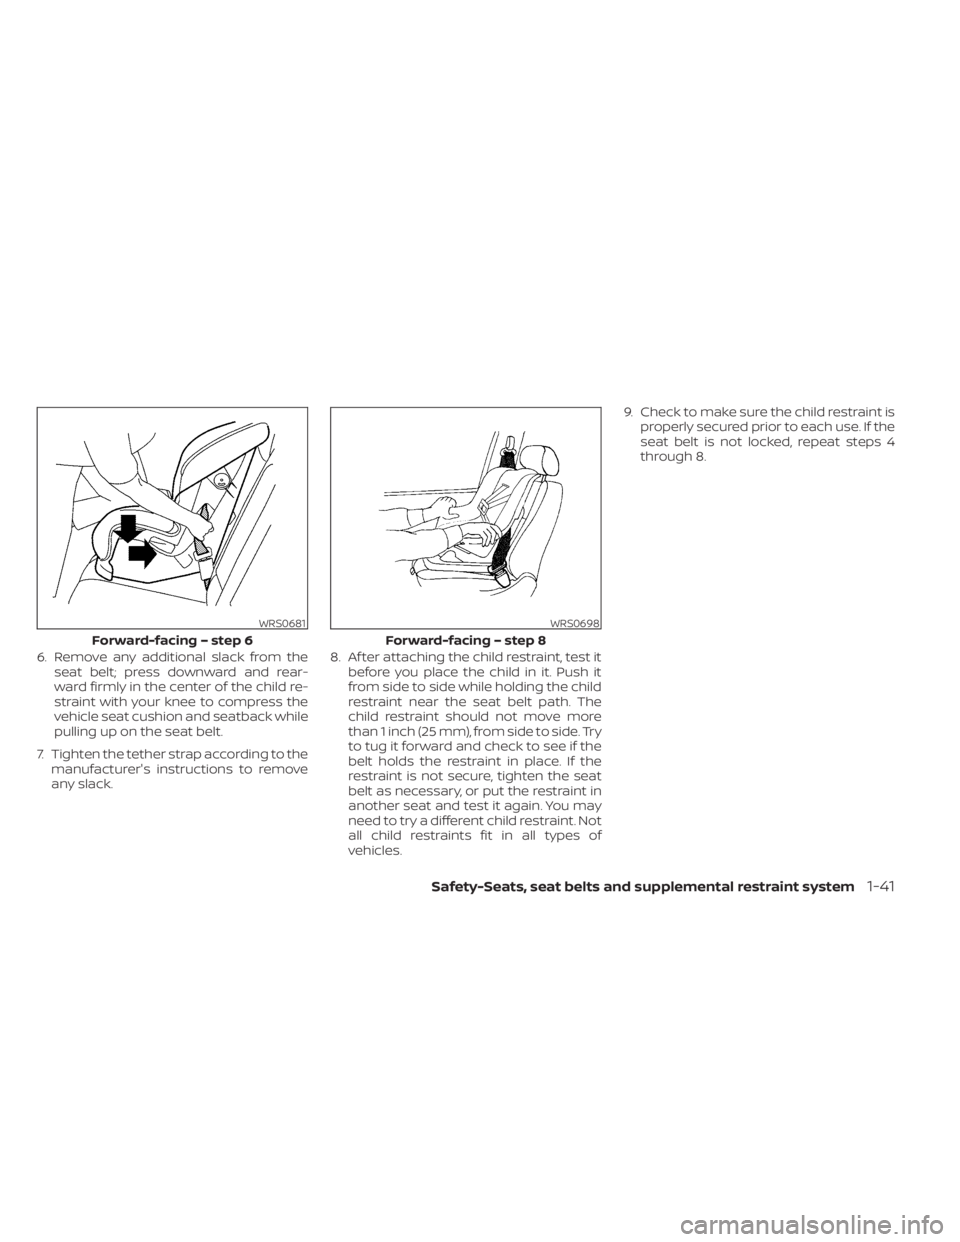
6. Remove any additional slack from theseat belt; press downward and rear-
ward firmly in the center of the child re-
straint with your knee to compress the
vehicle seat cushion and seatback while
pulling up on the seat belt.
7. Tighten the tether strap according to the manufacturer's instructions to remove
any slack. 8. Af ter attaching the child restraint, test it
before you place the child in it. Push it
from side to side while holding the child
restraint near the seat belt path. The
child restraint should not move more
than 1 inch (25 mm), from side to side. Try
to tug it forward and check to see if the
belt holds the restraint in place. If the
restraint is not secure, tighten the seat
belt as necessary, or put the restraint in
another seat and test it again. You may
need to try a different child restraint. Not
all child restraints fit in all types of
vehicles. 9. Check to make sure the child restraint is
properly secured prior to each use. If the
seat belt is not locked, repeat steps 4
through 8.
WRS0681
Forward-facing – step 6
WRS0698
Forward-facing – step 8
Safety-Seats, seat belts and supplemental restraint system1-41
Page 64 of 644
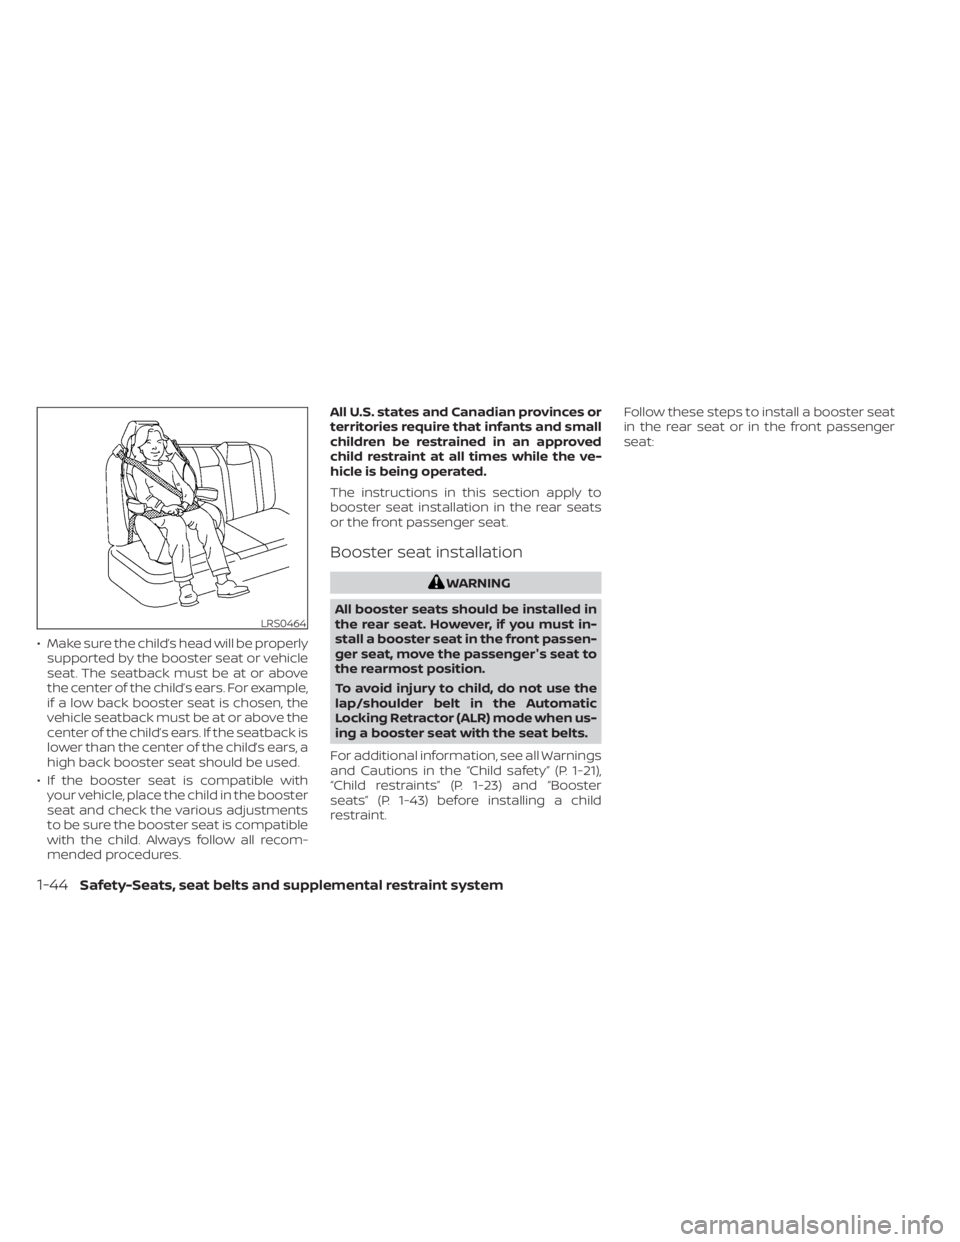
• Make sure the child’s head will be properlysupported by the booster seat or vehicle
seat. The seatback must be at or above
the center of the child’s ears. For example,
if a low back booster seat is chosen, the
vehicle seatback must be at or above the
center of the child’s ears. If the seatback is
lower than the center of the child’s ears, a
high back booster seat should be used.
• If the booster seat is compatible with your vehicle, place the child in the booster
seat and check the various adjustments
to be sure the booster seat is compatible
with the child. Always follow all recom-
mended procedures. All U.S. states and Canadian provinces or
territories require that infants and small
children be restrained in an approved
child restraint at all times while the ve-
hicle is being operated.
The instructions in this section apply to
booster seat installation in the rear seats
or the front passenger seat.
Booster seat installation
WARNING
All booster seats should be installed in
the rear seat. However, if you must in-
stall a booster seat in the front passen-
ger seat, move the passenger's seat to
the rearmost position.
To avoid injury to child, do not use the
lap/shoulder belt in the Automatic
Locking Retractor (ALR) mode when us-
ing a booster seat with the seat belts.
For additional information, see all Warnings
and Cautions in the “Child safety” (P. 1-21),
“Child restraints” (P. 1-23) and “Booster
seats” (P. 1-43) before installing a child
restraint. Follow these steps to install a booster seat
in the rear seat or in the front passenger
seat:
LRS0464
1-44Safety-Seats, seat belts and supplemental restraint system
Page 80 of 644
4. Remain in this position for 30 secondsallowing the system to classif y the front
passenger before the vehicle is put into
motion.
5. Ensure proper classification by checking the front passenger air bag status light.
NOTE:
This vehicle’s occupant classification
sensor system generally keeps the clas-
sification locked during driving, so it is
important that you confirm that the
front passenger is properly classified
prior to driving. However, the occupant
classification sensor may recalculate the
weight of the occupant under some con-
ditions (both while driving and when
stopped), so front passenger seat occu-
pants should continue to remain seated
as outlined above.
Troubleshooting
If you think the front passenger air bag
status light is incorrect:
1. If the light is ON with an adult occupyingthe front passenger seat:
•
Occupant is a small adult — the air bag light
is functioning as intended. The front pas-
senger air bag and front passenger supple-
mental knee air bag are suppressed.
However, if the occupant is not a small
adult, then this may be due to the following
conditions that may be interfering with the
weight sensors:
• Occupant is not sitting upright, leaning against the seatback, and centered on
the seat cushion with his/her feet com-
fortably extended to the floor.
• A child restraint or other object pressing against the rear of the seatback.
• A rear passenger pushing or pulling on the back of the front passenger seat.
• Forcing the front seat or seatback against an object on the seat or floor be-
hind it.
• An object placed under the front passen- ger seat.
• An object placed between the seat cush- ion and center console or between the
seat cushion and the door.
If the vehicle is moving, please come to a
stop when it is safe to do so. Check and
correct any of the above conditions. Re-
start the vehicle and wait 1 minute.NOTE:
A system check will be performed during
which the front passenger air bag status
light will remain lit for about 7 seconds
initially.
If the light is still ON af ter this, the person
should be advised not to ride in the front
passenger seat and the vehicle should be
checked as soon as possible. It is recom-
mended that you visit a NISSAN dealer for
this service.
2. If the light is OFF with a small adult, child or child restraint occupying the front
passenger seat.
This may be due to the following condi-
tions that may be interfering with the
weight sensors:
• Small adult or child is not sitting upright, leaning against the seatback, and cen-
tered on the seat cushion with his/her
feet comfortably extended to the floor.
• The child restraint is not properly in- stalled, as outlined in the “Child restraints”
section of this manual.
• An object weighing over 9.1 lbs. (4 kg) hanging on the seat or placed in the seat-
back pocket.
1-60Safety-Seats, seat belts and supplemental restraint system
Page 88 of 644
If any of the following conditions occur, the
front air bag, side air bag, curtain air bag,
knee air bag and pretensioner systems
need servicing:
• The supplemental air bag warning lightremains on af ter approximately 7
seconds.
• The supplemental air bag warning light flashes intermittently.
• The supplemental air bag warning light does not come on at all.
Under these conditions, the front air bag,
side air bag, curtain air bag, knee air bag or
pretensioner systems may not operate
properly. They must be checked and re-
paired. It is recommended that you visit a
NISSAN dealer for this service.
WARNING
If the supplemental air bag warning
light is on, it could mean that the front
air bag, side air bag, curtain air bag,
knee air bag and/or pretensioner sys-
tems will not operate in an accident. To
help avoid injury to yourself or others,
have your vehicle checked as soon as
possible. It is recommended that you
visit a NISSAN dealer for this service.
Repair and replacement
procedure
The front air bags, side air bags, curtain air
bags, knee air bags and pretensioner(s) are
designed to inflate on a one-time-only ba-
sis. As a reminder, unless it is damaged, the
supplemental air bag warning light re-
mains illuminated af ter inflation has oc-
curred. These systems should be repaired
and/or replaced as soon as possible. It is
recommended that you visit a NISSAN
dealer for this service.
When maintenance work is required on the
vehicle, the front air bags, side air bags,
curtain air bags, knee air bags, pretension-
er(s) and related parts should be pointed
out to the person performing the mainte-
nance. The ignition switch should always
be placed in the LOCK position when work-
ing under the hood or inside the vehicle.
WARNING
• Once a front air bag, side air bag, cur-
tain air bag or knee air bag has in-
flated, the air bag module will not
function again and must be replaced.
Additionally, the activated preten-
sioner(s) must also be replaced. The
air bag module and pretensioner(s)
should be replaced. It is recom-
mended that you visit a NISSAN
dealer for this service. However, the
air bag module and pretensioner(s)
cannot be repaired.
• The front air bag, side air bag, curtain
air bag, knee air bag systems and the
pretensioner system should be in-
spected if there is any damage to the
front end or side portion of the ve-
hicle. It is recommended that you
visit a NISSAN dealer for this service.
• If you need to dispose of the supple-
mental air bag or pretensioner sys-
tems or scrap the vehicle, it is recom-
mended that you contact a NISSAN
dealer for this service. Incorrect dis-
posal procedures could cause per-
sonal injury.
1-68Safety-Seats, seat belts and supplemental restraint system
Page 99 of 644
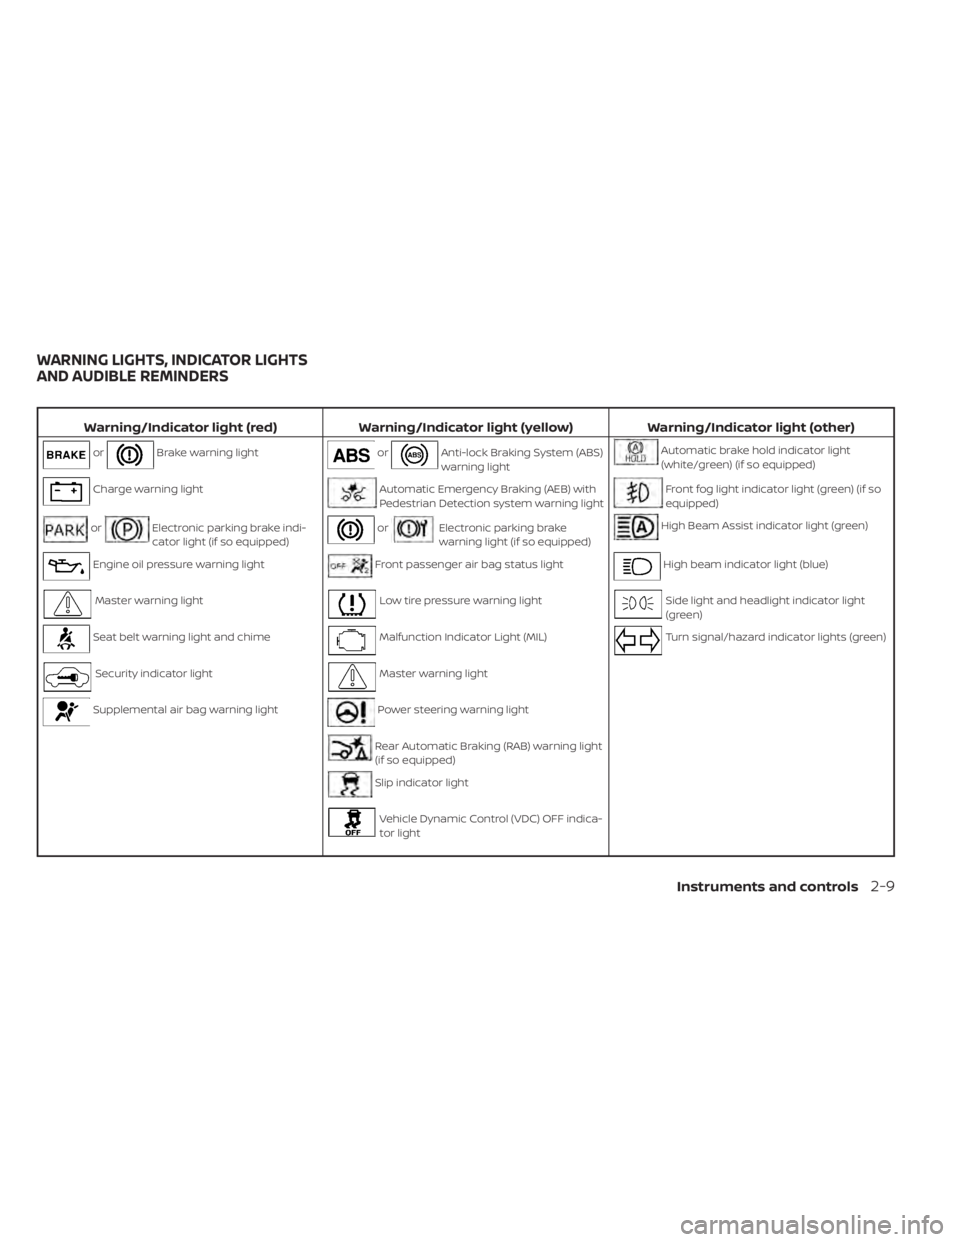
Warning/Indicator light (red)Warning/Indicator light (yellow) Warning/Indicator light (other)
orBrake warning lightorAnti-lock Braking System (ABS)
warning lightAutomatic brake hold indicator light
(white/green) (if so equipped)
Charge warning lightAutomatic Emergency Braking (AEB) with
Pedestrian Detection system warning lightFront fog light indicator light (green) (if so
equipped)
orElectronic parking brake indi-
cator light (if so equipped)orElectronic parking brake
warning light (if so equipped)High Beam Assist indicator light (green)
Engine oil pressure warning lightFront passenger air bag status lightHigh beam indicator light (blue)
Master warning lightLow tire pressure warning lightSide light and headlight indicator light
(green)
Seat belt warning light and chimeMalfunction Indicator Light (MIL)Turn signal/hazard indicator lights (green)
Security indicator lightMaster warning light
Supplemental air bag warning lightPower steering warning light
Rear Automatic Braking (RAB) warning light
(if so equipped)
Slip indicator light
Vehicle Dynamic Control (VDC) OFF indica-
tor light
WARNING LIGHTS, INDICATOR LIGHTS
AND AUDIBLE REMINDERS
Instruments and controls2-9
Page 102 of 644
• Parking brake release warning
• Door open warning (while moving)
• Steering Alert hands on detectionwarning
The warning(s) remain on the vehicle infor-
mation display until action is taken, or the
ignition is placed in the OFF position.
Seat belt warning light and
chime
The light and chime remind you to fasten
the driver and front passenger seat belts.
For additional information, see “Seat belts”
(P. 1-12).
Security indicator light
This light blinks when the ignition switch is
placed in the OFF, LOCK or AUTO ACC
position.
The blinking security indicator light indi-
cates that the security systems equipped
on the vehicle are operational.
For additional information, see “Security
systems” (P. 2-52).
Supplemental air bag
warning light
When the ignition switch is placed in the ON
or START position, the supplemental air
bag warning light illuminates for about 7
seconds and then turns off. This means the
system is operational.
If any of the following conditions occur, the
front air bag, side air bag, curtain air bag,
and pretensioner systems need servicing
and your vehicle must be taken to a NISSAN
dealer:
• The supplemental air bag warning light remains on af ter approximately 7
seconds.
• The supplemental air bag warning light flashes intermittently.
• The supplemental air bag warning light does not come on at all.
Unless checked and repaired, the supple-
mental restraint system (air bag system)
and/or the pretensioners may not function
properly. For additional details, see “Supple-
mental Restraint System (SRS)” (P. 1-47).
WARNING
If the supplemental air bag warning
light is on, it could mean that the front
air bag, side air bag, curtain air bag sys-
tems and/or pretensioner systems will
not operate in an accident. To help
avoid injury to yourself or others, have
your vehicle checked as soon as pos-
sible. It is recommended that you visit a
NISSAN dealer for this service.
WARNING/INDICATOR LIGHTS
(yellow)
For additional information on warnings
and indicators, see “Vehicle information
display-5 inch (13 cm) Type A” (P. 2-18) or
“Vehicle information display-7 inch (18 cm)
Type B” (P. 2-34).
orAnti-lock Braking
System (ABS)
warning light
When the ignition switch is placed in the ON
position, the ABS warning light illuminates
and then turns off. This indicates the ABS is
operational.
2-12Instruments and controls