Page 320 of 606

•Horn
•Exterior lights
FLOOR MATS
WARNING: Use a floor mat designedto fit the footwell of your vehicle that doesnot obstruct the pedal area. Failure tofollow this instruction could result in theloss of control of your vehicle, personalinjury or death.
WARNING: Pedals that cannot movefreely can cause loss of vehicle control andincrease the risk of serious personal injury.
WARNING: Secure the floor mat toboth retention devices so that it cannot slipout of position and interfere with thepedals. Failure to follow this instructioncould result in the loss of control of yourvehicle, personal injury or death.
WARNING: Do not place additionalfloor mats or any other covering on top ofthe original floor mats. This could result inthe floor mat interfering with the operationof the pedals. Failure to follow thisinstruction could result in the loss ofcontrol of your vehicle, personal injury ordeath.
WARNING: Always make sure thatobjects cannot fall into the driver foot wellwhile your vehicle is moving. Objects thatare loose can become trapped under thepedals causing a loss of vehicle control.
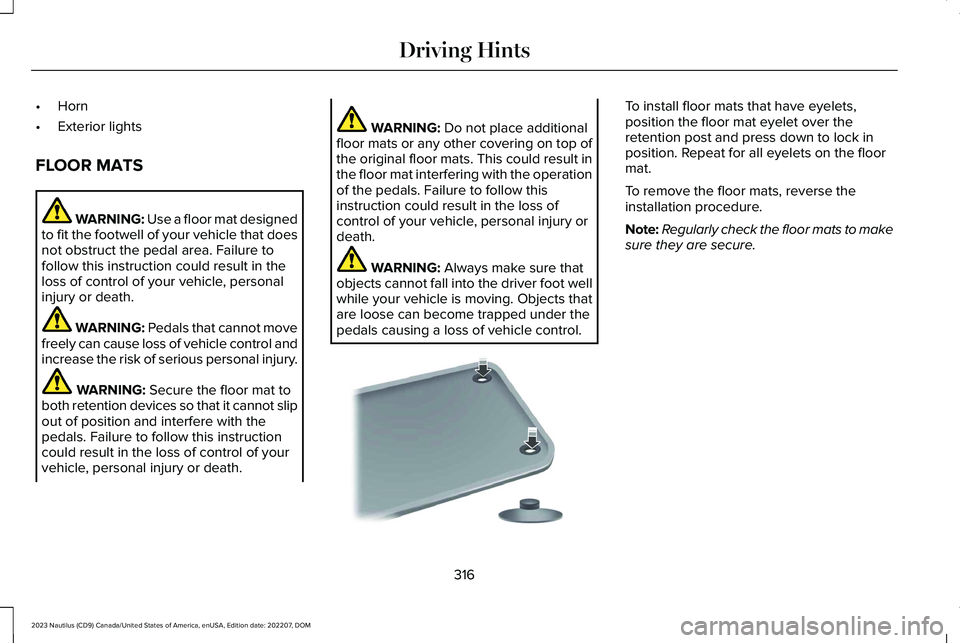
To install floor mats that have eyelets,position the floor mat eyelet over theretention post and press down to lock inposition. Repeat for all eyelets on the floormat.
To remove the floor mats, reverse theinstallation procedure.
Note:Regularly check the floor mats to makesure they are secure.
316
2023 Nautilus (CD9) Canada/United States of America, enUSA, Edition date: 202207, DOMDriving HintsE142666
Page 361 of 606

If you disconnect or replace the battery andyour vehicle has an automatic transmission,it must relearn its adaptive strategy. Becauseof this, the transmission may shift firmly whenfirst driven. This is normal operation whilethe transmission fully updates its operationto optimum shift feel.
Remove and Reinstall the Battery
To disconnect or remove the battery, do thefollowing:
1.Apply the parking brake and switch theignition off.
2.Switch all electrical equipment off, forexample lights and radio.
3.Wait a minimum of two minutes beforedisconnecting the battery.
Note:The engine management system hasa power hold function and remains poweredfor a period of time after you switch theignition off. This is to allow diagnostic andadaptive tables to be stored. Disconnectingthe battery without waiting can causedamage not covered by the vehicleWarranty.
4.Disconnect the negative battery cableterminal.
5.Disconnect the positive battery cableterminal.
6.Remove the battery securing clamp.
7.Remove the battery.
8.To install, reverse the removal procedure.
Note:Before reconnecting the battery, makesure the ignition remains switched off.
Note:Make sure the battery cable terminalsare fully tightened.
Note:After cleaning or replacing the battery,make sure you reinstall the battery cover orshield.
If you disconnect or replace the vehiclebattery, you must reset the followingfeatures:
•Window bounce-back. See Windows(page 131).
•Clock Settings.
•Pre-set radio stations.
•Steering Angle Sensor.
Note:To calibrate the steering angle sensor,drive the vehicle above 30 mph (50 km/h)for a minimum of 1.2 mi (2 km). Make sure todrive straight ahead for a minimum of 30seconds. Several vehicle functions aredisabled and a warning light could appearuntil the sensor is calibrated.
Note:The battery sensor must be reset whena new battery is installed. Install only abattery approved by Ford for use in thevehicle. Use the following procedure toperform the battery sensor reset:
1.1. Turn ignition to on and leave engineoff. Steps 2 and 3 must be completedwithin 10 seconds.
2.2. Flash the high beams 5 times, endingwith the high beams off.
3.3. Press and release the brake pedal 3times.
The battery warning light on the cluster willflash 3 times to confirm that the reset wassuccessful.
357
2023 Nautilus (CD9) Canada/United States of America, enUSA, Edition date: 202207, DOMMaintenance
Page 395 of 606

What to do when a tire is punctured
A tire puncture within the tire's tread areacan be repaired in two stages with the kit.
•In the first stage, the tire is reinflated witha sealing compound and air. After the tirehas been inflated, drive the vehicle ashort distance approximately 4 mi (6 km)to distribute the sealant in the tire.
•In the second stage, check the tirepressure and adjust, if necessary, to thevehicle's specified tire inflation pressure.
First Stage: Reinflating the Tire withsealing compound and air
WARNING: Do not stand directly overthe kit while inflating the tire. If you noticeany unusual bulges or deformations in thetire's sidewall during inflation, stop and callroadside assistance.
WARNING: If the tire does not inflateto the recommended tire pressure within15 minutes, stop and call roadsideassistance.
Park the vehicle in a safe, level and securearea, away from moving traffic.
Turn the hazard lights on. Apply the parkingbrake and power off the vehicle. Inspect theflat tire for visible damage.
If a puncture is located in the tire sidewall,stop and call roadside assistance.
1.Remove the valve cap from the tire valve.
2.Unwrap the dual purpose hose (blacktube) from the back of the compressorhousing.
3.Fasten the hose to the tire valve byturning the connector clockwise. Tightenthe connection securely.
4.Plug the power cable into the 12-voltpower point in the vehicle.
391
2023 Nautilus (CD9) Canada/United States of America, enUSA, Edition date: 202207, DOMTire Sealant and Inflator Kit (If Equipped) E175979