Page 46 of 380
2-2
Using the First Run Setup
You can configure the system settings for each driver when multiple people are using the
vehicle.
In First Run Setup, you can configure the values to display on the screen such as user name,
language.
1 When a safety warning message appears, read it, select the driver
image, and then press Confirm.
AWhen you log in as guest, you cannot configure the profile settings. To set a different
profile, select another user.
A
You can register up to 2 users.
2 When the First Run Setup screen appears, press Start.
A
To use the default settings without changing the environment, press Skip.
3 Set the language to display on the screen and then press Next.
Page 47 of 380
2-3
4 To set the driver's name, press Rename.
The name change screen appears.
A
To proceed with First Run Setup without changing the driver's name, press Next.
5 When the First Run Setup screen appears, press OK.
Displays the Home screen.
A
To set the detailed user information and operation environment, press Profile
Settings.
Using the phone projection function
When you connect an Android smartphone or iPhone to the vehicle with a USB cable, you can
run and control Apps on the phone through the widescreen using its user-friendly interface.
ÝWarning
Do not adjust or set up any phone settings while driving. You may lose your steering control
which could cause an accident and severe bodily injuries.
Page 52 of 380
2-8
Viewing the driving assistance screen
You can see the view around the vehicle through the system screen.
A
The displayed screen may differ depending on the vehicle model.
ÝWarning
When backing up, make sure to follow the guidelines below:
�Before entering your vehicle, always check the area behind your vehicle.
�Do not solely rely on the rear view camera when backing up. Always ensure that it is safe
to back up by checking behind you and looking in the rearview mirrors.
�Always back up slowly and stop immediately if you suspect that a person, especially a
child, might be behind you.
Page 53 of 380

2-9
a a VIEW icon
� (Home icon): Displays the Home screen.
� (Rear view icon): Press the icon to display the desired view.
� (Settings icon): Used to adjust the brightness and contrast of camera images.
A
To select the information to display on the screen, press Display Contents (if
equipped).
b b Parking Distance Warning or Split Screen (if equipped)
�Parking Distance Warning: Provides a visual warning in color and an audible
warning according to the level of collision risk, based on the distance from an
ambient obstacle.
�Split Screen: The split screen appears.
A
Available settings may differ depending on the vehicle model and specifications.
A
You can set to display the rear camera display even when you change the shift position
other than "R" (Reverse) after reversing. To change rear camera operation settings, On
the All Menus screen, press Setup >
Display >
Camera Settings >
Display Contents >
Extended Rear View Monitor (if equipped).
A
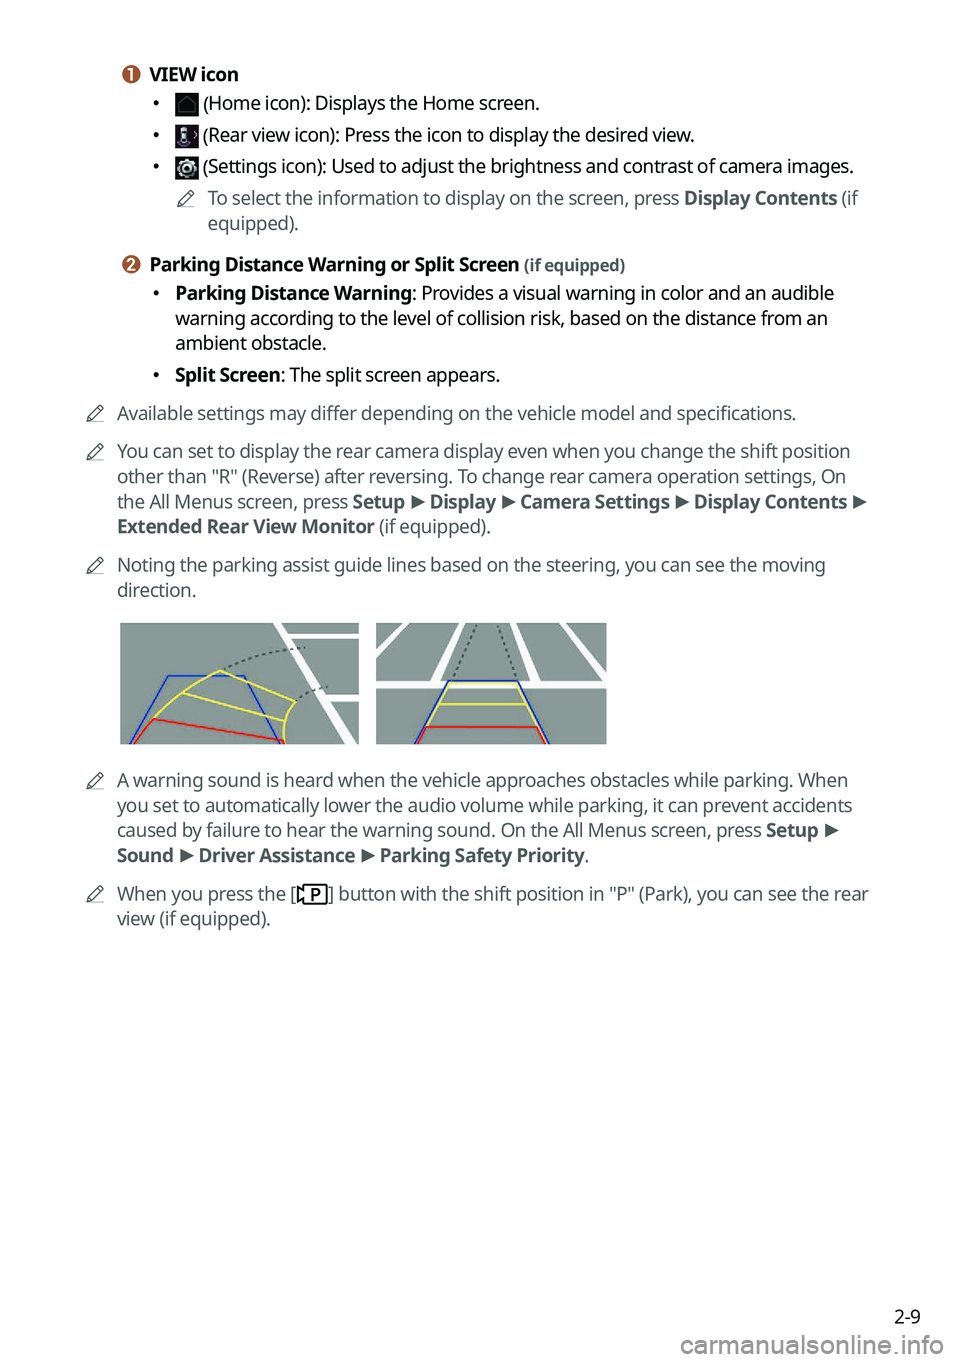
Noting the parking assist guide lines based on the steering, you can see the moving
direction.
AA warning sound is heard when the vehicle approaches obstacles while parking. When
you set to automatically lower the audio volume while parking, it can prevent accidents
caused by failure to hear the warning sound. On the All Menus screen, press Setup >
Sound >
Driver Assistance >
Parking Safety Priority.
A
When you press the [
] button with the shift position in "P" (Park), you can see the rear
view (if equipped).
Page 56 of 380

2-12
Viewing the surround view while reversing
1 Press the "R" (Reverse) button shifter (or move the shift lever to "R" in a
previous vehicle model) with the vehicle turned on.
The system displays the rear view of the vehicle.
A
The surround view monitor function is not available when you change the shift
position to "P" (Park).
A
When you press the [
] button with the shift position in "P" (Park), you can see the
rear view (if equipped).
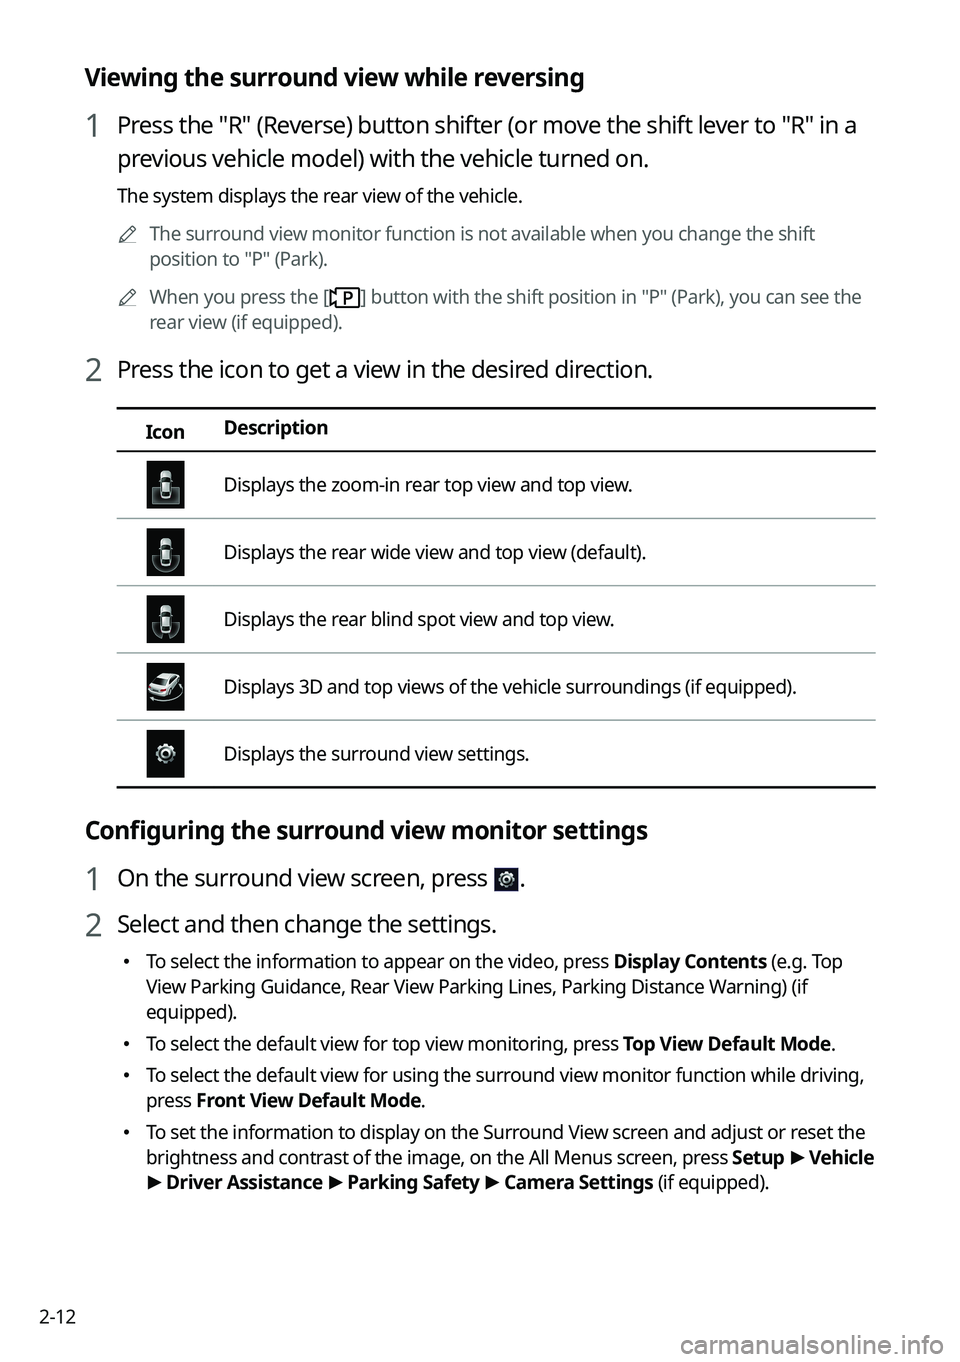
2 Press the icon to get a view in the desired direction.
Icon Description
Displays the zoom-in rear top view and top view.
Displays the rear wide view and top view (default).
Displays the rear blind spot view and top view.
Displays 3D and top views of the vehicle surroundings (if equipped).
Displays the surround view settings.
Configuring the surround view monitor settings
1 On the surround view screen, press .
2 Select and then change the settings.
�
To select the information to appear on the video, press Display Contents (e.g. Top
View Parking Guidance,
Rear View Parking Lines, Parking Distance Warning) (if
equipped).
� To select the default view for top view monitoring, press Top View Default Mode.
�To select the default view for using the surround view monitor function while driving,
press
Front View Default Mode.
�To set the information to display on the Surround View screen and adjust or reset the
brightness and contrast of the image, on the All Menus screen, press Setup
>
Vehicle
> Driver Assistance >
Parking Safety >
Camera Settings (if equipped).
Page 63 of 380

2-19
Using the rear-seat view (if equipped)
You can check the status and safety of rear-seat occupants through the rear-seat camera feed
displayed on the system screen.
ÝWarning
A car accident may occur when focusing on the vehicle display and not pa\
ying attention to
the road while driving.
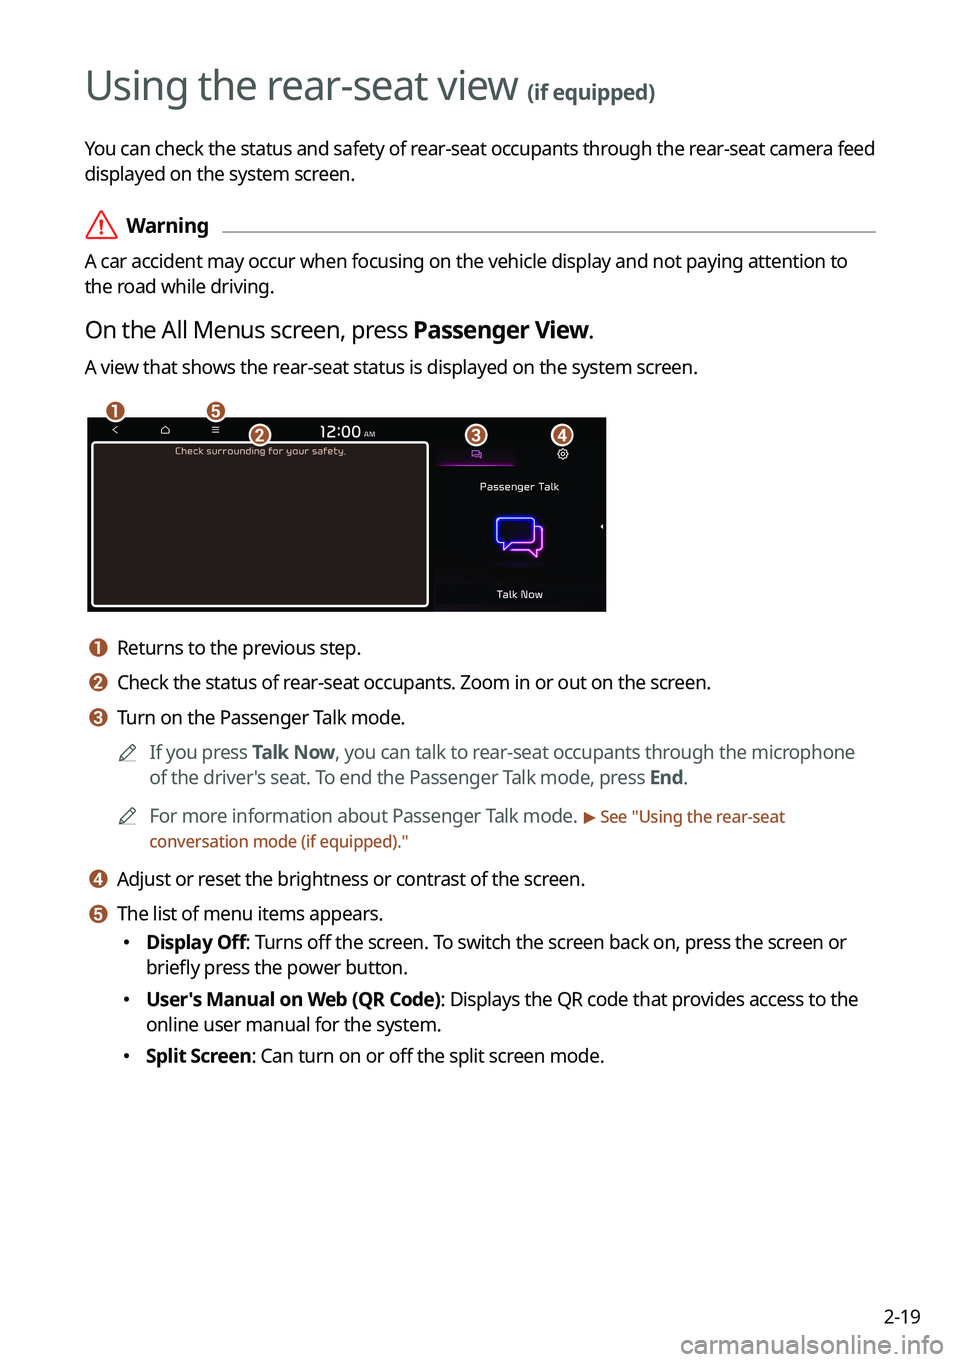
On the All Menus screen, press Passenger View.
A view that shows the rear-seat status is displayed on the system screen.
ae
cbd
a a Returns to the previous step.
b b Check the status of rear-seat occupants. Zoom in or out on the screen.
c c Turn on the Passenger Talk mode.
A
If you press Talk Now, you can talk to rear-seat occupants through the microphone
of the driver's seat. To end the Passenger Talk mode, press End.
A
For more information about Passenger Talk mode.
> See "Using the rear-seat
conversation mode (if equipped)."
d d Adjust or reset the brightness or contrast of the screen.
e e The list of menu items appears.
� Display Off: Turns off the screen. To switch the screen back on, press the screen or
briefly press the power button.
�User's Manual on Web (QR Code): Displays the QR code that provides access to the
online user manual for the system.
�Split Screen: Can turn on or off the split screen mode.
Page 84 of 380

2-40
Configuring the EV settings (EV only)
You can set to display the warning message when the remaining battery amount is low for
the destination and you can also see the drivable distance. In winter, you can also set to
increase the battery temperature in advance.
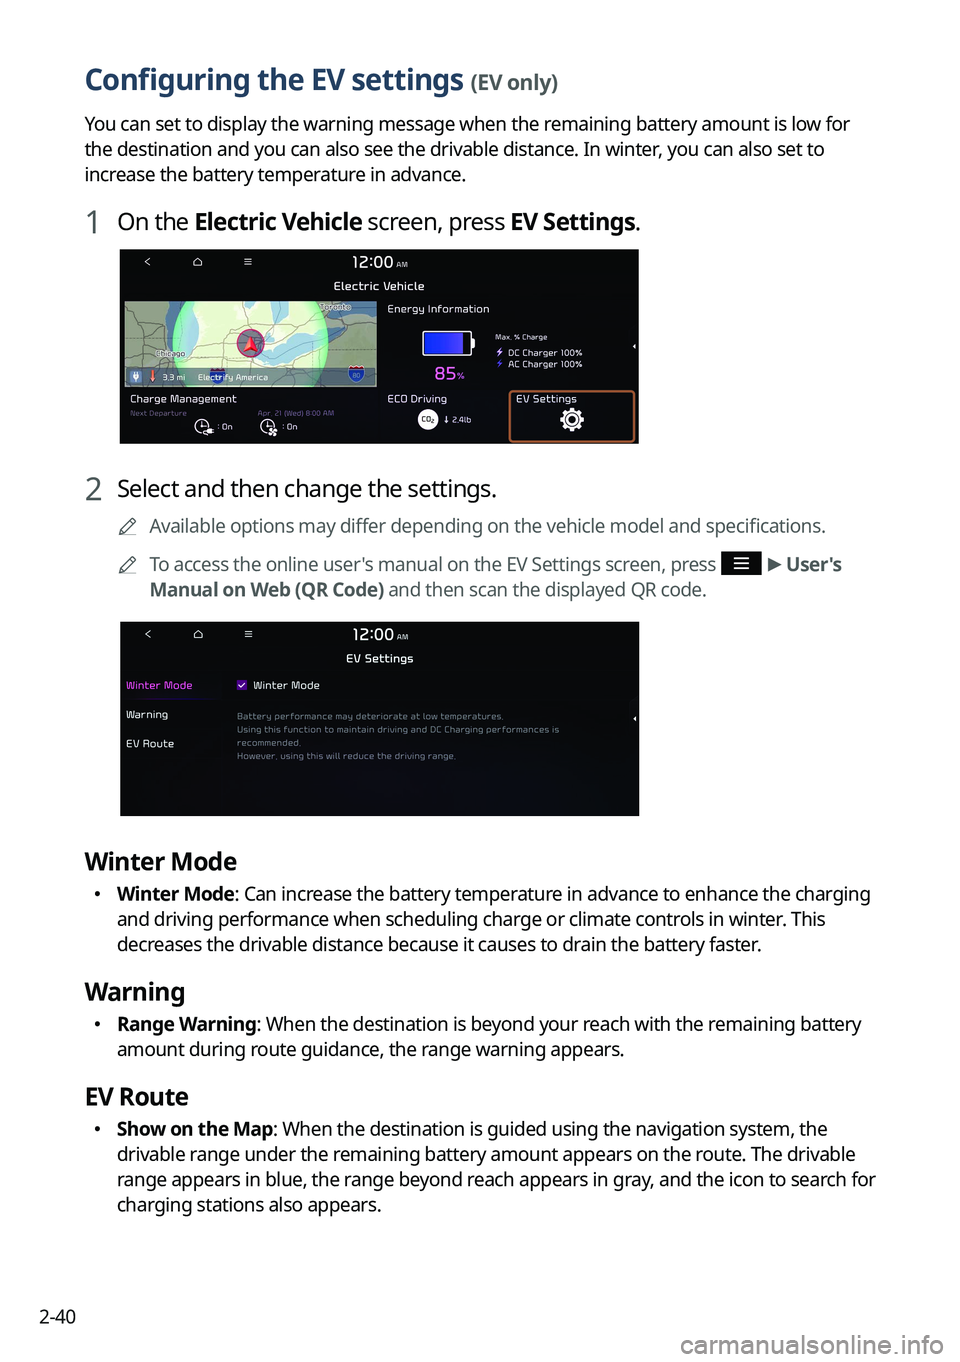
1 On the Electric Vehicle screen, press EV Settings.
2 Select and then change the settings.
A
Available options may differ depending on the vehicle model and specifications.
A
To access the online user's manual on the EV Settings screen, press
>
User's
Manual on Web (QR Code) and then scan the displayed QR code.
Winter Mode
� Winter Mode: Can increase the battery temperature in advance to enhance the charging
and driving performance when scheduling charge or climate controls in winter. This
decreases the drivable distance because it causes to drain the battery faster.
Warning
�Range Warning: When the destination is beyond your reach with the remaining battery
amount during route guidance, the range warning appears.
EV Route
�Show on the Map: When the destination is guided using the navigation system, the
drivable range under the remaining battery amount appears on the route. The drivable
range appears in blue, the range beyond reach appears in gray, and the icon to search for
charging stations also appears.
Page 87 of 380
2-43
3 On the Range screen, check the drivable distance and nearby charging
stations.
The drivable range is distinguished by a blue circle. Using the icons within the drivable
range, you can check the locations and availabilities of charging stations.
e
b
f
g
h
j
Option A (EV6 only)
ba
cd
e
g
j
k
i
Option B (EV only)
a a Returns to the previous step (if equipped).
b b Displays the Home screen.
c c See the list of nearby charging stations (if equipped).
d d Set a filter to view specific types of charging stations on the map (if equipped).
e e Used to change the map display mode.
� (North Up 2D): Displays the map with the north fixed at the top.
� (Heading Up 2D): Rotates the map depending on the travel direction.
� (Heading Up 3D ): Rotates the map depending on the travel direction for 3D view (if
equipped).
f f You can adjust the volume of navigation or GPS warning sound (if equipped).
g g Zooms in the map.
h h The scale of the map automatically changes (if equipped).