2023 INFINITI QX80 door locks
[x] Cancel search: door locksPage 13 of 590

JVC1126X
1. Hood (P.3-21)
2. Windshield wiper and washer— Switch operation (P.2-40)
— Rain-sensing auto wiper system
(P.2-41)
— Wiper blade replacement (P.8-15) — Window washer fluid (P.8-10)
3. Moonroof (P.2-76)
4. Power windows (P.2-73)
5. Roof rack (P.2-72)
6. Towing hook (P.6-18)
7. Front view camera (P.4-4) 8. Sonar sensors
— Camera aiding sonar function
(P.4-17)
9. Headlight washers (if so equipped) (P.2-50)
10. Fog light (P.2-52)
11. Headlight (P.2-44) — Adaptive Front lighting System
(AFS) (if so equipped) (P.2-50)
12. Front parking light/daytime running light/front turn signal light (P.2-44)
13. Tires — Wheel and tires (P.8-27, P.10-9)
— Flat tire (P.6-3)
— Tire Pressure Monitoring System
(TPMS) (P.2-16, P.5-5)
14. Outside mirrors (P.3-37) — Side view camera (P.4-4)
— Welcome light (P.2-78)
15. Side turn signal lights (P.8-23)
16. Doors — Keys (P.3-2)
— Door locks (P.3-4)
— Intelligent Key system (P.3-7)
— Remote keyless entry system
(P.3-15)
— Remote engine start (if so equipped)
(P.3-19)
Illustrated table of contents0-3
EXTERIOR FRONT
Page 14 of 590

0-4Illustrated table of contents
17. Child safety rear door locks (P.3-6)
Page 86 of 590

1-62Safety — seats, seat belts and supplemental restraint system
.Make sure that there is no object placed
under the front passenger seat.
Steps:
1. Adjust the seat as outlined. (See “Seats” (P.1-3).) Sit upright, leaning against the
seatback, and centered on the seat
cushion with your feet comfortably ex-
tended to the floor.
2. Make sure there are no objects on your lap.
3. Fasten the seat belt as outlined. (See “Seat belts” (P.1-18).)
4. Remain in this position for 30 seconds allowing the system to classify the front
passenger before the vehicle is put into
motion.
5. Ensure proper classification by checking the front passenger air bag status light.
NOTE:
This vehicle’s occupant classification sensor
system locks the classification during driv-
ing so it is important that you confirm that
the front passenger is properly classified
prior to driving. Also, the occupant classifi-
cation sensor system may recalculate the
weight of the occupant when the vehicle
comes to a stop (i.e. stop light, stop sign,
etc.), so the front passenger seat occupant
should continue to remain seated as out-
lined above. Troubleshooting:
If you think the front passenger air bag
status light is incorrect:
1. If the light is ON with no front passenger and no objects on the front
passenger seat:
This may be due to the following conditions
that may be interfering with the weight
sensors:
. An object weighing over 9.1 lbs (4 kg)
hanging on the seat or placed in the
seatback pocket.
. A child restraint or other object pressing
against the rear of the seatback.
. A rear passenger pushing or pulling on
the back of the front passenger seat.
. Forcing the front seat or seatback
against an object on the seat or floor
behind it.
. An object placed under the front passen-
ger seat.
. An object placed between the seat
cushion and center console or between
the seat cushion and the door.
If the vehicle is moving, please come to a
stop when it is safe to do so. Check and
correct any of the above conditions. Restart
the vehicle and wait 1 minute. NOTE:
A system check will be performed during
which the front passenger air bag status
light will remain lit for about 7 seconds
initially.
If the light is still ON after this, it is
recommended that the vehicle be checked
by an INFINITI retailer as soon as possible.
2. If the light is ON with an adult occupy- ing the front passenger seat:
. Occupant is a small adult — the front
passenger air bag status light is func-
tioning as intended. The front passenger
air bag and front passenger knee air bag
are suppressed.
However, if the occupant is not a small adult,
then this may be due to the following
conditions that may be interfering with the
weight sensors:
. Occupant is not sitting upright, leaning
against the seatback, and centered on
the seat cushion with his/her feet com-
fortably extended to the floor.
. A child restraint or other object pressing
against the rear of the seatback.
. A rear passenger pushing or pulling on
the back of the front passenger seat.
. Forcing the front seat or seatback
against an object on the seat or floor
behind it.
Page 134 of 590
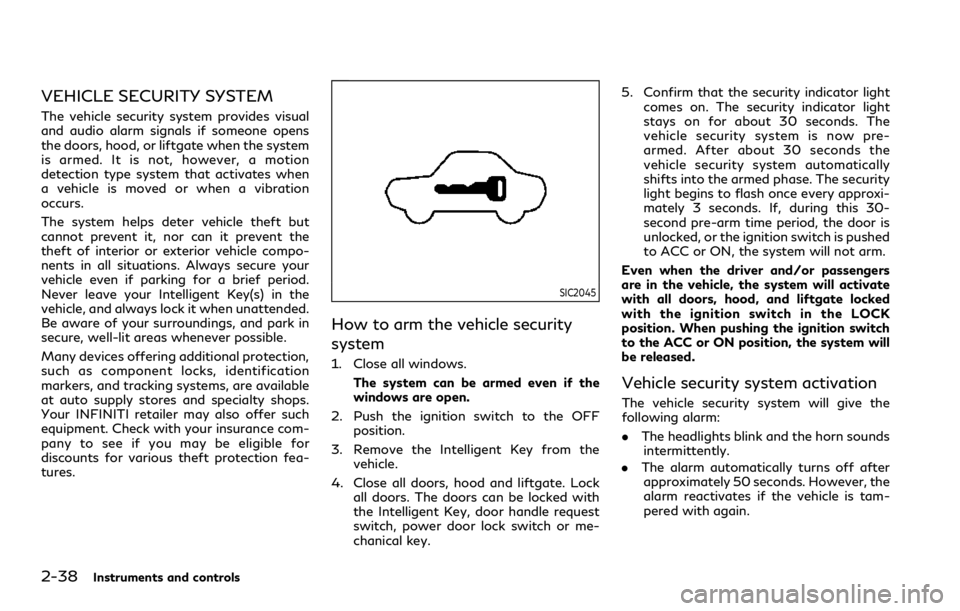
2-38Instruments and controls
VEHICLE SECURITY SYSTEM
The vehicle security system provides visual
and audio alarm signals if someone opens
the doors, hood, or liftgate when the system
is armed. It is not, however, a motion
detection type system that activates when
a vehicle is moved or when a vibration
occurs.
The system helps deter vehicle theft but
cannot prevent it, nor can it prevent the
theft of interior or exterior vehicle compo-
nents in all situations. Always secure your
vehicle even if parking for a brief period.
Never leave your Intelligent Key(s) in the
vehicle, and always lock it when unattended.
Be aware of your surroundings, and park in
secure, well-lit areas whenever possible.
Many devices offering additional protection,
such as component locks, identification
markers, and tracking systems, are available
at auto supply stores and specialty shops.
Your INFINITI retailer may also offer such
equipment. Check with your insurance com-
pany to see if you may be eligible for
discounts for various theft protection fea-
tures.
SIC2045
How to arm the vehicle security
system
1. Close all windows.The system can be armed even if the
windows are open.
2. Push the ignition switch to the OFF position.
3. Remove the Intelligent Key from the vehicle.
4. Close all doors, hood and liftgate. Lock all doors. The doors can be locked with
the Intelligent Key, door handle request
switch, power door lock switch or me-
chanical key. 5. Confirm that the security indicator light
comes on. The security indicator light
stays on for about 30 seconds. The
vehicle security system is now pre-
armed. After about 30 seconds the
vehicle security system automatically
shifts into the armed phase. The security
light begins to flash once every approxi-
mately 3 seconds. If, during this 30-
second pre-arm time period, the door is
unlocked, or the ignition switch is pushed
to ACC or ON, the system will not arm.
Even when the driver and/or passengers
are in the vehicle, the system will activate
with all doors, hood, and liftgate locked
with the ignition switch in the LOCK
position. When pushing the ignition switch
to the ACC or ON position, the system will
be released.
Vehicle security system activation
The vehicle security system will give the
following alarm:
. The headlights blink and the horn sounds
intermittently.
. The alarm automatically turns off after
approximately 50 seconds. However, the
alarm reactivates if the vehicle is tam-
pered with again.
Page 177 of 590

SIC4448
The light on the vanity mirror will turn on
when the cover on the vanity mirror is
opened.
When the cover is closed, the light will turn
off.
The lights will also turn off after a period of
time when the lights remain illuminated to
prevent the battery from becoming dis-
charged.
SIC4418
The cargo light switch has three positions:
ON, centerand OFF.
ON position
When the switch is in the ON position
, the
cargo light will illuminate.
Center position
When the switch is in the center position
,
the cargo light will illuminate when the
liftgate is opened.
OFF position
When the switch is in the OFF position
,
the cargo light will not illuminate. The HomeLink
®Universal Transceiver pro-
vides a convenient way to consolidate the
functions of up to three individual hand-held
transmitters into one built-in device.
HomeLink
®Universal Transceiver:
. Will operate most Radio Frequency (RF)
devices such as garage doors, gates,
home and office lighting, entry door
locks and security systems.
. Is powered by your vehicle’s battery. No
separate batteries are required. If the
vehicle’s battery is discharged or is
disconnected, HomeLink
®will retain all
programming.
When the HomeLink
®Universal Transceiver
is programmed, retain the original trans-
mitter for future programming procedures
(Example: new vehicle purchases). Upon
sale of the vehicle, the programmed
HomeLink
®Universal Transceiver buttons
should be erased for security purposes. For
additional information, refer to “Program-
ming HomeLink
®” (P.2-82).
WARNING
. Do not use the HomeLink®Universal
Transceiver with any garage door
opener that lacks safety stop and
reverse features as required by fed-
eral safety standards. (These stan-
Instruments and controls2-81
VANITY MIRROR LIGHTS CARGO LIGHTHomeLink®UNIVERSAL
TRANSCEIVER (Type A) (if so equipped)
Page 181 of 590

For questions or comments, contact
HomeLink®at: www. homelink.com/infiniti
or 1-800-355-3515.
The HomeLink
®Universal Transceiver but-
ton has now been reprogrammed. The new
device can be activated by pushing the
HomeLink
®button that was just pro-
grammed. This procedure will not affect
any other programmed HomeLink
®buttons.
IF YOUR VEHICLE IS STOLEN
If your vehicle is stolen, you should change
the codes of any non-rolling code device that
has been programmed into HomeLink
®.
Consult the Owner’s Manual of each device
or call the manufacturer or retailer of those
devices for additional information.
When your vehicle is recovered, you will
need to reprogram the HomeLink
®Univer-
sal Transceiver with your new transmitter
information.
FCC Notice:
For USA:
This device complies with Part 15 of the
FCC Rules. Operation is subject to the
following two conditions: (1) This device
may not cause harmful interference, and (2)
this device must accept any interference
received, including interference that may
cause undesired operation. NOTE:
Changes or modifications not expressly
approved by the party responsible for
compliance could void the user’s authority
to operate the equipment.
For Canada:
This device contains licence-exempt trans-
mitter(s)/receiver(s) that comply with In-
novation, Science and Economic
Development Canada’s licence-exempt
RSS(s). Operation is subject to the follow-
ing two conditions: (1) This device may not
cause interference. (2) This device must
accept any interference, including interfer-
ence that may cause undesired operation of
the device.
The HomeLink®Universal Transceiver pro-
vides a convenient way to consolidate the
functions of up to three individual hand-held
transmitters into one built-in device.
HomeLink
®Universal Transceiver:
. Will operate most Radio Frequency (RF)
devices such as garage doors, gates,
home and office lighting, entry door
locks and security systems.
. Is powered by your vehicle’s battery. No
separate batteries are required. If the
vehicle’s battery is discharged or is
disconnected, HomeLink
®will retain all
programming.
When the HomeLink
®Universal Transceiver
is programmed, retain the original trans-
mitter for future programming procedures
(Example: new vehicle purchases). Upon
sale of the vehicle, the programmed
HomeLink
®Universal Transceiver buttons
should be erased for security purposes. For
additional information, refer to “Program-
ming HomeLink
®” (P.2-86).
WARNING
. Do not use the HomeLink®Universal
Transceiver with any garage door
opener that lacks safety stop and
reverse features as required by fed-
eral safety standards. (These stan-
Instruments and controls2-85
HomeLink®UNIVERSAL
TRANSCEIVER (Type B) (if so equipped)
Page 189 of 590

3 Pre-driving checks and adjustments
Keys ........................................................................\
.............. 3-2Intelligent Key .............................................................. 3-2
Valet hand-off ............................................................. 3-4
Doors ........................................................................\
............ 3-4 Locking with mechanical key ................................... 3-4
Opening and closing windows with the
mechanical key ............................................................. 3-5
Locking with inside lock knob ................................. 3-5
Locking with power door lock switch ................... 3-5
Automatic door locks ................................................. 3-6
Child safety rear door lock ...................................... 3-6
Intelligent Key system ...................................................... 3-7 Intelligent Key operating range ............................... 3-9
Door locks/unlocks precaution ............................... 3-9
Intelligent Key operation ......................................... 3-10
Battery saver system ............................................... 3-12
Warning signals ......................................................... 3-12
Troubleshooting guide ............................................. 3-13
Remote keyless entry system ...................................... 3-15 How to use remote keyless entry system .......... 3-16
Remote engine start (if so equipped) ........................ 3-19 Remote engine start operating range ................. 3-19
Remote starting the engine ................................... 3-19
Extending engine run time ..................................... 3-20 Canceling a remote engine start ........................ 3-20
Conditions the remote engine start will
not work ................................................................... 3-20
Hood ........................................................................\
.......... 3-21
Liftgate ........................................................................\
..... 3-22 Operating manual liftgate .................................... 3-22
Operating power liftgate ...................................... 3-22
Auto closure ............................................................ 3-25
Liftgate release lever ............................................. 3-26
Fuel-filler door ................................................................ 3-26
Opening the fuel-filler door ................................. 3-26
Fuel-filler cap ........................................................... 3-26
Tilt/telescopic steering ................................................. 3-29
Electric operation .................................................... 3-29
Sun visors ........................................................................\
. 3-29
Mirrors ........................................................................\
..... 3-30
Inside mirror ............................................................. 3-30
Outside mirrors ........................................................ 3-37
Vanity mirror ............................................................ 3-39
Memory seat ................................................................... 3-39
Entry/exit function ................................................. 3-39
Memory storage ..................................................... 3-40
Setting memory function ...................................... 3-41
System operation .................................................... 3-41
Page 194 of 590

3-6Pre-driving checks and adjustments
Lockout protection
When the power door lock switch (driver or
front passenger) is moved to the lock
position with any door open, all doors will
lock and unlock automatically. With the
Intelligent Key left in the vehicle and any
door open, all doors will unlock automati-
cally and a chime will sound after the door is
closed.
These functions help to prevent the Intelli-
gent Key from being accidentally locked
inside the vehicle.
AUTOMATIC DOOR LOCKS
.All doors lock automatically when the
vehicle speed reaches 15 MPH (24
km/h).
. All doors unlock automatically when the
ignition switch is placed in the OFF
position.
The automatic unlock function can be
deactivated or activated. To deactivate or
activate the automatic door unlock system,
perform the following procedure:
1. Close all doors.
2. Place the ignition switch in the ON position.
3. Within 20 seconds of performing Step 2, push and hold the power door lock
switch to the
position (UNLOCK) for more than 5 seconds.
4. When activated, the hazard indicator will flash twice. When deactivated, the ha-
zard indicator will flash once.
5. The ignition switch must be placed in the OFF and ON position again between
each setting change.
When the automatic door unlock system is
deactivated, the doors do not unlock when
the ignition switch is placed in the OFF
position. To unlock the door manually, use
the inside lock knob or the power door lock
switch (driver’s or front passenger’s side).
SPA2536
CHILD SAFETY REAR DOOR
LOCK
Child safety rear door locks help prevent
doors from being opened accidentally, espe-
cially when small children are in the vehicle.
When the levers are in the lock position
,
the rear doors can be opened only from the
outside.
To disengage, move the levers to the unlock
position
.