2023 HYUNDAI TUCSON screen
[x] Cancel search: screenPage 183 of 638

05
5-39
NOTICE
• While integrated memory system
is being reset, if the resetting
and notification sound stops
incompletely, restart the resetting
procedure again.
• Before performing the IMS memory
reset operation, make sure there are
no objects on or around the driver’s
seat.
Seat Easy Access Operation (if
equipped)
The system will move the driver’s seat
automatically as follows:
• Vehicles equipped with Driver’s Power
Seat and Smart Key
-The driver’s seat will move rearward
when the Engine Start/Stop button
is pressed to turn the engine OFF.
-The driver’s seat will move forward
when the Engine Start/Stop button
is pressed to the ACC or engine
START position.
Note that Seat Easy Access operation
may be limited when the driver’s seat
position setting is already close to the
maximum rearward travel position.
You can enable or disable the Seat Easy
Access feature in the User Settings menu
on the LCD display or the navigation
infotainment screen on some models.
‘Convenience → Seat Easy Access → Off/Normal/Extended’.
For more details, refer to “LCD Display”
In chapter 4.
CAUTION
The driver should be aware and be
cautious to avoid injury or damage
when using this feature if there are
objects or passengers in the driver’s
side rear seat or seat floor.
In case of emergency or to stop
movement of the front seat when the
Seat Easy Access is operating, press the
SET button or any of the driver’s seat
control switches.
Page 186 of 638
Convenient features
5-42
• Auto Comfort Control for Driver (if
equipped)
The Automatic Comfort Control
feature can control the steering
wheel heater operation according
to the ambient temperature and
the set climate control temperature
while the engine is running.
If the heated steering wheel switch
is pressed while the Automatic
Comfort Control feature is
operating, then the heated steering
wheel operation will be controlled
manually.
The Auto Comfort Control feature
is enabled from the Vehicle
Settings menu on the navigation
infotainment screen.
-The heated steering wheel defaults
to the OFF position whenever the
ignition switch is ON. However, if
the Auto Comfort Control function
is ON, the heated steering wheel
will turn on and off depending on
the ambient temperature and the
set climate control temperature.
For more details, we recommend that
you contact an authorized HYUNDAI
dealer.
Information
The heated steering wheel will turn off
automatically approximately 30 minutes
after the heated steering wheel is turned
on.
NOTICE
Do not install any cover or accessory
on the steering wheel. This cover or
accessory could cause damage to the
heated steering wheel system.
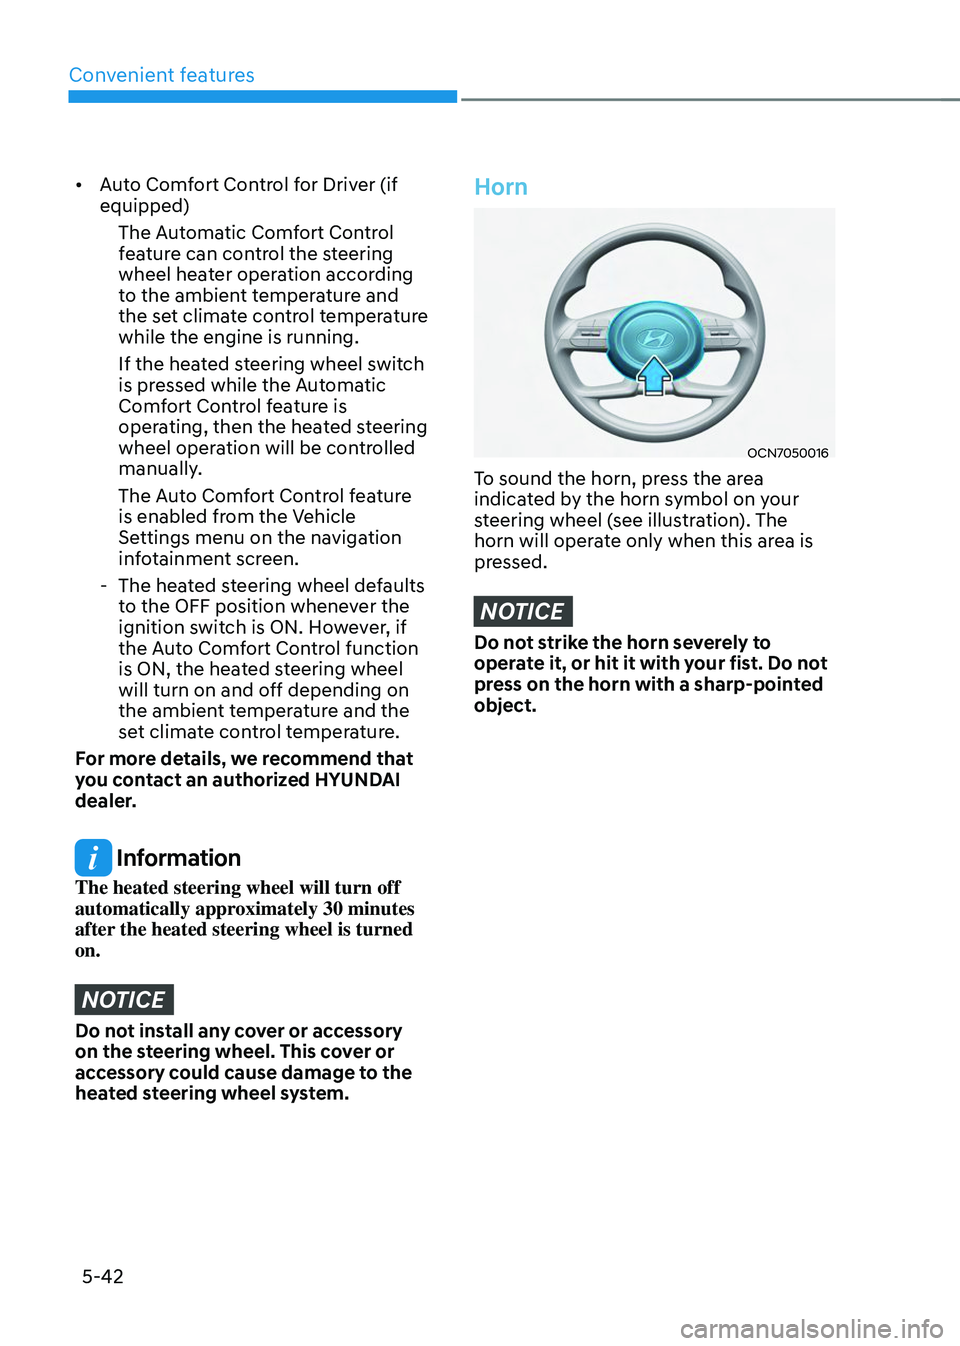
Horn
OCN7050016
To sound the horn, press the area
indicated by the horn symbol on your
steering wheel (see illustration). The
horn will operate only when this area is
pressed.
NOTICE
Do not strike the horn severely to
operate it, or hit it with your fist. Do not
press on the horn with a sharp-pointed
object.
Page 216 of 638

Convenient features
5-72
Resetting the power liftgate
ONX4E050145
If the battery has been discharged or
disconnected, or if the power liftgate
fuse has been replaced or removed, reset
the power liftgate by performing the
following procedure:
1. Put the gear in P (Park).
2. Press the power liftgate inner button
(B) and the power liftgate handle
switch (A) simultaneously for more
than 3 seconds. The chime will sound.
3. Close the liftgate manually.
If the power liftgate does not work
properly after the above procedure, we
recommend that the system be checked
by an authorized HYUNDAI dealer.
Information
If the power liftgate does not operate
normally, check again if the gear position
is in right position.
WARNING
ONX4E050058R
Do not grab or hold on to the liftgate
support struts at any time. Damage to
the liftgate support struts could result.
Deformation of the liftgate support
struts may cause vehicle damage and
personal injury may occur.
User Settings for the Power Liftgate
From the Infotainment Screen
The driver can select the power liftgate
opening height or speed from the
Settings menu in the infotainment
system screen.
OJX1050111N
Power liftgate opening height
To adjust the power liftgate opening
height, select ‘Setup → Vehicle Settings → Door/Liftgate → Power Liftgate Opening Height → Full Open/Level 3/Level 2/Level 1/User Height Setting’.
See additional information in supplied
Infotainment Manual.
Page 218 of 638
Convenient features
5 -74
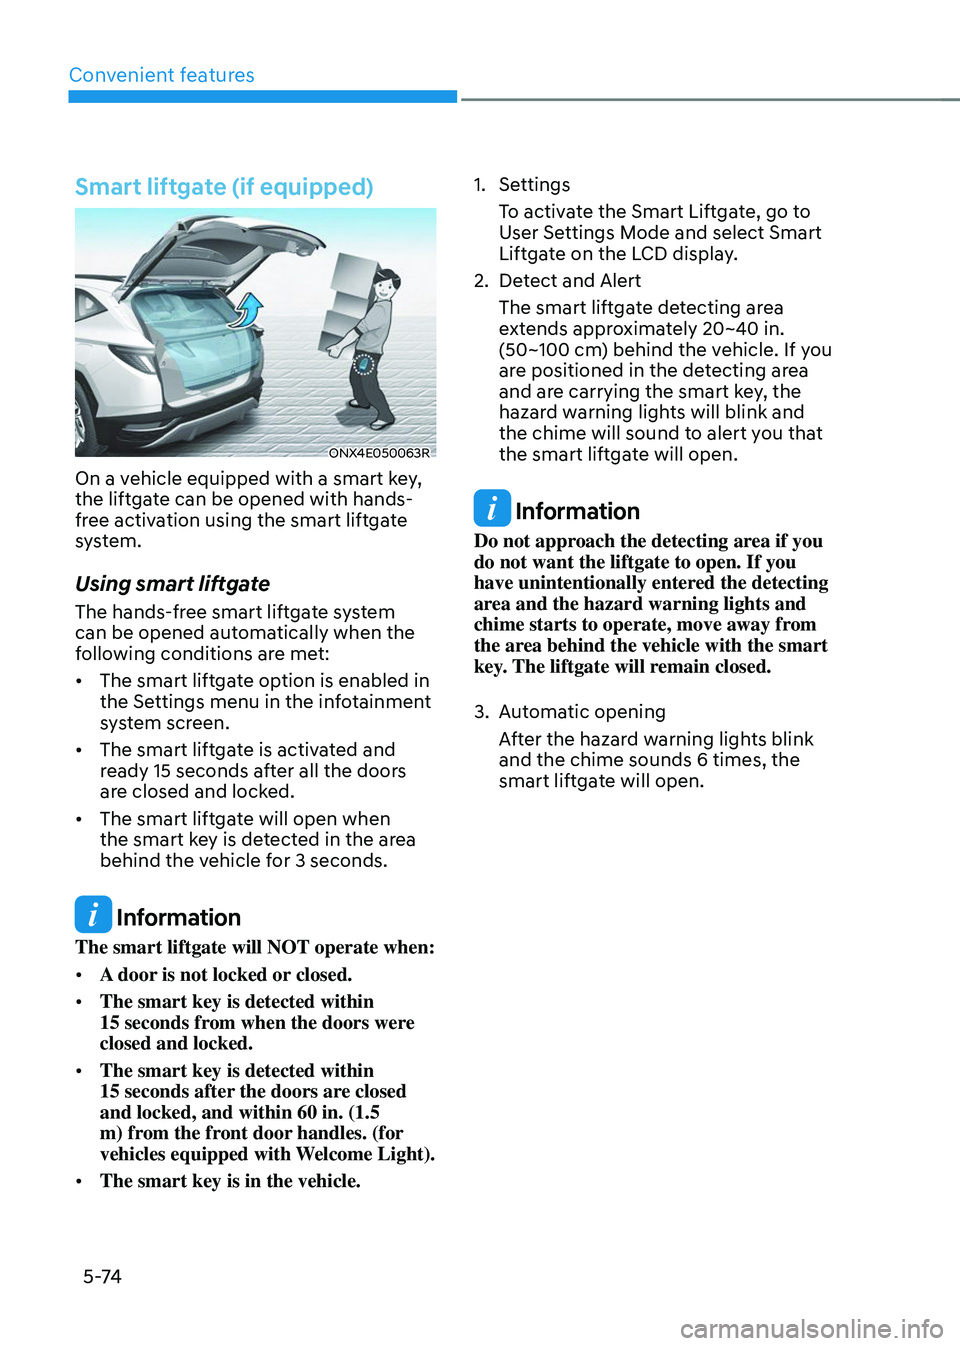
Smart liftgate (if equipped)
ONX4E050063R
On a vehicle equipped with a smart key,
the liftgate can be opened with hands-
free activation using the smart liftgate
system.
Using smart liftgate
The hands-free smart liftgate system
can be opened automatically when the
following conditions are met:
• The smart liftgate option is enabled in
the Settings menu in the infotainment
system screen.
• The smart liftgate is activated and
ready 15 seconds after all the doors
are closed and locked.
• The smart liftgate will open when
the smart key is detected in the area
behind the vehicle for 3 seconds.
Information
The smart liftgate will NOT operate when:
• A door is not locked or closed.
• The smart key is detected within
15 seconds from when the doors were closed and locked.
• The smart key is detected within
15 seconds after the doors are closed and locked, and within 60 in. (1.5
m) from the front door handles. (for
vehicles equipped with Welcome Light).
• The smart key is in the vehicle.
1. Settings
To activate the Smart Liftgate, go to
User Settings Mode and select Smart
Liftgate on the LCD display.
2. Detect and Alert
The smart liftgate detecting area
extends approximately 20~40 in.
(50~100 cm) behind the vehicle. If you
are positioned in the detecting area
and are carrying the smart key, the
hazard warning lights will blink and
the chime will sound to alert you that
the smart liftgate will open.
Information
Do not approach the detecting area if you
do not want the liftgate to open. If you
have unintentionally entered the detecting
area and the hazard warning lights and
chime starts to operate, move away from
the area behind the vehicle with the smart
key. The liftgate will remain closed.
3. Automatic opening
After the hazard warning lights blink
and the chime sounds 6 times, the
smart liftgate will open.
Page 247 of 638
05
5-103
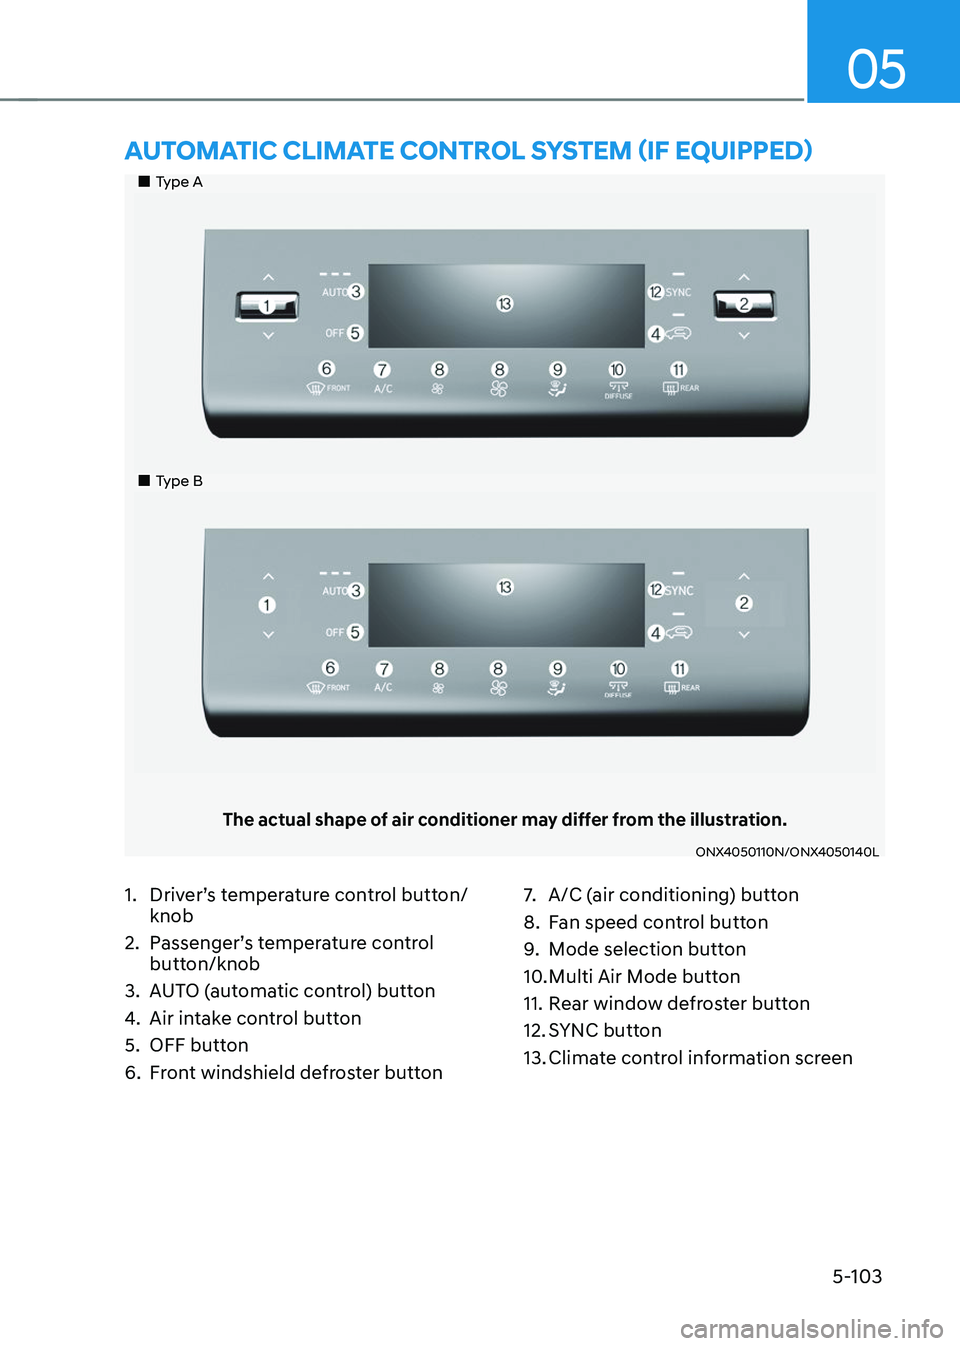
„„Type A
„„Type B
The actual shape of air conditioner may differ from the illustration.
ONX4050110N/ONX4050140L
AUTOMATIC CLIMATE CONTROL SYSTEM (IF EQUIPPED)
1. Driver’s temperature control button/
knob
2. Passenger’s temperature control
button/knob
3. AUTO (automatic control) button
4. Air intake control button
5. OFF button
6. Front windshield defroster button
7. A/C (air conditioning) button
8. Fan speed control button
9. Mode selection button
10. Multi Air Mode button
11. Rear window defroster button
12. SYNC button
13. Climate control information screen
Page 252 of 638
Convenient features
5-108
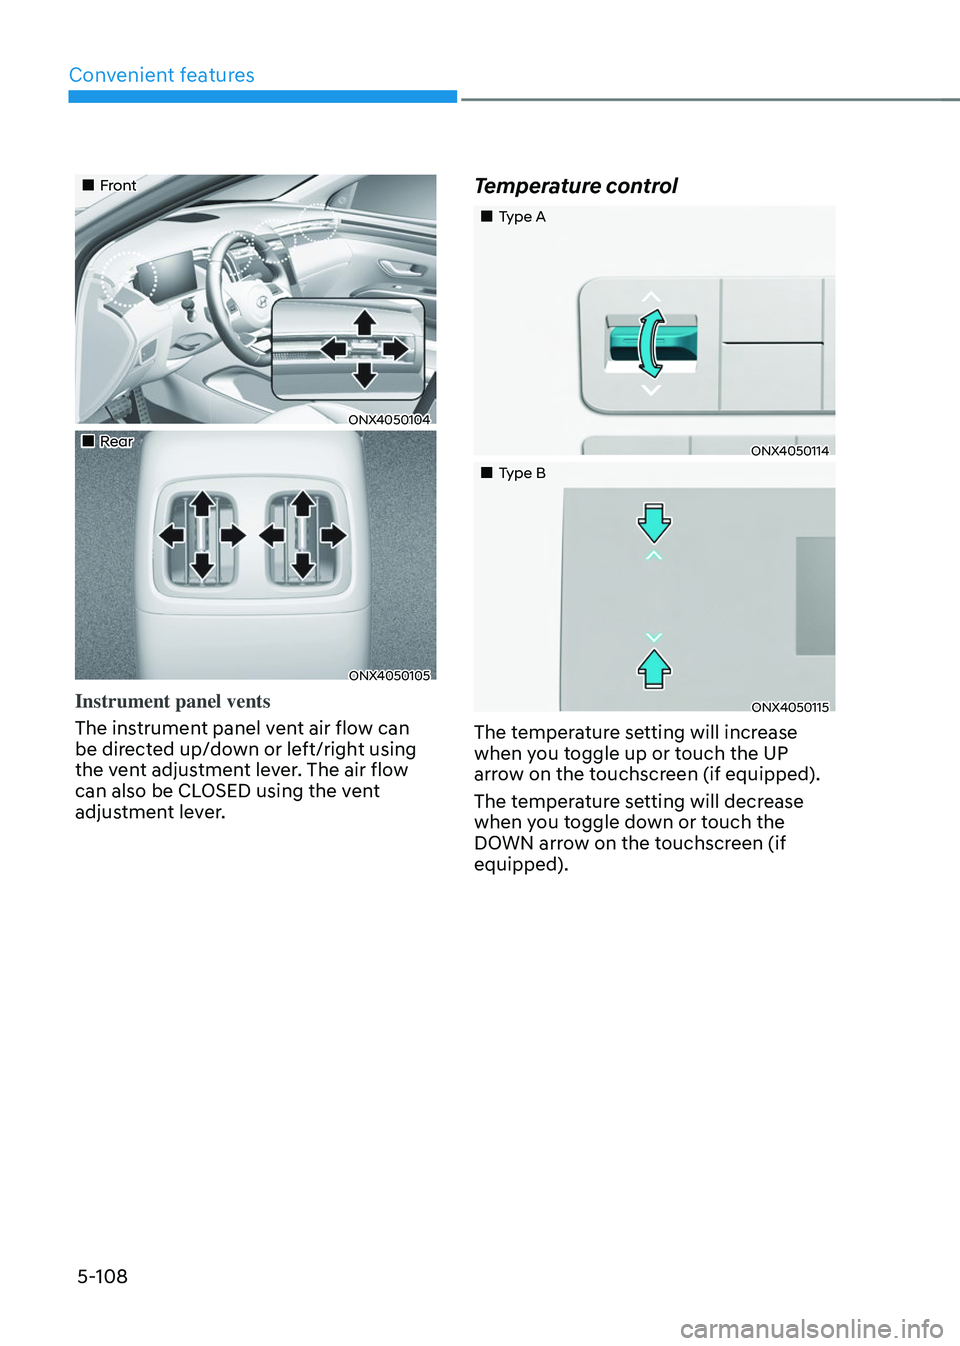
„„Front
ONX4050104
„„Rear
ONX4050105
Instrument panel vents
The instrument panel vent air flow can
be directed up/down or left/right using
the vent adjustment lever. The air flow
can also be CLOSED using the vent
adjustment lever.
Temperature control
„„Type A
ONX4050114
„„Type B
ONX4050115
The temperature setting will increase
when you toggle up or touch the UP
arrow on the touchscreen (if equipped).
The temperature setting will decrease
when you toggle down or touch the
DOWN arrow on the touchscreen (if
equipped).
Page 253 of 638

05
5-109
ONX4050122
Adjusting the temperature equally
Press the SYNC button (indicator light
ON) to adjust the driver and passenger
side and the rear seat’s temperature
equally.
Adjusting the temperature and
individually
Press the SYNC button (indicator light
OFF) again to adjust the driver and
passenger side and the rear seat’s
temperature individually.
Temperature conversion
If the battery has been discharged or
disconnected, the temperature mode
display will reset to Fahrenheit.
To change the temperature unit from °C
to °F or °F to °C :
-Instrument cluster or infotainment
system screen
Go to Setup→ Unit → Temperature unit
The temperature unit on both the cluster
LCD display and the climate control
screen will change.
Air intake control
The air intake control button is used to
select either Fresh mode (outside air) or
Recirculation mode (cabin air).
Recirculated air position
With the recirculated air
position selected, air from the
passenger compartment will
be drawn through the heating
system and heated or cooled
according to the function
selected.
Outside (fresh) air position
With the outside (fresh) air
position selected, air enters
the vehicle from outside
and is heated or cooled
according to the function
selected.
Page 264 of 638
Convenient features
5-120
Auto Defogging System
on Models with Automatic
Temperature Control
ONX4050046
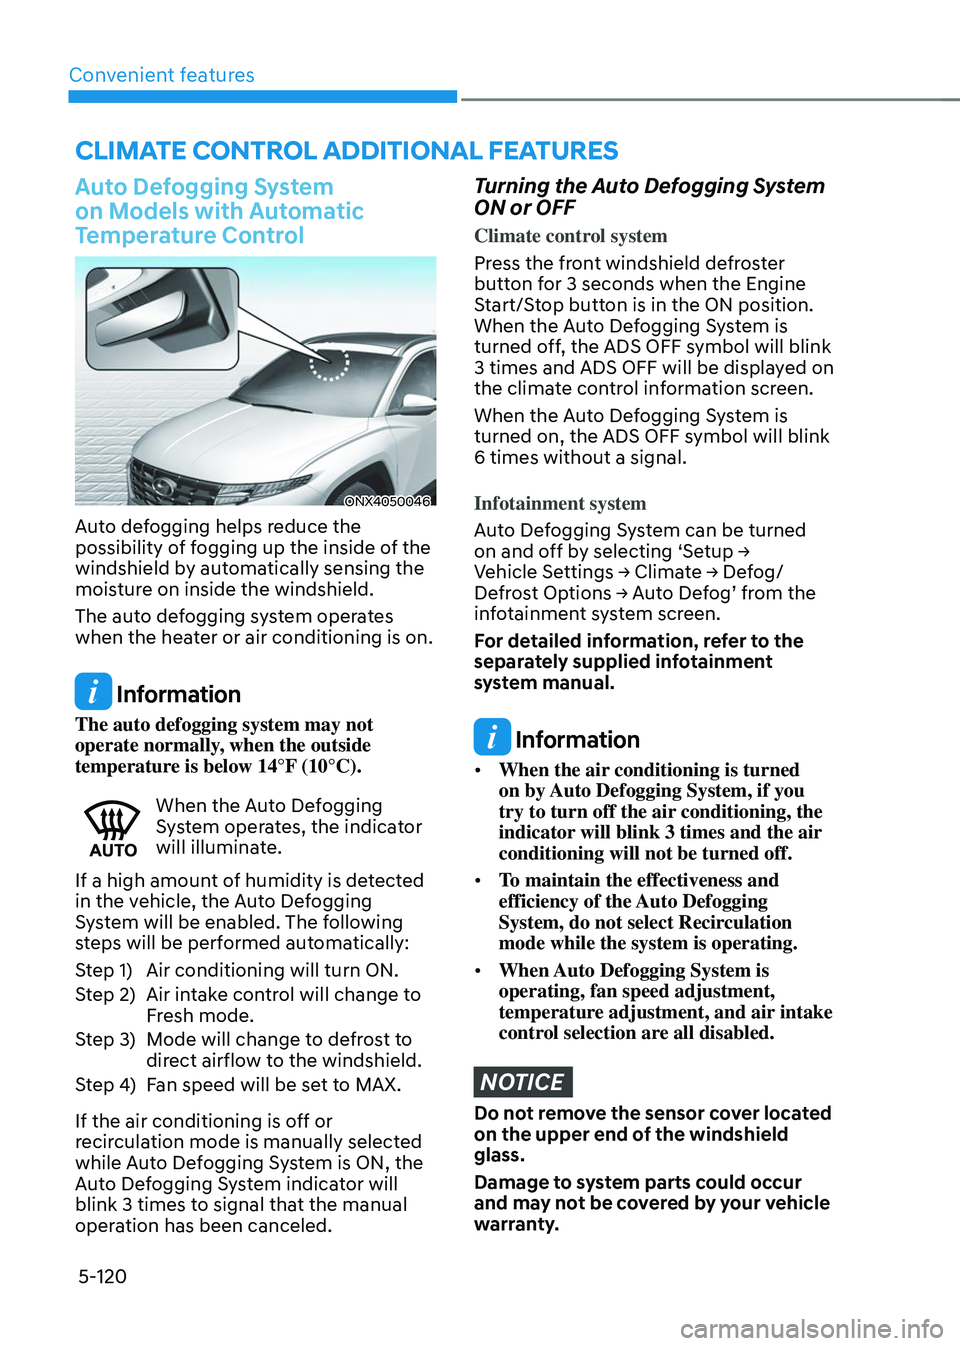
Auto defogging helps reduce the
possibility of fogging up the inside of the
windshield by automatically sensing the
moisture on inside the windshield.
The auto defogging system operates
when the heater or air conditioning is on.
Information
The auto defogging system may not
operate normally, when the outside
temperature is below 14°F (10°C).
When the Auto Defogging System operates, the indicator
will illuminate.
If a high amount of humidity is detected
in the vehicle, the Auto Defogging
System will be enabled. The following
steps will be performed automatically:
Step 1) Air conditioning will turn ON.
Step 2) Air intake control will change to
Fresh mode.
Step 3) Mode will change to defrost to
direct airflow to the windshield.
Step 4) Fan speed will be set to MAX.
If the air conditioning is off or
recirculation mode is manually selected
while Auto Defogging System is ON, the
Auto Defogging System indicator will
blink 3 times to signal that the manual
operation has been canceled.
Turning the Auto Defogging System
ON or OFF
Climate control system
Press the front windshield defroster
button for 3 seconds when the Engine
Start/Stop button is in the ON position.
When the Auto Defogging System is
turned off, the ADS OFF symbol will blink
3 times and ADS OFF will be displayed on
the climate control information screen.
When the Auto Defogging System is
turned on, the ADS OFF symbol will blink
6 times without a signal.
Infotainment system
Auto Defogging System can be turned
on and off by selecting ‘Setup → Vehicle Settings → Climate → Defog/Defrost Options → Auto Defog’ from the infotainment system screen.
For detailed information, refer to the
separately supplied infotainment
system manual.
Information
• When the air conditioning is turned
on by Auto Defogging System, if you
try to turn off the air conditioning, the
indicator will blink 3 times and the air
conditioning will not be turned off.
• To maintain the effectiveness and
efficiency of the Auto Defogging
System, do not select Recirculation
mode while the system is operating.
• When Auto Defogging System is
operating, fan speed adjustment,
temperature adjustment, and air intake
control selection are all disabled.
NOTICE
Do not remove the sensor cover located
on the upper end of the windshield
glass.
Damage to system parts could occur
and may not be covered by your vehicle
warranty.
CLIMATE CONTROL ADDITIONAL FEATURES