2023 HYUNDAI TUCSON brake light
[x] Cancel search: brake lightPage 209 of 638
05
5-65
Hood
Opening the hood
ONX4050020
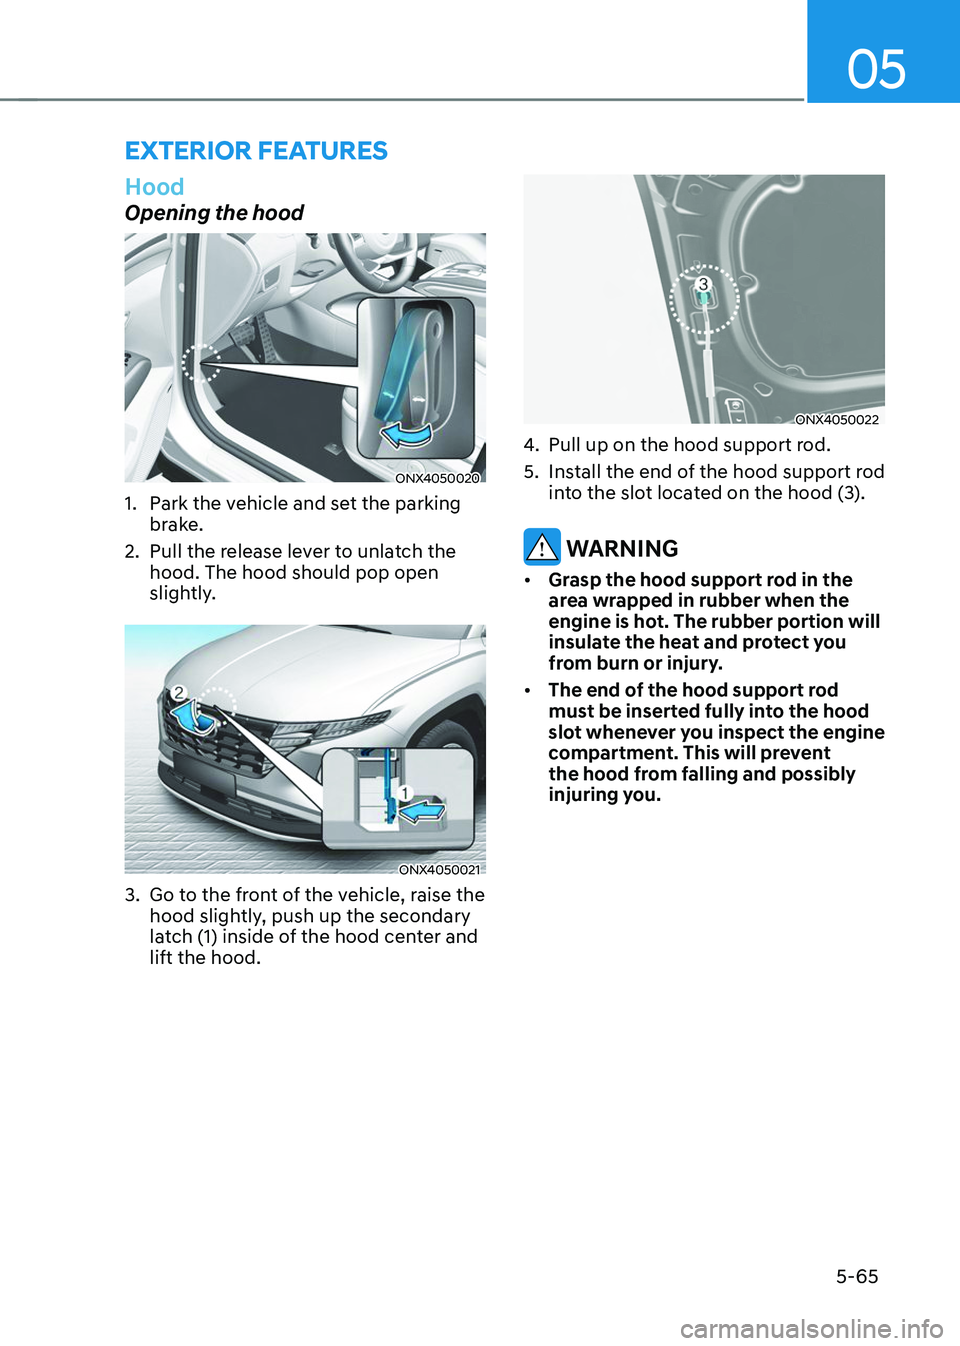
1. Park the vehicle and set the parking
brake.
2. Pull the release lever to unlatch the
hood. The hood should pop open
slightly.
ONX4050021
3. Go to the front of the vehicle, raise the
hood slightly, push up the secondary
latch (1) inside of the hood center and
lift the hood.
ONX4050022
4. Pull up on the hood support rod.
5. Install the end of the hood support rod
into the slot located on the hood (3).
WARNING
• Grasp the hood support rod in the
area wrapped in rubber when the
engine is hot. The rubber portion will
insulate the heat and protect you
from burn or injury.
• The end of the hood support rod
must be inserted fully into the hood
slot whenever you inspect the engine
compartment. This will prevent
the hood from falling and possibly
injuring you.
EXTERIOR FEATURES
Page 210 of 638
Convenient features
5-66
Closing the hood
1. Before closing the hood, check in and
around the engine compartment to
ensure the following:
-Any tools or other loose objects
are removed from the engine room
area or hood opening area
-All glove, rags, or other
combustible material is removed
from the engine compartment
-All filler caps are tightly and
correctly installed
2. Return the hood support rod to its clip
to prevent it from rattling.
3. Lower the hood until it is about 30 cm
(12in.) above the closed position and
let it drop. Make sure that it locks into
place.
4. Check that the hood has engaged
properly. If the hood can be raised
slightly, it is not properly engaged.
Open it again and close it with a little
more force.
WARNING
• Before closing the hood, ensure
all obstructions are removed from
around the hood opening.
• Always double check to be sure that
the hood is firmly latched before
driving away. Check there is no
hood open warning light or message
displayed on the instrument cluster.
Driving with the hood opened may
cause a total loss of visibility, which
might result in an accident.
• Do not move the vehicle with the
hood in the raised position, as vision
is obstructed, which might result in
an accident, and the hood could fall
or be damaged.
Liftgate
Opening the liftgate
ONX4050023
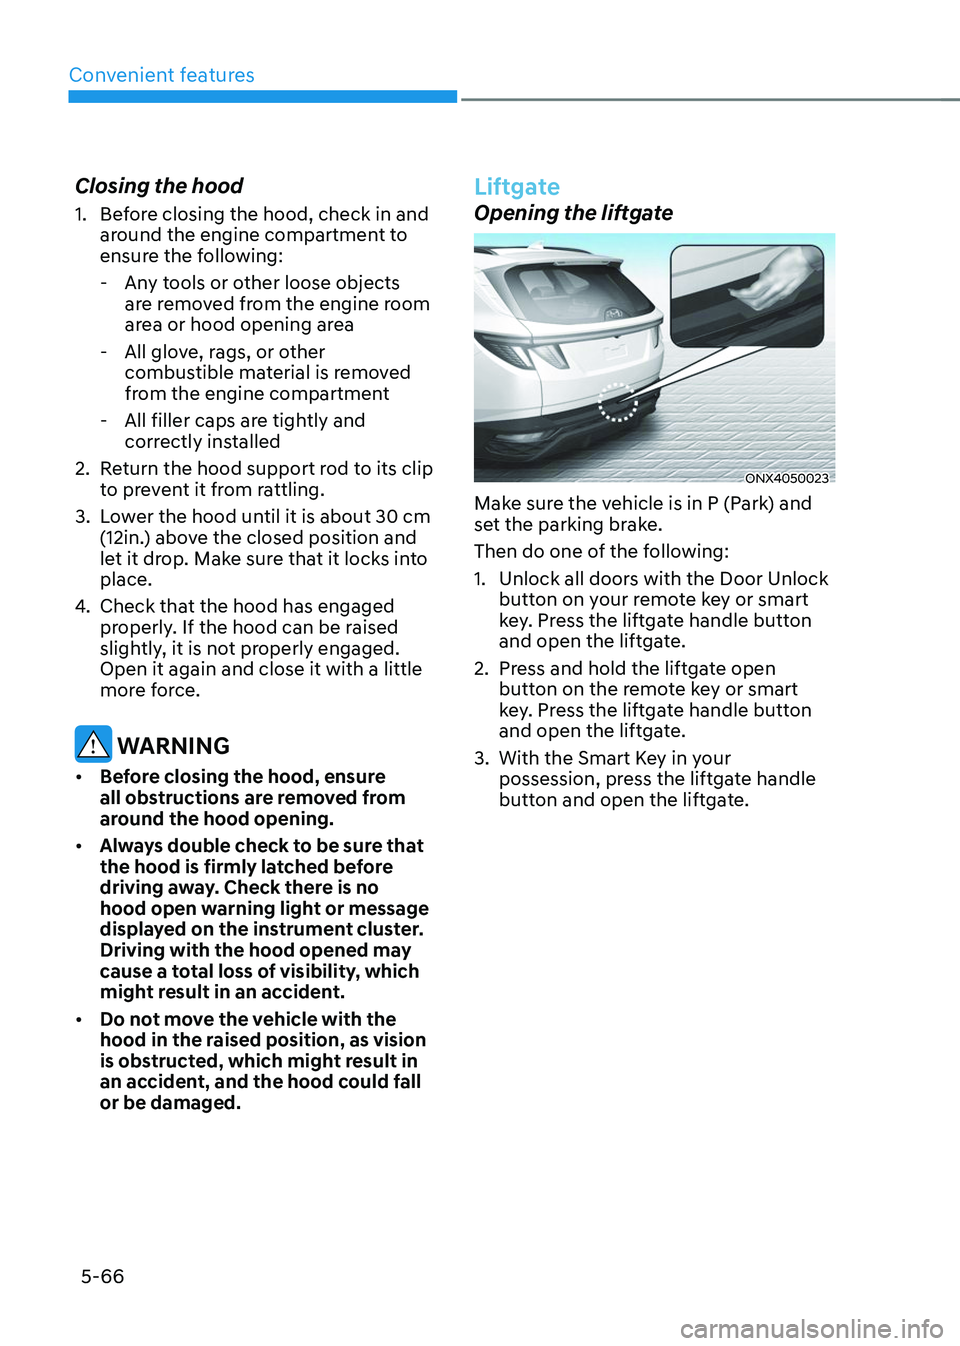
Make sure the vehicle is in P (Park) and
set the parking brake.
Then do one of the following:
1. Unlock all doors with the Door Unlock
button on your remote key or smart
key. Press the liftgate handle button
and open the liftgate.
2. Press and hold the liftgate open
button on the remote key or smart
key. Press the liftgate handle button
and open the liftgate.
3. With the Smart Key in your
possession, press the liftgate handle
button and open the liftgate.
Page 221 of 638
05
5-77
Closing the fuel filler door
1. To install the fuel tank cap, turn it
clockwise until it “clicks” one time.
2. Close the fuel filler door until it is
latched securely.
Information
To lock the fuel filler door, make sure the
fuel filler door is completely closed. Press
the LOCK button on the remote key or
smart key to lock your vehicle. The fuel
filler door will also lock.
Note that if the fuel filler door is not
completely closed when the vehicle is
locked, the fuel filler door will not be
locked.
CAUTION
Make sure the fuel filler door is
completely closed before driving
through a car wash or operating a high
pressure spray washer.
WARNING
Automotive fuel is highly flammable
and explosive. Failure to follow these
guidelines may result in SERIOUS
INJURY or DEATH:
• Read and follow all warnings posted
at the gas station.
• Before refueling, note the location
of the Emergency Fuel Shut-Off, if
available, at the gas station.
• Before touching the fuel nozzle, you
should eliminate the potential build-
up of static electricity by touching
a metal part of the vehicle, a safe
distance away from the fuel filler
neck, nozzle, or other gas source,
with your bare hand.
• Do not use mobile phones while
refueling. Electric current and/or
electronic interference from cellular
phones can potentially ignite fuel
vapors and cause a fire. •
Do not get back into a vehicle
once you have begun refueling.
You can generate a buildup of
static electricity by touching,
rubbing or sliding against any item
or fabric capable of producing
static electricity. Static electricity
discharge can ignite fuel vapors
causing a fire. If you must re-enter
the vehicle, you should once again
eliminate potentially dangerous
static electricity discharge by
touching a metal part of the vehicle,
away from the fuel filler neck, nozzle
or other fuel source, with your bare
hand.
• When using an approved portable
fuel container, be sure to place the
container on the ground prior to
refueling. Static electricity discharge
from the container can ignite fuel
vapors causing a fire.
Once refueling has begun, contact
between your bare hand and the
vehicle should be maintained until
the filling is complete.
• Use only approved portable plastic
fuel containers designed to carry and
store fuel.
• When refueling, always shift the
gear to the P (Park) position, set
the parking brake, and press the
Engine Start/Stop button to the
OFF position. Sparks produced by
electrical components related to the
engine can ignite fuel vapors causing
a fire.
• Do not use matches or a lighter and
do not smoke or leave a lit cigarette
in your vehicle while at a gas station,
especially during refueling.
Page 223 of 638
05
5-79
Exterior lights
Lighting control
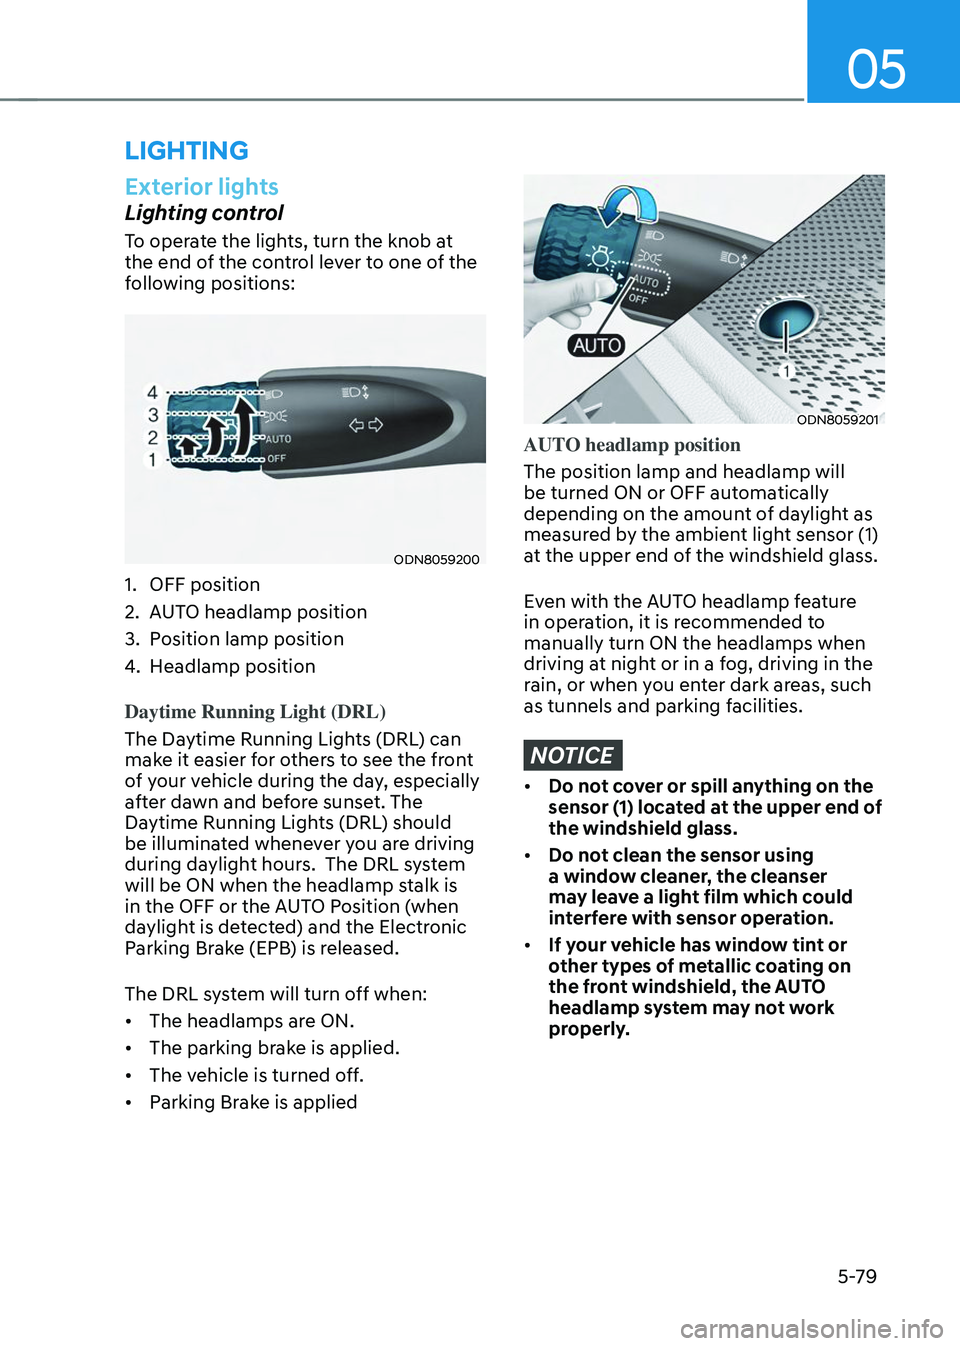
To operate the lights, turn the knob at
the end of the control lever to one of the
following positions:
ODN8059200
1. OFF position
2. AUTO headlamp position
3. Position lamp position
4. Headlamp position
Daytime Running Light (DRL)
The Daytime Running Lights (DRL) can
make it easier for others to see the front
of your vehicle during the day, especially
after dawn and before sunset. The
Daytime Running Lights (DRL) should
be illuminated whenever you are driving
during daylight hours. The DRL system
will be ON when the headlamp stalk is
in the OFF or the AUTO Position (when
daylight is detected) and the Electronic
Parking Brake (EPB) is released.
The DRL system will turn off when:
• The headlamps are ON.
• The parking brake is applied.
• The vehicle is turned off.
• Parking Brake is applied
ODN8059201
AUTO headlamp position
The position lamp and headlamp will
be turned ON or OFF automatically
depending on the amount of daylight as
measured by the ambient light sensor (1)
at the upper end of the windshield glass.
Even with the AUTO headlamp feature
in operation, it is recommended to
manually turn ON the headlamps when
driving at night or in a fog, driving in the
rain, or when you enter dark areas, such
as tunnels and parking facilities.
NOTICE
• Do not cover or spill anything on the
sensor (1) located at the upper end of
the windshield glass.
• Do not clean the sensor using
a window cleaner, the cleanser
may leave a light film which could
interfere with sensor operation.
• If your vehicle has window tint or
other types of metallic coating on
the front windshield, the AUTO
headlamp system may not work
properly.
LIGHTING
Page 290 of 638
06
6-5
WARNING
To reduce the risk of SERIOUS INJURY or
DEATH, take the following precautions:
• NEVER allow children or any person
who is unfamiliar with the vehicle to
touch the ignition switch or related
parts. Unexpected and sudden
vehicle movement can occur.
• NEVER reach through the steering
wheel for the ignition switch, or any
other control, while the vehicle is in
motion. The presence of your hand
or arm in this area may cause a loss
of vehicle control resulting in an
accident.
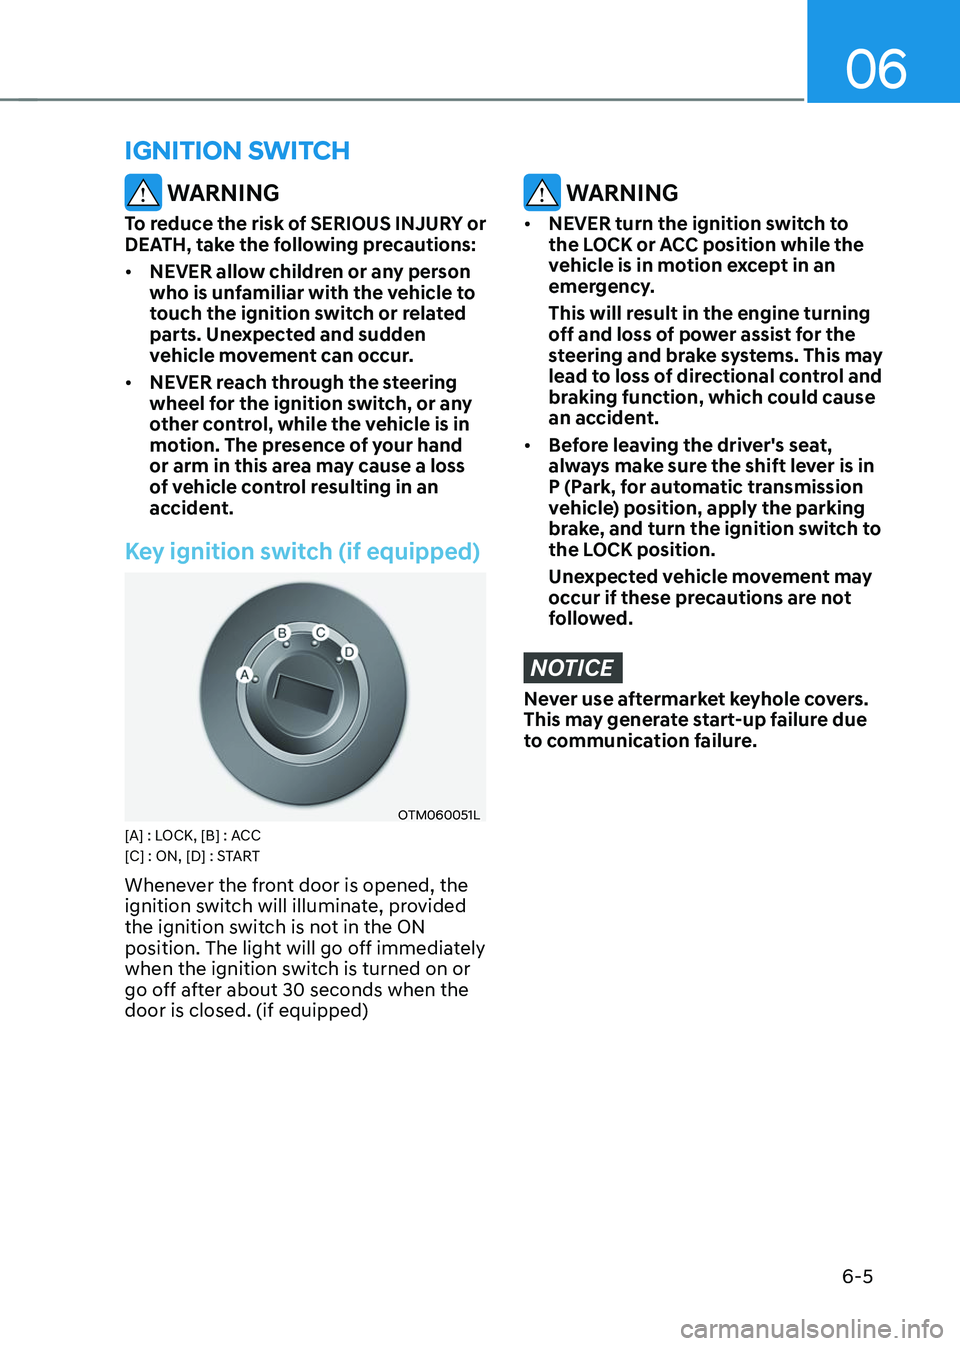
Key ignition switch (if equipped)
OTM060051L[A] : LOCK, [B] : ACC
[C] : ON, [D] : START
Whenever the front door is opened, the
ignition switch will illuminate, provided
the ignition switch is not in the ON
position. The light will go off immediately
when the ignition switch is turned on or
go off after about 30 seconds when the
door is closed. (if equipped)
WARNING
• NEVER turn the ignition switch to
the LOCK or ACC position while the
vehicle is in motion except in an
emergency.
This will result in the engine turning
off and loss of power assist for the
steering and brake systems. This may
lead to loss of directional control and
braking function, which could cause
an accident.
• Before leaving the driver's seat,
always make sure the shift lever is in
P (Park, for automatic transmission
vehicle) position, apply the parking
brake, and turn the ignition switch to
the LOCK position.
Unexpected vehicle movement may
occur if these precautions are not
followed.
NOTICE
Never use aftermarket keyhole covers.
This may generate start-up failure due
to communication failure.
IGNITION SWITCH
Page 294 of 638
06
6-9
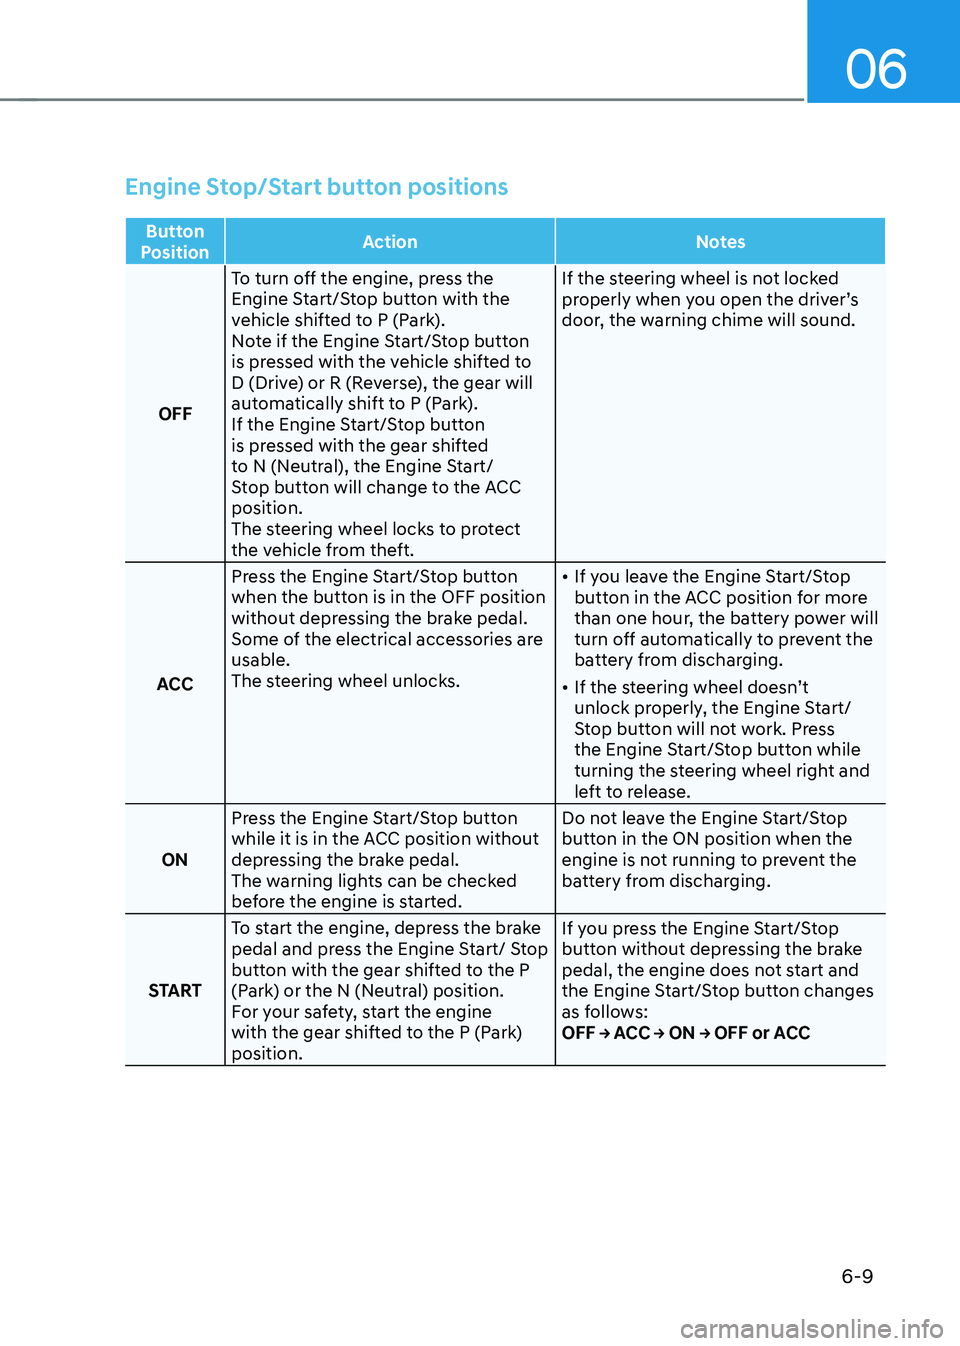
Engine Stop/Start button positions
Button
Position Action
Notes
OFF To turn off the engine, press the
Engine Start/Stop button with the
vehicle shifted to P (Park).
Note if the Engine Start/Stop button
is pressed with the vehicle shifted to
D (Drive) or R (Reverse), the gear will
automatically shift to P (Park).
If the Engine Start/Stop button
is pressed with the gear shifted
to N (Neutral), the Engine Start/
Stop button will change to the ACC
position.
The steering wheel locks to protect
the vehicle from theft. If the steering wheel is not locked
properly when you open the driver’s
door, the warning chime will sound.
ACC Press the Engine Start/Stop button
when the button is in the OFF position
without depressing the brake pedal.
Some of the electrical accessories are
usable.
The steering wheel unlocks.
•
If you leave the Engine Start/Stop
button in the ACC position for more
than one hour, the battery power will
turn off automatically to prevent the
battery from discharging.
• If the steering wheel doesn’t
unlock properly, the Engine Start/
Stop button will not work. Press
the Engine Start/Stop button while
turning the steering wheel right and
left to release.
ON Press the Engine Start/Stop button
while it is in the ACC position without
depressing the brake pedal.
The warning lights can be checked
before the engine is started. Do not leave the Engine Start/Stop
button in the ON position when the
engine is not running to prevent the
battery from discharging.
START To start the engine, depress the brake
pedal and press the Engine Start/ Stop
button with the gear shifted to the P
(Park) or the N (Neutral) position.
For your safety, start the engine
with the gear shifted to the P (Park)
position. If you press the Engine Start/Stop
button without depressing the brake
pedal, the engine does not start and
the Engine Start/Stop button changes
as follows:
OFF → ACC → ON → OFF or ACC
Page 308 of 638
06
6-23
The manual shift mode also changes
back to automatic shift mode in one of
following situations
-When the accelerator pedal is gently
depressed for more than 6 seconds
while driving
-When the vehicle stops
Information
If the [+] and [-] paddle shifters are pulled
at the same time, gear shift may not occur.
Good driving practices
• Never move the shift button from
P (Park) or N (Neutral) to any other
position with the accelerator pedal
depressed.
• Never move the shift lever/button into
P (Park) when the vehicle is in motion.
Be sure the vehicle is completely
stopped before you attempt to shift
into R (Reverse) or D (Drive).
• Do not move the shift button to N
(Neutral) when driving. Doing so
may result in an accident because
of a loss of engine braking and the
transmission could be damaged.
• Driving uphill or downhill, shift to D
(Drive) to drive forward or R (Reverse)
to drive backwards, and check
the gear position indicated on the
cluster before driving. If the vehicle
is moving in the opposite direction
of the selected gear, the engine may
stop and a serious accident may
occur. Never attempt to select a gear
that is opposite to the direction of
the vehicle motion. Stop the vehicle
before changing to the desired gear.
• Do not drive with your foot resting
on the brake pedal. Even light, but
consistent pedal pressure can result
in the brakes overheating, brake wear
and possibly even brake failure.
• When driving with shifter paddles,
slow down before shifting to a lower
gear. Otherwise, the lower gear may
not be engaged if the engine RPMs
are outside of the allowable range.
• Always apply the parking brake when
leaving the vehicle. Do not depend on
placing the transmission in P (Park) to
keep the vehicle from moving.
Page 310 of 638
06
6-25
BRAKING SYSTEM
Power-assist brakes
Your vehicle has power-assisted brakes
that adjust automatically through normal
usage.
If the engine is not running or is turned
off while driving, the power assist for
the brakes will not work. You can still
stop your vehicle by applying greater
force to the brake pedal than typical.
The stopping distance, however, will be
longer than with power brakes.
When the engine is not running, the
reserve brake power is partially depleted
each time the brake pedal is applied.
Do not pump the brake pedal when the
power assist has been interrupted.
WARNING
Take the following precautions:
• Do not drive with your foot resting
on the brake pedal. This will create
abnormal high brake temperatures,
excessive brake lining and pad wear,
and increased stopping distances.
• When descending down a long or
steep hill, use the paddle shifter
and manually downshift to a
lower gear in order to control your
speed without using the brake
pedal excessively. Applying the
brakes continuously will cause
the brakes to overheat and could
result in a temporary loss of braking
performance.
• Wet brakes may impair the vehicle's
ability to safely slow down; the
vehicle may also pull to one side
when the brakes are applied.
Applying the brakes lightly will
indicate whether they have been
affected in this way. Always test your
brakes in this fashion after driving
through deep water. To dry the
brakes, lightly tap the brake pedal to
heat up the brakes while maintaining
a safe forward speed until brake
performance returns to normal.
Avoid driving at high speeds until the
brakes function correctly.
Disc brakes wear indicator
When your brake pads are worn and new
pads are required, you will hear a high
pitched warning sound from your front
or rear brakes. You may hear this sound
come and go or it may occur whenever
you depress the brake pedal.
Note that some driving conditions or
climates may cause a brake squeal
when you first apply (or lightly apply)
the brakes. This is normal and does not
indicate a problem with your brakes.
NOTICE
To avoid costly brake repairs, do not
continue to drive with worn brake pads.
Information
Always replace brake pads as complete
front or rear axle sets.