2023 HYUNDAI SONATA ac vents
[x] Cancel search: ac ventsPage 47 of 555
Seats & Safety System
3-18
NOTICE
To prevent damage to the air ventilation
seat: • Use the air ventilation seat ONLY
when the climate control system
is on. Using the air ventilation seat
for prolonged periods of time with
the climate control system off could
cause the air ventilation seat to malfunction.
• NEVER use a solvent such as paint
thinner, benzene, alcohol or gasoline
to clean the seats.
• Avoid spilling liquids on the surface
of the front seats and seatbacks;
this may cause the air vent holes
to become blocked and not work
properly.
• Do not place materials such as
plastic bags or newspapers under
the seats. They may block the air
intake causing the air vents to not
work properly.
• Do not change the seat covers. It may
damage the air ventilation seat.
• If the air vents do not operate, restart
the vehicle. If there is no change,
have the vehicle inspected by an
authorized HYUNDAI dealer.
Page 58 of 555
03
3-29
Children Always in the Rear
WARNING
Always properly restrain children in the
rear seats of the vehicle.
Children of all ages are safer when
restrained in the rear seat. A child riding
in the front passenger seat can be
forcefully struck by an inflating air bag
resulting in SERIOUS INJURY or DEATH.
Children under age 13 must always
ride in the rear seats and must always
be properly restrained to minimize the
risk of injury in an accident, sudden
stop or sudden maneuver. According
to accident statistics, children are safer
when properly restrained in the rear
seats than in the front seat. Even with
air bags, children can be seriously
injured or killed. Children too large for
a child restraint must use the seat belts
provided.
Most countries have child restraint
laws which require children to travel in
approved child restraint devices.
The laws governing the age or height/
weight restrictions at which seat belts
can be used instead of child restraints
differs among countries, so you should
be aware of the specific requirements
in your country, and where you are
travelling.
Child restraint systems must be properly
placed and installed in the rear seat.
You must use a commercially available
child restraint system that meets the
requirements of the Safety Standards of
your country.
Child restraint systems are generally
designed to be secured in a vehicle seat
by lap belt portion of a lap/shoulder belt,
or by a LATCH system in the rear seats of
the vehicle. Child restraint system (CRS)
Infants and younger children must be
restrained in an appropriate rear-facing
or forward-facing CRS that has first
been properly secured to the rear seat
of the vehicle. Read and comply with
the instructions for installation and use
provided by the manufacturer of the
child restraint.
WARNING
An improperly secured child restraint
can increase the risk of SERIOUS
INJURY or DEATH in an accident. Always
take the following precautions when
using a child restraint system: • NEVER install a child or infant
restraint in the front passenger’s
seat.
• Always properly secure the child
restraint to a rear seat of the vehicle.
• Always follow the child restraint
system manufacturer’s instructions
for installation and use.
• Always properly restrain your child in
the child restraint.
• If the vehicle head restraint prevents
proper installation of a child seat
(as described in the child restraint
system manual), the head restraint of
the respective seating position shall
be readjusted or entirely removed.
• Do not use an infant carrier or a
child safety seat that “hooks” over
a seatback, it may not provide
adequate protection in an accident.
• After an accident, have a HYUNDAI
dealer check the child restraint
system, seat belts, tether anchors
and lower anchors.
Child RestRaint system (CRs)
Page 60 of 555
03
3-31
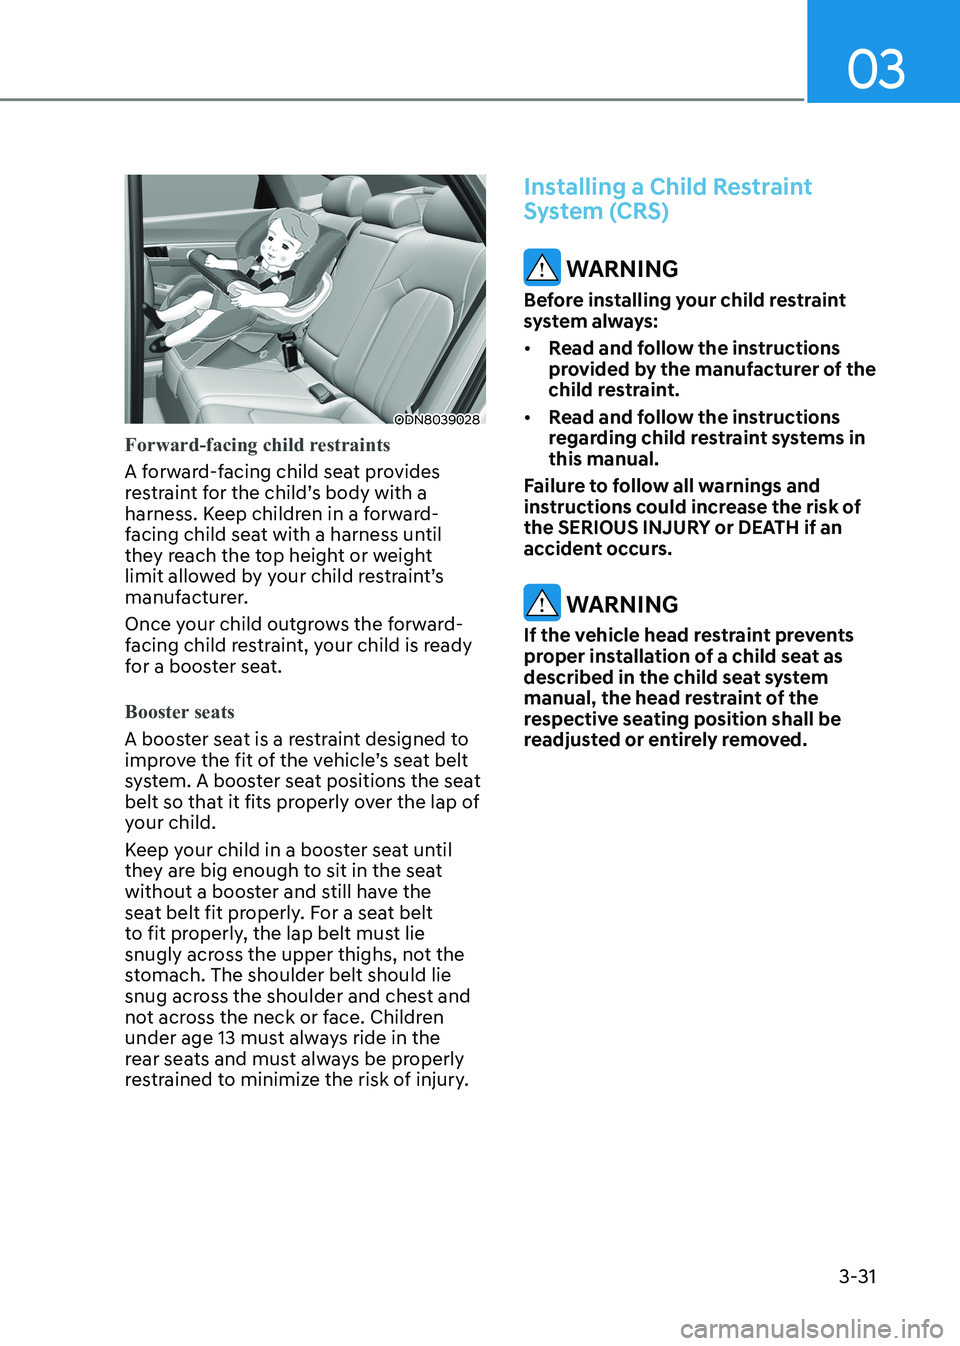
ODN8039028
Forward-facing child restraints
A forward-facing child seat provides
restraint for the child’s body with a
harness. Keep children in a forward-
facing child seat with a harness until
they reach the top height or weight
limit allowed by your child restraint’s
manufacturer.
Once your child outgrows the forward-
facing child restraint, your child is ready
for a booster seat.
Booster seats
A booster seat is a restraint designed to
improve the fit of the vehicle’s seat belt
system. A booster seat positions the seat
belt so that it fits properly over the lap of
your child.
Keep your child in a booster seat until
they are big enough to sit in the seat
without a booster and still have the
seat belt fit properly. For a seat belt
to fit properly, the lap belt must lie
snugly across the upper thighs, not the
stomach. The shoulder belt should lie
snug across the shoulder and chest and
not across the neck or face. Children
under age 13 must always ride in the
rear seats and must always be properly
restrained to minimize the risk of injury.
Installing a Child Restraint
System (CRS)
WARNING
Before installing your child restraint
system always: • Read and follow the instructions
provided by the manufacturer of the
child restraint.
• Read and follow the instructions
regarding child restraint systems in this manual.
Failure to follow all warnings and
instructions could increase the risk of
the SERIOUS INJURY or DEATH if an
accident occurs.
WARNING
If the vehicle head restraint prevents
proper installation of a child seat as
described in the child seat system
manual, the head restraint of the
respective seating position shall be
readjusted or entirely removed.
Page 85 of 555
Seats & Safety System
3-56
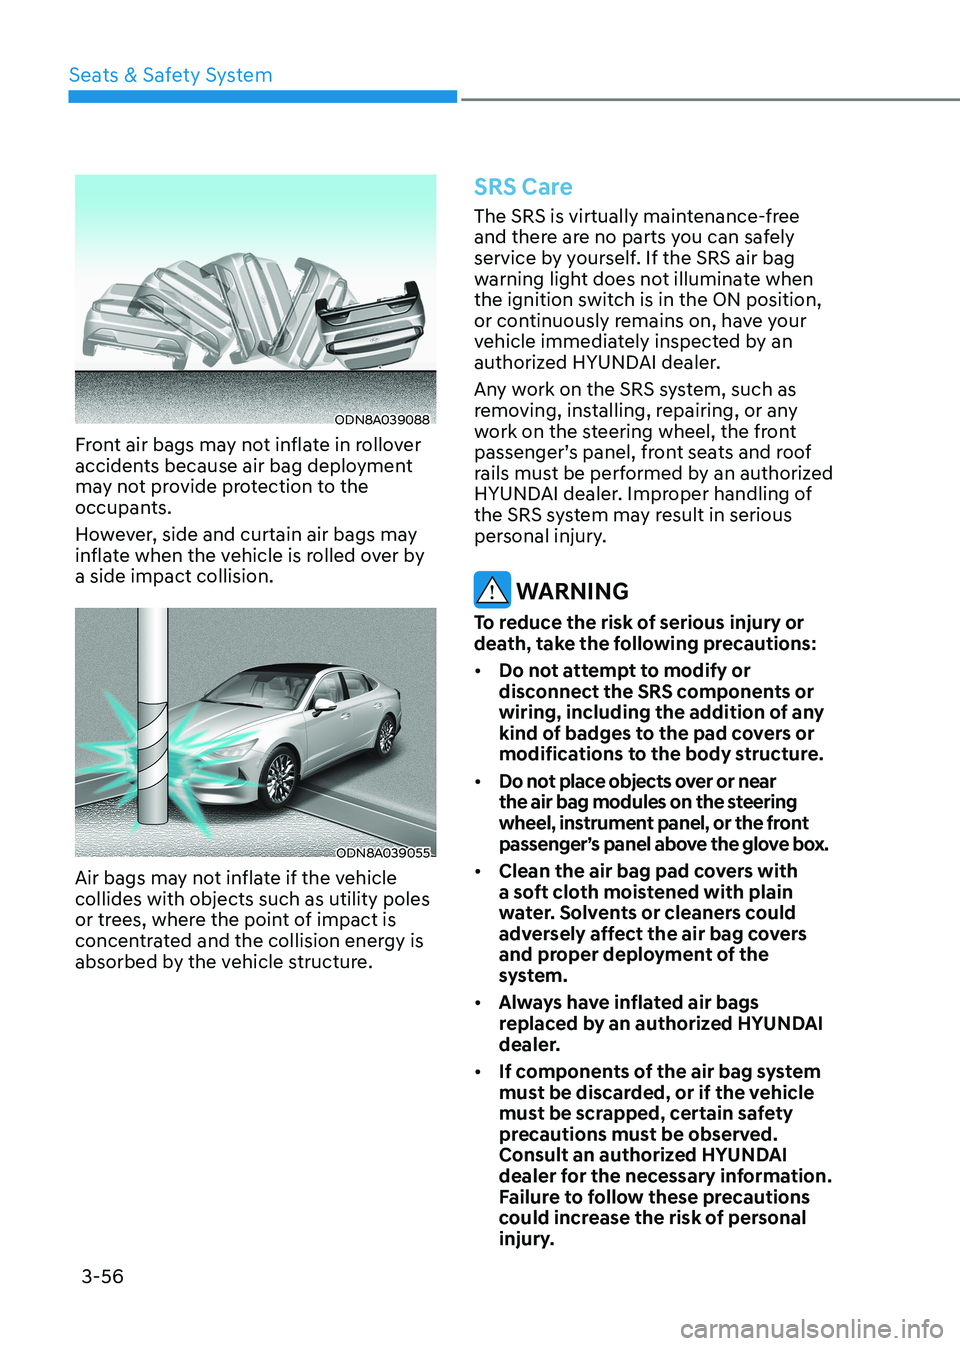
ODN8A039088
Front air bags may not inflate in rollover
accidents because air bag deployment
may not provide protection to the
occupants.
However, side and curtain air bags may
inflate when the vehicle is rolled over by a side impact collision.
ODN8A039055
Air bags may not inflate if the vehicle collides with objects such as utility poles
or trees, where the point of impact is
concentrated and the collision energy is
absorbed by the vehicle structure.
SRS Care
The SRS is virtually maintenance-free
and there are no parts you can safely
service by yourself. If the SRS air bag
warning light does not illuminate when
the ignition switch is in the ON position,
or continuously remains on, have your
vehicle immediately inspected by an
authorized HYUNDAI dealer.
Any work on the SRS system, such as
removing, installing, repairing, or any
work on the steering wheel, the front
passenger’s panel, front seats and roof
rails must be performed by an authorized
HYUNDAI dealer. Improper handling of
the SRS system may result in serious
personal injury.
WARNING
To reduce the risk of serious injury or
death, take the following precautions: • Do not attempt to modify or
disconnect the SRS components or
wiring, including the addition of any
kind of badges to the pad covers or
modifications to the body structure.
• Do not place objects over or near
the air bag modules on the steering
wheel, instrument panel, or the front
passenger’s panel above the glove box.
• Clean the air bag pad covers with
a soft cloth moistened with plain
water. Solvents or cleaners could
adversely affect the air bag covers
and proper deployment of the
system.
• Always have inflated air bags
replaced by an authorized HYUNDAI
dealer.
• If components of the air bag system
must be discarded, or if the vehicle
must be scrapped, certain safety
precautions must be observed.
Consult an authorized HYUNDAI
dealer for the necessary information.
Failure to follow these precautions
could increase the risk of personal
injury.
Page 220 of 555
Convenience Features
5 -74
WARNING
• Never rely solely on the rear camera
display when backing-up.
• ALWAYS look around your vehicle
to make sure there are no objects or
obstacles before moving the vehicle
in any direction to prevent a collision.
• Always pay close attention when the
vehicle is driven close to objects,
particularly pedestrians, and
especially children.
NOTICE
• Do not spray the camera or its
surrounding area directly with a high
pressure washer. Shock applied from
high pressure water may cause the
device to not operate normally.
• Do not use any cleanser containing
acid or alkaline detergents when
cleaning the lens. Use only a mild
soap or neutral detergent, and rinse
thoroughly with water.
• Always keep the rear view camera
lens clean. If the lens is covered with
foreign material, it may adversely
affect camera performance and
Rear View Monitor may not operate
normally. However, do not use
chemical solvents such as strong
detergents containing high alkaline
or volatile organic solvents (gasoline,
acetone etc.). This may damage the
camera lens.
Page 221 of 555
05
5-75
SUrroUnD view moniTor (Svm) (if eQUippeD)
ODN8059265
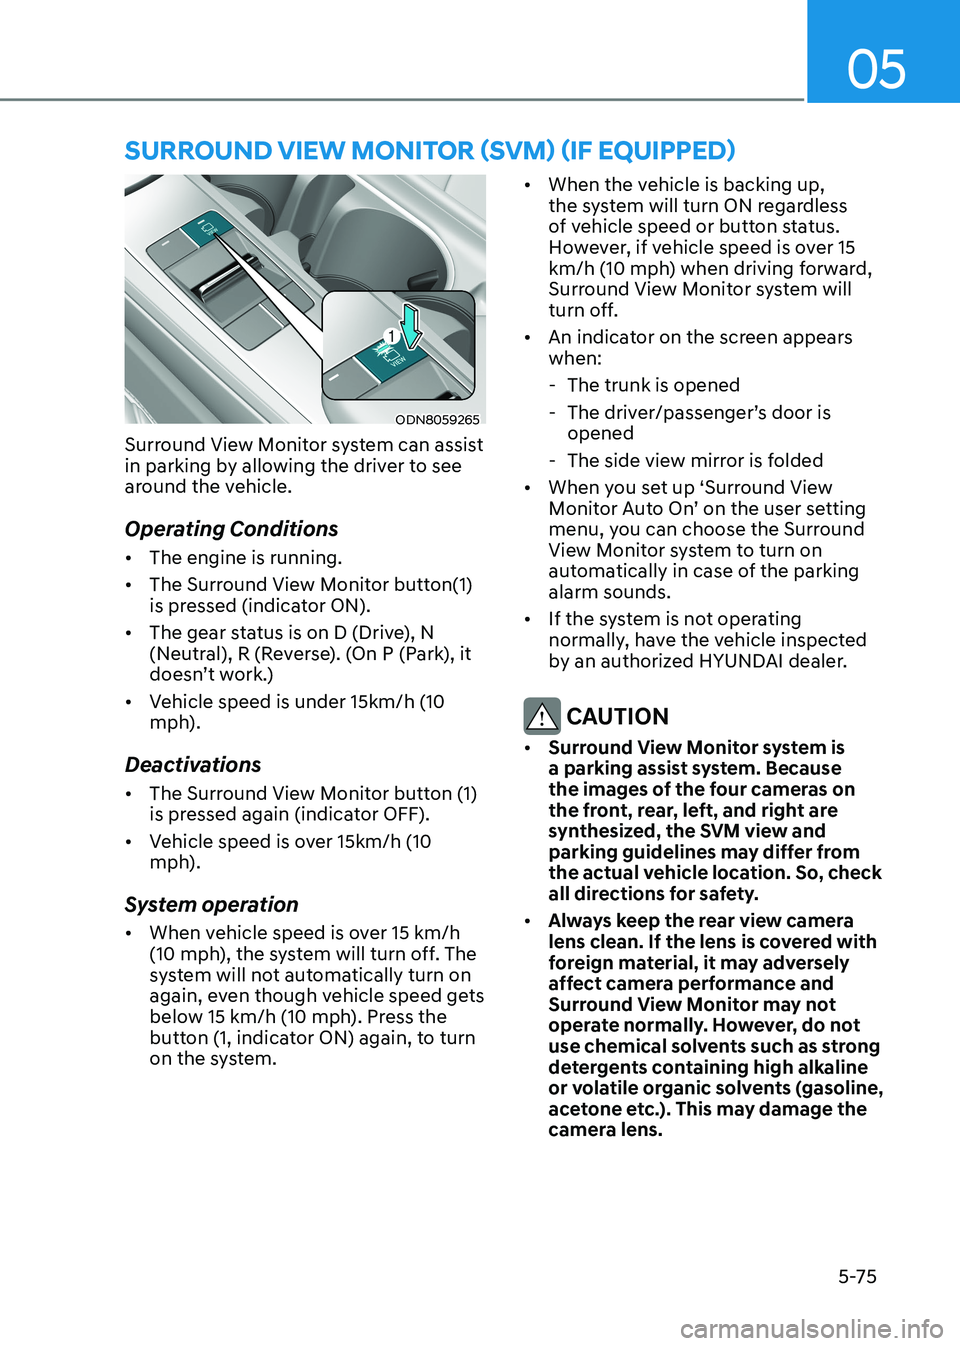
Surround View Monitor system can assist
in parking by allowing the driver to see
around the vehicle.
Operating Conditions • The engine is running.
• The Surround View Monitor button(1)
is pressed (indicator ON).
• The gear status is on D (Drive), N
(Neutral), R (Reverse). (On P (Park), it
doesn’t work.)
• Vehicle speed is under 15km/h (10
mph).
Deactivations • The Surround View Monitor button (1)
is pressed again (indicator OFF).
• Vehicle speed is over 15km/h (10
mph).
System operation • When vehicle speed is over 15 km/h
(10 mph), the system will turn off. The
system will not automatically turn on
again, even though vehicle speed gets
below 15 km/h (10 mph). Press the
button (1, indicator ON) again, to turn
on the system. •
When the vehicle is backing up,
the system will turn ON regardless
of vehicle speed or button status.
However, if vehicle speed is over 15
km/h (10 mph) when driving forward,
Surround View Monitor system will
turn off.
• An indicator on the screen appears when:
- The trunk is opened
- The driver/passenger’s door is opened
- The side view mirror is folded
• When you set up ‘Surround View
Monitor Auto On’ on the user setting
menu, you can choose the Surround
View Monitor system to turn on
automatically in case of the parking alarm sounds.
• If the system is not operating
normally, have the vehicle inspected
by an authorized HYUNDAI dealer.
CAUTION
• Surround View Monitor system is
a parking assist system. Because
the images of the four cameras on
the front, rear, left, and right are
synthesized, the SVM view and
parking guidelines may differ from
the actual vehicle location. So, check
all directions for safety.
• Always keep the rear view camera
lens clean. If the lens is covered with
foreign material, it may adversely
affect camera performance and
Surround View Monitor may not
operate normally. However, do not
use chemical solvents such as strong
detergents containing high alkaline
or volatile organic solvents (gasoline,
acetone etc.). This may damage the
camera lens.
Page 255 of 555
05
5-109
Instrument panel vents
ODN8059109
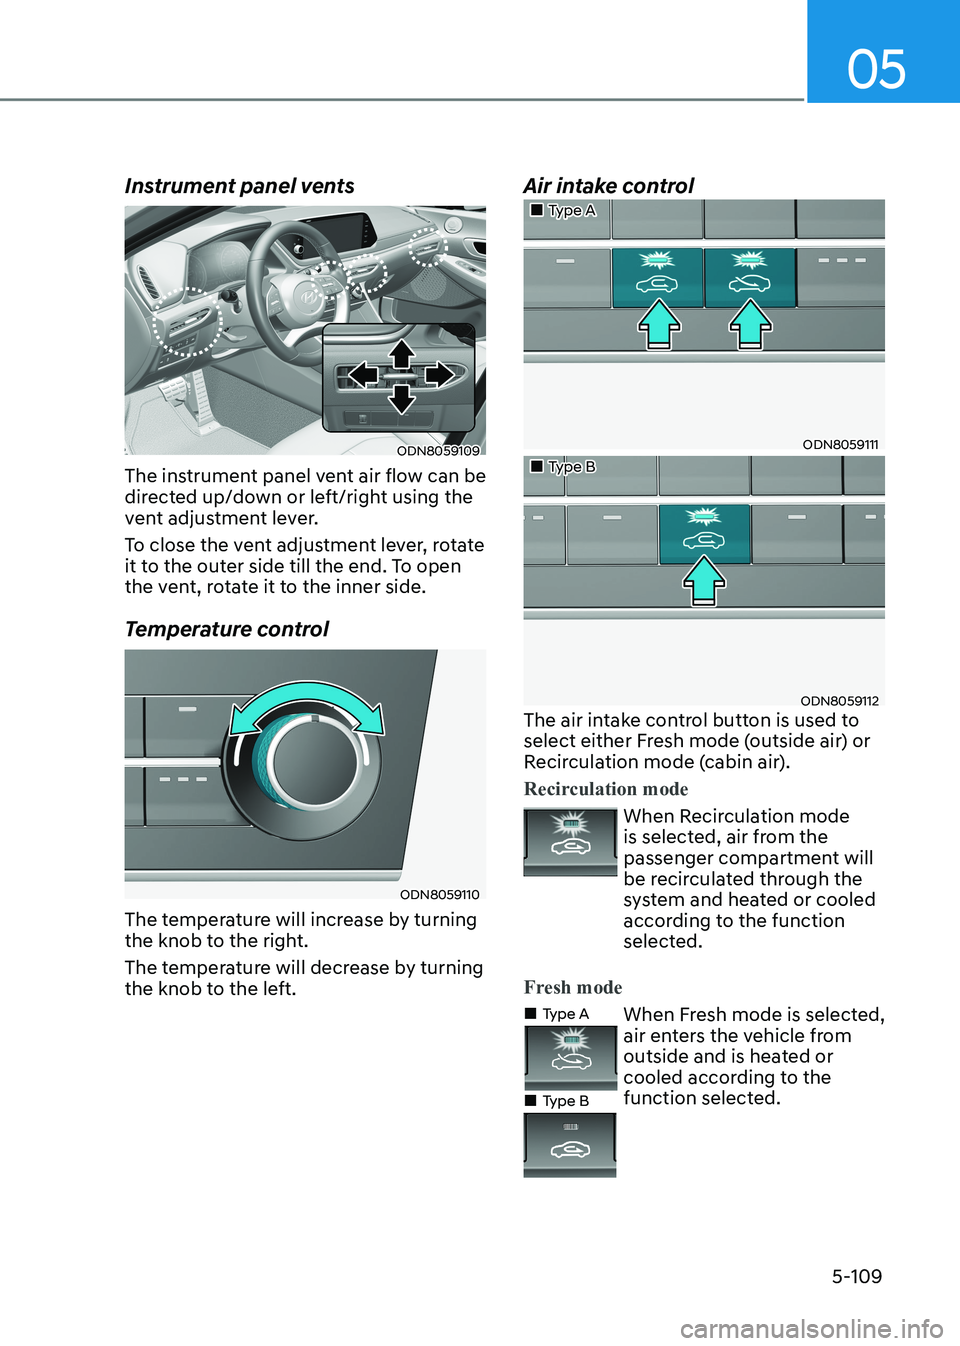
The instrument panel vent air flow can be
directed up/down or left/right using the
vent adjustment lever.
To close the vent adjustment lever, rotate
it to the outer side till the end. To open
the vent, rotate it to the inner side.
Temperature control
ODN8059110
The temperature will increase by turning
the knob to the right.
The temperature will decrease by turning
the knob to the left. Air intake control
„„Type A
ODN8059111
„„Type B
ODN8059112
The air intake control button is used to
select either Fresh mode (outside air) or
Recirculation mode (cabin air).
Recirculation mode
When Recirculation mode
is selected, air from the
passenger compartment will
be recirculated through the
system and heated or cooled
according to the function
selected.
Fresh mode
„„Type A
„
„Type B When Fresh mode is selected,
air enters the vehicle from
outside and is heated or
cooled according to the
function selected.
Page 265 of 555
05
5-119
Instrument panel vents
ODN8059109
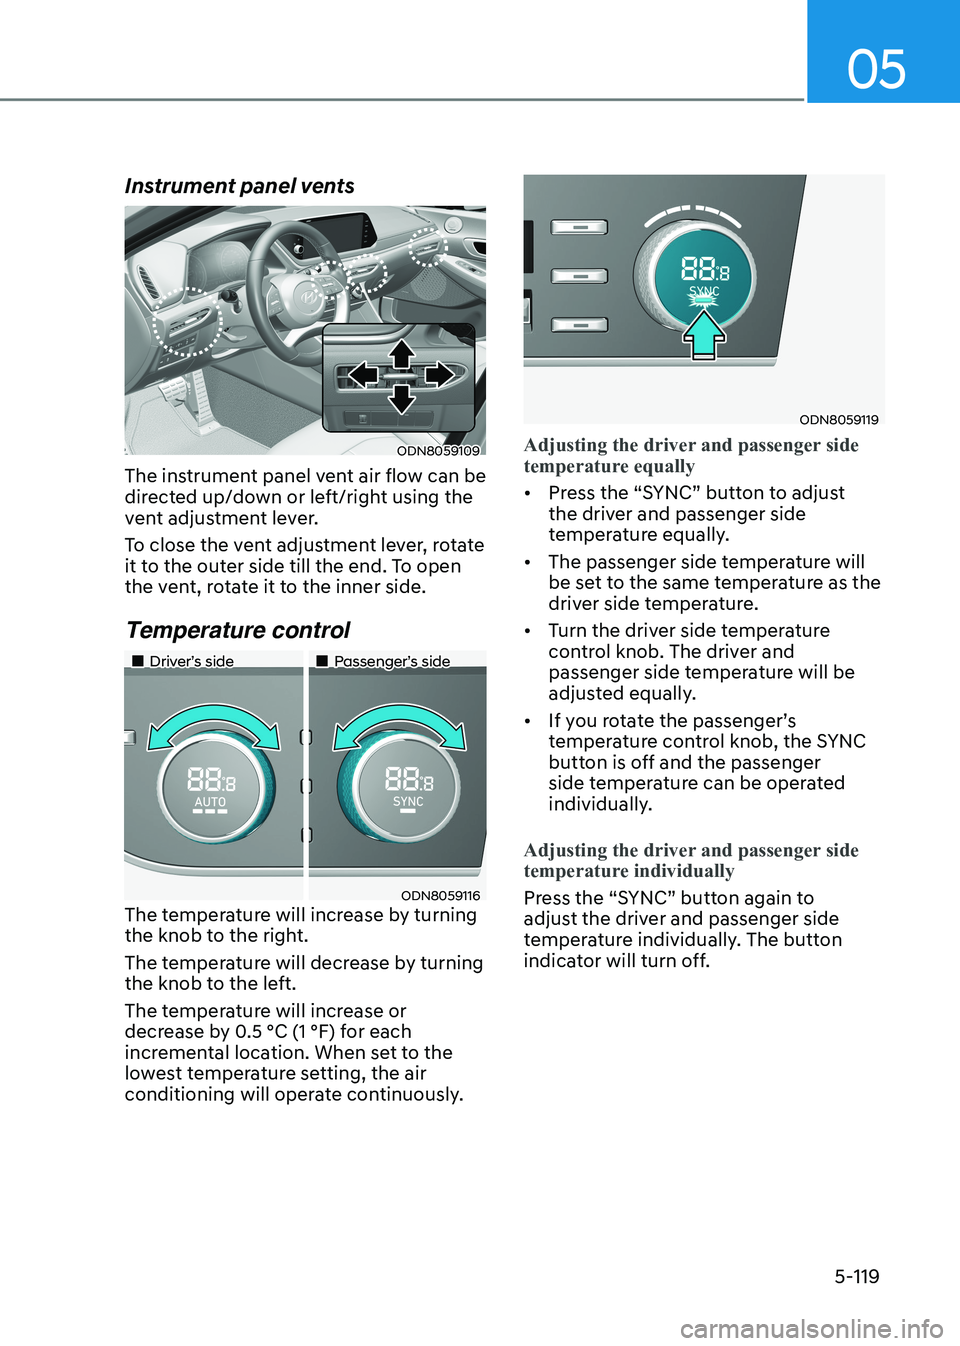
The instrument panel vent air flow can be
directed up/down or left/right using the
vent adjustment lever.
To close the vent adjustment lever, rotate
it to the outer side till the end. To open
the vent, rotate it to the inner side. Temperature control
„„Driver’s side „„Passenger’s side
ODN8059116
The temperature will increase by turning
the knob to the right.
The temperature will decrease by turning
the knob to the left.
The temperature will increase or
decrease by 0.5 °C (1 °F) for each
incremental location. When set to the
lowest temperature setting, the air
conditioning will operate continuously.
ODN8059119
Adjusting the driver and passenger side
temperature equally
• Press the “SYNC” button to adjust
the driver and passenger side
temperature equally.
• The passenger side temperature will
be set to the same temperature as the
driver side temperature.
• Turn the driver side temperature
control knob. The driver and
passenger side temperature will be
adjusted equally.
• If you rotate the passenger’s
temperature control knob, the SYNC
button is off and the passenger
side temperature can be operated
individually.
Adjusting the driver and passenger side
temperature individually
Press the “SYNC” button again to
adjust the driver and passenger side
temperature individually. The button
indicator will turn off.