2023 HYUNDAI SONATA Cluster user setting
[x] Cancel search: Cluster user settingPage 137 of 555
04
4-51
Utility View Mode
The Utility view mode displays
information related to vehicle driving
parameters including fuel economy and
trip distance information.
Utility Items
The utility items appear as well in utility
view mode, driving assist view mode and
turn by turn view mode. The utility items
in utility view mode display in the center
of the instrument cluster but the items in
other modes show up on the right side of
the instrument cluster.
The information provided may differ
depending on which functions are
applicable to your vehicle.
Fuel Economy Information
The average fuel economy and instant
fuel economy are displayed • Manual reset: Press and hold OK
button to initialize set up
• Automatic reset: Automatically reset
the average fuel economy when the
set-up conditions are satisfied in User
Settings menu.
Driving Information
The trip distance for each ignition cycle,
fuel economy (undisplayed item in fuel
economy: driving speed), trip time
are shown. Press and hold OK button
to initialize set up. When the engine
has been OFF for 4 hours or longer
the average fuel economy will reset
automatically.
Information after Refueling
The vehicle information such as trip
distance, fuel economy (undisplayed
item in fuel economy: driving speed)
and trip time is displayed after refueling.
Press and hold OK button to initialize set up.
Accumulated Information
The vehicle information such as trip
distance, fuel economy (undisplayed
item in fuel economy: driving speed)
and trip time is displayed after manual
initialization.
Digital Speed Display
It shows current vehicle speed.
Driver Attention Warning
Display the status of the Driver Attention
Warning system. When the engine is
off or the vehicle comes to a stop, the
system is reset. Press and hold OK button
to initialize set up.
Smart Shift
Tire pressureDigital RPM
Page 140 of 555
Instrument Cluster
4-54
Warning message mode
When the warning message light appears
in the option menu, press the OK button
and check the detailed information.
User Settings Mode
In this mode, you can change the
settings of the instrument cluster, doors,
lamps, etc.
1. Head-up display (if quipped)
2. Driver assistance3. Door
4. Lights5. Sound
6. Convenience
7. Service interval8. Other
9. Language
10. Reset
The information provided may differ
depending on which functions are
applicable to your vehicle.
OOSEV048172L
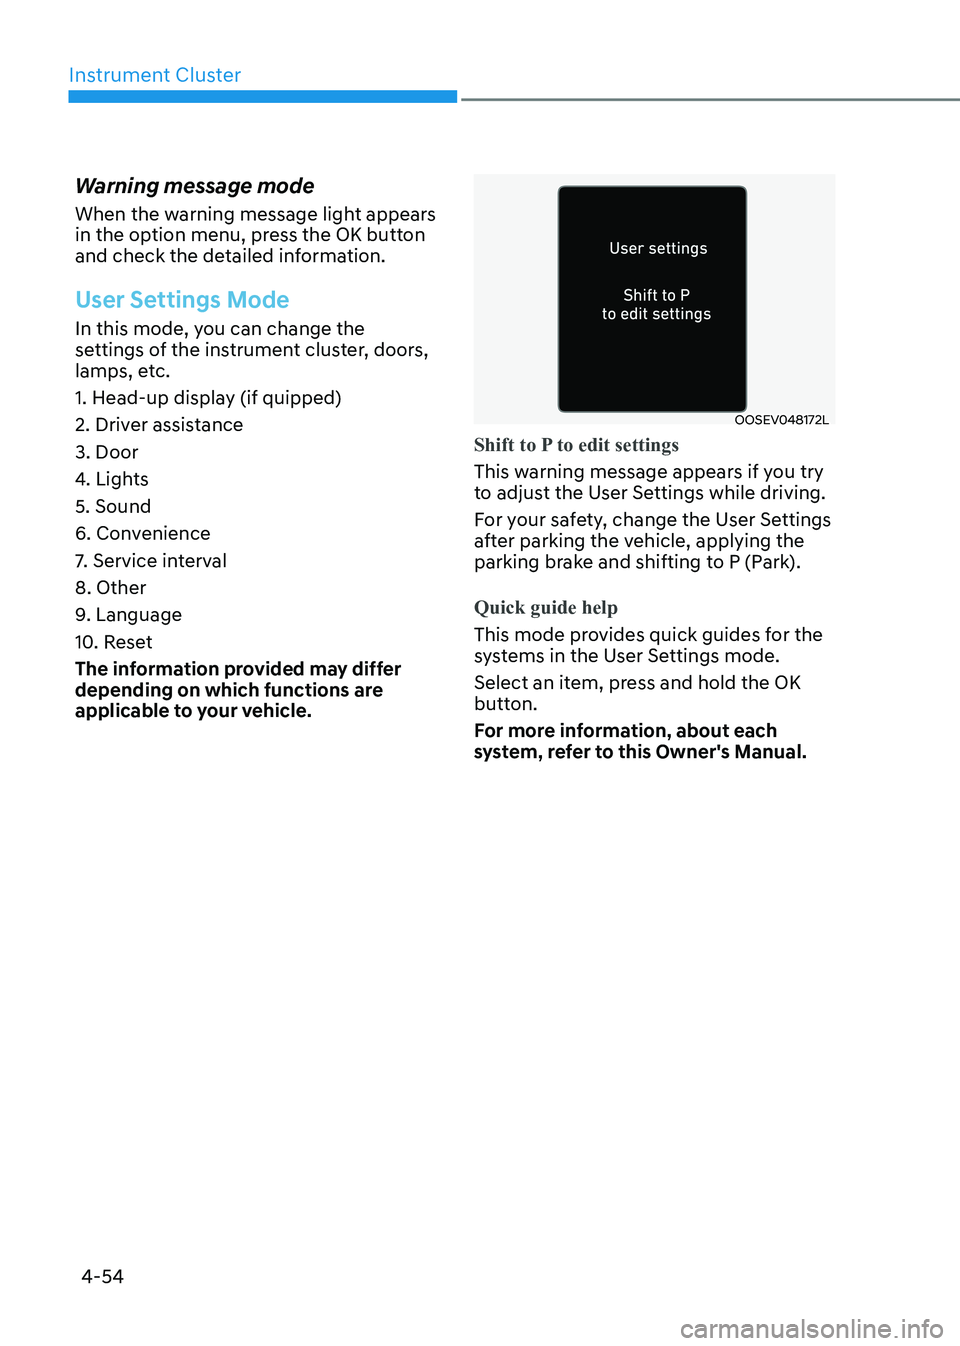
Shift to P to edit settings
This warning message appears if you try
to adjust the User Settings while driving.
For your safety, change the User Settings
after parking the vehicle, applying the
parking brake and shifting to P (Park).
Quick guide help
This mode provides quick guides for the
systems in the User Settings mode.
Select an item, press and hold the OK
button.
For more information, about each
system, refer to this Owner's Manual.
Page 146 of 555
Instrument Cluster
4-60
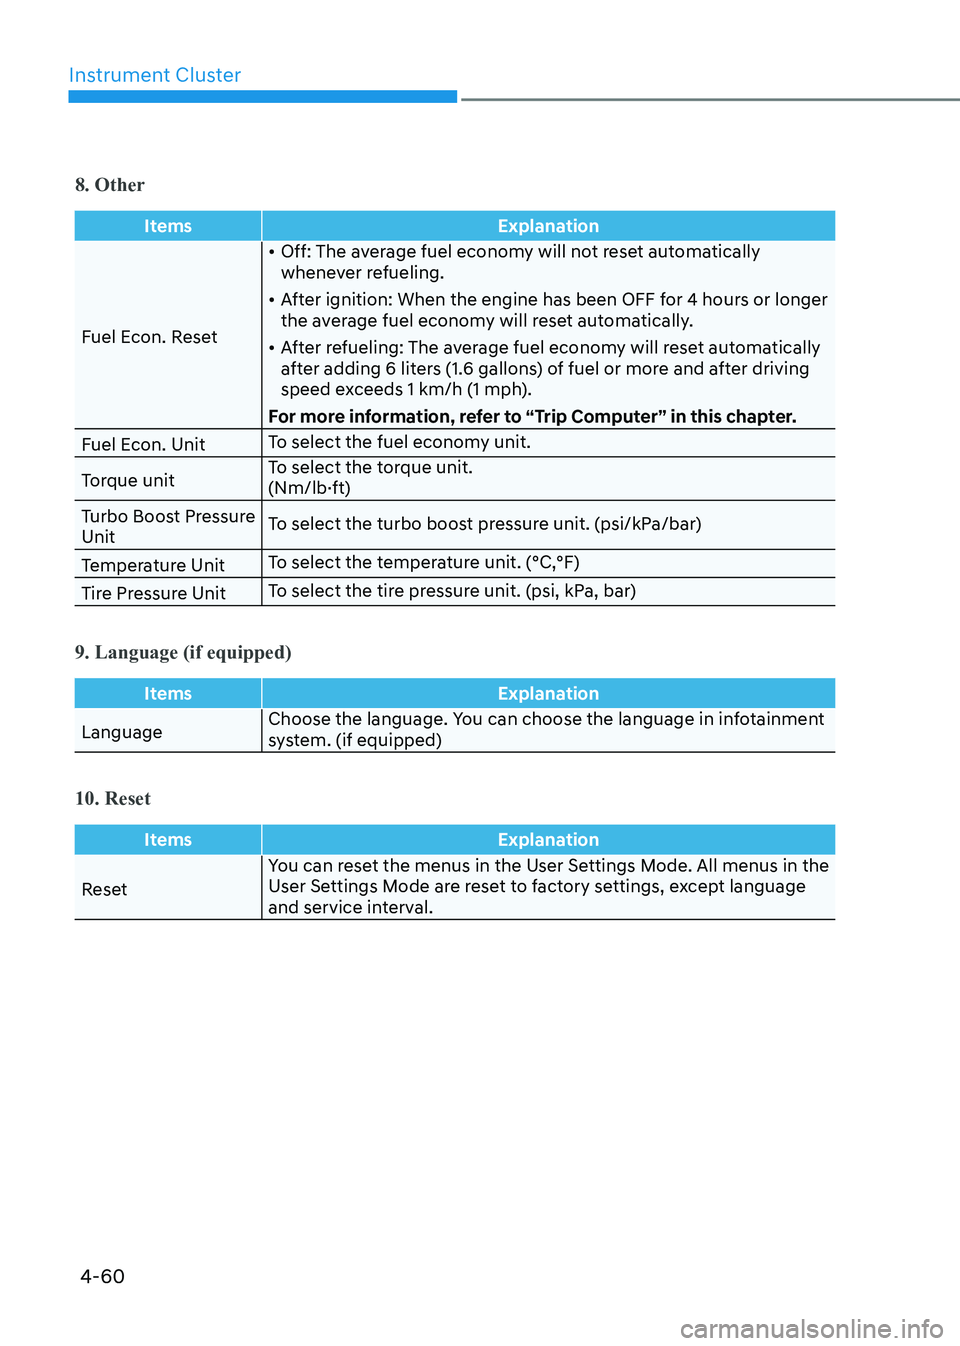
8. Other
ItemsExplanation
Fuel Econ. Reset•
Off: The average fuel economy will not reset automatically
whenever refueling.
• After ignition: When the engine has been OFF for 4 hours or longer
the average fuel economy will reset automatically.
• After refueling: The average fuel economy will reset automatically
after adding 6 liters (1.6 gallons) of fuel or more and after driving
speed exceeds 1 km/h (1 mph).
For more information, refer to “Trip Computer” in this chapter.
Fuel Econ. Unit To select the fuel economy unit.
Torque unit To select the torque unit.
(Nm/lb·ft)
Turbo Boost Pressure Unit To select the turbo boost pressure unit. (psi/kPa/bar)
Temperature Unit To select the temperature unit. (°C,°F)
Tire Pressure Unit To select the tire pressure unit. (psi, kPa, bar)
9. Language (if equipped)
Items
Explanation
LanguageChoose the language. You can choose the language in infotainment
system. (if equipped)
10. Reset
Items
Explanation
ResetYou can reset the menus in the User Settings Mode. All menus in the
User Settings Mode are reset to factory settings, except language
and service interval.
Page 150 of 555
Convenience Features
5-4
Remote Key (if equipped)
OIG046001
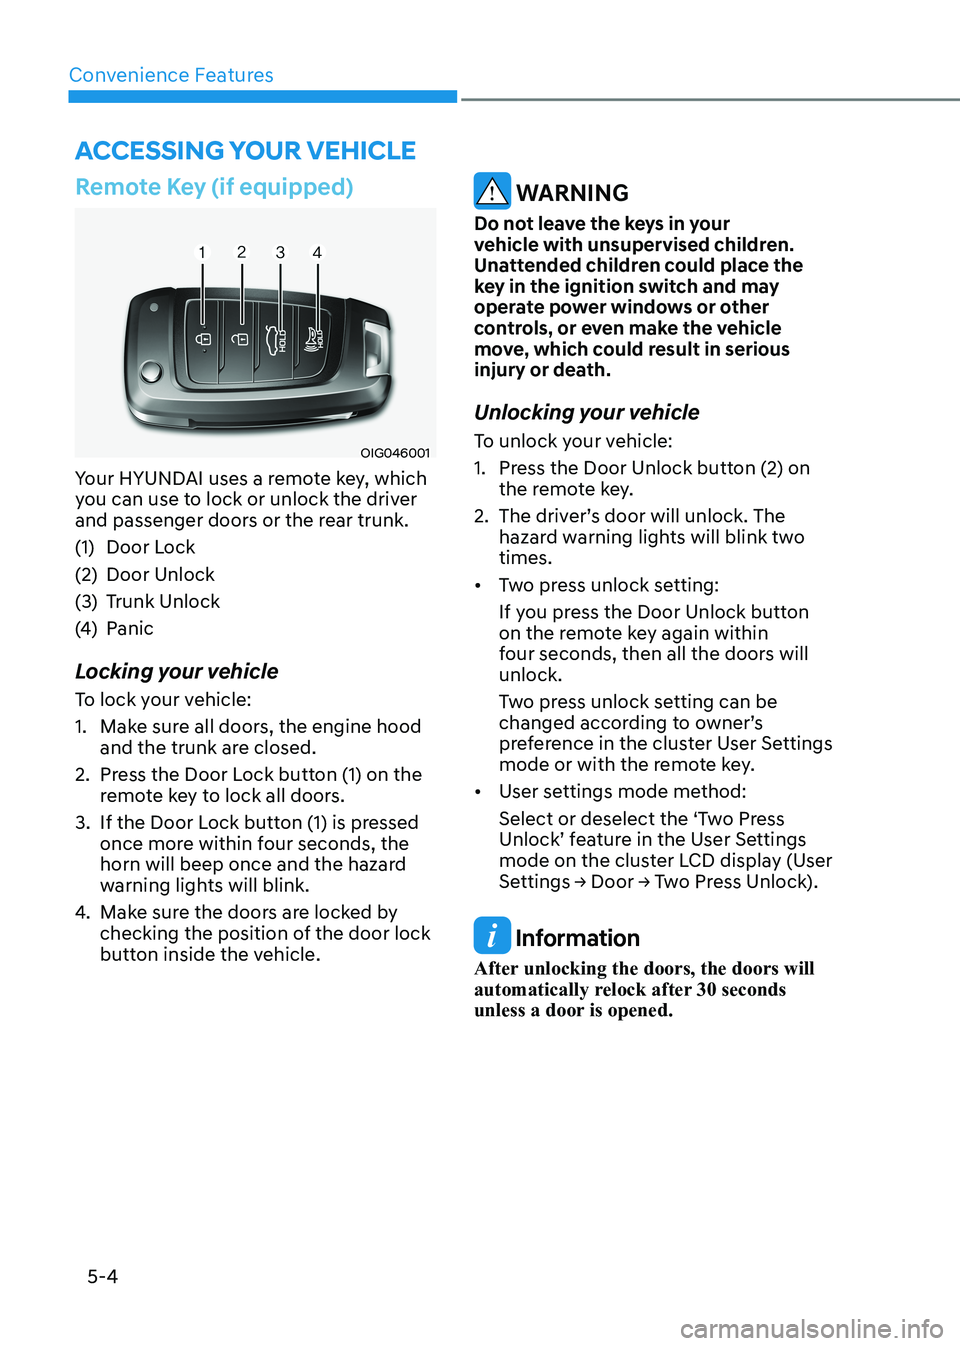
Your HYUNDAI uses a remote key, which
you can use to lock or unlock the driver
and passenger doors or the rear trunk.
(1) Door Lock
(2) Door Unlock
(3) Trunk Unlock
(4) Panic
Locking your vehicle
To lock your vehicle:
1. Make sure all doors, the engine hood and the trunk are closed.
2. Press the Door Lock button (1) on the remote key to lock all doors.
3. If the Door Lock button (1) is pressed once more within four seconds, the
horn will beep once and the hazard
warning lights will blink.
4. Make sure the doors are locked by
checking the position of the door lock
button inside the vehicle.
WARNING
Do not leave the keys in your
vehicle with unsupervised children.
Unattended children could place the
key in the ignition switch and may
operate power windows or other
controls, or even make the vehicle
move, which could result in serious
injury or death.
Unlocking your vehicle
To unlock your vehicle:
1. Press the Door Unlock button (2) on the remote key.
2. The driver’s door will unlock. The hazard warning lights will blink two times.
• Two press unlock setting:
If you press the Door Unlock button
on the remote key again within
four seconds, then all the doors will unlock.
Two press unlock setting can be
changed according to owner’s
preference in the cluster User Settings
mode or with the remote key.
• User settings mode method:
Select or deselect the ‘Two Press
Unlock’ feature in the User Settings
mode on the cluster LCD display (User
Settings → Door → Two Press Unlock).
Information
After unlocking the doors, the doors will
automatically relock after 30 seconds
unless a door is opened.
Accessing Your Vehicle
Page 156 of 555
Convenience Features
5-10
Two Press Unlock Feature
The priority for unlocking the driver door
only, or unlocking all the doors with
one press may be adjusted in the User
Settings mode in the cluster LCD display.
The Two Press Unlock feature, when
enabled, will require the user to press
the door unlock button once for driver
door only and twice for unlocking all the
doors.
Select or Deselect the Two Press Unlock
feature in the User Settings mode in the
cluster LCD display. The option can be
found under the following menu:
User Settings → Door → Two Press Unlock
The Two Press Unlock feature can also be
enabled or disabled by pressing the door
lock and unlock buttons simultaneously
on the Key FOB:
Press and hold both the Door Lock
button and the Door Unlock button
simultaneously until the hazard warning
lights blink.
This will enable or disable the Two Press
Unlock feature. Repeat this procedure to enable/disable the mode again.
Information
If you press the front passenger outside
door handle with the smart key in your possession, all the doors will unlock. Smart Key Reminder
If the smart key is in the vehicle and
any door is opened, the doors will not
lock even though the lock button of the
central door lock switch is pressed.
Trunk opening
To open:
1. Make sure you have the smart key
in your possession and either press
inside the trunk emblem or press the
Trunk Unlock button (3) on the smart
key for more than one second.
2. Once the trunk is opened, the hazard warning lights will blink two times.
• The trunk handle button will only
operate when the smart key is within
0.7~1 m (28~40 inches) from the outside door handle.
• Once the trunk is opened and then
closed, the trunk will automatically
re-lock and the hazard warning will blink once.
• If you leave the smart key and close
the trunk, the chime will sound for 5
seconds. In the case, the trunk cannot
be locked so open it with the trunk
handle button.
Panic button
Press and hold the Panic button (4) for
more than one second. The horn sounds
and hazard warning lights blink for about
30 seconds. To cancel the panic mode,
press any button on the Smart Key.
Page 162 of 555
Convenience Features
5-16
Door locks
Operating Door Locks from
Outside the Vehicle
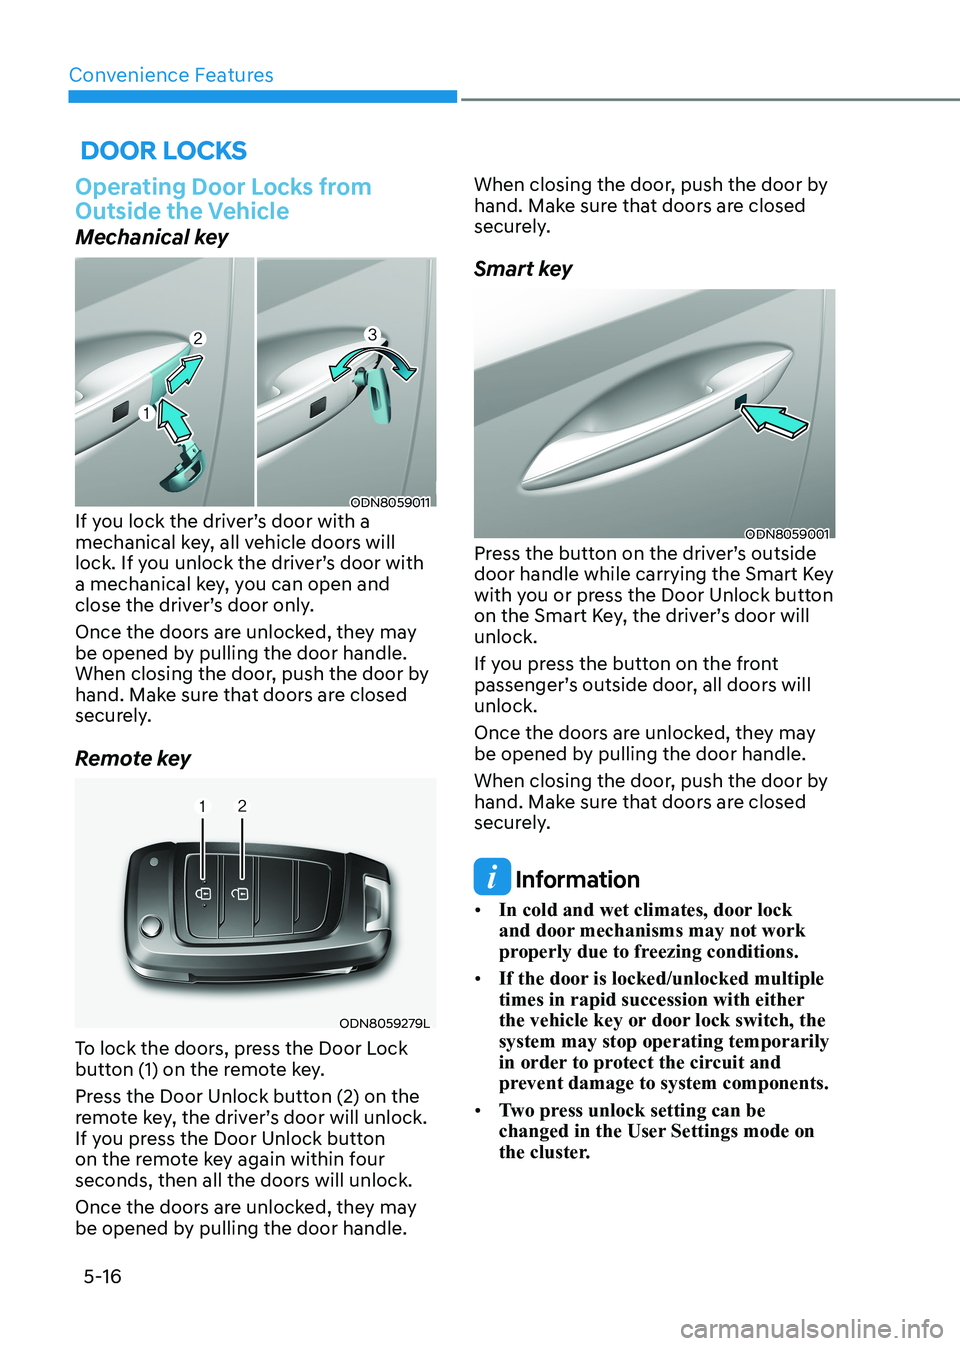
Mechanical key
ODN8059011
If you lock the driver’s door with a
mechanical key, all vehicle doors will
lock. If you unlock the driver’s door with
a mechanical key, you can open and
close the driver’s door only.
Once the doors are unlocked, they may
be opened by pulling the door handle.
When closing the door, push the door by
hand. Make sure that doors are closed
securely.
Remote key
ODN8059279L
To lock the doors, press the Door Lock
button (1) on the remote key.
Press the Door Unlock button (2) on the
remote key, the driver’s door will unlock.
If you press the Door Unlock button
on the remote key again within four
seconds, then all the doors will unlock.
Once the doors are unlocked, they may
be opened by pulling the door handle. When closing the door, push the door by
hand. Make sure that doors are closed
securely.
Smart key
ODN8059001
Press the button on the driver’s outside
door handle while carrying the Smart Key
with you or press the Door Unlock button
on the Smart Key, the driver’s door will unlock.
If you press the button on the front
passenger’s outside door, all doors will unlock.
Once the doors are unlocked, they may
be opened by pulling the door handle.
When closing the door, push the door by
hand. Make sure that doors are closed
securely.
Information
• In cold and wet climates, door lock
and door mechanisms may not work
properly due to freezing conditions.
• If the door is locked/unlocked multiple
times in rapid succession with either
the vehicle key or door lock switch, the system may stop operating temporarily
in order to protect the circuit and
prevent damage to system components.
• Two press unlock setting can be
changed in the User Settings mode on
the cluster.
Page 172 of 555
Convenience Features
5-26
NOTICE
• Reattempt to do the resetting procedure again, when the resetting
procedure incompletely stops or the
notification sound do not stop.
• Make sure that there is no obstacle around the driver’s seat in advance
of resetting the driver’s seat memory
system.
Easy Access Function
The system will move the driver’s seat
automatically as follows: • It will move the driver’s seat rearward
when the Engine Start/Stop button is
pressed to the OFF position.
• It will move the driver’s seat forward
when the Engine Start/Stop button is
pressed to the ACC or START position.
You can activate or deactivate the Easy
Access Function from the User Settings
mode in the cluster LCD display.
‘Convenience → Seat Easy Access →
Off/Normal/Extended’.
For more information, refer to “LCD
Display” in chapter 4.If your vehicle is
equipped with additional navigation,
please refer to the infotainment system
manual separately supplied.
CAUTION
Driver should be cautious when using
this function to assure no injury to
passenger or child on the back seat.
In case of emergency the driver has to
stop movement of front seat (when easy
access feature is activated) by pressing
SET button or any of the driver seat
control switches.
Page 205 of 555
05
5-59
heAD Up DiSplAy (hUD) (if eQUippeD)
ODN8A059054C
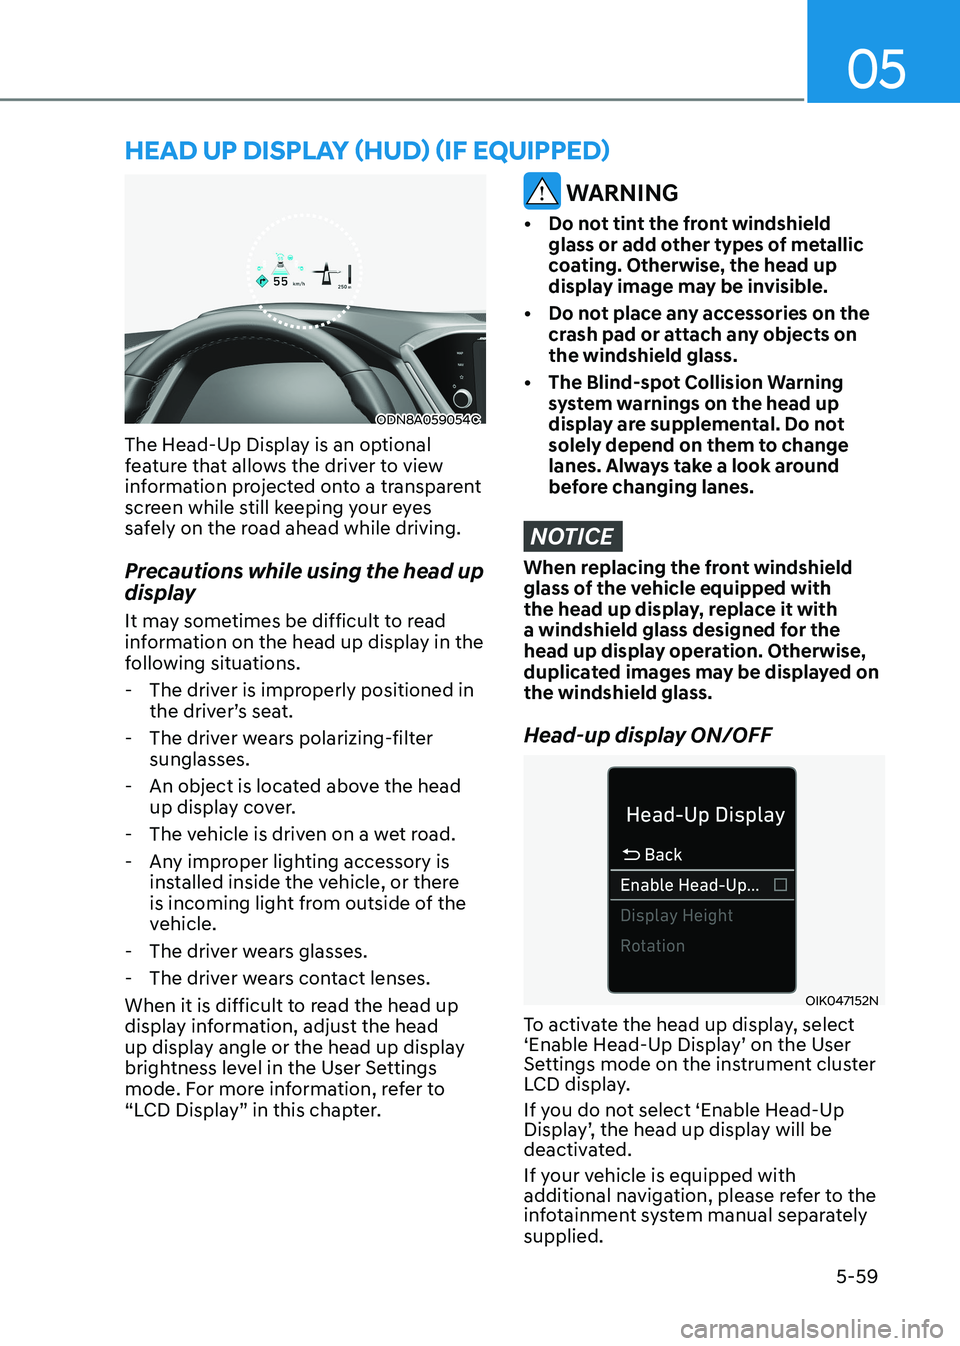
The Head-Up Display is an optional
feature that allows the driver to view
information projected onto a transparent
screen while still keeping your eyes
safely on the road ahead while driving.
Precautions while using the head up
display
It may sometimes be difficult to read
information on the head up display in the
following situations.
- The driver is improperly positioned in the driver’s seat.
- The driver wears polarizing-filter sunglasses.
- An object is located above the head up display cover.
- The vehicle is driven on a wet road.
- Any improper lighting accessory is installed inside the vehicle, or there
is incoming light from outside of the
vehicle.
- The driver wears glasses.
- The driver wears contact lenses.
When it is difficult to read the head up
display information, adjust the head
up display angle or the head up display
brightness level in the User Settings
mode. For more information, refer to
“LCD Display” in this chapter.
WARNING
• Do not tint the front windshield glass or add other types of metallic
coating. Otherwise, the head up
display image may be invisible.
• Do not place any accessories on the crash pad or attach any objects on the windshield glass.
• The Blind-spot Collision Warning system warnings on the head up
display are supplemental. Do not
solely depend on them to change
lanes. Always take a look around
before changing lanes.
NOTICE
When replacing the front windshield
glass of the vehicle equipped with
the head up display, replace it with
a windshield glass designed for the
head up display operation. Otherwise,
duplicated images may be displayed on the windshield glass.
Head-up display ON/OFF
OIK047152N
To activate the head up display, select
‘Enable Head-Up Display’ on the User
Settings mode on the instrument cluster
LCD display.
If you do not select ‘Enable Head-Up
Display’, the head up display will be
deactivated.
If your vehicle is equipped with
additional navigation, please refer to the
infotainment system manual separately supplied.