2023 HYUNDAI NEXO battery reset
[x] Cancel search: battery resetPage 13 of 558
1-4
Your vehicle at a glanceI
I NN TTEERR IIOO RR OO VVEERR VV IIEE WW
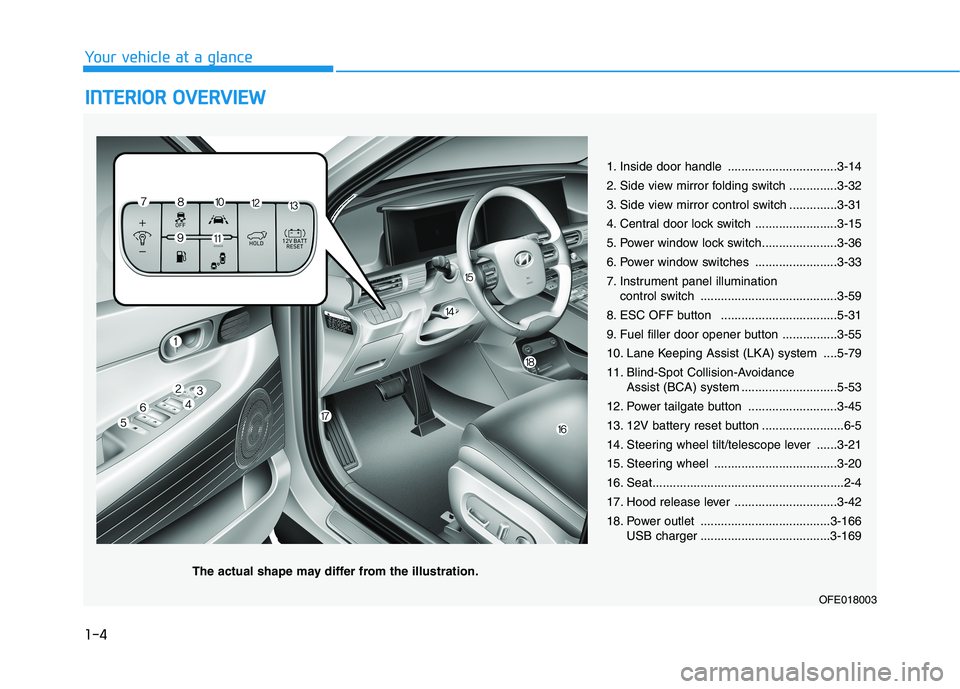
1. Inside door handle ................................3-14
2. Side view mirror folding switch ..............3-32
3. Side view mirror control switch ..............3-31
4. Central door lock switch ........................3-15
5. Power window lock switch......................3-36
6. Power window switches ........................3-33
7. Instrument panel illumination
control switch ........................................3-59
8. ESC OFF button ..................................5-31
9. Fuel filler door opener button ................3-55
10. Lane Keeping Assist (LKA) system ....5-79
11. Blind-Spot Collision-Avoidance Assist (BCA) system ............................5-53
12. Power tailgate button ..........................3-45
13. 12V battery reset button ........................6-5
14. Steering wheel tilt/telescope lever ......3-21
15. Steering wheel ....................................3-20
16. Seat........................................................2-4
17. Hood release lever ..............................3-42
18. Power outlet ......................................3-166 USB charger ......................................3-169
OFE018003
The actual shape may differ from the illustration.
Page 127 of 558
3-40
Convenient features of your vehicle
Resetting the Sunroof
Sunroof needs to be reset if the fol-
lowing occurs :
- Battery is discharged or discon-nected or the related fuse has been replaced or disconnected
- The one-touch sliding function of the sunroof does not normally oper-ate
Reset procedure :
1. Place the POWER button to the ON position or start the vehicle
( indicator ON). It is recom-mended to reset the sunroof while
the vehicle is in the ready ( )
mode.
2. Push the control lever forward. The sunroof will close completelyor tilt depending on the condition
of the sunroof.
3. Release the control lever when the sunroof stops moving. 4. Push the control lever forward
about 10 seconds.
- When the sunroof is in the closed position :
The glass will tilt and slightly move up and down.
- When the sunroof is in the tilt position:
The glass will slightly move up and down.
Do not release the lever until the
operation is completed.
If you release the lever during opera-
tion, start the procedure again fromstep 2.
5. Within 3 seconds, push and hold the control lever forward until the
sunroof operates as follows:
Tilt down �Slide Open �Slide
Close. Do not release the lever until the
operation is completed.
If you release the lever during opera-
tion, start the procedure again fromstep 2.
6. Release the sunroof control lever
after all steps have completed. The sunroof system has been reset.
Information
If the sunroof is not reset when the vehicle battery is disconnected or
discharged, or the sunroof fuse is
blown, the sunroof may not operate
normally.
For more detailed information, con- tact an authorized HYUNDAI dealer.
i
Page 137 of 558
3-50
Convenient features of your vehicle
How to reset the power tailgate
If the battery has been discharged or
disconnected, or if the power tailgate
fuse has been replaced or removed,
reset the power tailgate by perform-
ing the following procedure:
1. Put the shift button in P (Park).
2. Press the power tailgate inner but-ton and the power tailgate outer
handle button simultaneously for
more than 3 seconds. The chimewill sound.
3. Close the tailgate manually.
If the power tailgate does not work
properly after the above procedure,
have the system checked by an
authorized HYUNDAI dealer.
When operating the power tail-
gate, the gear shift button must be
in the (P) park position in order to
operate normally.
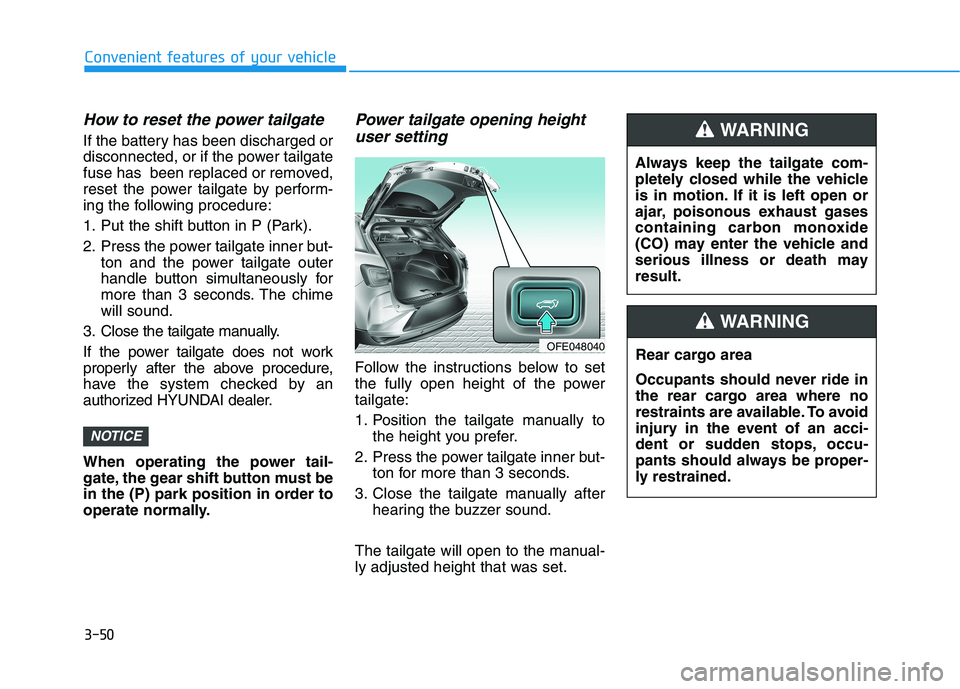
Power tailgate opening height user setting
Follow the instructions below to set
the fully open height of the powertailgate:
1. Position the tailgate manually to the height you prefer.
2. Press the power tailgate inner but- ton for more than 3 seconds.
3. Close the tailgate manually after hearing the buzzer sound.
The tailgate will open to the manual-
ly adjusted height that was set.
NOTICE
OFE048040 Always keep the tailgate com-
pletely closed while the vehicle
is in motion. If it is left open or
ajar, poisonous exhaust gases
containing carbon monoxide
(CO) may enter the vehicle and
serious illness or death mayresult.
WARNING
Rear cargo area
Occupants should never ride in
the rear cargo area where no
restraints are available. To avoid
injury in the event of an acci-
dent or sudden stops, occu-
pants should always be proper-
ly restrained.
WARNING
Page 172 of 558
3-85
Convenient features of your vehicle
The trip computer is a microcomput-
er-controlled driver information sys-
tem that displays information related
to driving.Information
Some driving information stored in the
trip computer (for example Average
Vehicle Speed) resets if the battery is
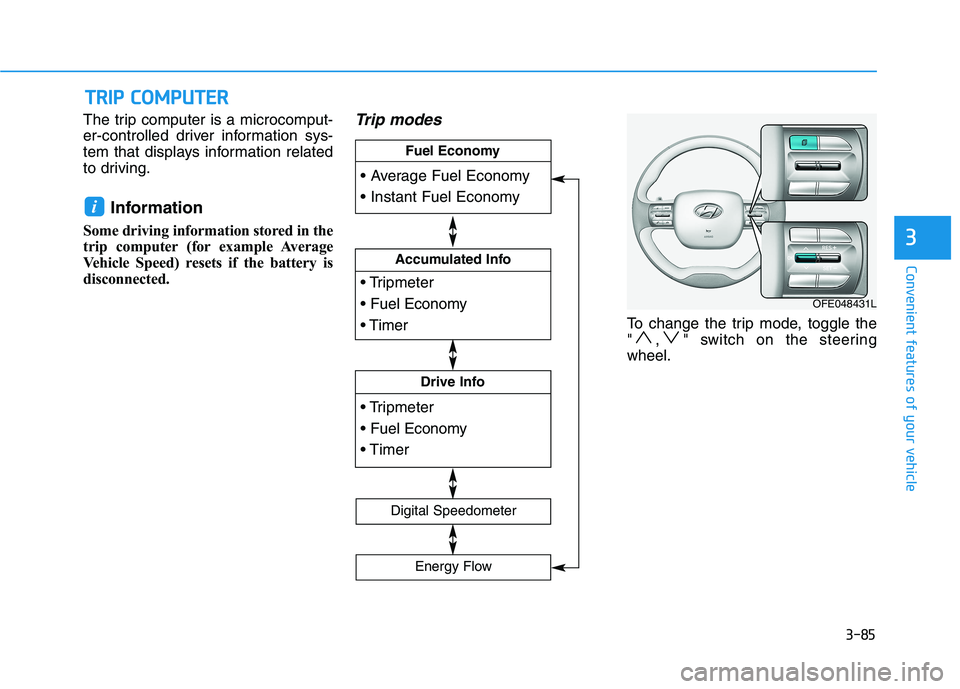
disconnected.Trip modes
To change the trip mode, toggle the
" , " switch on the steeringwheel.
i
TT RR IIPP CC OO MM PPUU TTEERR
3
Accumulated Info
Drive Info
Fuel Economy
Digital Speedometer
Energy Flow
OFE048431L
Page 239 of 558
3-152
Convenient features of your vehicle
Adjusting the driver and passenger
side temperature individually
Press the "SYNC" button again to
operate the driver and passenger
side temperature individually. The
button indicator will turn off.
Temperature conversion
If the battery has been discharged or
disconnected, the temperature mode
display will reset to Fahrenheit.
To change the temperature unit from °C to °F or °F to °C:
- Press the AUTO button while press-ing the OFF button on the climate
control unit for 3 seconds.
- Go to General settings mode �Unit
� Temperature in the AVN display.
The temperature unit on both the
cluster LCD display and climate con-
trol screen will change.
Air intake control (8)
The air intake control button is used
to select either Fresh mode (outsideair) or Recirculation mode (cabin air).
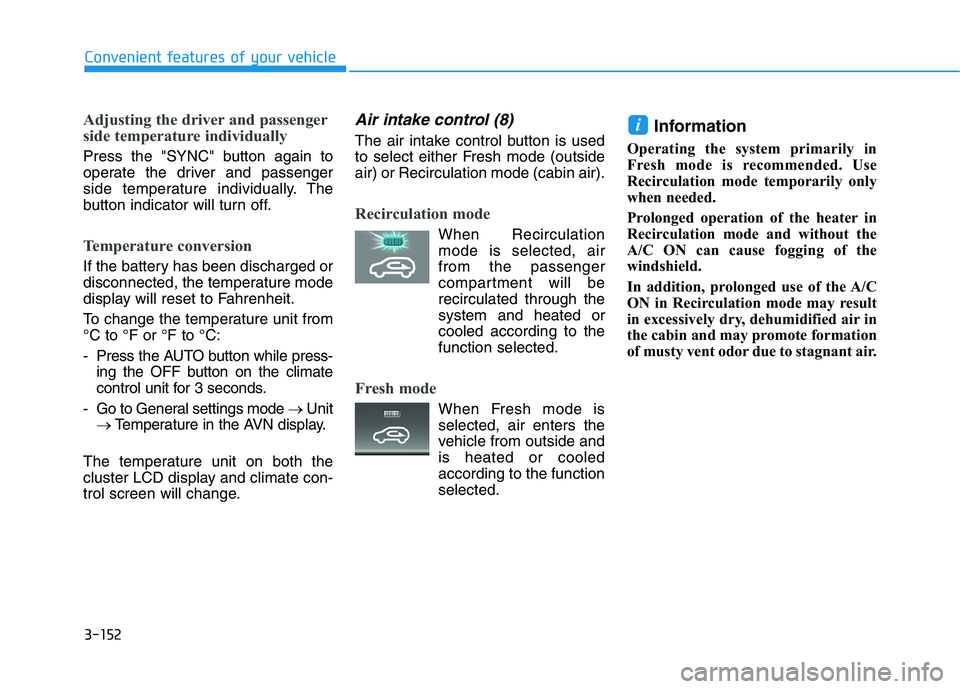
Recirculation mode
When Recirculation mode is selected, air from the passenger
compartment will berecirculated through thesystem and heated or
cooled according to thefunction selected.
Fresh mode
When Fresh mode is selected, air enters the
vehicle from outside andis heated or cooled
according to the functionselected. Information
Operating the system primarily in
Fresh mode is recommended. Use
Recirculation mode temporarily only
when needed.
Prolonged operation of the heater in
Recirculation mode and without the
A/C ON can cause fogging of the
windshield.
In addition, prolonged use of the A/C
ON in Recirculation mode may result
in excessively dry, dehumidified air in
the cabin and may promote formation
of musty vent odor due to stagnant air.
i
Page 246 of 558
3-159
Convenient features of your vehicle
3
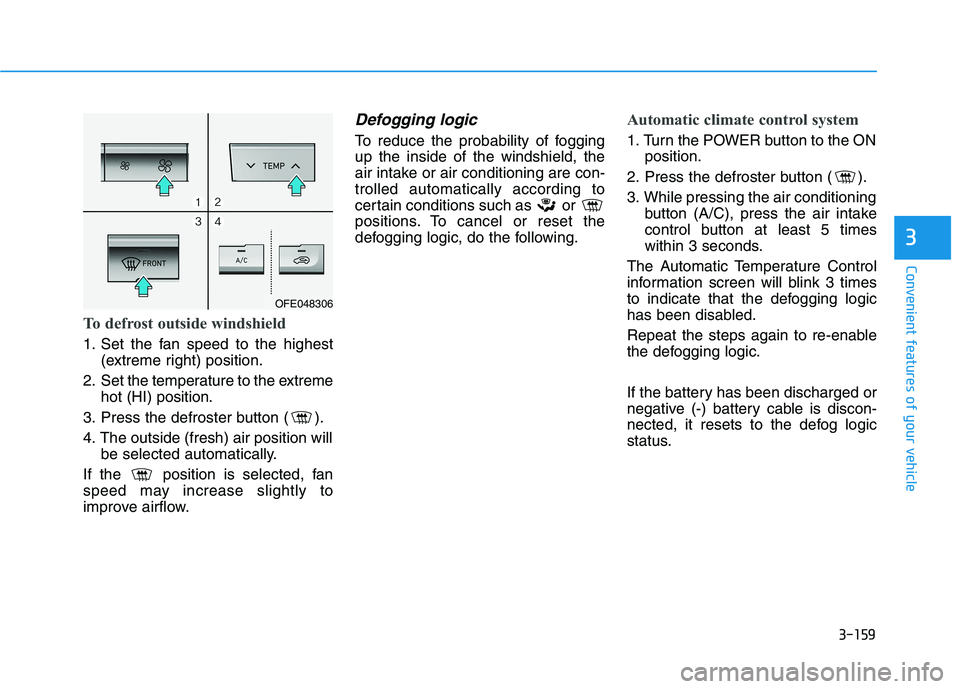
To defrost outside windshield
1. Set the fan speed to the highest(extreme right) position.
2. Set the temperature to the extreme hot (HI) position.
3. Press the defroster button ( ).
4. The outside (fresh) air position will be selected automatically.
If the position is selected, fan
speed may increase slightly to
improve airflow.
Defogging logic
To reduce the probability of foggingup the inside of the windshield, the
air intake or air conditioning are con-trolled automatically according to
certain conditions such as or
positions. To cancel or reset the
defogging logic, do the following.
Automatic climate control system
1. Turn the POWER button to the ON position.
2. Press the defroster button ( ).
3. While pressing the air conditioning button (A/C), press the air intake
control button at least 5 times
within 3 seconds.
The Automatic Temperature Control
information screen will blink 3 times
to indicate that the defogging logic
has been disabled.
Repeat the steps again to re-enable
the defogging logic.
If the battery has been discharged or
negative (-) battery cable is discon-
nected, it resets to the defog logic
status.
OFE048306
Page 304 of 558
5-37
Driving your vehicle
The drive mode may be selected
according to the driver's preferenceor road condition. The system resets to be in the NOR-
MAL mode (except if it is in ECO
mode), when the vehicle is restarted.Information
If there is a problem with the instru-
ment cluster, the drive mode will be in
NORMAL mode and may not change
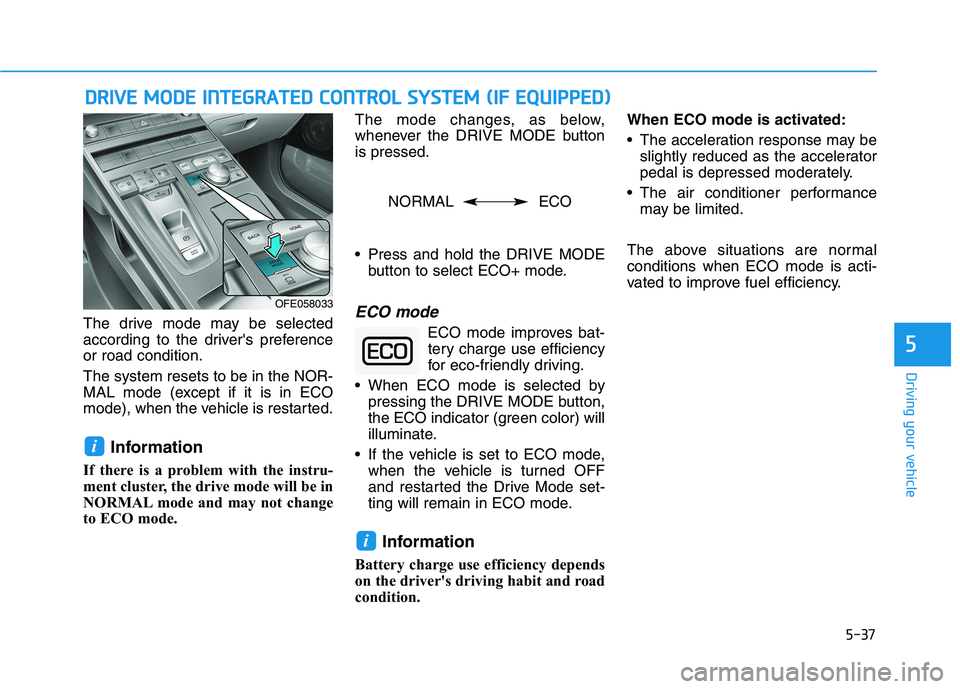
to ECO mode. The mode changes, as below,
whenever the DRIVE MODE buttonis pressed.
Press and hold the DRIVE MODE
button to select ECO+ mode.ECO mode
ECO mode improves bat-tery charge use efficiency
for eco-friendly driving.
When ECO mode is selected by pressing the DRIVE MODE button,
the ECO indicator (green color) will
illuminate.
If the vehicle is set to ECO mode, when the vehicle is turned OFF
and restarted the Drive Mode set-
ting will remain in ECO mode.
Information
Battery charge use efficiency depends
on the driver's driving habit and road
condition. When ECO mode is activated:
The acceleration response may be
slightly reduced as the accelerator
pedal is depressed moderately.
The air conditioner performance may be limited.
The above situations are normalconditions when ECO mode is acti-
vated to improve fuel efficiency.
i
i
DD RRIIVV EE MM OODDEE IINN TTEEGG RRAA TTEEDD CC OO NNTTRR OO LL SS YY SSTT EEMM (( IIFF EE QQ UUIIPP PPEEDD ))
5
OFE058033
NORMAL ECO
Page 401 of 558
6-4
If you have a flat tire while driving
If a tire goes flat while you are driv- ing:
1. Take your foot off the acceleratorpedal and let the vehicle slow
down while driving straight ahead.
Do not apply the brakes immedi-ately or attempt to pull off the road
as this may cause a loss of con-
trol. When the vehicle has slowed
to such a speed that it is safe to do
so, brake carefully and pull off the
road. Drive off the road as far as
possible and park on firm, level
ground. If you are on a divided
highway, do not park in the medi-
an area between the two traffic
lanes.
2. When the vehicle is stopped, turn on your emergency hazard flash-
ers, set the parking brake and shift
gear to the P(Park) position.
3. Have all passengers get out of the vehicle. Be sure they all get out on
the side of the vehicle that is away
from traffic.
If the vehicle stalls while driv- ing
1. Reduce your speed gradually,keeping a straight line. Move cau-
tiously off the road to a safe place.
2. Turn on your emergency flashers.
3. Try to start the vehicle again. If your vehicle will not start, contact
an authorized HYUNDAI dealer. Be sure the shift lever is in P
(Park). The vehicle starts only
when the shift lever is in P (Park).
This vehicle does not have a regu- lar 12V battery that needs periodic
replacement. It is lithium ion poly-
mer type integrated into the high
voltage battery. The vehicle has a
12V battery protection system that
cuts 12V battery from vehicle draw
to prevent full discharge. If vehicle
will not start, first try pressing the
12V Battery Reset switch (left side
of the steering wheel near the fuel
door open switch) to reconnect the
12V battery, but you must start
vehicle within 15 seconds of press-
ing the 12V Battery Reset switch.
After starting vehicle, operate the
vehicle safely outdoors in ready
mode stopped and/or drive it for 30
minutes total to charge the 12V
battery fully.
Check the fuel level and add fuel if necessary.
Do not push or pull the vehicle to start it.
If the vehicle still does not start, call
an authorized HYUNDAI dealer for
assistance.
What to do in an emergency
I
IFF TT HH EE VV EEHH IICC LLEE WW IILL LL NN OO TT
S
S TT AA RRTT