Page 14 of 548
01
1-9
eV mode
OOSEV040522L
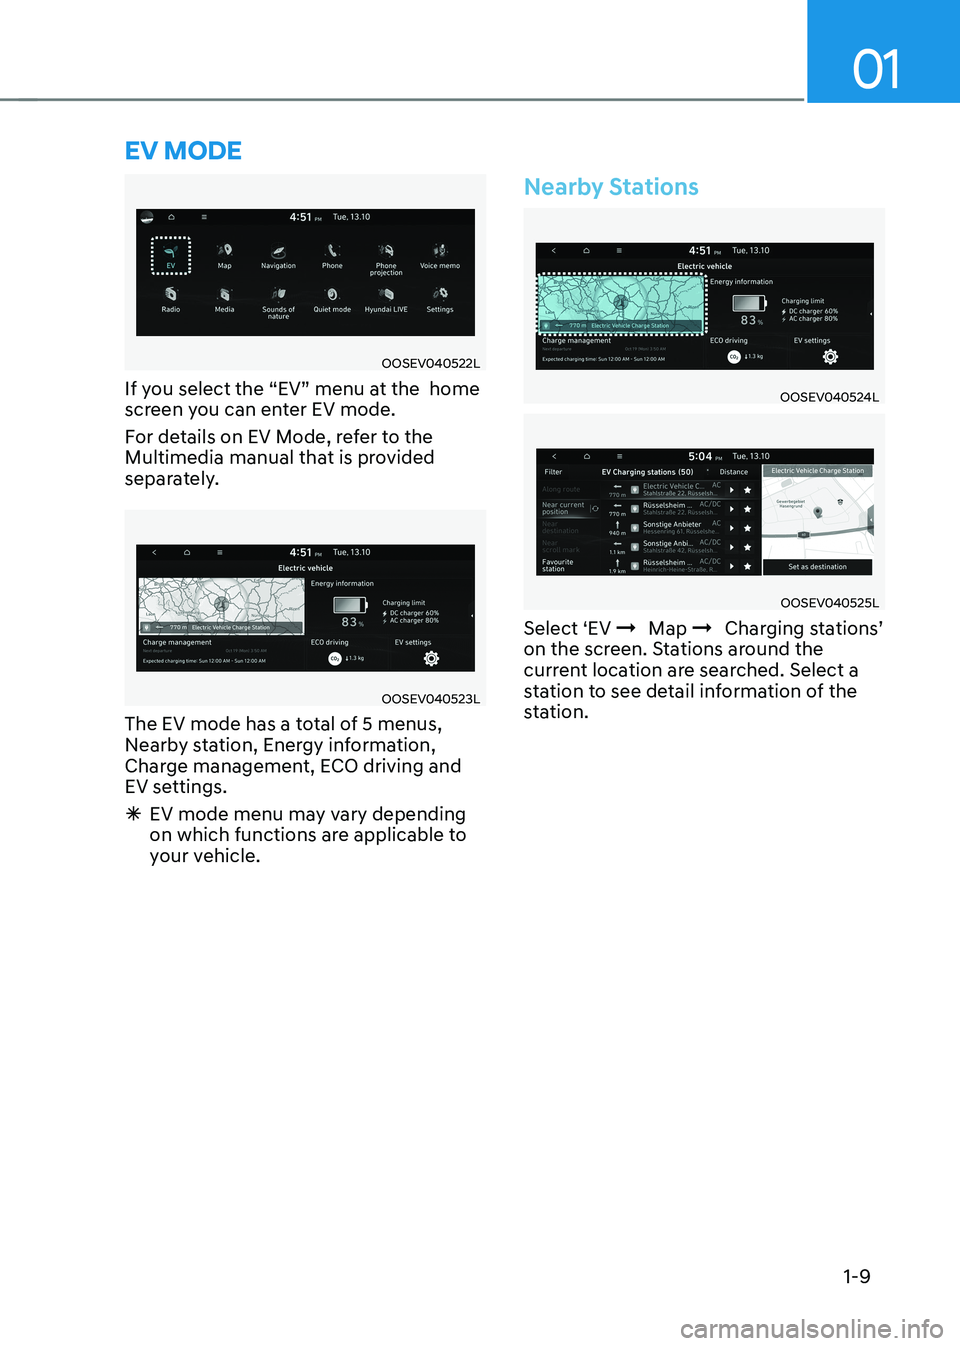
If you select the “EV” menu at the home
screen you can enter EV mode.
For details on EV Mode, refer to the
Multimedia manual that is provided
separately.
OOSEV040523L
The EV mode has a total of 5 menus,
Nearby station, Energy information,
Charge management, ECO driving and
EV settings.
à EV mode menu may vary depending
on which functions are applicable to
your vehicle.
Nearby Stations
OOSEV040524L
OOSEV040525L
Select ‘EV Þ Map
Þ Charging stations’
on the screen. Stations around the
current location are searched. Select a
station to see detail information of the
station.
Page 16 of 548
01
1-11
Charge Management
OOSEV040529L
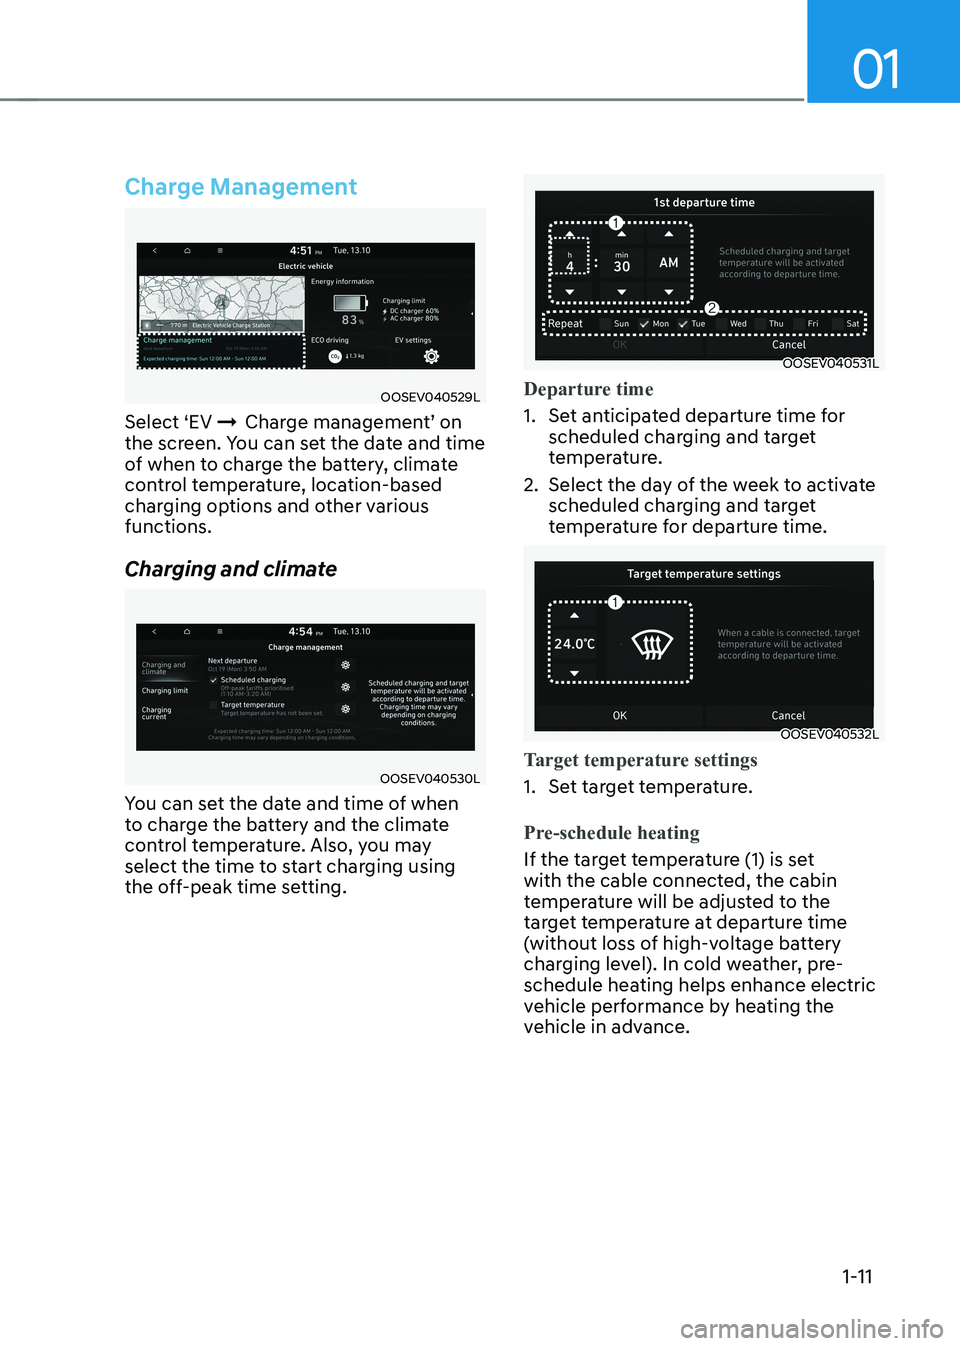
Select ‘EV ÞCharge management’ on
the screen. You can set the date and time
of when to charge the battery, climate
control temperature, location-based
charging options and other various functions.
Charging and climate
OOSEV040530L
You can set the date and time of when
to charge the battery and the climate
control temperature. Also, you may
select the time to start charging using
the off-peak time setting.
OOSEV040531L
Departure time
1. Set anticipated departure time for scheduled charging and target
temperature.
2. Select the day of the week to activate scheduled charging and target
temperature for departure time.
OOSEV040532L
Target temperature settings
1. Set target temperature.
Pre-schedule heating
If the target temperature (1) is set
with the cable connected, the cabin
temperature will be adjusted to the
target temperature at departure time
(without loss of high-voltage battery
charging level). In cold weather, pre-
schedule heating helps enhance electric
vehicle performance by heating the
vehicle in advance.
Page 21 of 548
Foreword / Electric Vehicle System Overview
1-16
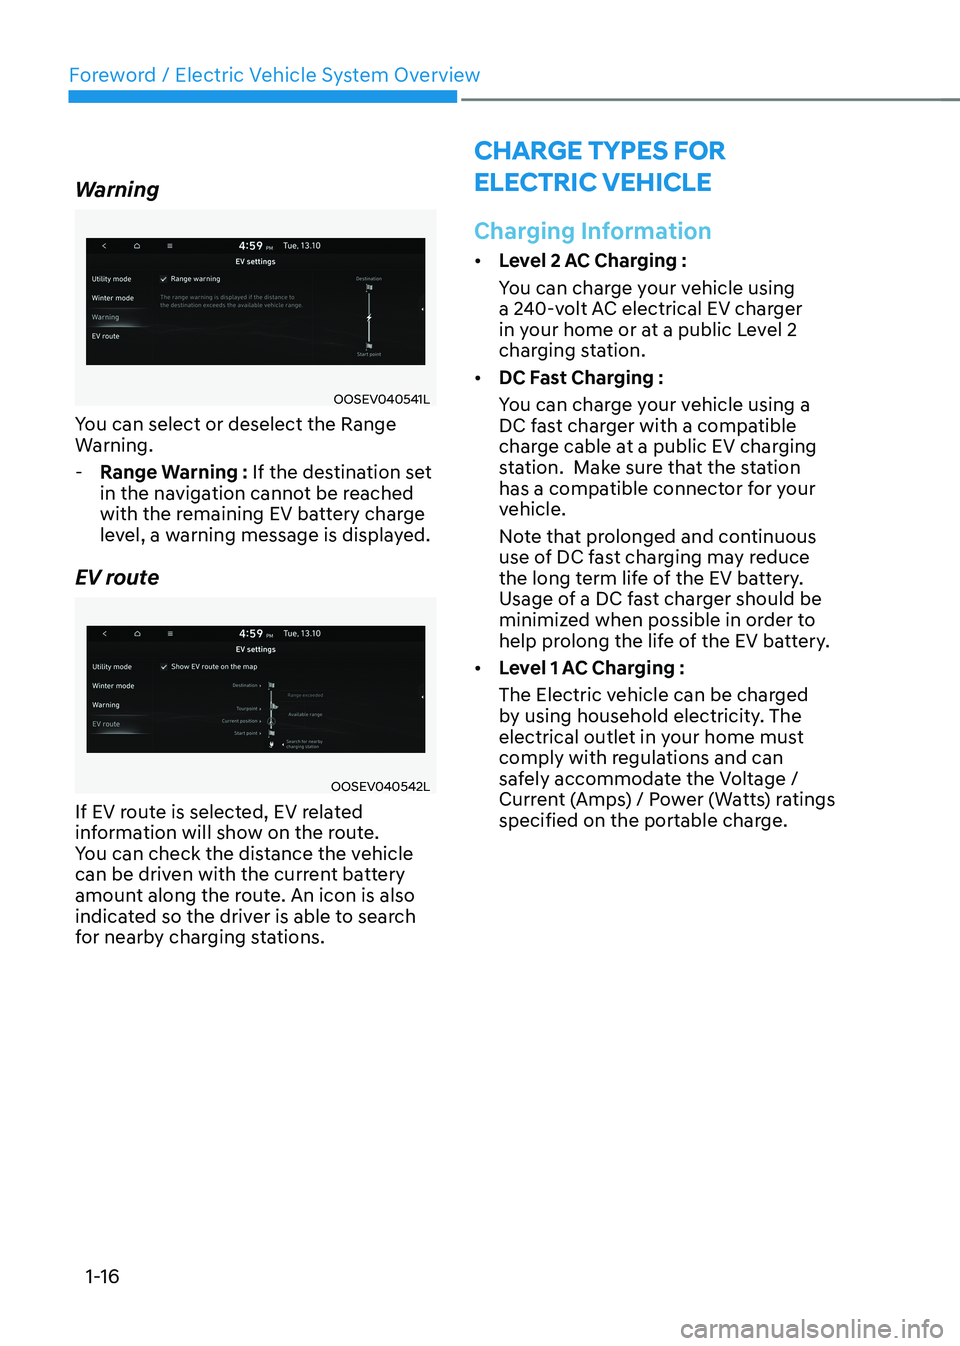
Warning
OOSEV040541L
You can select or deselect the Range
Warning.
- Range Warning : If the destination set
in the navigation cannot be reached
with the remaining EV battery charge
level, a warning message is displayed.
EV route
OOSEV040542L
If EV route is selected, EV related
information will show on the route.
You can check the distance the vehicle
can be driven with the current battery
amount along the route. An icon is also
indicated so the driver is able to search
for nearby charging stations.
CHarge Types For
eleCTriC VeHiCle
Charging Information
• Level 2 AC Charging :
You can charge your vehicle using
a 240-volt AC electrical EV charger
in your home or at a public Level 2
charging station.
• DC Fast Charging :
You can charge your vehicle using a
DC fast charger with a compatible
charge cable at a public EV charging
station. Make sure that the station
has a compatible connector for your
vehicle.
Note that prolonged and continuous
use of DC fast charging may reduce
the long term life of the EV battery.
Usage of a DC fast charger should be
minimized when possible in order to
help prolong the life of the EV battery.
• Level 1 AC Charging :
The Electric vehicle can be charged
by using household electricity. The
electrical outlet in your home must
comply with regulations and can
safely accommodate the Voltage /
Current (Amps) / Power (Watts) ratings
specified on the portable charge.
Page 26 of 548
![HYUNDAI KONA EV 2023 Owners Manual 01
1-21
CHarging ConneCTor loCK
Charging Connector AUTO/
LOCK Mode
OOSEVQ019006
[A] : Auto mode, [B] : Lock mode
You can change the setting that locks
the charging connector to the charging
port](/manual-img/35/56170/w960_56170-25.png "HYUNDAI KONA EV 2023 Owners Manual 01
1-21
CHarging ConneCTor loCK
Charging Connector AUTO/
LOCK Mode
OOSEVQ019006
[A] : Auto mode, [B] : Lock mode
You can change the setting that locks
the charging connector to the charging
port")
01
1-21
CHarging ConneCTor loCK
Charging Connector AUTO/
LOCK Mode
OOSEVQ019006
[A] : Auto mode, [B] : Lock mode
You can change the setting that locks
the charging connector to the charging
port on the vehicle. Change the mode
using the Charging AUTO / LOCK button
located on the left of the driver side dash
panel.Press the (
) button to change
between AUTO mode and LOCK mode.
Information
The charging inlet is locked during the DC
charge regardless of AUTO/ LOCK mode.
After charging is complete the locked charging inlet is unlocked. When the Charging Connector Is
Locked
LOCK
AUTO
Before charging O X
While charging O O
Finished charging O X
• LOCK mode (button indicator off) :
The connector locks when the
charging connector is plugged into
the charging port. The connector is
locked until all doors are unlocked by
the driver. This mode can be used to
prevent charging cable theft.
- If the charge connector is not disconnected within 15 seconds
after unlocking all doors, the
connector will be automatically
locked again.
- The charge connector will automatically relock when all the
doors of the vehicle are locked.
• AUTO mode (button indicator on) :
The connector locks when charging
starts. The connector unlocks when
charging is complete. This mode can
be used when charging in a public
charging station.
Page 27 of 548
Foreword / Electric Vehicle System Overview
1-22
sCHeduled CHarging
Scheduled Charging
• You can set-up a charging schedule
for your vehicle using the Audio
or Navigation screen or Blue Link
application.
Refer to the Multimedia manual or
the Blue Link manual for detailed
information about setting scheduled
charging.
• Scheduled charging can only be done
when using a Level 2 AC charging
station or the Level 1 AC charger with
the Hyundai-supplied charging power
cord.
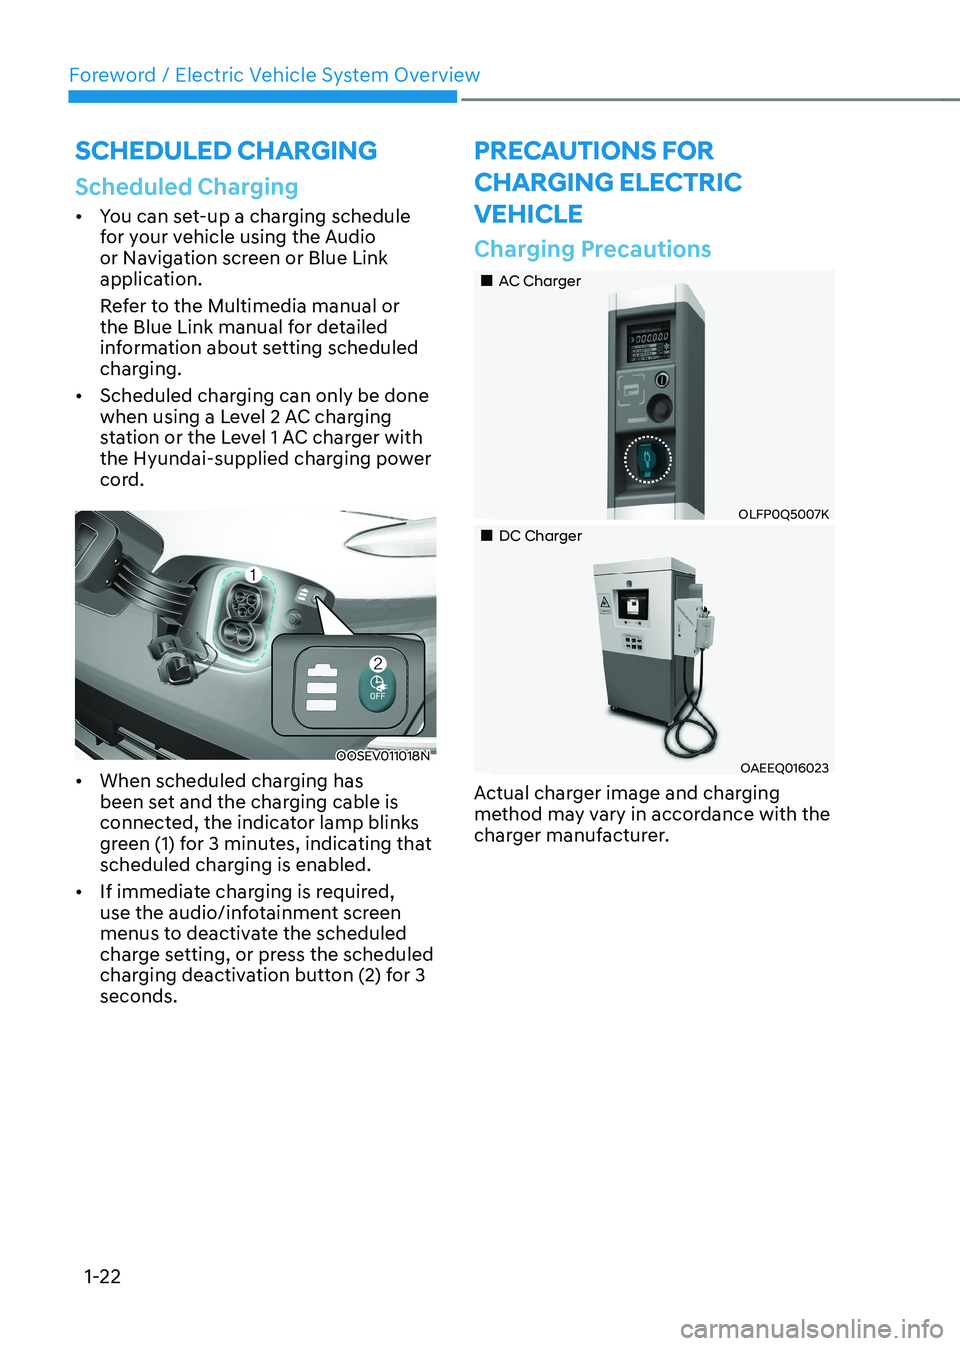
OOSEV011018N
• When scheduled charging has
been set and the charging cable is
connected, the indicator lamp blinks
green (1) for 3 minutes, indicating that
scheduled charging is enabled.
• If immediate charging is required,
use the audio/infotainment screen
menus to deactivate the scheduled
charge setting, or press the scheduled
charging deactivation button (2) for 3 seconds.
preCauTions For
CHarging eleCTriC VeHiCle
Charging Precautions
„„AC Charger
OLFP0Q5007K
„„DC Charger
OAEEQ016023
Actual charger image and charging
method may vary in accordance with the
charger manufacturer.
Page 28 of 548
01
1-23
WARNING
• Electromagnetic waves that are
generated from the charger can seriously impact medical electric
devices such as an implantable
cardiac pacemaker.
When using medical electric devices
such as an implantable cardiac
pacemaker, make sure to ask the
medical team and manufacturer
whether charging your electric
vehicle will impact the operation of
the medical electric devices such as
an implantable cardiac pacemaker.
• Inspect the charging cable connector
for any signs of water or excess
dust or dirt. Connecting the cable
when there is water or dirt on the
connector may initiate a short circuit
and cause a fire or electric shock.
WARNING
• Use caution not to touch the
charging connector or the charging
port when connecting the cable from
the charger to the charging port on
the vehicle.
• Comply with the following in order
to prevent electrical shock when
charging:
- Use caution when connecting the
charger to the charging port when
it is raining or snowing.
- Use caution when there are
adverse weather conditions such
as lightning.
- Use caution when the charging
connector or the charging plug is
wet.
WARNING
• Immediately stop charging when
you find abnormal symptoms (odor,
smoke).
• Replace the charging cable if the
cable coating is damaged to prevent electrical shock.
• When connecting or removing the
charging cable, make sure to hold
the charging connector handle and
charging plug.
If you pull the cable itself (without
using the handle), the internal wires
may disconnect or get damaged. This
may lead to electric shock or fire.
CAUTION
• Always keep the charging connector
and charging plug in clean and
dry condition. Be sure to keep the
charging cable in a condition where
there is no water or moisture.
• Before charging the battery, turn the
vehicle OFF.
• When the vehicle is switched OFF
while charging, the cooling fan
inside the motor compartment may
automatically operate. Do not touch
the cooling fan while charging.
• Be careful not to drop the charging
connector. The charging connector can be damaged.
Page 32 of 548
01
1-27
How to Disconnect AC Charger
„„AC Charger
OLFP0Q4057N
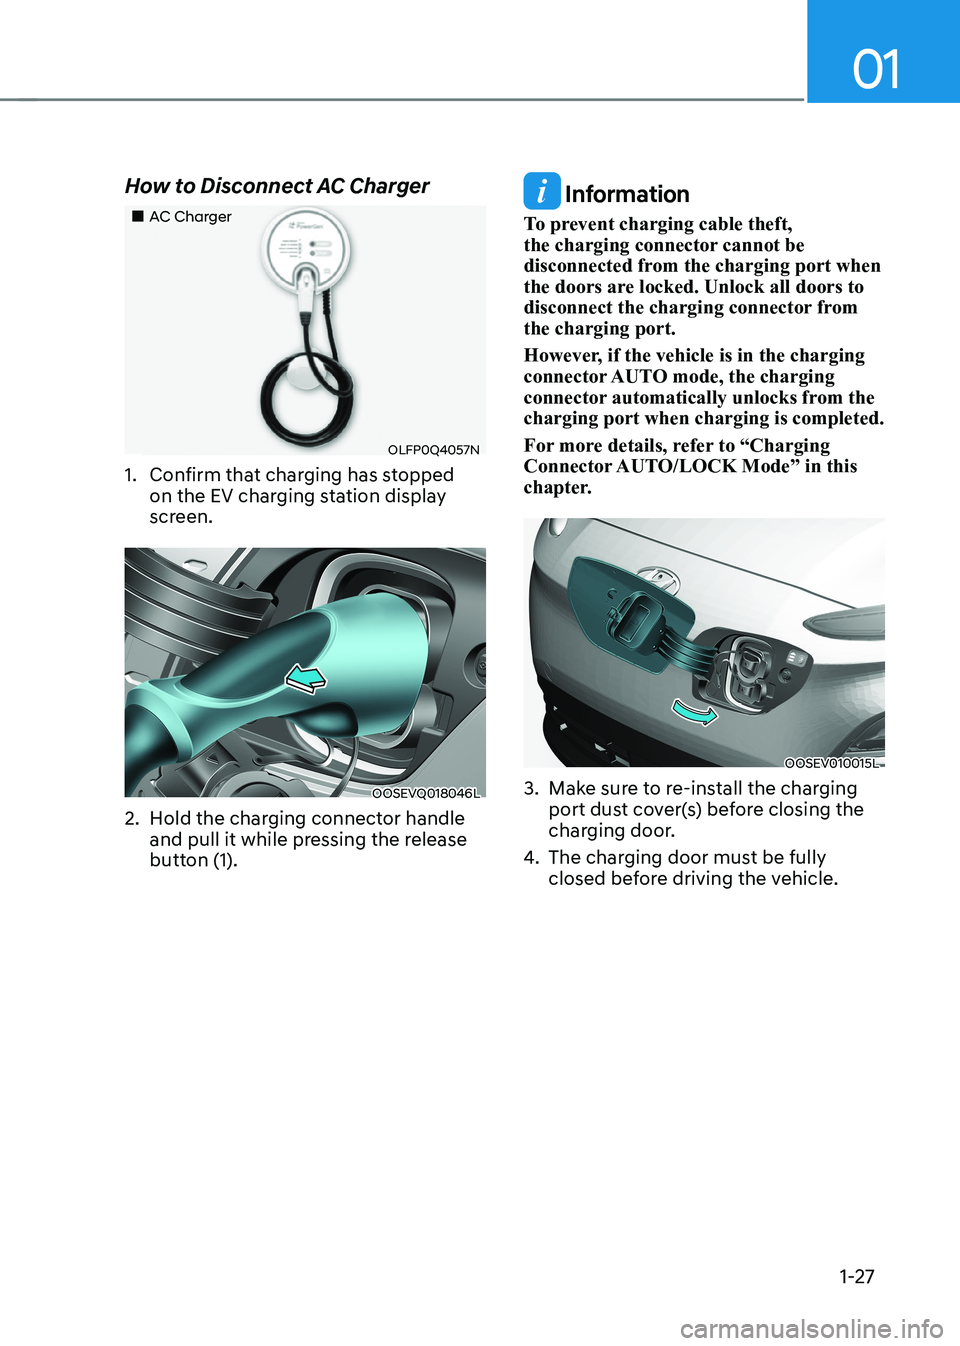
1. Confirm that charging has stopped on the EV charging station display
screen.
OOSEVQ018046L
2. Hold the charging connector handle and pull it while pressing the release
button (1).
Information
To prevent charging cable theft,
the charging connector cannot be
disconnected from the charging port when
the doors are locked. Unlock all doors to
disconnect the charging connector from the charging port.
However, if the vehicle is in the charging
connector AUTO mode, the charging
connector automatically unlocks from the charging port when charging is completed.
For more details, refer to “Charging
Connector AUTO/LOCK Mode” in this
chapter.
OOSEV010015L
3. Make sure to re-install the charging port dust cover(s) before closing the
charging door.
4. The charging door must be fully
closed before driving the vehicle.
Page 37 of 548
Foreword / Electric Vehicle System Overview
1-32
How to Disconnect DC Charger
1. Refer to the instructions on the on-
screen display of the DC charging
station before disconnecting the
charging connector from the vehicle.
Once charging is stopped, remove the
charging connector.
OOSEV010015L
2. Make sure to re-install the charging port dust cover(s) before closing the
charging door.
3. The charging door must be fully closed before driving the vehicle.
Portable Charge
„„Portable Charger
OOSEVQ018047L
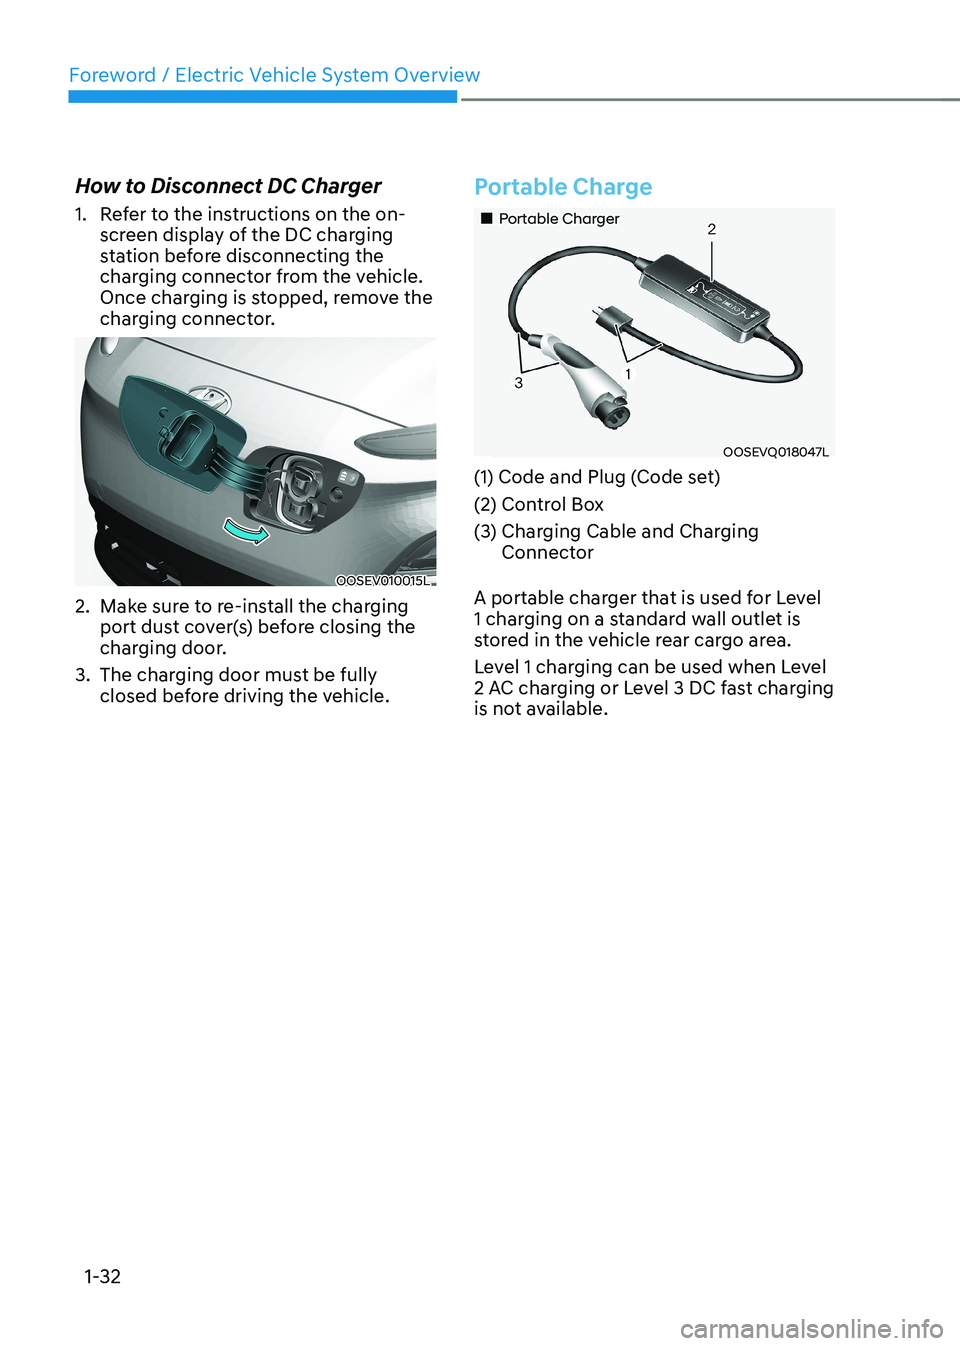
(1) Code and Plug (Code set)
(2) Control Box
(3) Charging Cable and Charging Connector
A portable charger that is used for Level
1 charging on a standard wall outlet is
stored in the vehicle rear cargo area.
Level 1 charging can be used when Level
2 AC charging or Level 3 DC fast charging
is not available.