2023 HYUNDAI KONA EV reset
[x] Cancel search: resetPage 318 of 548
Driving your vehicle
6-38
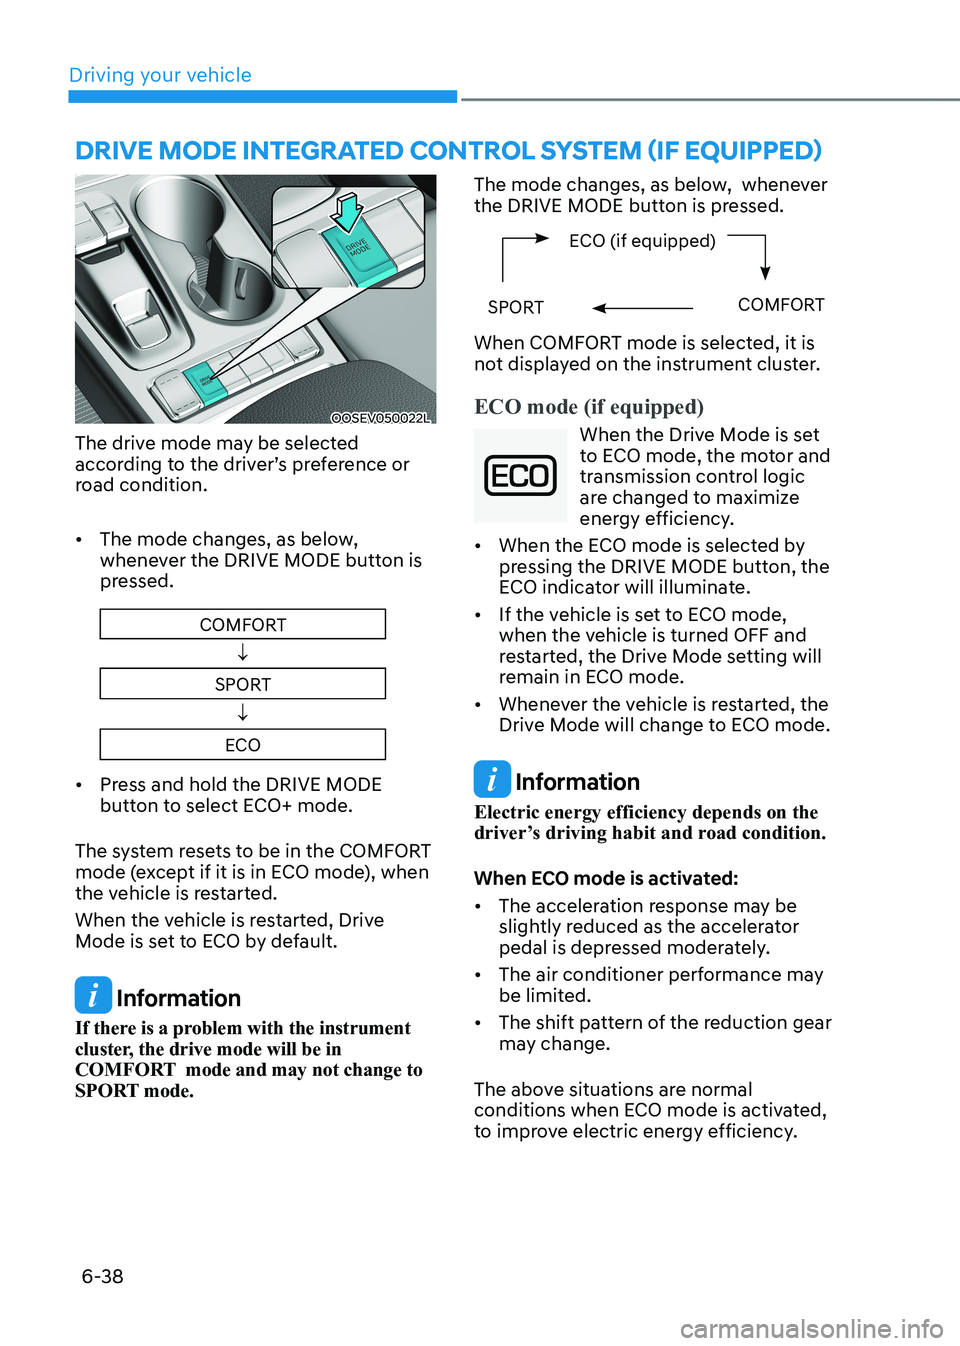
OOSEV050022L
The drive mode may be selected
according to the driver’s preference or
road condition. • The mode changes, as below,
whenever the DRIVE MODE button is
pressed.
COMFORT
↓
SPORT ↓
ECO
• Press and hold the DRIVE MODE
button to select ECO+ mode.
The system resets to be in the COMFORT
mode (except if it is in ECO mode), when
the vehicle is restarted.
When the vehicle is restarted, Drive
Mode is set to ECO by default.
Information
If there is a problem with the instrument
cluster, the drive mode will be in
COMFORT mode and may not change to
SPORT mode. The mode changes, as below, whenever
the DRIVE MODE button is pressed.
ECO (if equipped)
SPORTCOMFORT
When COMFORT mode is selected, it is
not displayed on the instrument cluster.
ECO mode (if equipped)
When the Drive Mode is set
to ECO mode, the motor and
transmission control logic
are changed to maximize
energy efficiency.
• When the ECO mode is selected by
pressing the DRIVE MODE button, the
ECO indicator will illuminate.
• If the vehicle is set to ECO mode,
when the vehicle is turned OFF and
restarted, the Drive Mode setting will
remain in ECO mode.
• Whenever the vehicle is restarted, the
Drive Mode will change to ECO mode.
Information
Electric energy efficiency depends on the
driver’s driving habit and road condition.
When ECO mode is activated: • The acceleration response may be
slightly reduced as the accelerator
pedal is depressed moderately.
• The air conditioner performance may
be limited.
• The shift pattern of the reduction gear
may change.
The above situations are normal
conditions when ECO mode is activated,
to improve electric energy efficiency.
dRIvE MOdE INTEgRATEd CONTROl SYSTEM (If EqUIPPEd)
Page 389 of 548
Driver assistance system
7-56
• The driver’s attention level is displayed
on the scale of 1 to 5. The lower the
level is, the more inattentive the driver is.
• The level decreases when the driver
does not take a break for a certain
period of time.
Taking a break
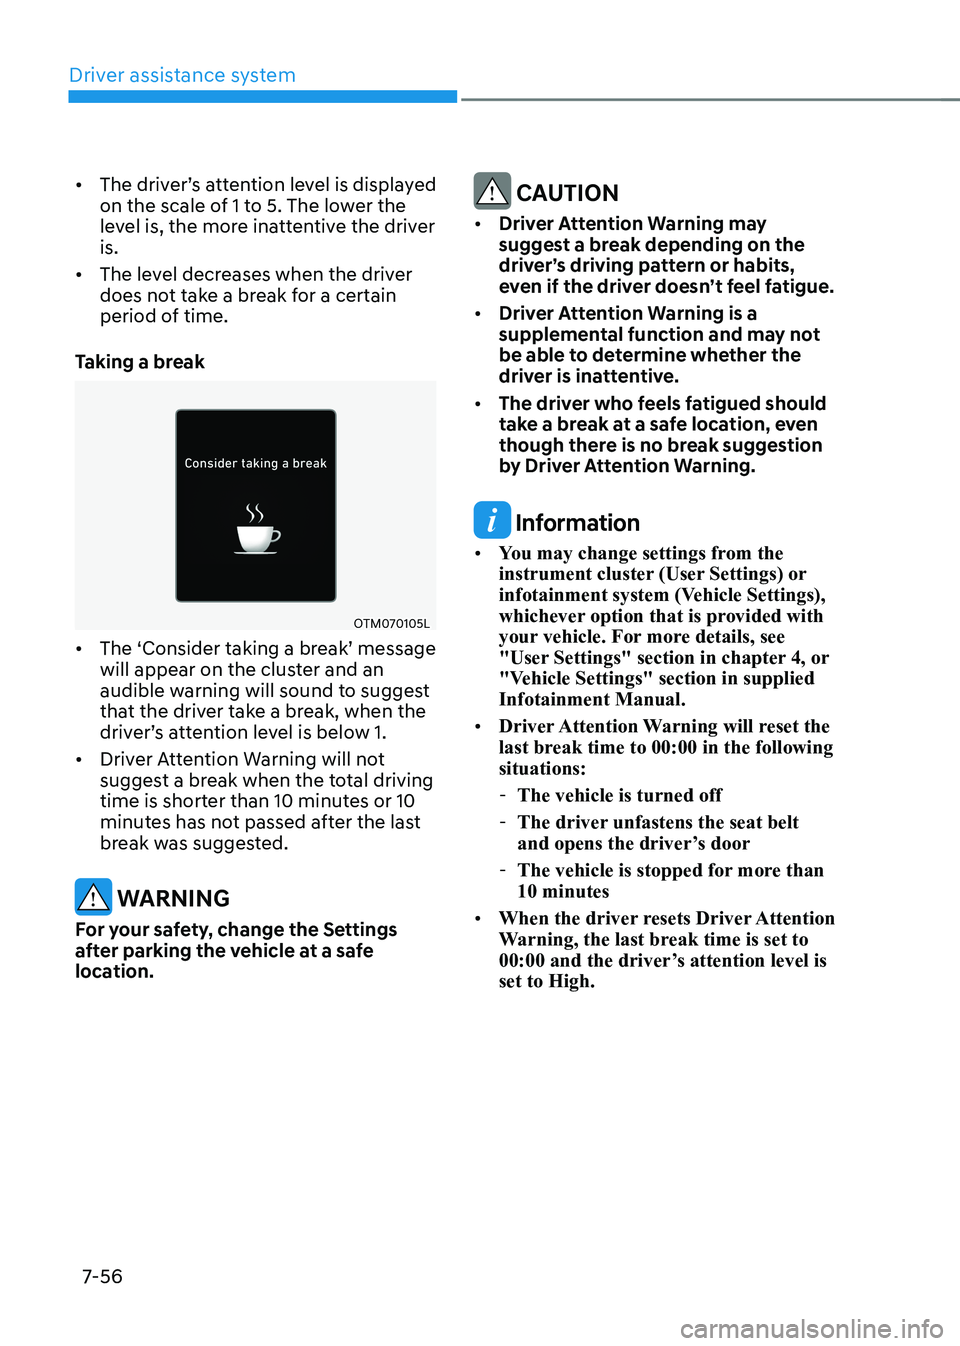
OTM070105L
• The ‘Consider taking a break’ message will appear on the cluster and an
audible warning will sound to suggest
that the driver take a break, when the
driver’s attention level is below 1.
• Driver Attention Warning will not
suggest a break when the total driving
time is shorter than 10 minutes or 10
minutes has not passed after the last
break was suggested.
warning
For your safety, change the Settings
after parking the vehicle at a safe
location.
CAUTION
• Driver Attention Warning may
suggest a break depending on the
driver’s driving pattern or habits,
even if the driver doesn’t feel fatigue.
• Driver Attention Warning is a
supplemental function and may not
be able to determine whether the
driver is inattentive.
• The driver who feels fatigued should
take a break at a safe location, even
though there is no break suggestion
by Driver Attention Warning.
Information
• You may change settings from the
instrument cluster (User Settings) or
infotainment system (Vehicle Settings),
whichever option that is provided with
your vehicle. For more details, see
"User Settings" section in chapter 4, or
"Vehicle Settings" section in supplied Infotainment Manual.
• Driver Attention Warning will reset the
last break time to 00:00 in the following situations:
- The vehicle is turned off
- The driver unfastens the seat belt
and opens the driver’s door
- The vehicle is stopped for more than 10 minutes
• When the driver resets Driver Attention
Warning, the last break time is set to
00:00 and the driver’s attention level is set to High.
Page 395 of 548
Driver assistance system
7-62
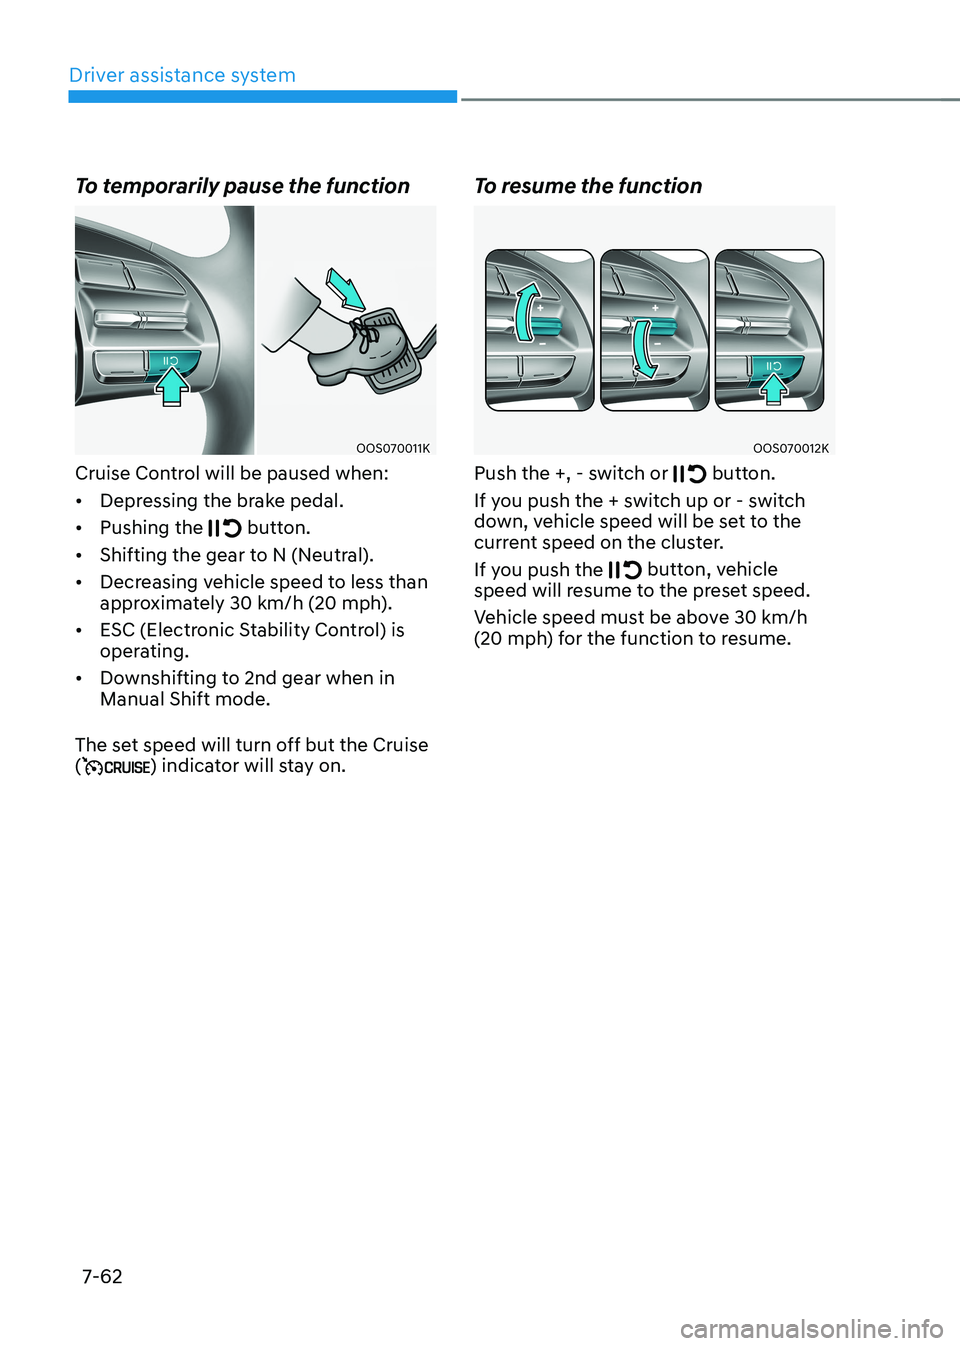
To temporarily pause the function
OOS070011K
Cruise Control will be paused when: • Depressing the brake pedal.
• Pushing the
button.
• Shifting the gear to N (Neutral).
• Decreasing vehicle speed to less than
approximately 30 km/h (20 mph).
• ESC (Electronic Stability Control) is
operating.
• Downshifting to 2nd gear when in Manual Shift mode.
The set speed will turn off but the Cruise (
) indicator will stay on. To resume the function
OOS070012K
Push the +, - switch or
button.
If you push the + switch up or - switch
down, vehicle speed will be set to the
current speed on the cluster.
If you push the
button, vehicle
speed will resume to the preset speed.
Vehicle speed must be above 30 km/h
(20 mph) for the function to resume.
Page 400 of 548
07
7-67
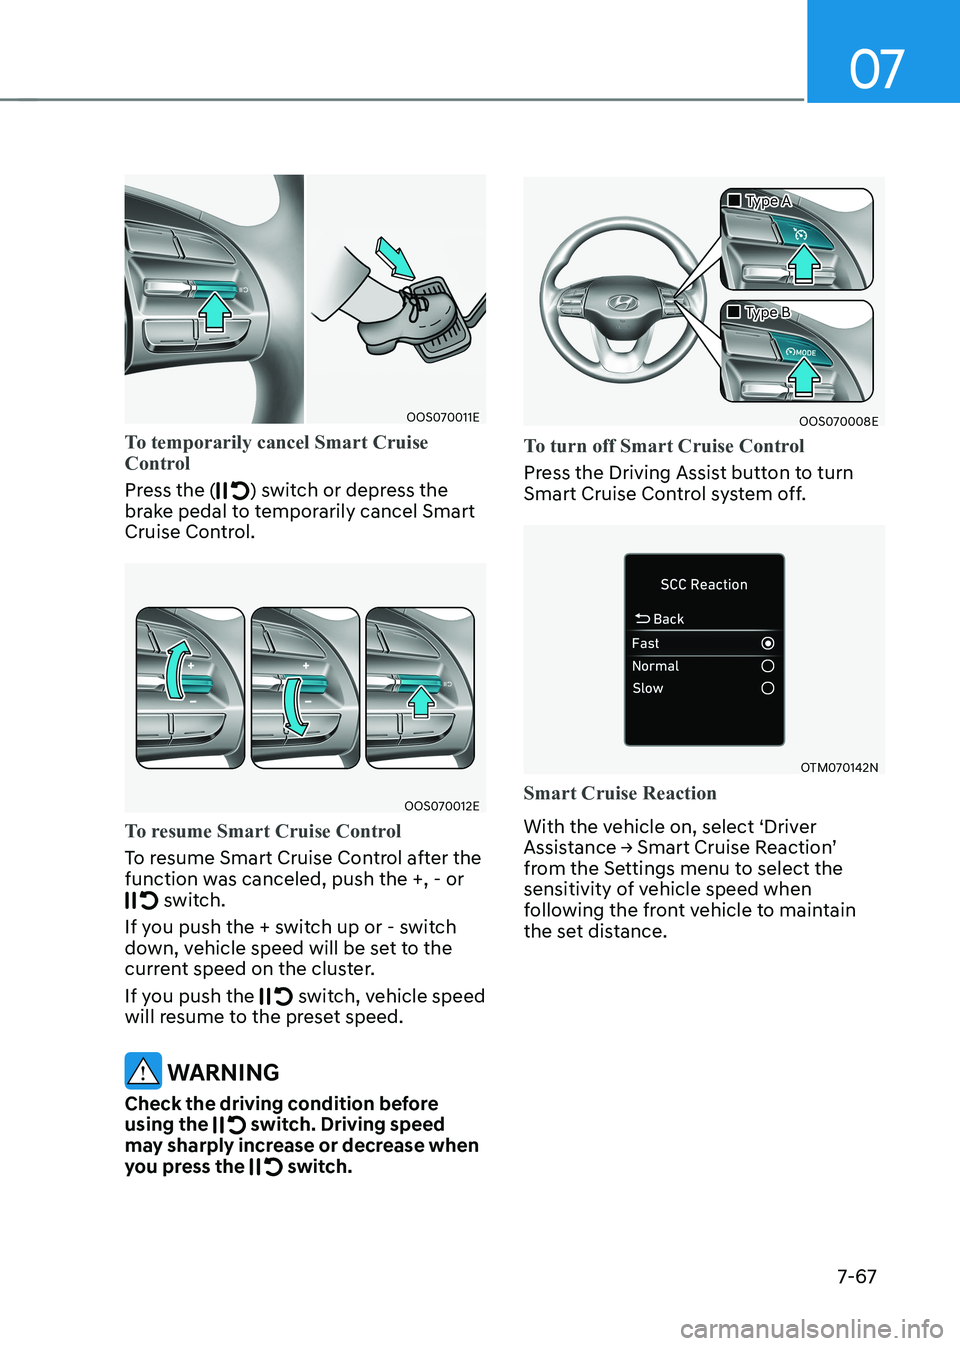
OOS070011E
To temporarily cancel Smart Cruise
Control
Press the () switch or depress the
brake pedal to temporarily cancel Smart
Cruise Control.
OOS070012E
To resume Smart Cruise Control
To resume Smart Cruise Control after the
function was canceled, push the +, - or
switch.
If you push the + switch up or - switch
down, vehicle speed will be set to the
current speed on the cluster.
If you push the
switch, vehicle speed
will resume to the preset speed.
warning
Check the driving condition before using the
switch. Driving speed
may sharply increase or decrease when
you press the
switch.
OOS070008E
„
„Type A
„
„Type B
To turn off Smart Cruise Control
Press the Driving Assist button to turn
Smart Cruise Control system off.
OTM070142N
Smart Cruise Reaction
With the vehicle on, select ‘Driver
Assistance → Smart Cruise Reaction’
from the Settings menu to select the
sensitivity of vehicle speed when
following the front vehicle to maintain
the set distance.
Page 417 of 548
Driver assistance system
7-84
•
The driver goes off course the route
set in the navigation
• The route to the destination is
changed or canceled by resetting the
navigation
• The vehicle enters a service station or
rest area
• Android Auto or Car Play is operating
• The navigation cannot detect the
current vehicle position (ex: elevated
roads including overpass adjacent to
general roads or nearby roads exist in
a parallel way)
• The navigation is being updated while driving
• The navigation is being restarted while driving
• The speed limit of some sections
changes according to the road
situations
• Driving on a road under construction
• Driving on a road that is controlled
• There is bad weather, such as heavy
rain, heavy snow, etc.
• Driving on a road that is sharply
curved
OJX1070280L
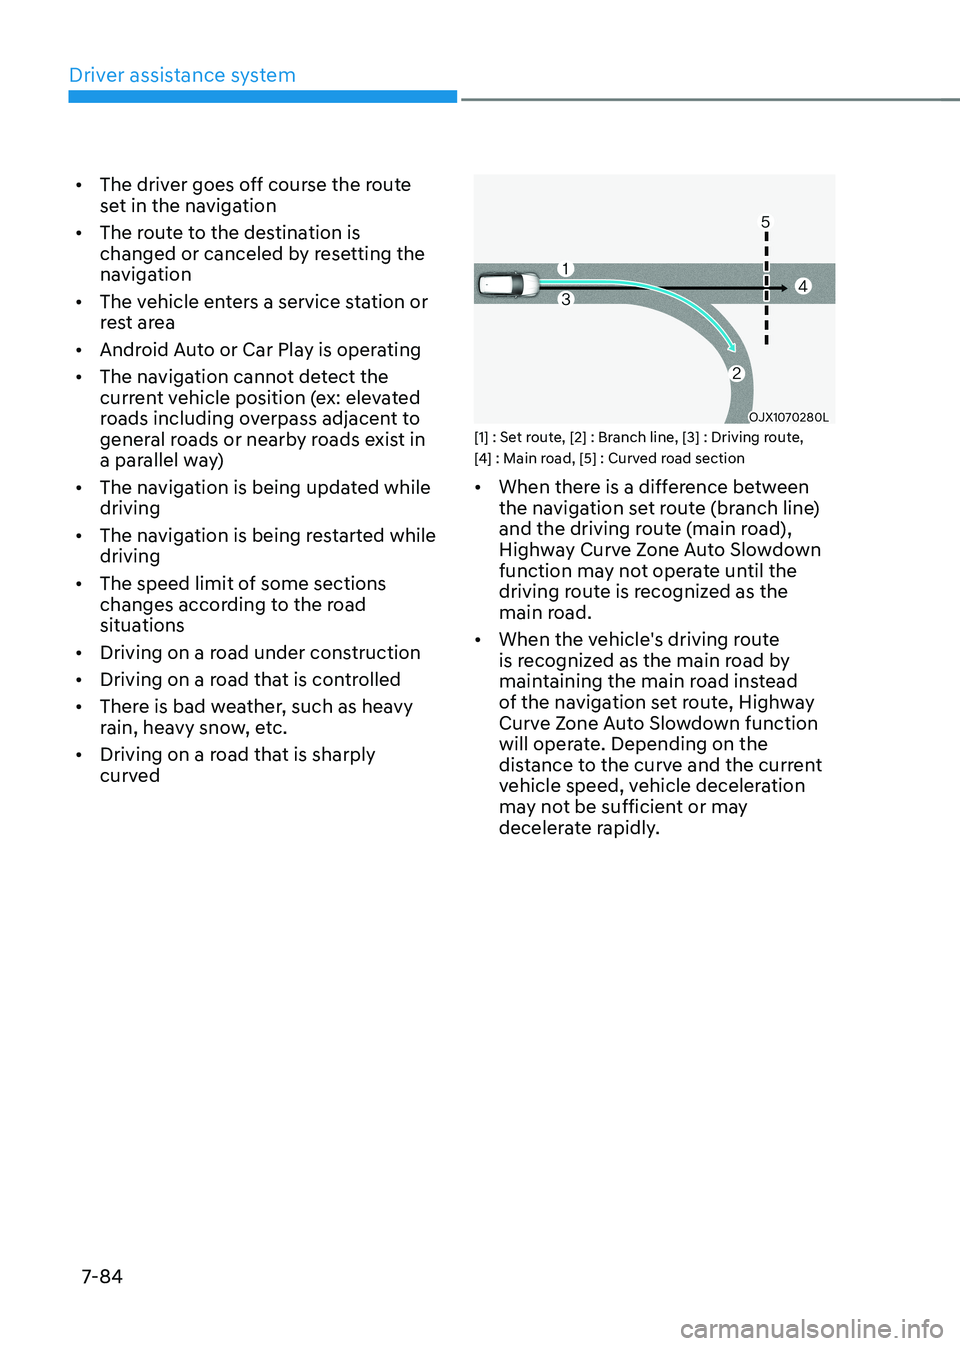
[1] : Set route, [2] : Branch line, [3] : Driving route,
[4] : Main road, [5] : Curved road section • When there is a difference between
the navigation set route (branch line)
and the driving route (main road),
Highway Curve Zone Auto Slowdown
function may not operate until the
driving route is recognized as the
main road.
• When the vehicle's driving route
is recognized as the main road by
maintaining the main road instead
of the navigation set route, Highway
Curve Zone Auto Slowdown function
will operate. Depending on the
distance to the curve and the current
vehicle speed, vehicle deceleration
may not be sufficient or may
decelerate rapidly.
Page 430 of 548
07
7-97
Limitations of Highway Driving
Assist
Highway Driving Assist and Highway
Lane Change function may not operate
normally, or may not operate under the
following circumstances: •
The map information and the
actual road is different because the
navigation is not updated
• The map information and the actual
road is different because of real-time
GPS data or map information error
• The infotainment system is overloaded
by simultaneously performing
functions such as route search, video
playback, voice recognition, etc.
• GPS signals are blocked in areas such as a tunnel
• The driver goes off course or the
route to the destination is changed or
canceled by resetting the navigation
• The vehicle enters a service station or
rest area
• Android Auto or Car Play is operating
• The navigation cannot detect the
current vehicle position (ex: elevated
roads including overpass adjacent to
general roads or nearby roads exist in
a parallel way)
• White single dotted lane line or road
edge cannot be detected
• The road is temporarily controlled due
to construction, etc.
• There is no structure, such as a
medium strip, guardrails, etc., on the
road
• There is a changeable lane in the
direction of lane change
Information
For more details on the limitations of
the front view camera, front radar, front
corner radar and rear corner radar, refer
to “Forward Collision-Avoidance Assist
(FCA)” section in this chapter.
Information
This device complies with Industry Canada RSS-210 standard.
Operation is subject to the following three conditions: 1. This device may not cause harmful
interference, and
2. This device must accept any
interference received, including
interference that may cause undesired operation.
3. Changes or modifications not expressly
approved by the party responsible
for compliance could void the user's authority to operate the device.
Information
Radio frequency radiation exposure information: This equipment complies with RSS- 210
radiation exposure limits set forth for an
uncontrolled environment. This equipment should be installed and operated with minimum distance of 20cm
(8 in.) between the radiator (antenna) and
your body.
This transmitter must not be co-located or
operating in conjunction with any other
antenna or transmitter.
Page 477 of 548
9
9. Maintenance
Motor compartment ......................................................................................... 9-3
Maintenance services ....................................................................................... 9-4
Owner’s responsibility ................................................................................................ 9-4
Owner maintenance precautions............................................................................... 9-4
Owner maintenance ......................................................................................... 9-5
Owner maintenance schedule .................................................................................... 9-5
Scheduled maintenance services ..................................................................... 9 -7
Maintenance Schedule ................................................................................................ 9 -7
Explanation of scheduled maintenance items ...............................................9-9
Cooling system ............................................................................................................ 9-9
Coolant ......................................................................................................................... 9-9
Reduction gear fluid.................................................................................................... 9-9
Brake hoses and lines.................................................................................................. 9-9Brake fluid ................................................................................................................... 9-9
Brake pads, calipers and rotors .................................................................................. 9-9
Suspension mounting bolts ........................................................................................ 9-9
Drive shafts and boots ................................................................................................ 9-9
Air conditioning refrigerant/compressor................................................................... 9-9
Coolant ............................................................................................................. 9-10
Brake fluid ......................................................................................................... 9-11
Checking the brake fluid level .................................................................................... 9-11
Washer fluid ..................................................................................................... 9-12
Checking the washer fluid level ................................................................................ 9-12
Climate control air filter................................................................................... 9-13
Filter inspection ............................................................................................... 9-13
Filter replacement ...................................................................................................... 9-13
Wiper blades .................................................................................................... 9-14
Blade inspection ......................................................................................................... 9-14
Blade replacement ................................................................................................... 9-14
Battery (12 Volt) ................................................................................................ 9-17
Battery usage.............................................................................................................. 9-18 Battery capacity label ................................................................................................ 9-18
Battery recharging ..................................................................................................... 9-18
Reset items ................................................................................................................. 9-19
Page 495 of 548
09
9-19
• Wear eye protection when checking
the battery during charging.
• The battery must be removed from
the vehicle and placed in a well
ventilated area.
• Watch the battery during charging,
and stop or reduce the charging
rate if the battery cells begin boiling
violently.
• The negative battery cable must
be removed first and installed last
when the battery is disconnected.
Disconnect the battery charger in the
following order:
(1) Turn off the battery charger main
switch.
(2) Unhook the negative clamp from the negative battery terminal.
(3) Unhook the positive clamp from the positive battery terminal.
• Always use a genuine HYUNDAI
approved battery or the equivalent
specified for your vehicle when you
replace the battery. By jump starting
After a jump start from a good battery,
drive the vehicle for 20-30 minutes
before it is shutoff. The vehicle may
not restart if you shut it off before the
battery had a chance to adequately
recharge. See “Jump Starting” in chapter
8 for more information on jump starting
procedures.
Information
An inappropriately disposed of battery can be harmful to the
environment and human health.
Dispose of the battery according to your
local law(s) or regulations.
Reset items
The following items may need to be reset
after the battery has been discharged or
the battery has been disconnected. • Auto up/down window
• Sunroof
• Trip computer
• Climate control system
• Clock
• Audio system