2023 HYUNDAI KONA EV headlamp
[x] Cancel search: headlampPage 179 of 548
Instrument cluster
4-36
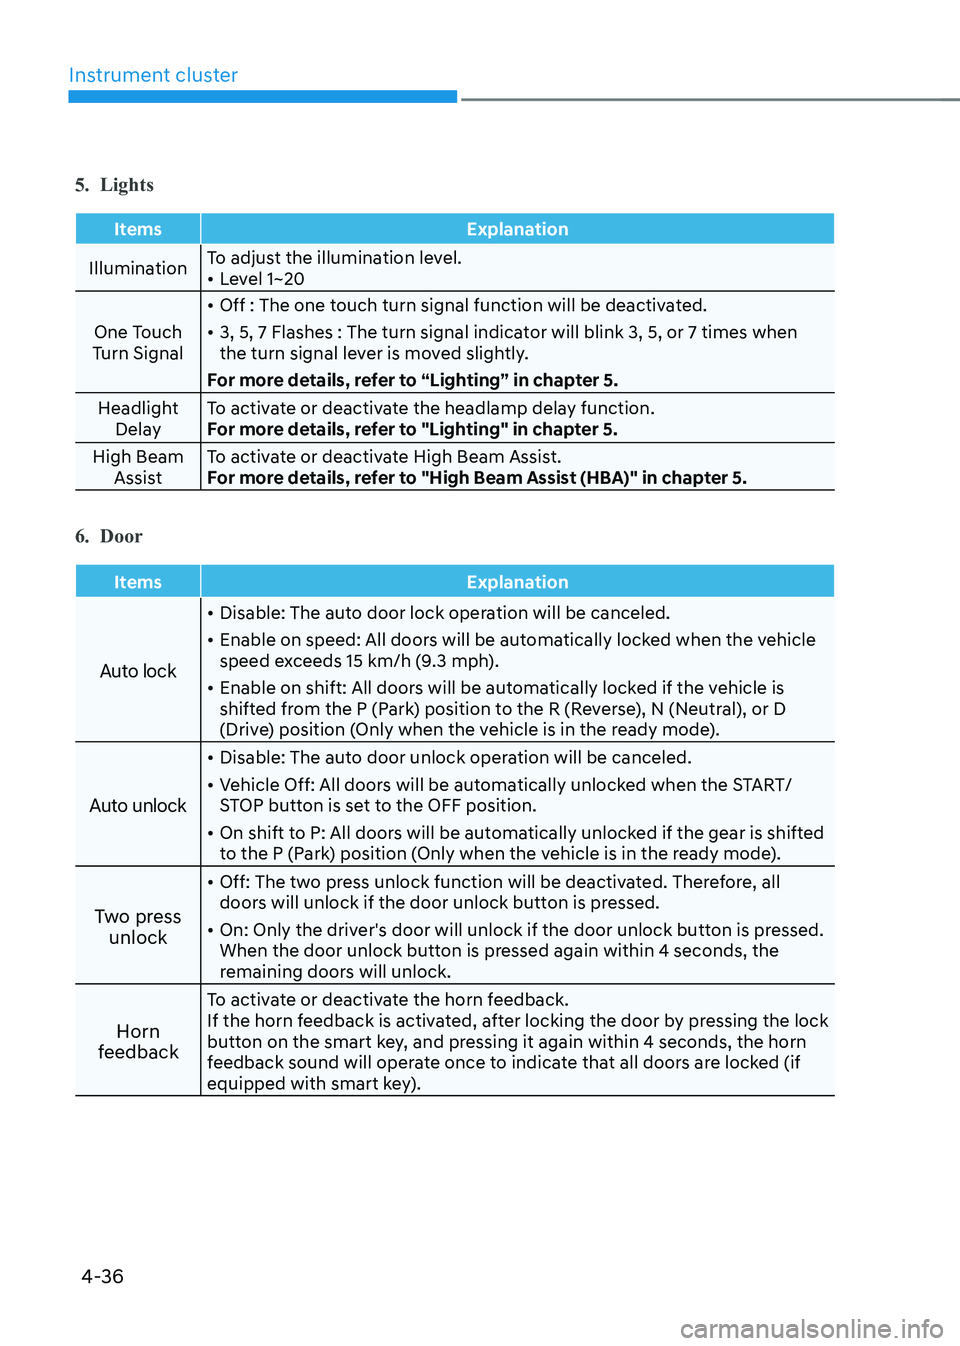
5. Lights
Items Explanation
IlluminationTo adjust the illumination level. •
Level 1~20
One Touch
Turn Signal •
Off : The one touch turn signal function will be deactivated.
• 3, 5, 7 Flashes : The turn signal indicator will blink 3, 5, or 7 times when
the turn signal lever is moved slightly.
For more details, refer to “Lighting” in chapter 5.
Headlight Delay To activate or deactivate the headlamp delay function.
For more details, refer to "Lighting" in chapter 5.
High Beam Assist To activate or deactivate High Beam Assist.
For more details, refer to "High Beam Assist (HBA)" in chapter 5.
6. Door
Items Explanation
Auto lock
•
Disable: The auto door lock operation will be canceled.
• Enable on speed: All doors will be automatically locked when the vehicle
speed exceeds 15 km/h (9.3 mph).
• Enable on shift: All doors will be automatically locked if the vehicle is
shifted from the P (Park) position to the R (Reverse), N (Neutral), or D
(Drive) position (Only when the vehicle is in the ready mode).
Auto unlock
• Disable: The auto door unlock operation will be canceled.
• Vehicle Off: All doors will be automatically unlocked when the START/
STOP button is set to the OFF position.
• On shift to P: All doors will be automatically unlocked if the gear is shifted
to the P (Park) position (Only when the vehicle is in the ready mode).
Two press unlock •
Off: The two press unlock function will be deactivated. Therefore, all
doors will unlock if the door unlock button is pressed.
• On: Only the driver's door will unlock if the door unlock button is pressed.
When the door unlock button is pressed again within 4 seconds, the
remaining doors will unlock.
Horn
feedback To activate or deactivate the horn feedback.
If the horn feedback is activated, after locking the door by pressing the lock
button on the smart key, and pressing it again within 4 seconds, the horn
feedback sound will operate once to indicate that all doors are locked (if
equipped with smart key).
Page 203 of 548
05
5-19
mirrors
Inside rearview mirror
Before you start driving, adjust the
rearview mirror to the center on the view
through the rear window.
WARNING
Make sure your line of sight is not
obstructed. Do not place objects in the
rear seat, cargo area, or behind the rear
headrests which could interfere with
your vision through the rear window.
WARNING
To prevent serious injury during an
accident or deployment of the air bag,
do not modify the rearview mirror and
do not install a wide mirror.
WARNING
NEVER adjust the mirror while driving.
This may cause loss of vehicle control
resulting in an accident.
NOTICE
When cleaning the mirror, use a paper
towel or similar material dampened
with glass cleaner. Do not spray glass
cleaner directly on the mirror as that
may cause the liquid cleaner to enter
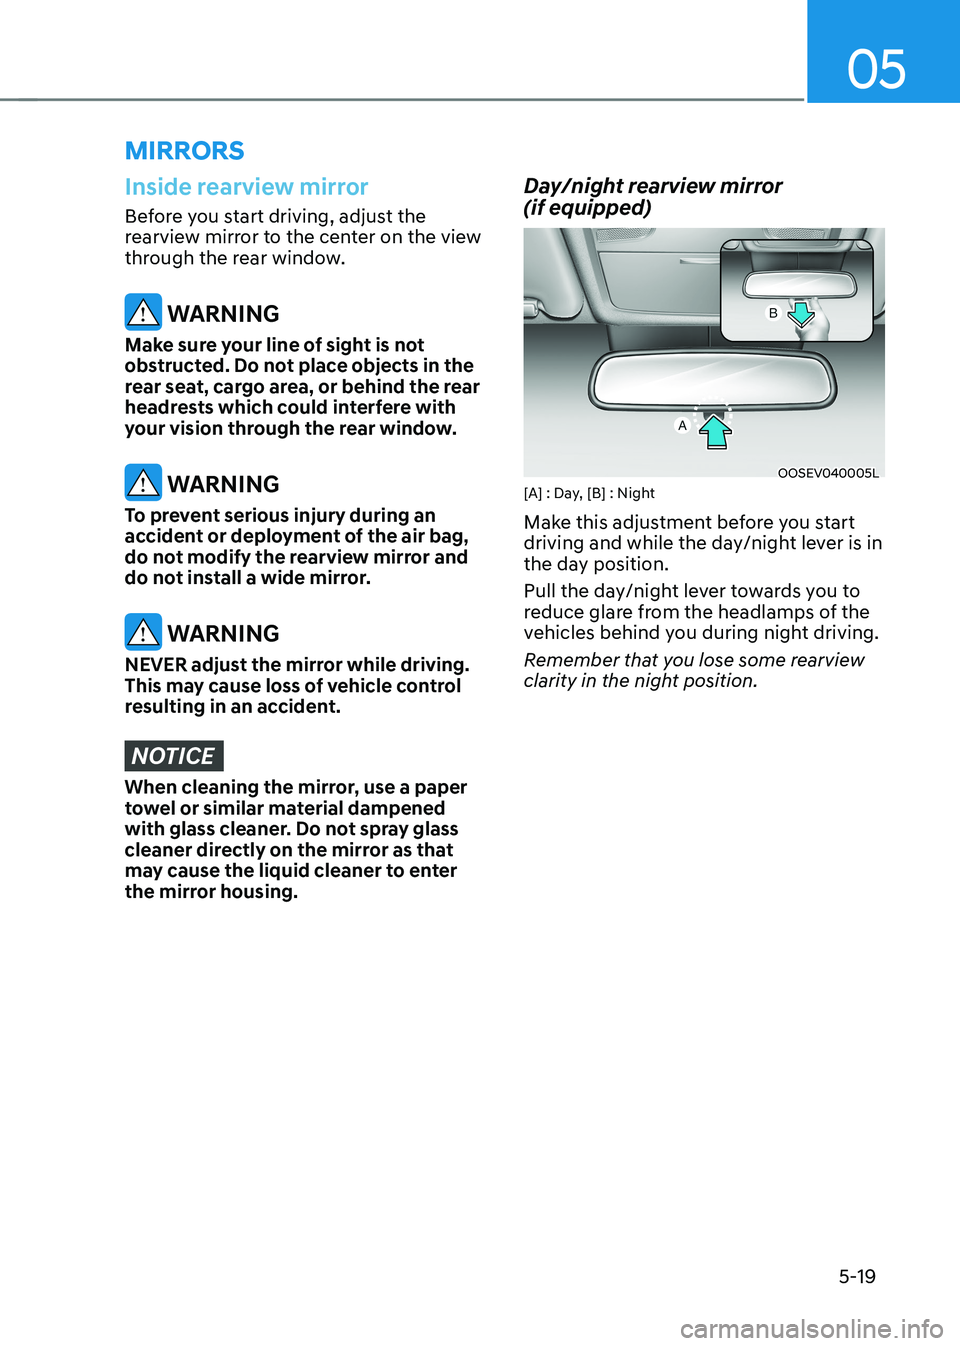
the mirror housing. Day/night rearview mirror (if equipped)
OOSEV040005L
[A] : Day, [B] : Night
Make this adjustment before you start
driving and while the day/night lever is in
the day position.
Pull the day/night lever towards you to
reduce glare from the headlamps of the
vehicles behind you during night driving.
Remember that you lose some rearview
clarity in the night position.
Page 204 of 548
![HYUNDAI KONA EV 2023 Owners Manual Convenient features
5-20
Electric Chromic Mirror (ECM) (if equipped)
OOSEV048006L
[A] : Indicator
The electric chromic rearview mirror
automatically controls the glare from
the headlamp of the v HYUNDAI KONA EV 2023 Owners Manual Convenient features
5-20
Electric Chromic Mirror (ECM) (if equipped)
OOSEV048006L
[A] : Indicator
The electric chromic rearview mirror
automatically controls the glare from
the headlamp of the v](/manual-img/35/56170/w960_56170-203.png)
Convenient features
5-20
Electric Chromic Mirror (ECM) (if equipped)
OOSEV048006L
[A] : Indicator
The electric chromic rearview mirror
automatically controls the glare from
the headlamp of the vehicle behind
you in nighttime or low light driving
conditions. When the vehicle is ON, the
glare is automatically controlled by the
sensor mounted in the rearview mirror.
The sensor detects the light level around
the vehicle, and automatically adjusts
to control the headlamp glare from
vehicles behind you. Whenever the gear
is shifted to R (Reverse), the mirror will
automatically go to the brightest setting
in order to improve the driver’s view
behind the vehicle. Electrochromic mirror (ECM) with
HomeLink® system and Genesis
Connected Service (if equipped)
Your vehicle may be equipped with
a Gentex Automatic-Dimming Mirror
with an Integrated HomeLink® Wireless
Control System.
During nighttime driving, this feature will
automatically detect and help reduce
rearview mirror glare. The HomeLink®
Universal Transceiver allows you to
activate your garage door(s), electric
gate, home lighting, etc.
OOS040477N
(1) HomeLink Channel 1
(2) HomeLink Channel 2
(3) HomeLink Channel 3
(4) Garage Door Opener Status Indicator : Closing or Closed
(5) HomeLink Operation Indicator
(6) Garage Door Opener Status Indicator : Opening or Opened
(7) HomeLink User Interface Indicator
Page 232 of 548
Convenient features
5-48
Exterior lights
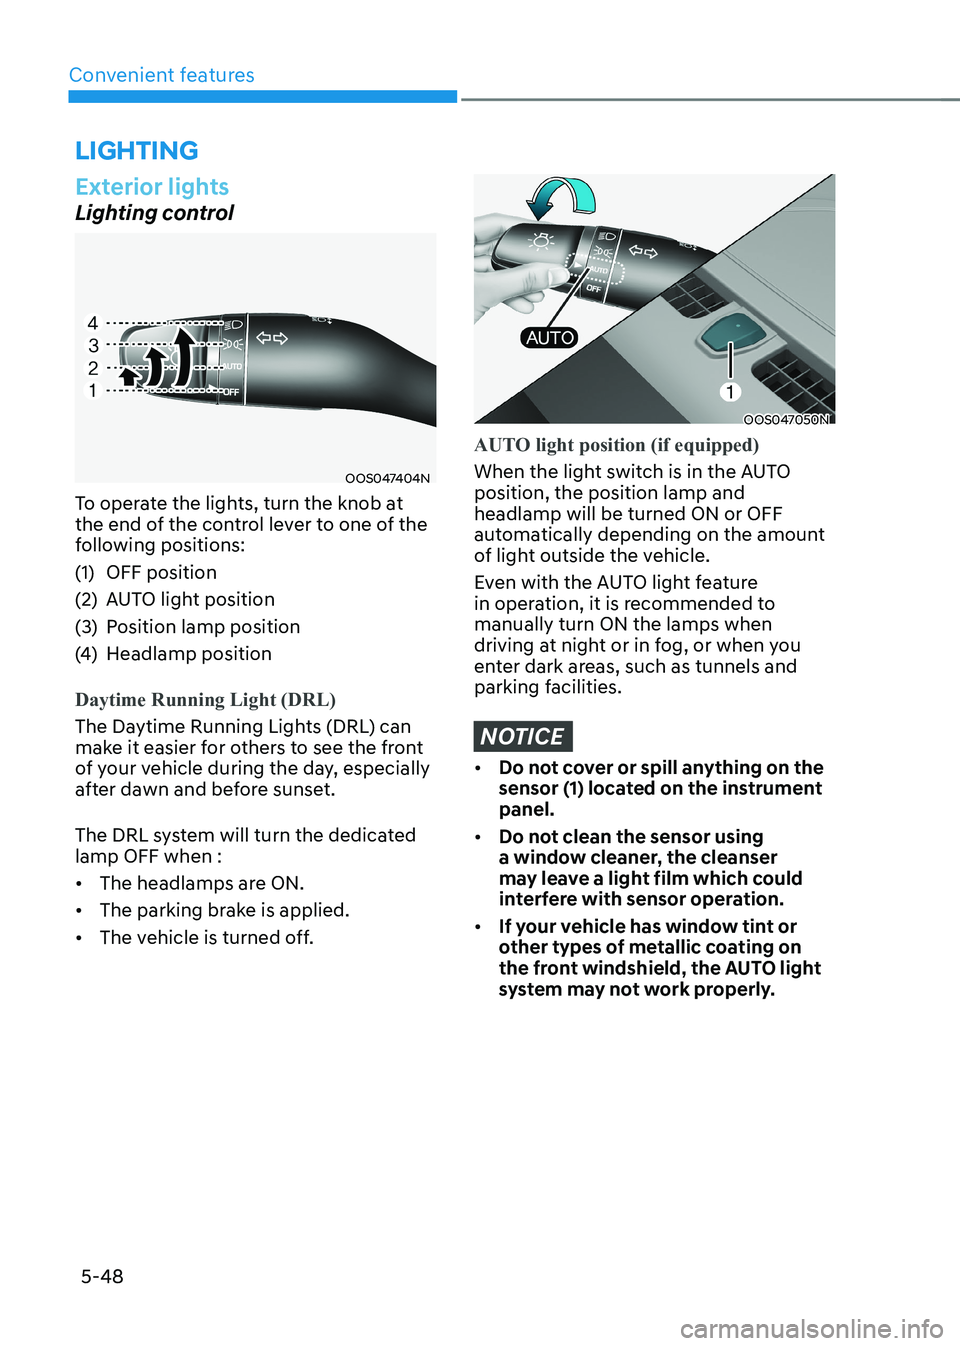
Lighting control
OOS047404N
To operate the lights, turn the knob at
the end of the control lever to one of the
following positions:
(1) OFF position
(2) AUTO light position
(3) Position lamp position
(4) Headlamp position
Daytime Running Light (DRL)
The Daytime Running Lights (DRL) can
make it easier for others to see the front
of your vehicle during the day, especially
after dawn and before sunset.
The DRL system will turn the dedicated lamp OFF when : • The headlamps are ON.
• The parking brake is applied.
• The vehicle is turned off.
OOS047050N
AUTO light position (if equipped)
When the light switch is in the AUTO position, the position lamp and headlamp will be turned ON or OFF
automatically depending on the amount
of light outside the vehicle.
Even with the AUTO light feature
in operation, it is recommended to manually turn ON the lamps when
driving at night or in fog, or when you
enter dark areas, such as tunnels and
parking facilities.
NOTICE
• Do not cover or spill anything on the
sensor (1) located on the instrument panel.
• Do not clean the sensor using
a window cleaner, the cleanser
may leave a light film which could
interfere with sensor operation.
• If your vehicle has window tint or
other types of metallic coating on
the front windshield, the AUTO light
system may not work properly.
lighting
Page 233 of 548
05
5-49
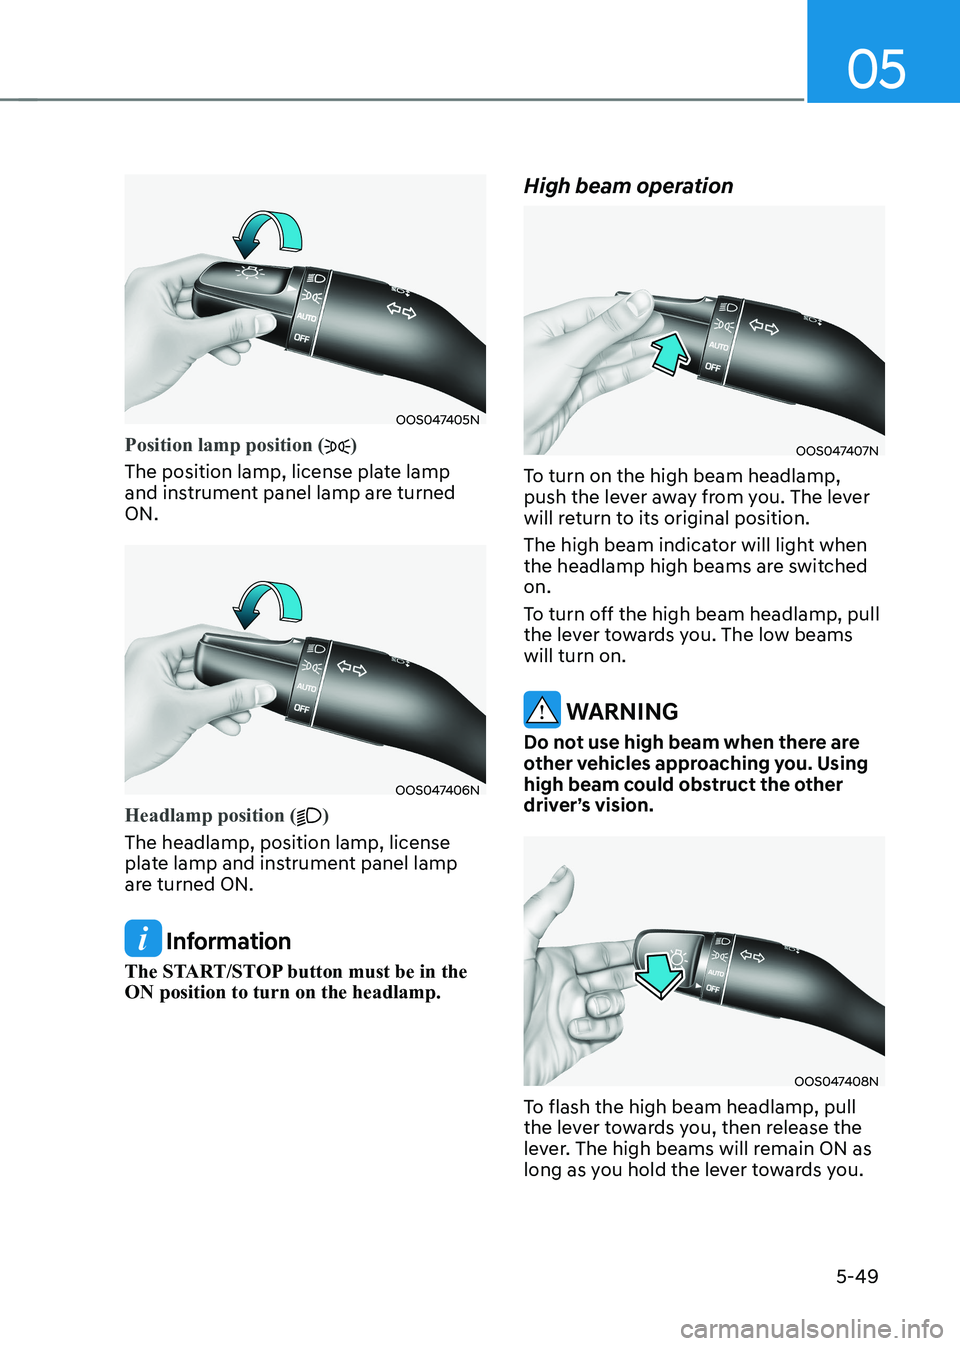
OOS047405N
Position lamp position ()
The position lamp, license plate lamp
and instrument panel lamp are turned ON.
OOS047406N
Headlamp position ()
The headlamp, position lamp, license
plate lamp and instrument panel lamp
are turned ON.
Information
The START/STOP button must be in the ON position to turn on the headlamp. High beam operation
OOS047407N
To turn on the high beam headlamp,
push the lever away from you. The lever
will return to its original position.
The high beam indicator will light when
the headlamp high beams are switched on.
To turn off the high beam headlamp, pull
the lever towards you. The low beams will turn on.
WARNING
Do not use high beam when there are
other vehicles approaching you. Using
high beam could obstruct the other
driver’s vision.
OOS047408N
To flash the high beam headlamp, pull
the lever towards you, then release the
lever. The high beams will remain ON as
long as you hold the lever towards you.
Page 235 of 548
05
5-51
Headlamp delay function (if equipped)
If you place the START/STOP button
to the ACC or OFF position with the
headlamps ON, the headlamps (and/or
position lamps) remain on for about 5
minutes. However, with the vehicle off if
the driver’s door is opened and closed,
the headlamps (and/or position lamps)
are turned off after 15 seconds.
The headlamps (and/or position lamps)
can be turned off by pressing the lock
button on the smart key twice or turning
the light switch to the OFF or AUTO
position. However, if you turn the light
switch to the AUTO position when it is
dark outside, the headlamps will not be
turned off.
You can activate or deactivate the
Headlamp Delay function from the User
Settings mode on the LCD display. For
more details, refer to “LCD Display” in
chapter 4.
NOTICE
If the driver gets out of the vehicle
through other doors (except driver’s
door), the battery saver function
does not operate and the headlamp
delay function does not turn off
automatically. Therefore, It causes the
battery to be discharged. In this case,
make sure to turn off the headlamps
before getting out of the vehicle.
Welcome system (if equipped)
Headlamp and position lamp
When the headlamp (lamp switch in the
headlamp or AUTO position) is on and
all doors (and tailgate) are locked and closed, the position lamp and headlamp
will come on for 15 seconds when the
door unlock button is pressed on the
smart key.
At this time, if you press the door lock
or unlock button, the position lamp and
headlamp will turn off immediately
Interior lamp
When the interior lamp switch is in
the DOOR position and all doors (and
tailgate) are closed and locked, the room
lamp will come on for 30 seconds if any
of the below is performed. • When the door unlock button is
pressed on the smart key.
• When the button of the outside door
handle is pressed with the smart key in possession.
At this time, if you press the door lock or
unlock button, the room lamp will turn
off immediately.
Page 239 of 548
05
5-55
OPDE046057
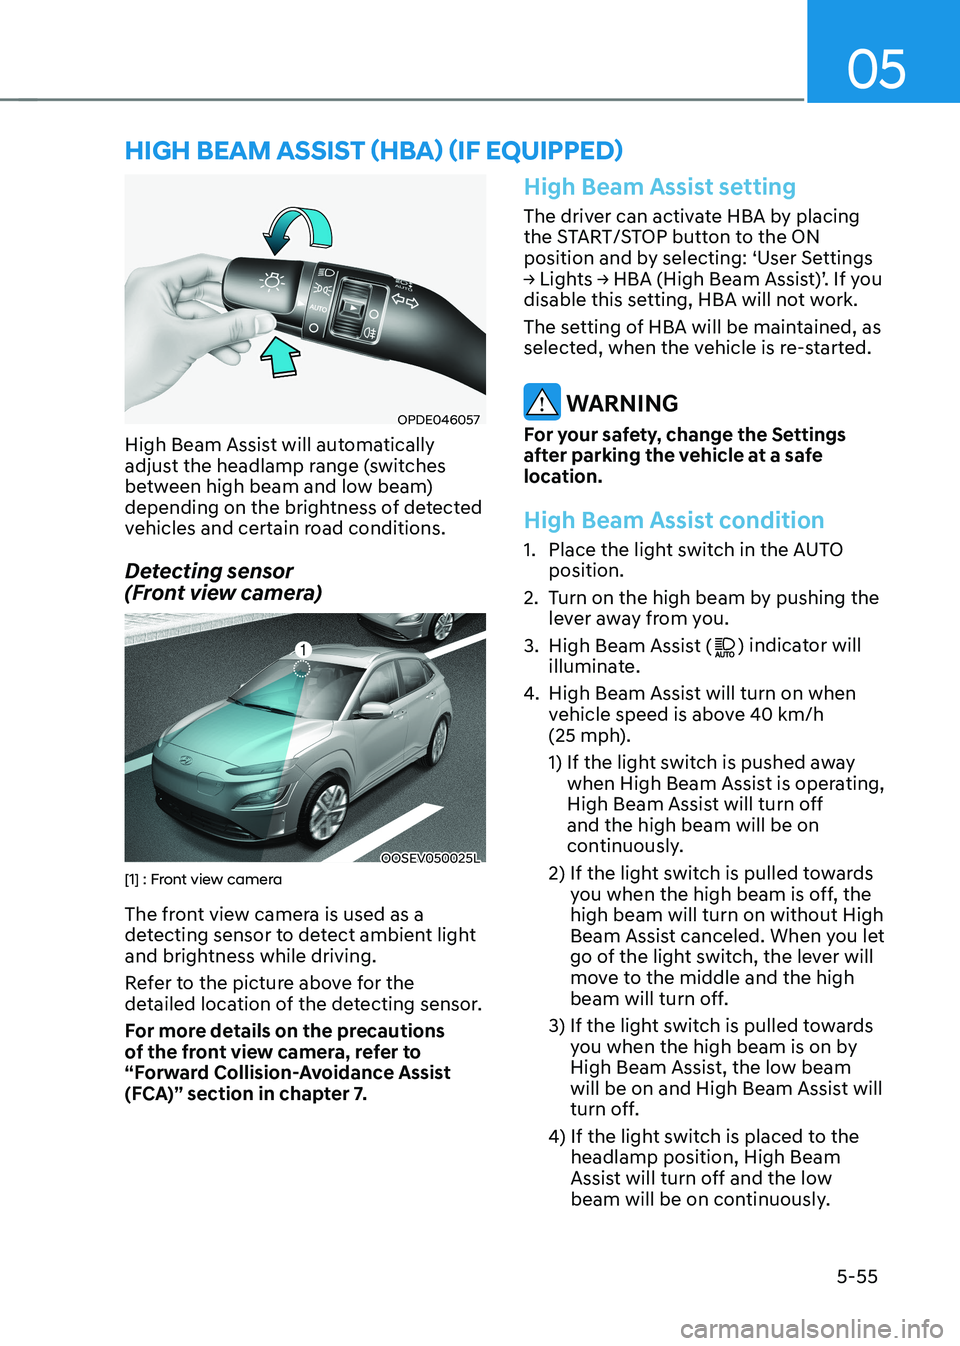
High Beam Assist will automatically
adjust the headlamp range (switches
between high beam and low beam)
depending on the brightness of detected
vehicles and certain road conditions.
Detecting sensor
(Front view camera)
OOSEV050025L[1] : Front view camera
The front view camera is used as a
detecting sensor to detect ambient light
and brightness while driving.
Refer to the picture above for the
detailed location of the detecting sensor.
For more details on the precautions
of the front view camera, refer to
“Forward Collision-Avoidance Assist
(FCA)” section in chapter 7.
High Beam Assist setting
The driver can activate HBA by placing
the START/STOP button to the ON
position and by selecting: ‘User Settings
→ Lights → HBA (High Beam Assist)’. If you
disable this setting, HBA will not work.
The setting of HBA will be maintained, as
selected, when the vehicle is re-started.
WARNING
For your safety, change the Settings
after parking the vehicle at a safe
location.
High Beam Assist condition
1. Place the light switch in the AUTO position.
2. Turn on the high beam by pushing the lever away from you.
3. High Beam Assist (
) indicator will
illuminate.
4. High Beam Assist will turn on when
vehicle speed is above 40 km/h
(25 mph).
1) If the light switch is pushed away
when High Beam Assist is operating,
High Beam Assist will turn off and the high beam will be on
continuously.
2) If the light switch is pulled towards you when the high beam is off, the high beam will turn on without High
Beam Assist canceled. When you let
go of the light switch, the lever will
move to the middle and the high
beam will turn off.
3) If the light switch is pulled towards you when the high beam is on by
High Beam Assist, the low beam
will be on and High Beam Assist will
turn off.
4) If the light switch is placed to the headlamp position, High Beam
Assist will turn off and the low
beam will be on continuously.
high Beam assisT (hBa) (if equipped)
Page 240 of 548
Convenient features
5-56
When High Beam Assist is operating, the
high beam switches to low beam in the
following conditions.
- When the headlamp of an on-coming vehicle is detected.
- When the tail lamp of a vehicle in front
is detected.
- When headlamp/tail lamp of bicycle/ motorcycle is detected.
- When the surroundings are bright enough high beams are not needed.
- When street lights or other lights are detected.
- When the light switch is not in the AUTO position.
- When High Beam Assist is off.
- When vehicle speed is below 25 km/h (15 mph).
High Beam Assist Malfunction
and Limitations
High Beam Assist malfunction
OOS047127L
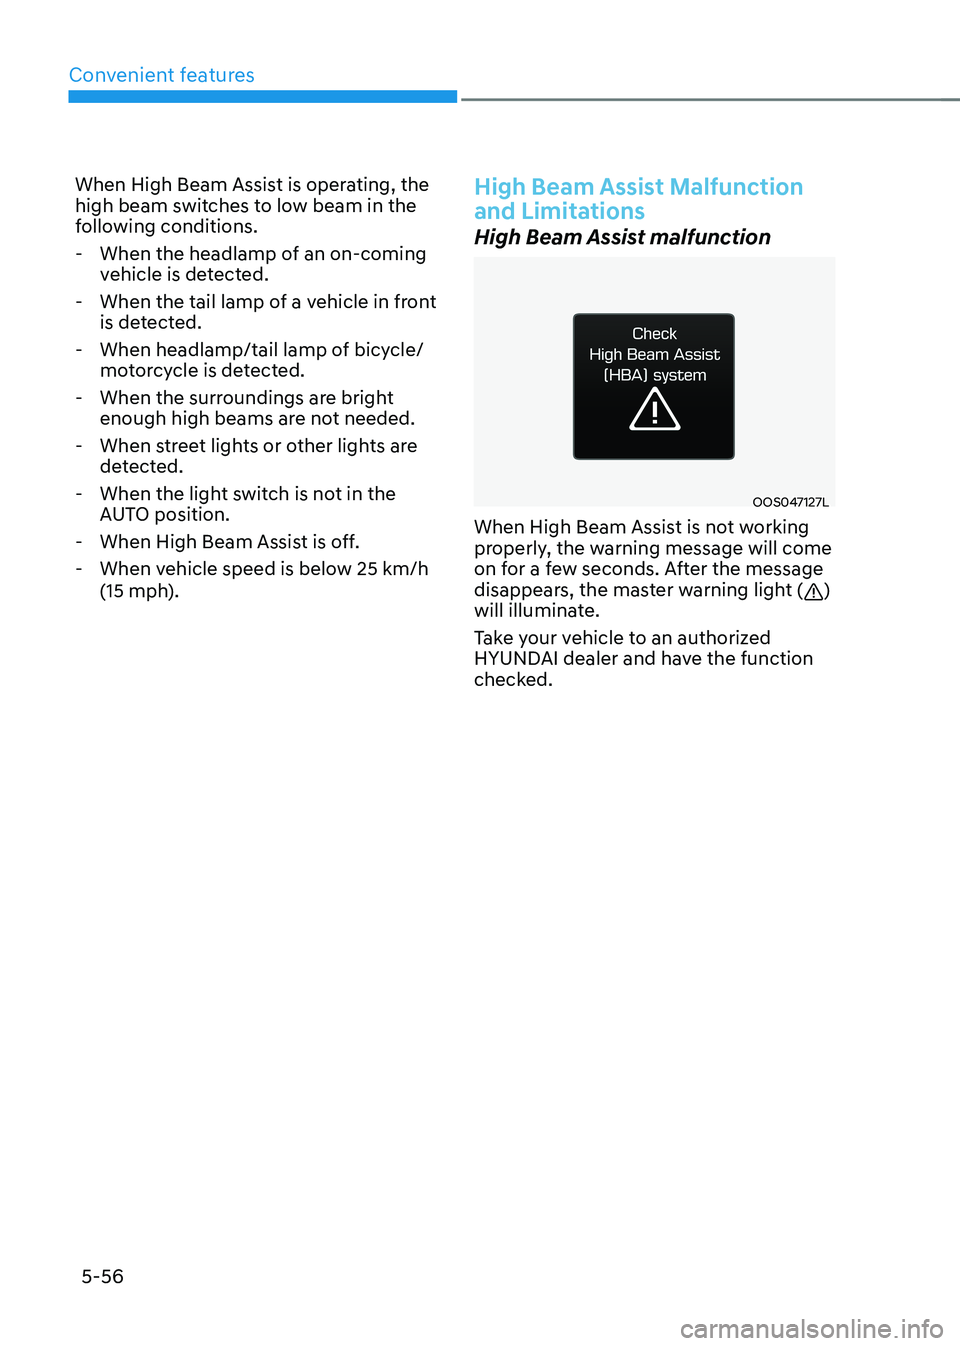
When High Beam Assist is not working
properly, the warning message will come
on for a few seconds. After the message
disappears, the master warning light (
)
will illuminate.
Take your vehicle to an authorized
HYUNDAI dealer and have the function
checked.