2023 HYUNDAI IONIQ 5 change time
[x] Cancel search: change timePage 514 of 680

Driver Assistance System
7-112
•
If the vehicle is driven at high speed
above a certain speed at a curve,
your vehicle may drive to one side or
may depart from the driving lane.
• When you are towing a trailer or
another vehicle, turn off Highway
Driving Assist for safety reasons.
• The hands–off warning message
may appear early or late depending
on how the steering wheel is held or
road conditions. Always have your
hands on the steering wheel while driving.
• For your safety, please read the
owner's manual before using the
Highway Driving Assist.
• Highway Driving Assist will not
operate when the vehicle is started,
or when the detecting sensors or
navigation is being initialized.
Limitations of Highway Driving
Assist
Highway Driving Assist and Highway
Lane Change function may not operate
properly, or may not operate under the
following circumstances: • The map information and the
actual road is different because the
navigation is not updated
• The map information and the actual
road is different because of real-time
GPS data or map information error
• The infotainment system is overloaded
by simultaneously performing
functions such as route search, video
playback, voice recognition, etc. •
GPS signals are blocked in areas such as a tunnel
• The driver goes off course or the
route to the destination is changed or
canceled by resetting the navigation
• The vehicle enters a service station or
rest area
• Android Auto or Car Play is operating
• The navigation cannot detect the
current vehicle position (for example,
elevated roads including overpass
adjacent to general roads or nearby
roads exist in a parallel way)
• White single dotted lane line or road
edge cannot be detected
• The road is temporarily controlled due
to construction, etc.
• There is no structure, such as a
medium strip, guardrails, etc., on the
road
• There is a changeable lane in the
direction of lane change
Information
For more details on the limitations of
the front view camera, front radar, front
corner radar and rear corner radar, refer
to “Forward Collision-Avoidance Assist
(FCA)” section in this chapter.
Page 525 of 680
07
7-123
Rear Cross-Traffic Collision-
Avoidance Assist Settings
Setting features
ONE1071215L
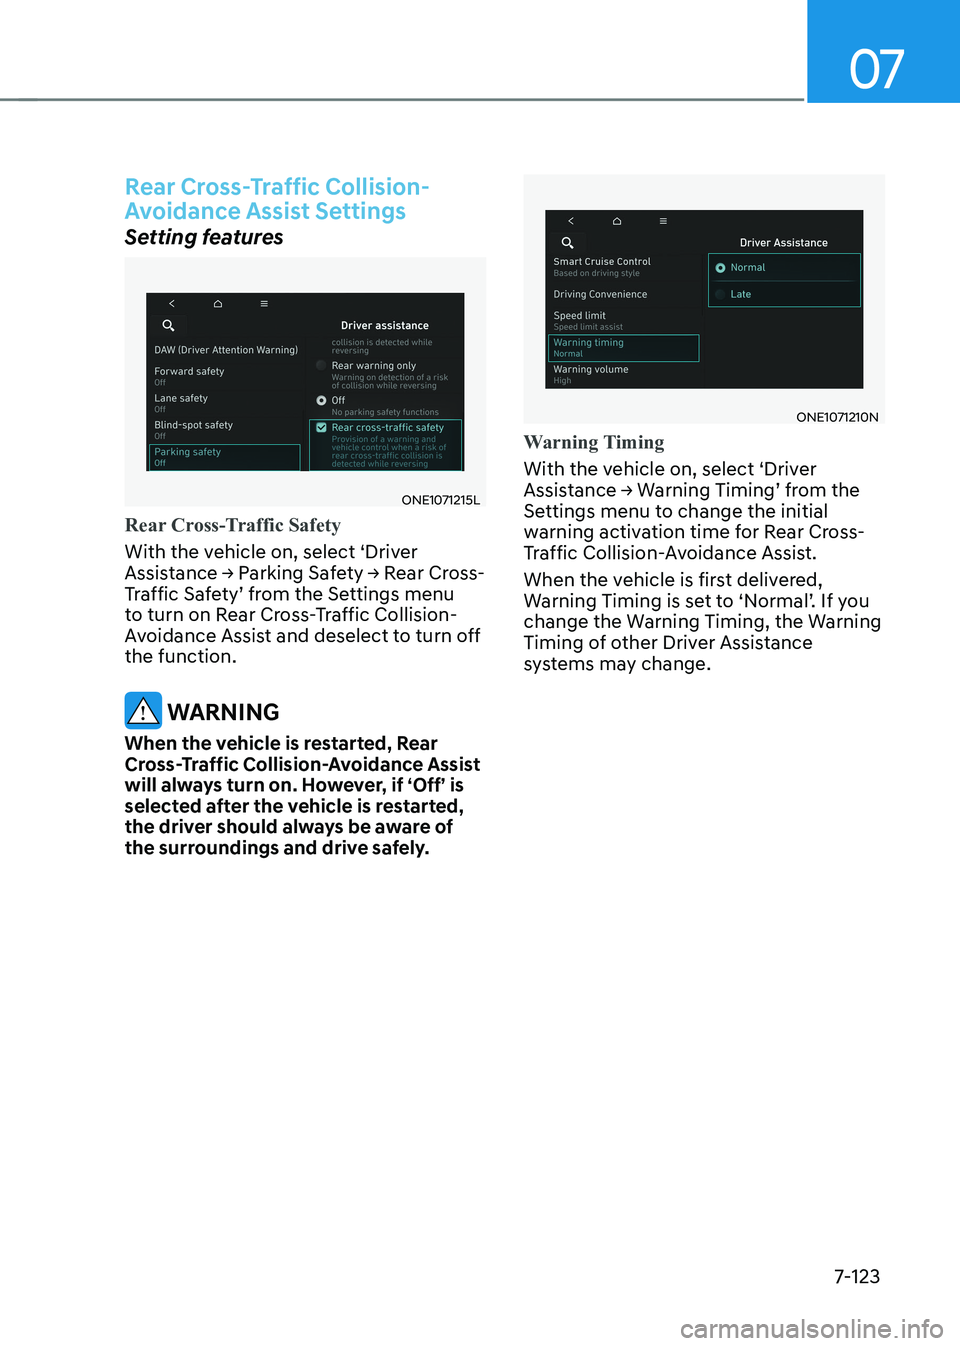
Rear Cross-Traffic Safety
With the vehicle on, select ‘Driver
Assistance → Parking Safety → Rear Cross-
Traffic Safety’ from the Settings menu
to turn on Rear Cross-Traffic Collision-
Avoidance Assist and deselect to turn off the function.
WARNING
When the vehicle is restarted, Rear
Cross-Traffic Collision-Avoidance Assist
will always turn on. However, if ‘Off’ is
selected after the vehicle is restarted,
the driver should always be aware of
the surroundings and drive safely.
ONE1071210N
Warning Timing
With the vehicle on, select ‘Driver
Assistance → Warning Timing’ from the
Settings menu to change the initial
warning activation time for Rear Cross-
Traffic Collision-Avoidance Assist.
When the vehicle is first delivered,
Warning Timing is set to ‘Normal’. If you
change the Warning Timing, the Warning
Timing of other Driver Assistance
systems may change.
Page 526 of 680
Driver Assistance System
7-124
ONE1071202N
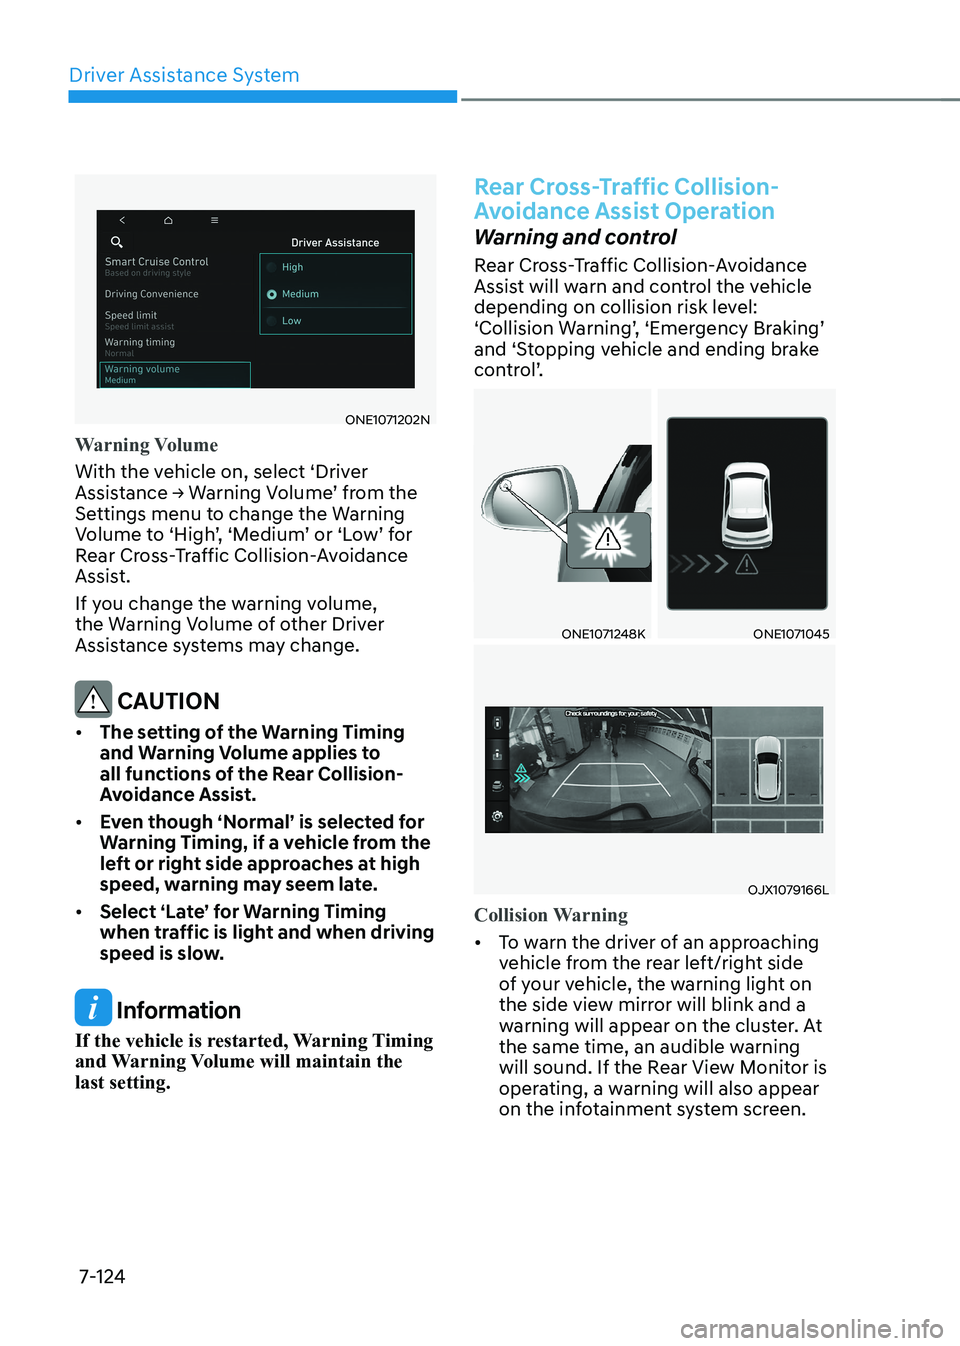
Warning Volume
With the vehicle on, select ‘Driver
Assistance → Warning Volume’ from the
Settings menu to change the Warning
Volume to ‘High’, ‘Medium’ or ‘Low’ for
Rear Cross-Traffic Collision-Avoidance
Assist.
If you change the warning volume,
the Warning Volume of other Driver
Assistance systems may change.
CAUTION
• The setting of the Warning Timing
and Warning Volume applies to
all functions of the Rear Collision-
Avoidance Assist.
• Even though ‘Normal’ is selected for
Warning Timing, if a vehicle from the
left or right side approaches at high
speed, warning may seem late.
• Select ‘Late’ for Warning Timing
when traffic is light and when driving
speed is slow.
Information
If the vehicle is restarted, Warning Timing
and Warning Volume will maintain the last setting.
Rear Cross-Traffic Collision-
Avoidance Assist Operation
Warning and control
Rear Cross-Traffic Collision-Avoidance
Assist will warn and control the vehicle
depending on collision risk level:
‘Collision Warning’, ‘Emergency Braking’
and ‘Stopping vehicle and ending brake
control’.
ONE1071248KONE1071045
OJX1079166L
Collision Warning
• To warn the driver of an approaching
vehicle from the rear left/right side
of your vehicle, the warning light on
the side view mirror will blink and a
warning will appear on the cluster. At
the same time, an audible warning
will sound. If the Rear View Monitor is
operating, a warning will also appear
on the infotainment system screen.
Page 545 of 680
07
7-143
ONE1071210N
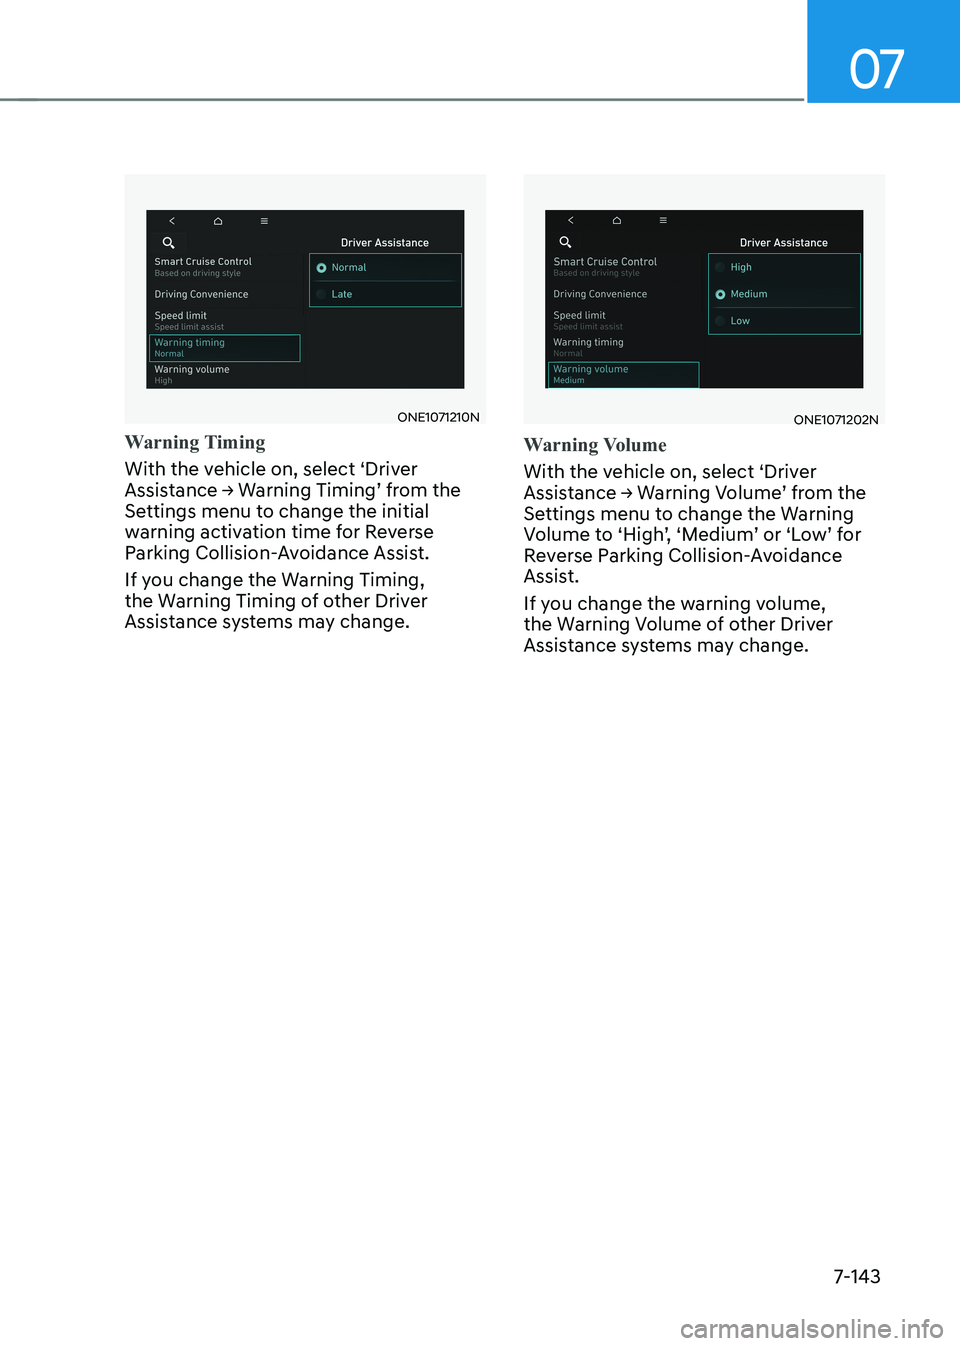
Warning Timing
With the vehicle on, select ‘Driver
Assistance → Warning Timing’ from the
Settings menu to change the initial
warning activation time for Reverse
Parking Collision-Avoidance Assist.
If you change the Warning Timing,
the Warning Timing of other Driver
Assistance systems may change.
ONE1071202N
Warning Volume
With the vehicle on, select ‘Driver
Assistance → Warning Volume’ from the
Settings menu to change the Warning
Volume to ‘High’, ‘Medium’ or ‘Low’ for
Reverse Parking Collision-Avoidance
Assist.
If you change the warning volume,
the Warning Volume of other Driver
Assistance systems may change.
Page 564 of 680
Driver Assistance System
7-162•
Smart Parking function will not
operate if the door is open or the
seat belt is not fastened.
• The parking location indicator is
displayed on Surround View Monitor
screen and is displayed until the
vehicle enters the parking space
for the first time by Smart Parking function.
• Vehicle speed can be adjusted
by depressing the brake pedal
while Smart Parking function is
operating. However, the vehicle
does not accelerate even when the
accelerator pedal is depressed.
• Depending on parking
environments, if the vehicle is
stopped by a stopper, parking may
be completed.
• If you need to change the vehicle's
position or location, manually
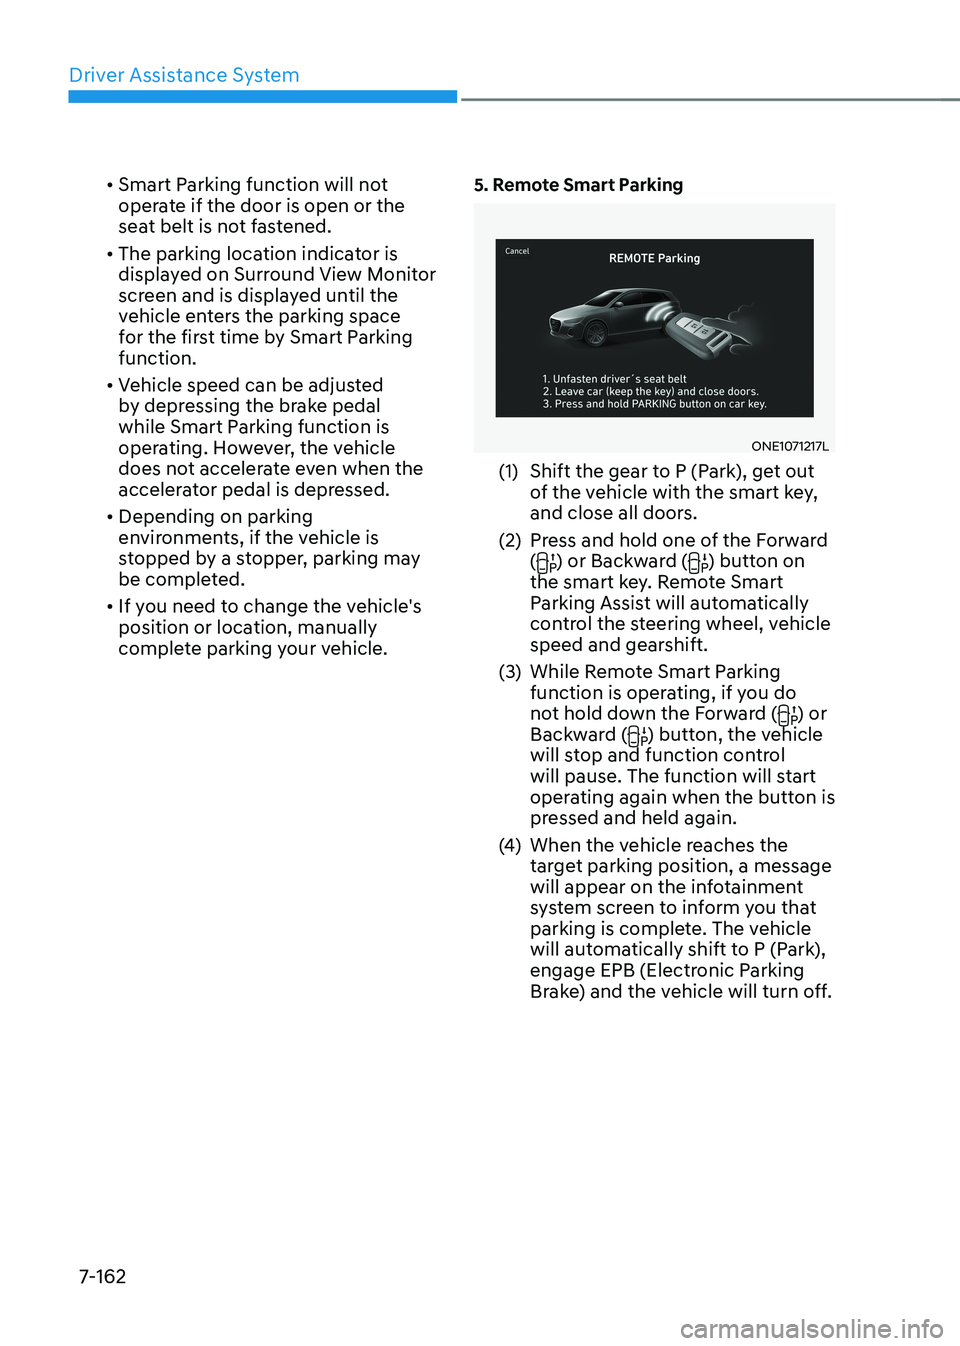
complete parking your vehicle. 5. Remote Smart Parking
ONE1071217L
(1) Shift the gear to P (Park), get out of the vehicle with the smart key,
and close all doors.
(2) Press and hold one of the Forward (
) or Backward () button on
the smart key. Remote Smart
Parking Assist will automatically
control the steering wheel, vehicle
speed and gearshift.
(3) While Remote Smart Parking function is operating, if you do
not hold down the Forward (
) or
Backward () button, the vehicle
will stop and function control
will pause. The function will start
operating again when the button is
pressed and held again.
(4) When the vehicle reaches the
target parking position, a message
will appear on the infotainment
system screen to inform you that
parking is complete. The vehicle
will automatically shift to P (Park),
engage EPB (Electronic Parking
Brake) and the vehicle will turn off.
Page 565 of 680
07
7-163
•
When operating Remote Smart
Parking function, make sure all
smart keys are outside of the
vehicle.
• Remote Smart Parking function will
operate only when the smart key is
within 13 ft. (4 m) from the vehicle. If
there is no vehicle movement even
when the Remote Operation button
is pressed on the smart key, check
the distance to the vehicle and
press the button again.
• The detecting range of the smart
key may vary depending on the
surroundings that are affected by
radio waves such as transmission
tower, broadcast station, etc.
• The parking location indicator is
displayed on Surround View Monitor
screen and is displayed until the
vehicle enters the parking space
for the first time by Remote Smart
Parking function.
• Depending on parking
environments, if the vehicle is
stopped by a stopper, parking may
be completed.
• If you need to change the vehicle's
position or location, manually
complete parking your vehicle.
CAUTION
• When using Remote Smart Parking
function, make sure that all
passengers have gotten out of the
vehicle.
• After ending or turning off Remote
Smart Parking function, before
leaving the vehicle, close windows
and sunroofs, and make sure the
vehicle is off before locking the
doors. How to turn off Parking function
while operating •
Press the Parking/View (
) button in
the following stage:
- Searching for parking space
- Select parking type
• Shift the gear to R (Reverse) in the
following stage:
- Searching for parking space
- Select parking type
- Select operating mode
• Press the Parking Safety (
) button
or select ‘Cancel’ on the infotainment
system screen to turn off Parking function.
• While Smart Parking function is
operating:
- If the vehicle is stopped by depressing the brake pedal, and the
gear is shifted, Parking function will
turn off. At this time, EPB (Electronic
Parking Brake) will not be engaged.
• While Remote Smart Parking function
is operating:
- Press the Remote Start (
) button
on the smart key. Parking function
will turn off.
- Get on the vehicle with the smart key. Parking function will turn off. At
this time, the vehicle will remain on.
Page 609 of 680

9-8
Maintenance
Normal Maintenance Schedule The following maintenance services must be performed to ensure good vehicle performance.
Keep receipts for all vehicle services to protect your warranty. Where both mileage and time are shown, the frequency of
service is determined by whichever occurs first.
MAINTENANCE INTERVALS
MAINTENANCE ITEM Months
4 8 12 16 20 24 28 32 36 40 44 48 52 56 60 64 68 72 76 80 84 88 92 96
Miles×1,000 5 10 15 20 25 30 35 40 45 50 55 60 65 70 75 80 85 90 95 100 105 110 115 120
Km×1,000 8 16 24 32 40 48 56 64 75 80 88 96 104 112 120 128 136 144 152 160 168 176 184 192
Cooling system
Inspect every 15,000 miles or 12 months
Rotate Tires
(Includes Tire Pressure and
Tread Wear Inspection) I I I I I I I I I I I I I I I I I I I I I I I I
Replace Climate Control Air
Filter (For Evaporator and
Blower Unit) R R
R R R R R R
Coolant *
1 Standard
At first, replace 120,000 miles (200,000 km) or 120 months.
After that, replace every 25,000 miles (40,000 km) or 24 month.
Low Conductivity Replace every 40,000 miles (60,000 km) or 36 months *
2
12V auxiliary battery condition I I
I I I I I I
Brake lines, hoses, and connections I I
I I I I I I
I : Inspect and if necessary, adjust, correct, clean or replace.
R : Replace or change. *1 : When replacing or adding coolant, visit an authorized HYUNDAI dealer.
*2 : For your convenience, it can be replaced prior to it’s interval when you do maintenance of other items.
Page 649 of 680

Maintenance
9-48
Consult an authorized HYUNDAI dealer
to replace most vehicle light bulbs. It is
difficult to replace vehicle light bulbs
because other parts of the vehicle must
be removed before you can get to the
bulb. This is especially true for removing
the headlamp assembly to get to the
bulb(s).
Removing/installing the headlamp
assembly can result in damage to the
vehicle.
WARNING
• Prior to working on a light, depress
the foot brake, shift to P (Park), apply
the parking brake, press the Start/
Stop button to the OFF position
and take the key with you when
leaving the vehicle to avoid sudden
movement of the vehicle and to
prevent possible electric shock.
• Be aware the bulbs may be hot and
may burn your fingers.
NOTICE
Be sure to replace the burned-out bulb
with one of the same wattage rating.
Otherwise, it may cause damage to the
fuse or electrical wiring system.
NOTICE
To prevent damage, do not clean the
headlamp lens with chemical solvents
or strong detergents.
Information - Headlamp
desiccant (if equipped)
This vehicle is equipped with desiccant to
reduce fogging inside the headlamp due
to moisture. The desiccant is consumable and its performance may change based on
the used period or environment. If fogging
inside the headlamp due to moisture
continues for a long time, consult an
authorized HYUNDAI dealer.
Information
The headlamp and tail lamp lenses could
appear frosty if the vehicle is washed after
driving or the vehicle is driven at night in
wet weather. This condition is caused by
temperature difference between the lamp inside and outside and, it does not indicate
a problem with your vehicle. When
moisture condenses in the lamp, it will be
removed after driving with the headlamp
on. The removable level may differ depending on lamp size, lamp position
and environmental condition. However, if
moisture is not removed, have your vehicle inspected by an authorized HYUNDAI
dealer.
light BulBs