2023 HYUNDAI IONIQ 5 air conditioning
[x] Cancel search: air conditioningPage 305 of 680

05
5-113
winDshielD Defrosting AnD Defogging
WARNING
Windshield heating
Do not use the
position during
cooling operation in extremely humid
weather. The difference between the
temperature of the outside air and that
of the windshield could cause the outer
surface of the windshield to fog up,
causing loss of visibility could cause
an accident resulting in serious injury
or death. In this case, set the mode
selection to the
position and fan
speed control to a lower speed. • For maximum defrost performance,
set the temperature control to the
highest temperature setting and
the fan speed control to the highest
setting.
• If warm air to the floor is desired while
defrosting or defogging, set the mode
to the floor-defrost position.
• Before driving, clear all snow and ice
from the windshield, rear window,
outside rearview mirrors, and all side
windows.
• Clear all snow and ice from the
hood and air inlet in the cowl grill
to improve heater and defroster
efficiency and to reduce the
probability of fogging up the inside of the windshield.
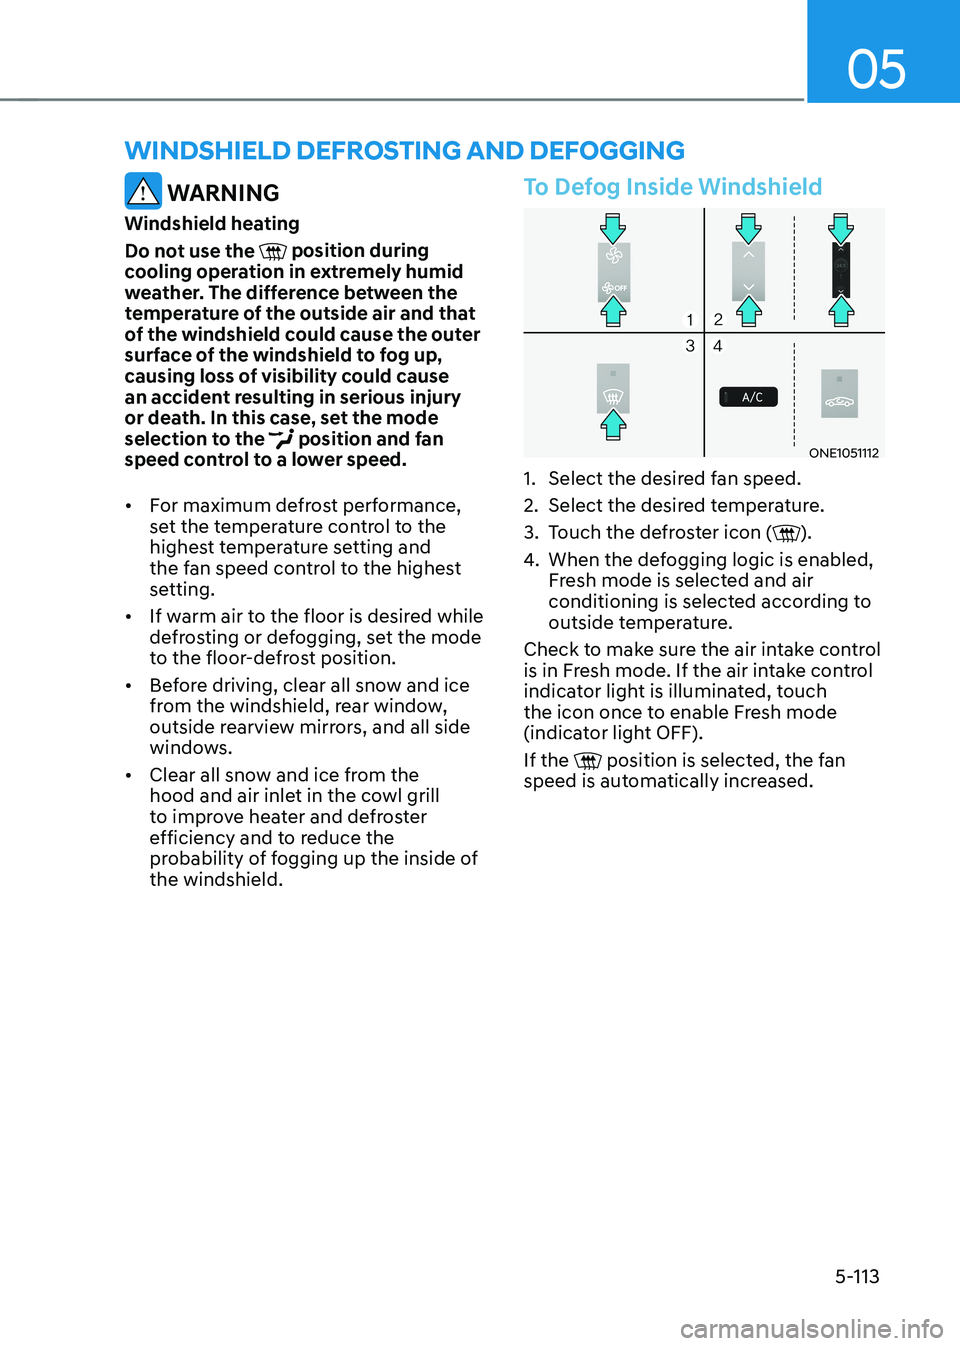
To Defog Inside Windshield
ONE1051112
1. Select the desired fan speed.
2. Select the desired temperature.
3. Touch the defroster icon (
).
4. When the defogging logic is enabled,
Fresh mode is selected and air
conditioning is selected according to
outside temperature.
Check to make sure the air intake control
is in Fresh mode. If the air intake control
indicator light is illuminated, touch
the icon once to enable Fresh mode
(indicator light OFF). If the
position is selected, the fan
speed is automatically increased.
Page 306 of 680

Convenience Features
5-114
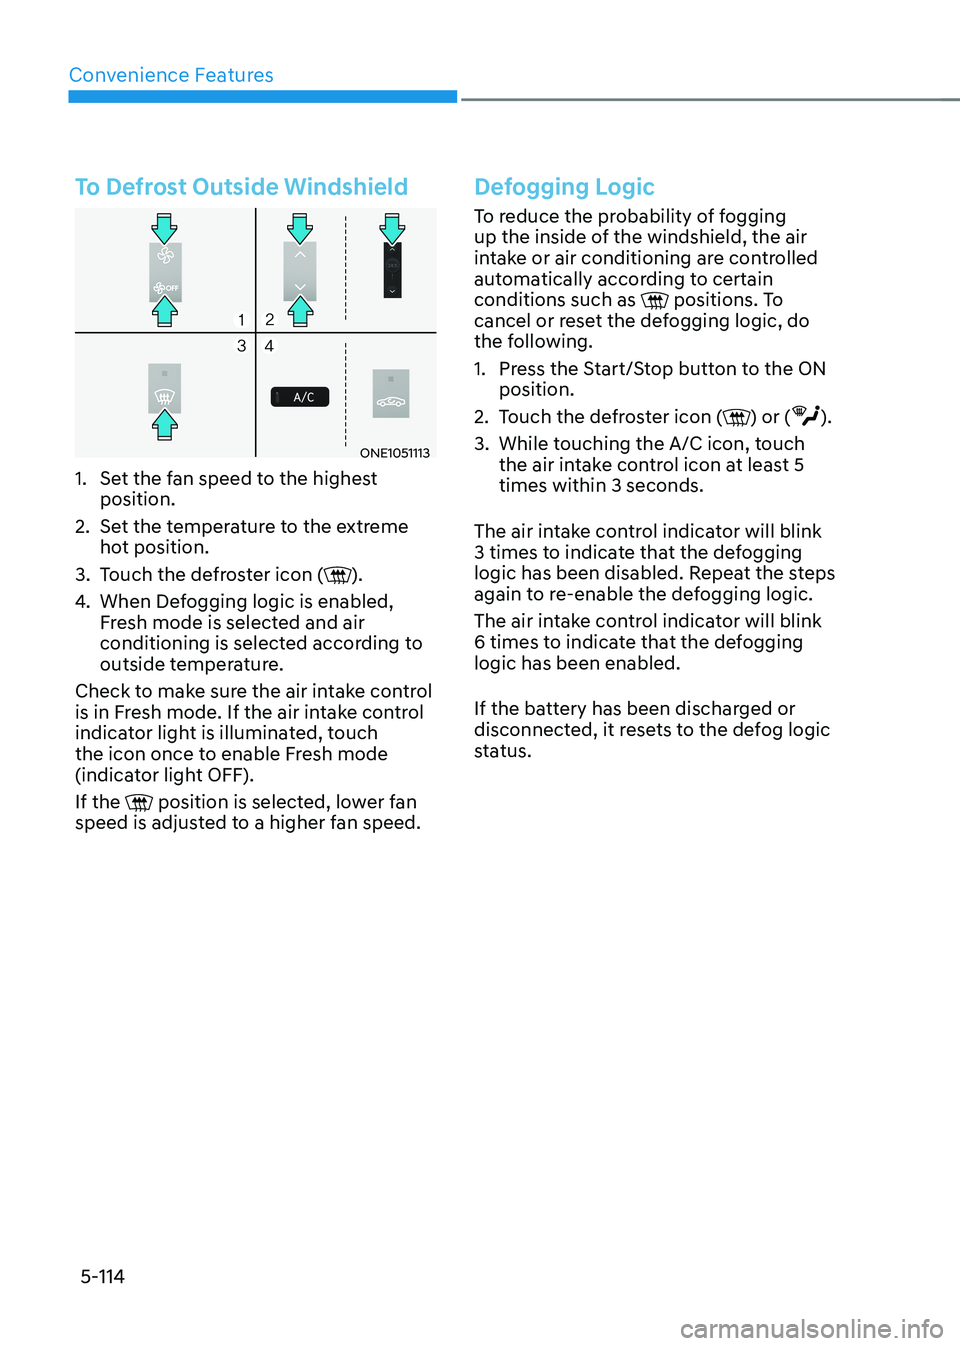
To Defrost Outside Windshield
ONE1051113
1. Set the fan speed to the highest position.
2. Set the temperature to the extreme hot position.
3. Touch the defroster icon (
).
4. When Defogging logic is enabled,
Fresh mode is selected and air
conditioning is selected according to
outside temperature.
Check to make sure the air intake control
is in Fresh mode. If the air intake control
indicator light is illuminated, touch
the icon once to enable Fresh mode
(indicator light OFF). If the
position is selected, lower fan
speed is adjusted to a higher fan speed.
Defogging Logic
To reduce the probability of fogging
up the inside of the windshield, the air
intake or air conditioning are controlled
automatically according to certain conditions such as
positions. To
cancel or reset the defogging logic, do
the following.
1. Press the Start/Stop button to the ON position.
2. Touch the defroster icon (
) or ().
3. While touching the A/C icon, touch the air intake control icon at least 5 times within 3 seconds.
The air intake control indicator will blink
3 times to indicate that the defogging
logic has been disabled. Repeat the steps
again to re-enable the defogging logic.
The air intake control indicator will blink
6 times to indicate that the defogging logic has been enabled.
If the battery has been discharged or
disconnected, it resets to the defog logic
status.
Page 308 of 680

Convenience Features
5-116
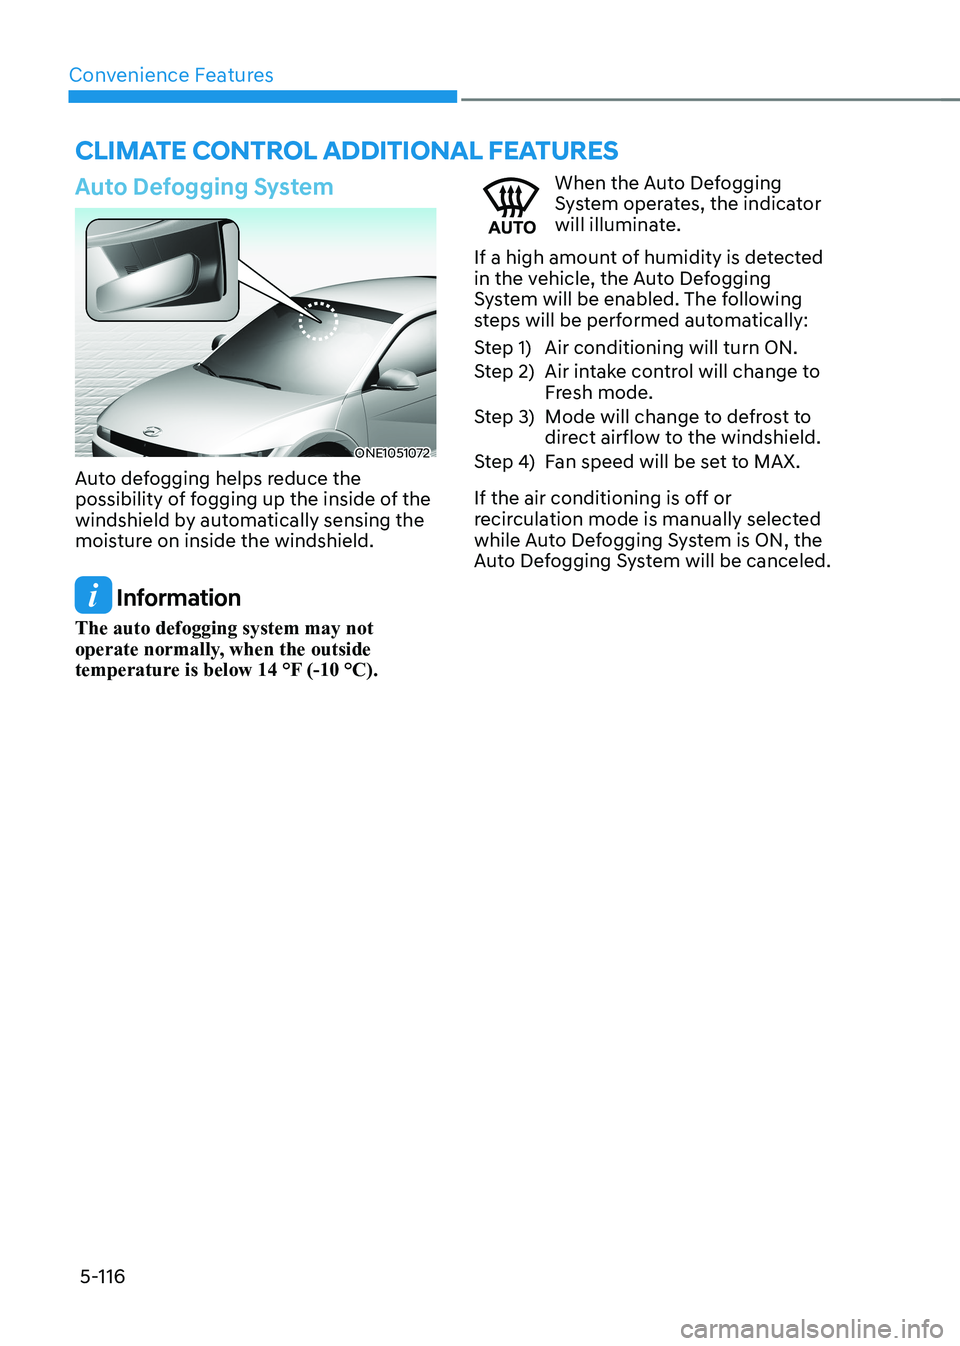
Auto Defogging System
ONE1051072
Auto defogging helps reduce the
possibility of fogging up the inside of the
windshield by automatically sensing the
moisture on inside the windshield.
Information
The auto defogging system may not
operate normally, when the outside
temperature is below 14 °F (-10 °C).
When the Auto Defogging
System operates, the indicator
will illuminate.
If a high amount of humidity is detected
in the vehicle, the Auto Defogging
System will be enabled. The following
steps will be performed automatically:
Step 1) Air conditioning will turn ON.
Step 2) Air intake control will change to Fresh mode.
Step 3) Mode will change to defrost to direct airflow to the windshield.
Step 4) Fan speed will be set to MAX.
If the air conditioning is off or
recirculation mode is manually selected
while Auto Defogging System is ON, the
Auto Defogging System will be canceled.
clImaTe conTrol addITIonal feaTUres
Page 309 of 680

05
5-117
Turning the Auto Defogging System ON or OFF
Climate control system
Touch the front windshield defroster
icon for 3 seconds when the Start/Stop
button is in the ON position. When the
Auto Defogging System is turned off, the
ADS OFF symbol will blink 3 times and
ADS OFF will be displayed on the climate
control information screen.
When the Auto Defogging System is
turned on, the ADS OFF symbol will blink 6 times without a signal.
Infotainment system
Auto Defogging System can be turned
on and off by selecting ‘Setup →
Vehicle Settings → Climate → Defog/
Defrost Options → Auto Defog’ from the
infotainment system screen.
For detailed information, refer to the
separately supplied infotainment
system manual.
Information
• When the air conditioning is turned
on by Auto Defogging System, if you
try to turn off the air conditioning, the
indicator will blink 3 times and the air conditioning will not be turned off.
• To maintain the effectiveness and
efficiency of the Auto Defogging
System, do not select Recirculation mode while the system is operating.
• When Auto Defogging System is operating, fan speed adjustment,
temperature adjustment, and air intake
control selection are all disabled.
NOTICE
Do not remove the sensor cover located
on the upper end of the windshield glass.
Damage to system parts could occur
and may not be covered by your vehicle
warranty.
Auto Dehumidify (if equipped)
To increase cabin air quality and reduce
windshield misting, recirculation mode
switches off automatically after about
5 minutes, depending on the outside
temperature, and the air intake will
change to fresh mode.
Turning Auto Dehumidify ON or OFF
Climate control system
To turn the Auto Dehumidify feature on
or off, select Face level () mode and
touch the air intake control icon at least
five times within three seconds. When
Auto Dehumidify is turned on, the air
intake control button indicator will blink
6 times. When turned off, the indicator will blink 3 times.
Infotainment system
Auto Dehumidify can be turned on and
off by selecting ‘Setup → Vehicle Settings
→ Climate → Automatic Ventilation →
Auto Dehumidify’ from the infotainment
system screen.
Information
If the battery (12V) is discharged or
disconnected, Auto dehumidify settings
will be reset. Readjust the settings to
turning Auto dehumidify option ON or
OFF.
For detailed information, refer to the separately supplied infotainment system manual.
Page 583 of 680

08
8-5
Jump starting procedure
Information
When you jump start your vehicle,
use the jumper terminal in the motor compartment.
1. Position the vehicles close enough that the jumper cables will reach, but
do not allow the vehicle body parts to
contact.
2. Avoid fans or any moving parts in the motor compartment at all times, even
when the vehicles are turned off.
3. Turn off all electrical devices such as radios, lights, air conditioning, etc.
Put the vehicles in P (Park) and set the
parking brake. Turn both vehicles OFF.
4. Open the hood.
5. Remove the battery cover located inside of the front trunk.
6. Remove the motor compartment fuse box cover.
CAUTION
Before jump starting, make sure to
correctly identify the positive (+) and
negative (-) terminals to avoid reverse
polarity connections.
ONE1081003
7. Connect the jumper cables in
the exact sequence shown in the
illustration. First connect one jumper
cable to the red, positive (+) jumper
terminal of your vehicle (1).
8. Connect the other end of the jumper cable to the red, positive (+) battery/
jumper terminal of the assisting
vehicle (2).
9. Connect the second jumper cable to
the black, negative (-) battery/jumper
terminal of the assisting vehicle (3).
10. Connect the other end of the second
jumper cable to the black, negative (-)
chassis ground of your vehicle (4).
Do not allow the jumper cables to
contact anything except the correct
battery or jumper terminals or the
correct ground. Do not lean over the
battery when making connections.
WARNING
Do not connect the jumper cable to
the negative (-) jumper terminal of the
discharged battery. A spark could cause
the battery to explode and lead to a
personal injury or vehicle damage.
Page 607 of 680

Maintenance
9-6
Owner Maintenance Schedule
When you stop for charging: • Check the coolant level in the coolant
reservoir.
• Check the windshield washer fluid
level.
• Check for low or under-inflated tires.
WARNING
Be careful when checking your coolant
level when the motor compartment is
hot. This may result in coolant being
blown out of the opening and cause
serious burns and other injuries.
While operating your vehicle: • Check for vibrations in the steering
wheel. Notice if there is any increased
steering effort or looseness in the
steering wheel, or change in its
straight-ahead position.
• Notice if your vehicle constantly turns
slightly or “pulls” to one side when
traveling on smooth, level road.
• When stopping, listen and check for
unusual sounds, pulling to one side,
increased brake pedal travel or “hard-
to-push” brake pedal.
• If any slipping or changes in the
operation of your gear shift occurs,
check the shift gear fluid level.
• Check the shift gear P (Park) function.
• Check the parking brake.
• Check for fluid leaks under your
vehicle (water dripping from the air
conditioning system during or after use is normal). At least monthly: •
Check coolant level in the coolant
reservoir.
• Check the operation of all exterior
lights, including the stoplights, turn
signals and hazard warning flashers.
• Check the inflation pressures of all
tires including the spare for tires that
are worn, show uneven wear, or are damaged.
• Check for loose wheel lug nuts.
At least twice a year: (for example,
every Spring and Autumn) • Check radiator, heater and air
conditioning hoses for leaks or damage.
• Check windshield washer spray and
wiper operation. Clean wiper blades
with a clean cloth dampened with
washer fluid.
• Check headlamp alignment.
• Check the seat belts for wear and function.
At least once a year: • Clean body and door drain holes.
• Lubricate door hinges and hood hinges.
• Lubricate door and hood locks and
latches.
• Lubricate door rubber weather strips.
• Check the air conditioning system.
• Inspect and lubricate shift gear
linkage and controls.
• Clean the battery (12V) and terminals.
• Check the brake fluid level.
Page 610 of 680

9-9
09
Normal Maintenance Schedule
MAINTENANCE INTERVALS
MAINTENANCE ITEM Months
4 8 12 16 20 24 28 32 36 40 44 48 52 56 60 64 68 72 76 80 84 88 92 96
Miles×1,000 5 10 15 20 25 30 35 40 45 50 55 60 65 70 75 80 85 90 95 100 105 110 115 120
Km×1,000 8 16 24 32 40 48 56 64 75 80 88 96 104 112 120 128 136 144 152 160 168 176 184 192
Disc brakes and pads I I
I I I I I I
Steering gear rack,
linkage, and boots I I
I I I I I I
Drive shafts and boots I I
I I I I I I
Air conditioning
compressor, air conditioner
refrigerant and performanceI I
I I I I I I
Reduction gear fluid
I I I
Brake pedal I I
I I I I I I
Brake fluid Inspect every 5,000 miles (8,000 km) or 12 months,
Replace every 60,000 miles (96,000 km) or 48 months
I : Inspect and if necessary, adjust, correct, clean or replace.
R : Replace or change.
Page 612 of 680

09
9-11
Cooling System
Check cooling system components, such
as radiator, coolant reservoir, hoses and
connections for leakage and damage.
Replace any damaged parts.
Coolant
The coolant should be changed at the
intervals specified in the maintenance schedule.
Reduction Gear Fluid
The reduction gear fluid should be
inspected according to the intervals
specified in the maintenance schedule.
Brake Hoses and Lines
Visually check for proper installation,
chafing, cracks, deterioration and any
leakage. Replace any deteriorated or
damaged parts immediately.
Brake Fluid
Check the brake fluid level in the brake
fluid reservoir. The level should be
between the MIN and the MAX marks
on the side of the reservoir. Use only
hydraulic brake fluid conforming to DOT
4 specification.
Brake Discs, Pads, Calipers and
Rotors
Check the pads, the disc, and the rotor
for any excessive wear-out. Inspect
calipers for any fluid leakage.
Suspension Mounting Bolts
Check the suspension connections for
looseness or damage. Retighten to the
specified torque.
Steering Gear Box, Linkage &
Boots/Lower Arm Ball Joint
With the vehicle stopped and the vehicle
off, check for excessive free-play in the
steering wheel. Check the linkage for
bends or damage. Check the dust boots
and ball joints for deterioration, cracks, or damage.
Replace any damaged parts.
Drive Shafts and Boots
Check the drive shafts, boots and clamps
for cracks, deterioration, or damage.
Replace any damaged parts and, if
necessary, repack the grease.
Air Conditioning Refrigerant
Check the air conditioning lines and
connections for leakage and damage.
explanation of scheduled Maintenance iteMs