2023 HYUNDAI IONIQ 5 stop button
[x] Cancel search: stop buttonPage 66 of 680

01
1-61
EV Battery Overheated! Stop vehicle
OOSEV040509L
This warning message is displayed to
protect battery and electric vehicle
system when the high voltage battery
temperature is too high.
Turn off the Start/Stop button and
stop the vehicle so that the battery
temperature decreases.
Power limited
ONE1Q011008L
This Indicator light illuminates: • When the START/STOP button is in the ON position.
- It illuminates for approximately 3 seconds and then goes off.
• When the power is limited for the
safety of the high-powered parts of an
electric vehicle. The power is limited
for the following reasons. (Unless
both Service Warning Light and Power
Down Indicator Light illuminate at the
same time, it is not a failure.)
- The high voltage battery level is too low or voltage is decreasing
- The temperature of the high voltage battery is too high or too low
- The temperature of the motor is high
NOTICE
• When this warning message is
displayed, do not accelerate or start
the vehicle suddenly.
• When the power is limited for the
safety of the high-powered parts of
an electric vehicle, the power down
indicator light illuminates. Your
vehicle may not drive uphill or skid
on a slope with the indicator light ON.
Page 73 of 680

2-3
02
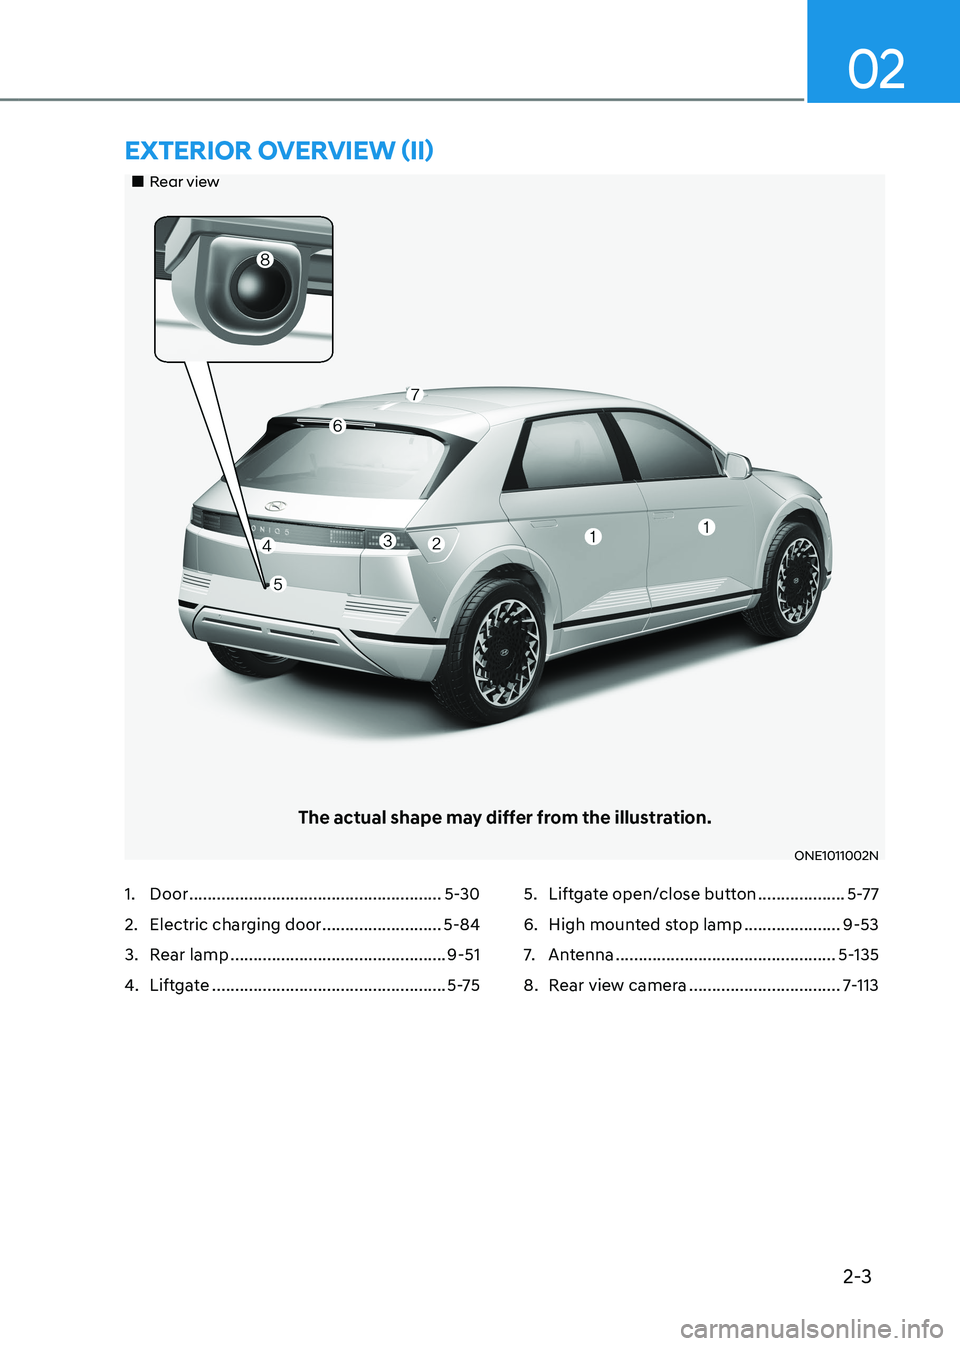
„„Rear view
The actual shape may differ from the illustration.
ONE1011002N
ExtErior ovErviEw (ii)
1. Door ....................................................... 5-30
2. Electric charging door ..........................5-84
3. Rear lamp ............................................... 9-51
4. Liftgate ................................................... 5-755. Liftgate open/close button
...................5-77
6. High mounted stop lamp .....................9-53
7. Antenna ................................................ 5-135
8. Rear view camera .................................7-113
Page 75 of 680

2-5
02
1. Instrument cluster ..................................4-4
2. Horn ....................................................... 5-46
3. Driver’s front air bag .............................3-53
4. Infotainment system ...........................5-136
5. Hazard warning flasher button ..............8-2
6. Start/Stop button ................................... 6-4
7. Automatic climate control system .....5-102
8. Parking/View button ............................7-114
9. Parking Safety button ..........................7-134
10. Passenger’s front air bag ..................... 3-53 11. Glove box
............................................. 5-123
12. USB port ............................................... 5-135
13. Power outlet ......................................... 5-125
14. Cup holder ........................................... 5-124
15. USB charger ......................................... 5-126
16. Wireless charging system ...................5-127
17. Wireless charging system pad ............5-127
18. Center console..................................... 5-122
19. Rear seat USB charger ........................5-126
The actual shape may differ from the illustration.
ONE1011004
instrumEnt panEl ovErviEw (i)
Page 112 of 680

03
3-25
„„Climate control panel
ONE1031081
Press WARMER in the front climate
control panel.
ONE1031080L
To activate seat warmer of each front
seats, touch
icon on the infotainment
screen. Adjust the temperature by
pressing either
or icons.
The seat warmer will automatically stop
when the seat temperature reaches
certain level and will automatically
reactivate when the seat temperature
drops below certain temperature. •
Manual temperature control
Refer to the infotainment system
web manual for manual temperature
control.
• Automatic temperature control
The seat warmer starts to
automatically control the seat
temperature in order to prevent
low temperature burns after being manually turned on.
OFF � HIGH ( 3 ) � MIDDLE ( 2 ) � LOW ( 1 )
30 min 60 min
You may manually touch the icon to
increase seat temperature. However,
the seat temperature is automatically
adjusted again.
• Auto. Controls That Use Climate
Control Settings (for driver’s seat)
The seat warmer automatically
controls the seat temperature
depending on the ambient
temperature when the vehicle is running.
To use this function, it must be
enabled from the Settings menu in the
infotainment system screen. Select:
- Setup � Vehicle Settings � Seat �
Heated/Ventilated Features � Auto.
Controls That Use Climate Control
Settings � Seat Warmer/Ventilation
• The seat warmer defaults to the OFF
position whenever the Start/Stop
button is pressed to the ON position.
However, if the Auto. Controls That
Use Climate Control Settings function
is On, the driver’s seat warmer will
turn on and off depending on the
ambient temperature.
Page 114 of 680

03
3-27
ONE1031080L
To activate air ventilation of each front
seats, touch
icon on the infotainment
screen. Adjust the airflow by pressing either
or icons.
• If the air ventilation seat is positioned
at HIGH, the airflow speed will
increase according to vehicle speed.
• Use the air ventilation seat with the
air conditioning on for more effective
ventilation.
• It may take 3~5 minutes after switch
operation to feel the temperature change.
Refer to the infotainment system
web manual for manual temperature
control. •
Auto. Controls That Use Climate
Control Settings (for driver’s seat)
The air ventilation seat automatically
controls the seat temperature
depending on the ambient
temperature when the vehicle is running.
To use this function, it must be
enabled from the Settings menu in the
infotainment system screen. Select:
- Setup � Vehicle Settings � Seat �
Heated/Ventilated Features � Auto.
Controls That Use Climate Control
Settings � Seat Warmer/Ventilation
• The air ventilation seats defaults to the
OFF position whenever the Start/Stop
button is pressed to the ON position.
However, if the Auto. Controls That
Use Climate Control Settings function
is on, the driver’s seat warmer will turn
on and off depending on the ambient
temperature.
Page 117 of 680

Seats & Safety System
3-30
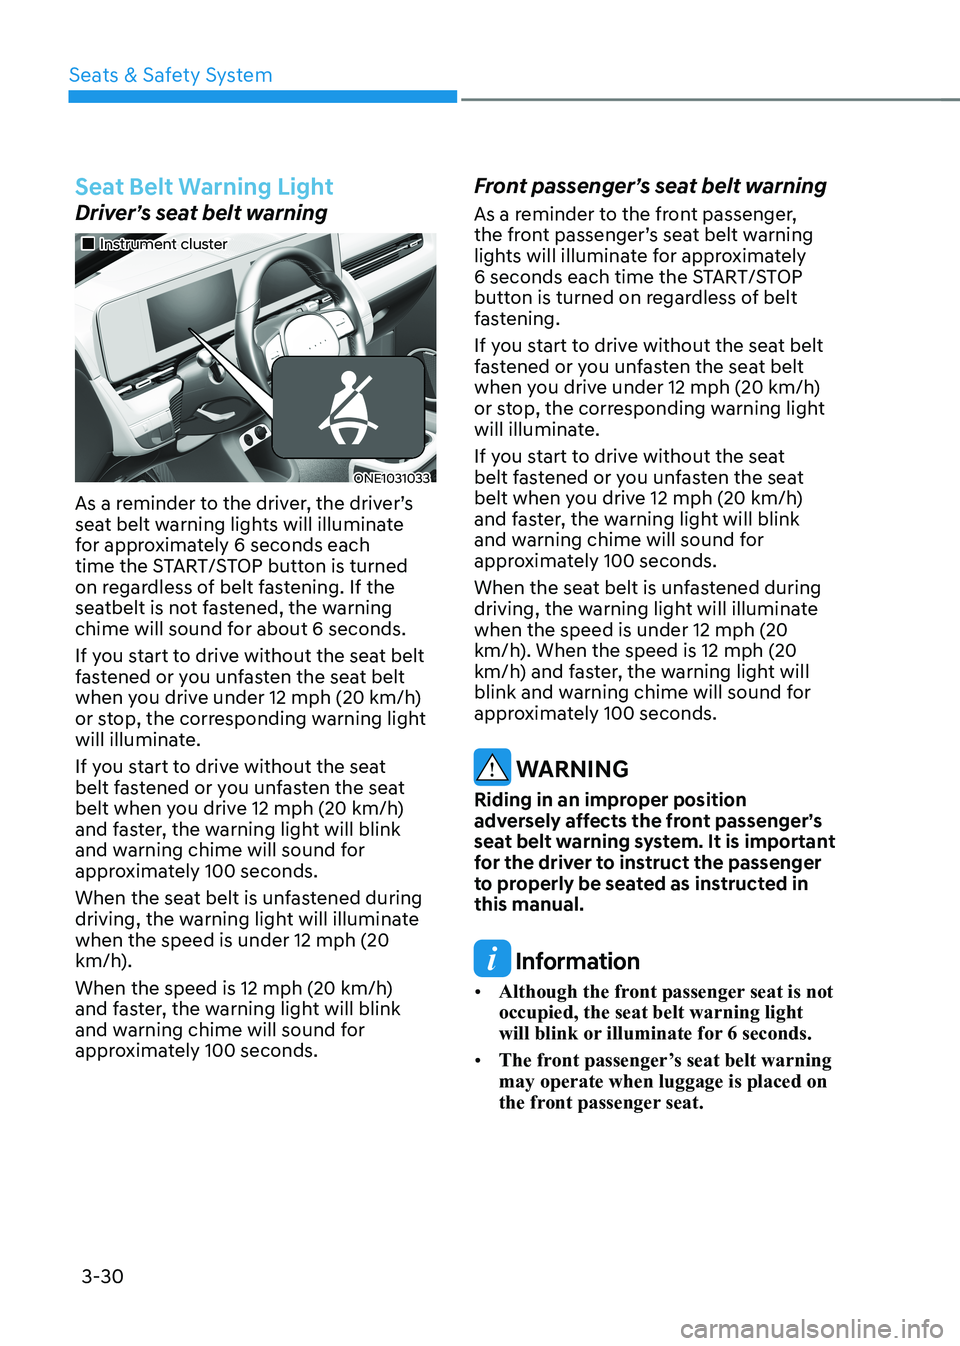
Seat Belt Warning Light
Driver’s seat belt warning
„„Instrument cluster
ONE1031033
As a reminder to the driver, the driver’s
seat belt warning lights will illuminate
for approximately 6 seconds each
time the START/STOP button is turned
on regardless of belt fastening. If the
seatbelt is not fastened, the warning
chime will sound for about 6 seconds.
If you start to drive without the seat belt
fastened or you unfasten the seat belt
when you drive under 12 mph (20 km/h)
or stop, the corresponding warning light
will illuminate.
If you start to drive without the seat
belt fastened or you unfasten the seat
belt when you drive 12 mph (20 km/h)
and faster, the warning light will blink
and warning chime will sound for
approximately 100 seconds.
When the seat belt is unfastened during
driving, the warning light will illuminate when the speed is under 12 mph (20
km/h).
When the speed is 12 mph (20 km/h)
and faster, the warning light will blink
and warning chime will sound for
approximately 100 seconds. Front passenger’s seat belt warning
As a reminder to the front passenger,
the front passenger’s seat belt warning
lights will illuminate for approximately
6 seconds each time the START/STOP
button is turned on regardless of belt
fastening.
If you start to drive without the seat belt
fastened or you unfasten the seat belt
when you drive under 12 mph (20 km/h)
or stop, the corresponding warning light
will illuminate.
If you start to drive without the seat
belt fastened or you unfasten the seat
belt when you drive 12 mph (20 km/h)
and faster, the warning light will blink
and warning chime will sound for
approximately 100 seconds.
When the seat belt is unfastened during
driving, the warning light will illuminate when the speed is under 12 mph (20
km/h). When the speed is 12 mph (20
km/h) and faster, the warning light will
blink and warning chime will sound for
approximately 100 seconds.
WARNING
Riding in an improper position
adversely affects the front passenger’s
seat belt warning system. It is important
for the driver to instruct the passenger
to properly be seated as instructed in this manual.
Information
• Although the front passenger seat is not occupied, the seat belt warning light
will blink or illuminate for 6 seconds.
• The front passenger’s seat belt warning may operate when luggage is placed on
the front passenger seat.
Page 122 of 680

03
3-35
OHI038175L
The Pre-Tensioner Seat Belt System
consists mainly of the following
components. Their locations are shown
in the illustration above:
(1) SRS air bag warning light
(2) Retractor pre-tensioner
(3) SRS control module
NOTICE
The sensor that activates the SRS
control module is connected with the
pre–tensioner seat belts. The SRS air
bag warning light on the instrument
cluster will illuminate for approximately
3~6 seconds after the Start/Stop button is in the ON position, and then it should
turn off.
If the pre-tensioner is not working
properly, the warning light will
illuminate even if the SRS air bag is not
malfunctioning. If the warning light
does not illuminate, stays illuminated
or illuminates when the vehicle is being
driven, have the pre-tensioner seat
belts and/or SRS control module be
inspected by an authorized HYUNDAI dealer as soon as possible.
Information
• Pre-tensioner seat belts may be
activated in certain frontal or side
collisions or rollover situations (if
equipped with rollover sensor).
• When the pre-tensioner seat belts are activated, a loud noise may be heard
and fine dust, which may appear to be
smoke, may be visible in the passenger
compartment. These are normal
operating conditions and are not hazardous.
• Although it is non-toxic, the fine dust may cause skin irritation and should
not be inhaled for prolonged periods.
Wash all exposed skin areas thoroughly
after an accident in which the pre-
tensioner seat belts were activated.
Page 135 of 680

3-48
Seats & Safety System
OHI038148
4. Slowly allow the shoulder portion of
the seat belt to retract and listen for
an audible "clicking" or "ratcheting"
sound. This indicates that the retractor
is in the "Automatic Locking" mode.
If no distinct sound is heard, repeat
steps 3 and 4.
5. Remove as much slack from the belt as possible by pushing down on the
Child Restraint System while feeding
the shoulder belt back into the
retractor.
6. Push and pull on the Child Restraint System to confirm that the seat belt
is holding it firmly in place. If it is not,
release the seat belt and repeat steps
2 through 6.
7. Double check that the retractor is in
the "Automatic Locking" mode by
attempting to pull more of the seat
belt out of the retractor. If you cannot,
the retractor is in the "Automatic
Locking" mode.
If your Child Restraint System
manufacturer instructs or recommends
you to use a tether anchor with the lap/
shoulder belt, refer to the previous pages
for more information.
Information
When the seat belt is allowed to retract to
its fully stowed position, the retractor will
automatically switch from the “Automatic Locking” mode to the emergency lock
mode for normal adult usage.
WARNING
If the retractor is not in the “Automatic
Locking” mode, the child restraint
can move when your vehicle turns or
stops suddenly. A child can be seriously
injured or killed if the child restraint
is not properly anchored in the car,
including manually pulling the seat belt
all the way out to shift the retractor to
the “Automatic Locking” mode.
To remove the Child Restraint System,
press the release button on the buckle
and then pull the lap/shoulder belt out of
the Child Restraint System and allow the
seat belt to retract fully.