2023 HYUNDAI I30 Drive transmission
[x] Cancel search: Drive transmissionPage 4 of 533
F4
FOREWORD
Thank you for choosing HYUNDAI. We are pleased to welcome you to the growing number of discerning people who
drive HYUNDAIs. The advanced engineering and high-quality construction of each HYUNDAI we build is something of
which we're very proud.
Your Owner's Manual will introduce you to the features and operation of your new HYUNDAI. It is suggested that you read
it carefully because the information it contains can contribute greatly to the satisfaction you receive from your new vehi-
cle.
The manufacturer also recommends that service and maintenance on your vehicle be performed by an authorised
HYUNDAI dealer.
HYUNDAI MOTOR COMPANY
Note :Because future owners will also need the information included in this manual, if you sell this HYUNDAI, please
leave the manual in the vehicle for their use. Thank you.
Copyright 2019 HYUNDAI Motor Company. All rights reserved. No part of this publication may be reproduced, stored
in any retrieval system or transmitted in any form or by any means without the prior written permission of HYUNDAI
Motor Company.Severe engine and transmission damage may result from the use of poor quality fuels and lubricants that
do not meet HYUNDAI specifications. You must always use high quality fuels and lubricants that meet the
specifications listed on Page 8-7 in the Vehicle Specifications section of this Owner's Manual.
CAUTION
Page 19 of 533
1-6
Your vehicle at a glance
I IN
NS
ST
TR
RU
UM
ME
EN
NT
T
P
PA
AN
NE
EL
L
O
OV
VE
ER
RV
VI
IE
EW
W
(
(I
II
I)
)
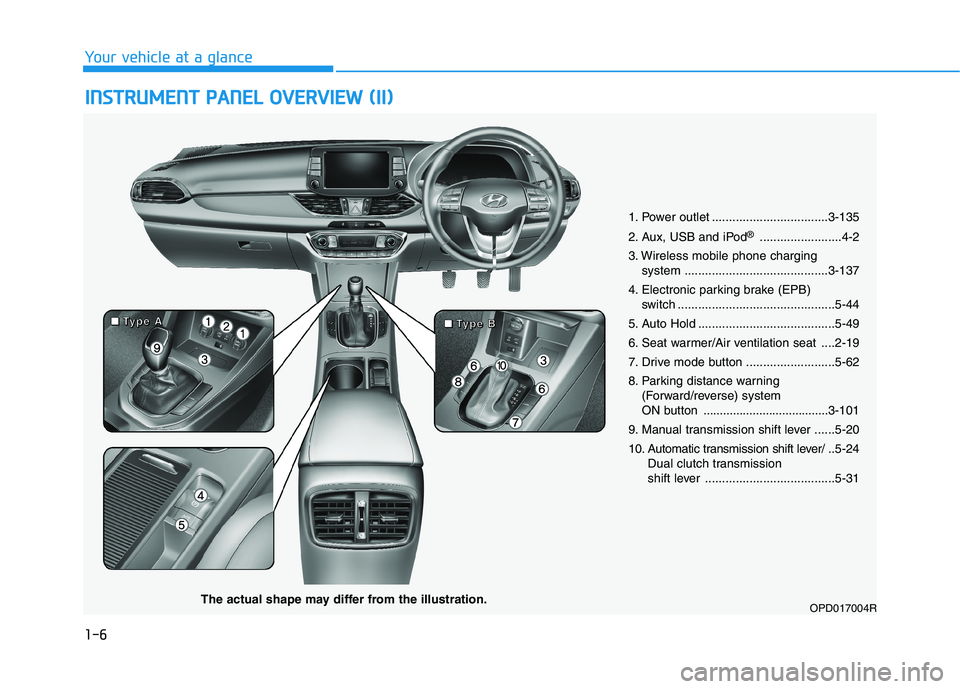
1. Power outlet ..................................3-135
2. Aux, USB and iPod
®........................4-2
3. Wireless mobile phone charging
system ..........................................3-137
4. Electronic parking brake (EPB)
switch ..............................................5-44
5. Auto Hold ........................................5-49
6. Seat warmer/Air ventilation seat ....2-19
7. Drive mode button ..........................5-62
8. Parking distance warning
(Forward/reverse) system
ON button ......................................3-101
9. Manual transmission shift lever ......5-20
10. Automatic transmission shift lever/ ..5-24
Dual clutch transmission
shift lever ......................................5-31
OPD017004RThe actual shape may differ from the illustration.
■ ■ ■ ■
T T T T
y y y y
p p p p
e e e e
A A A A
■ ■ ■ ■
T T T T
y y y y
p p p p
e e e e
B B B B
Page 129 of 533
3-46
Convenient features of your vehicle
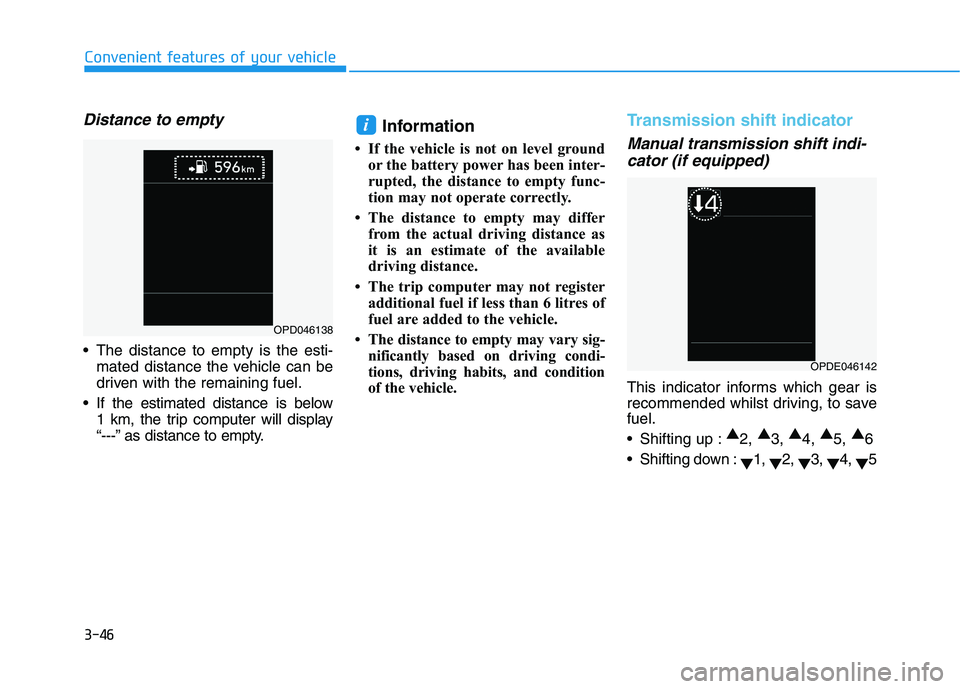
Distance to empty
The distance to empty is the esti-
mated distance the vehicle can be
driven with the remaining fuel.
If the estimated distance is below
1 km, the trip computer will display
“---” as distance to empty.
Information
• If the vehicle is not on level ground
or the battery power has been inter-
rupted, the distance to empty func-
tion may not operate correctly.
• The distance to empty may differ
from the actual driving distance as
it is an estimate of the available
driving distance.
• The trip computer may not register
additional fuel if less than 6 litres of
fuel are added to the vehicle.
• The distance to empty may vary sig-
nificantly based on driving condi-
tions, driving habits, and condition
of the vehicle.
Transmission shift indicator
Manual transmission shift indi-
cator (if equipped)
This indicator informs which gear is
recommended whilst driving, to save
fuel.
Shifting up :▲
2, ▲
3, ▲
4, ▲
5, ▲
6
Shifting down :
▼1,
▼2,
▼3,
▼4,
▼5
i
OPD046138
OPDE046142
Page 145 of 533
3-62
Convenient features of your vehicle
Icy Road Warning Light
(if equipped)
This warning light is to warn the driver
the road may be icy.
When the temperature on the out-
side temperature gauge is approxi-
mately below 4°C (40°F), the Icy
Road Warning Light and Outside
Temperature Gauge blinks and then
illuminates. Also, the warning chime
sounds 1 time.
Information
If the icy road warning light appears
whilst driving, you should drive more
attentively and safely refraining from
over-speeding, rapid acceleration, sud-
den braking or sharp turning, etc.
LCD display messages
Shift to P (for smart key system
and automatic transmission/
dual clutch transmission)
This warning message is displayed if
you try to turn off the engine without
the shift lever in P (Park) position.
At this time, the Engine Start/Stop
button turns to the ACC position (If
you press the Engine Start/Stop but-
ton once more, it will turn to the ON
position).
Low Key Battery
(for smart key system)
This warning message is displayed if
the battery of the smart key is dis-
charged whilst the Engine Start/Stop
button changes to the OFF position.
i
Page 157 of 533

3-74
Convenient features of your vehicle
2. Door
- Disable: The auto door lock opera-
tion will be cancelled.
- Enable on Speed: All doors will be
automatically locked when the vehi-
cle speed exceeds 15km/h.
- Enable on Shift: All doors will be
automatically locked if the automat-
ic transmission/dual clutch trans-
mission shift lever is shifted from
the P (Park) position to the R
(Reverse), N (Neutral), or D (Drive)
position.
- Disable: The auto door unlock oper-
ation will be cancelled.
- Vehicle Off: All doors will be auto-
matically unlocked when the
Engine Start/Stop button is set to
the OFF position (if equipped with
smart key).- On Key Out: All doors will be auto-
matically unlocked when the igni-
tion key is removed from the igni-
tion switch (if equipped with remote
key).
- On Shift to P: All doors will be auto-
matically unlocked if the automatic
transmission/dual clutch transmis-
sion shift lever is shifted to the P
(Park) position.
- Driver Door Unlock: All doors will be
automatically unlocked when the
driver’s door is opened.
To activate or deactivate the horn
feedback.
If the horn feedback is activated,
after locking the door by pressing the
lock button on the remote key, and
pressing it again within 4 seconds,
the horn feedback sound will operate
once to indicate that all doors are
locked (if equipped with remote key).3. Lights
- Off: The one touch turn signal func-
tion will be deactivated.
- 3, 5, 7 Flashes: The turn signal indi-
cator will blink 3, 5, or 7 times when
the turn signal lever is moved slightly.
For more information, refer to
"Lighting" in this chapter.
To activate or deactivate the head-
lamp delay function.
For more information, refer to
"Lighting" in this chapter
To activate or deactivate the wel-
come light function.
For more information, refer to
"Lighting" in this chapter.
Page 266 of 533

Driving your vehicle
Before driving.........................................................5-5
Before entering the vehicle ...........................................5-5
Before starting...................................................................5-5
Key ignition switch ............................................................5-7
Ignition switch ........................................................5-7
Engine Start/Stop button ..............................................5-11
Manual transmission............................................5-20
Manual transmission operation ..................................5-20
Good driving practices ..................................................5-22
Automatic transmission .......................................5-24
Automatic transmission operation ..............................5-24
Parking ...............................................................................5-29
Good driving practices ...................................................5-29
Dual clutch transmission .....................................5-31
Dual clutch transmission operation ............................5-31
Parking ...............................................................................5-39
Good driving practices ..................................................5-39
Braking system.....................................................5-41
Power brakes ...................................................................5-41
Disc brakes wear indicator ...........................................5-42
Parking brake (hand type) ............................................5-42
Electronic Parking Brake (EPB)...................................5-44
Auto hold ...........................................................................5-49
Anti-lock Brake System (ABS) ....................................5-53
Electronic Stability Control (ESC)................................5-55
Vehicle Stability Management (VSM).........................5-58
Hill-Start Assist Control (HAC) ....................................5-60
Emergency Stop Signal (ESS) ......................................5-60
Good braking practices..................................................5-61
Drive mode integrated control system .............5-62
Blind-spot collision warning (BCW) system ....5-64
BCW ....................................................................................5-65
RCCW (Rear cross-traffic collision warning) ...........5-67
Detecting sensor .............................................................5-69
Limitations of the system .............................................5-71
5
Page 272 of 533
5-7
Driving your vehicle
5
I IG
GN
NI
IT
TI
IO
ON
N
S
SW
WI
IT
TC
CH
H
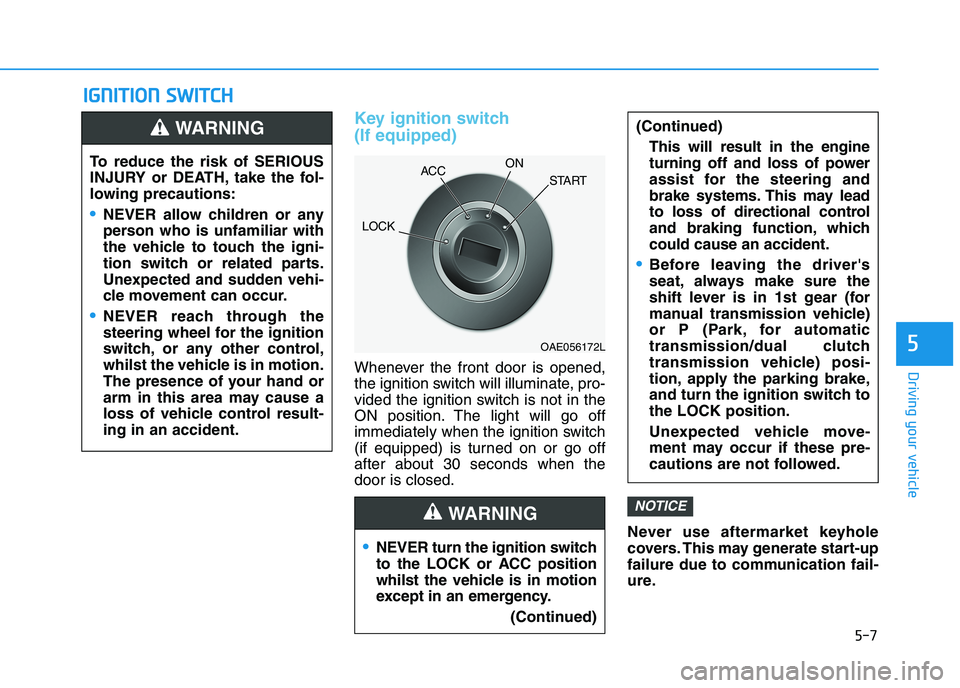
Key ignition switch
(If equipped)
Whenever the front door is opened,
the ignition switch will illuminate, pro-
vided the ignition switch is not in the
ON position. The light will go off
immediately when the ignition switch
(if equipped) is turned on or go off
after about 30 seconds when the
door is closed.
Never use aftermarket keyhole
covers. This may generate start-up
failure due to communication fail-
ure.
NOTICE
NEVER turn the ignition switch
to the LOCK or ACC position
whilst the vehicle is in motion
except in an emergency.
(Continued)
(Continued)
This will result in the engine
turning off and loss of power
assist for the steering and
brake systems. This may lead
to loss of directional control
and braking function, which
could cause an accident.
Before leaving the driver's
seat, always make sure the
shift lever is in 1st gear (for
manual transmission vehicle)
or P (Park, for automatic
transmission/dual clutch
transmission vehicle) posi-
tion, apply the parking brake,
and turn the ignition switch to
the LOCK position.
Unexpected vehicle move-
ment may occur if these pre-
cautions are not followed.
WARNING
To reduce the risk of SERIOUS
INJURY or DEATH, take the fol-
lowing precautions:
NEVER allow children or any
person who is unfamiliar with
the vehicle to touch the igni-
tion switch or related parts.
Unexpected and sudden vehi-
cle movement can occur.
NEVER reach through the
steering wheel for the ignition
switch, or any other control,
whilst the vehicle is in motion.
The presence of your hand or
arm in this area may cause a
loss of vehicle control result-
ing in an accident.
WARNING
OAE056172L
LOCKACCON
START
Page 275 of 533

5-10
Driving your vehicle
Starting the diesel engine
To start the diesel engine when the
engine is cold, it has to be pre-heat-
ed and then it has to be warmed up,
before starting to drive.
Vehicle with manual transmission:
1. Make sure the parking brake is
applied.
2. Make sure the shift lever is in neu-
tral.
3. Depress the clutch and brake ped-
als.
4. Turn the ignition switch to the ON
position to pre-heat the engine.
The glow indicator light ( ) will
illuminate.
5. When the glow indicator light ( )
goes out, turn the key ignition
switch to the START position. Hold
the key (maximum of 10 seconds)
until the engine starts and release
it.Vehicle with dual clutch transmis-
sion:
1. Make sure the parking brake is
applied.
2. Make sure the shift lever is in P
(Park).
3. Depress the brake pedal.
4. Turn the ignition switch to the ON
position to pre-heat the engine.
The glow indicator light ( ) will
illuminate.
5. When the glow indicator light ( )
goes out, turn the key ignition
switch to the START position. Hold
the key (maximum of 10 seconds)
until the engine starts and release
it.
If the engine does not start within
10 seconds after preheating is
completed, turn the ignition
switch once more to the LOCK
position and wait for 10 seconds.
Then turn the ignition switch to
the ON position in order to pre-
heat the engine again.
Starting and stopping the engine
for turbocharger intercooler
1. Do not race or accelerate the
engine immediately after starting
the engine.
If the engine is cold, idle for sever-
al seconds before sufficient lubri-
cation is ensured in the tur-
bocharger.
2. After high speed or extended driv-
ing that requires heavy engine
load, idle the engine about 1
minute before turning the engine
off.
This idle time will allow the tur-
bocharger to cool prior to shutting
the engine off.
Do not turn off the engine immedi-
ately after it has been subjected to
a heavy load. Doing so may cause
severe damage to the engine or
turbocharger.
NOTICENOTICE