2023 HYUNDAI I30 display
[x] Cancel search: displayPage 179 of 533

3-96
Convenient features of your vehicle
D DR
RI
IV
VE
ER
R
A
AS
SS
SI
IS
ST
T
S
SY
YS
ST
TE
EM
M
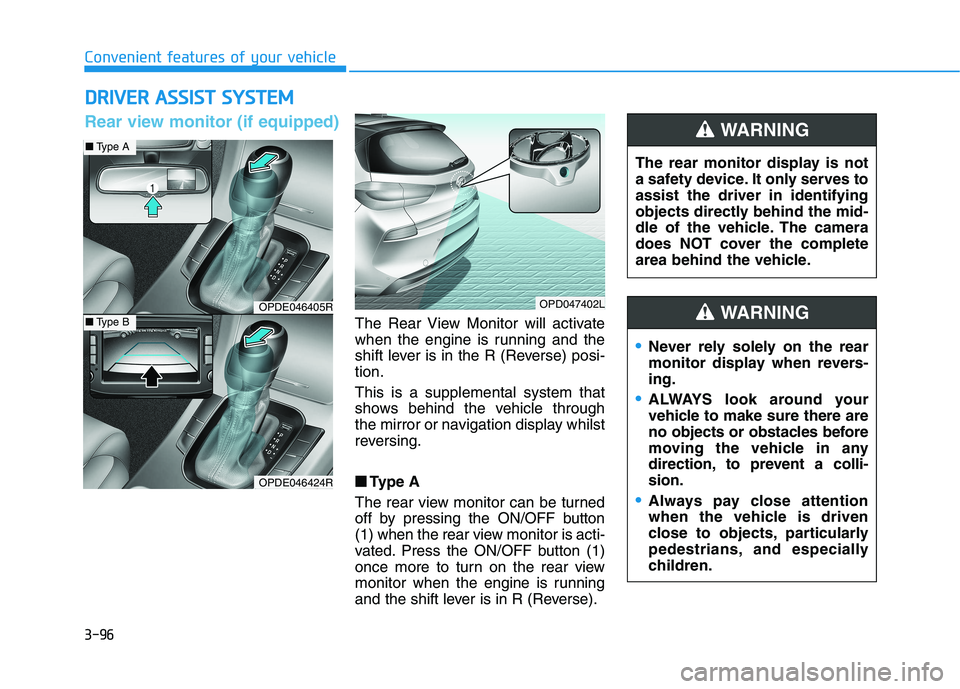
The Rear View Monitor will activate
when the engine is running and the
shift lever is in the R (Reverse) posi-
tion.
This is a supplemental system that
shows behind the vehicle through
the mirror or navigation display whilst
reversing.
■ ■
Type A
The rear view monitor can be turned
off by pressing the ON/OFF button
(1) when the rear view monitor is acti-
vated. Press the ON/OFF button (1)
once more to turn on the rear view
monitor when the engine is running
and the shift lever is in R (Reverse).The rear monitor display is not
a safety device. It only serves to
assist the driver in identifying
objects directly behind the mid-
dle of the vehicle. The camera
does NOT cover the complete
area behind the vehicle.
WARNING
OPDE046405R
OPDE046424R
OPD047402L
■Type A
■Type B
Rear view monitor (if equipped)
Never rely solely on the rear
monitor display when revers-
ing.
ALWAYS look around your
vehicle to make sure there are
no objects or obstacles before
moving the vehicle in any
direction, to prevent a colli-
sion.
Always pay close attention
when the vehicle is driven
close to objects, particularly
pedestrians, and especially
children.
WARNING
Page 198 of 533

3-115
Convenient features of your vehicle
3
Automatic heating and air con-
ditioning
The Automatic Climate Control
System is controlled by setting the
desired temperature.
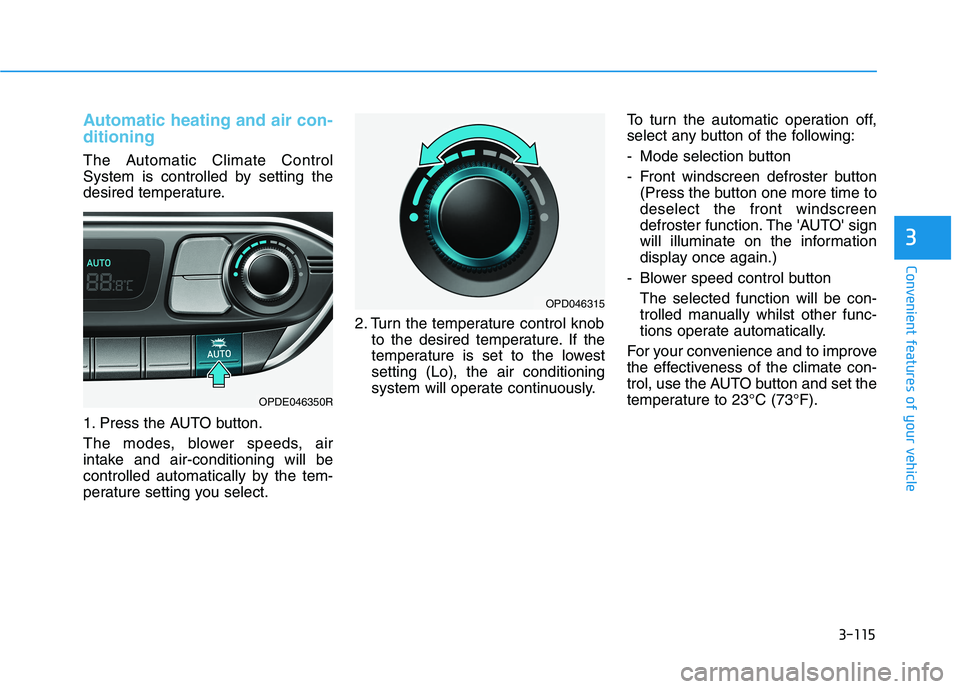
1. Press the AUTO button.
The modes, blower speeds, air
intake and air-conditioning will be
controlled automatically by the tem-
perature setting you select.2. Turn the temperature control knob
to the desired temperature. If the
temperature is set to the lowest
setting (Lo), the air conditioning
system will operate continuously.To turn the automatic operation off,
select any button of the following:
- Mode selection button
- Front windscreen defroster button
(Press the button one more time to
deselect the front windscreen
defroster function. The 'AUTO' sign
will illuminate on the information
display once again.)
- Blower speed control button
The selected function will be con-
trolled manually whilst other func-
tions operate automatically.
For your convenience and to improve
the effectiveness of the climate con-
trol, use the AUTO button and set the
temperature to 23°C (73°F).
OPDE046350R
OPD046315
Page 202 of 533

3-119
Convenient features of your vehicle
3
Temperature control
The temperature will increase by
turning the knob to the right. The
temperature will decrease by turning
the knob to the left.
Adjusting the driver and passenger
side temperature equally
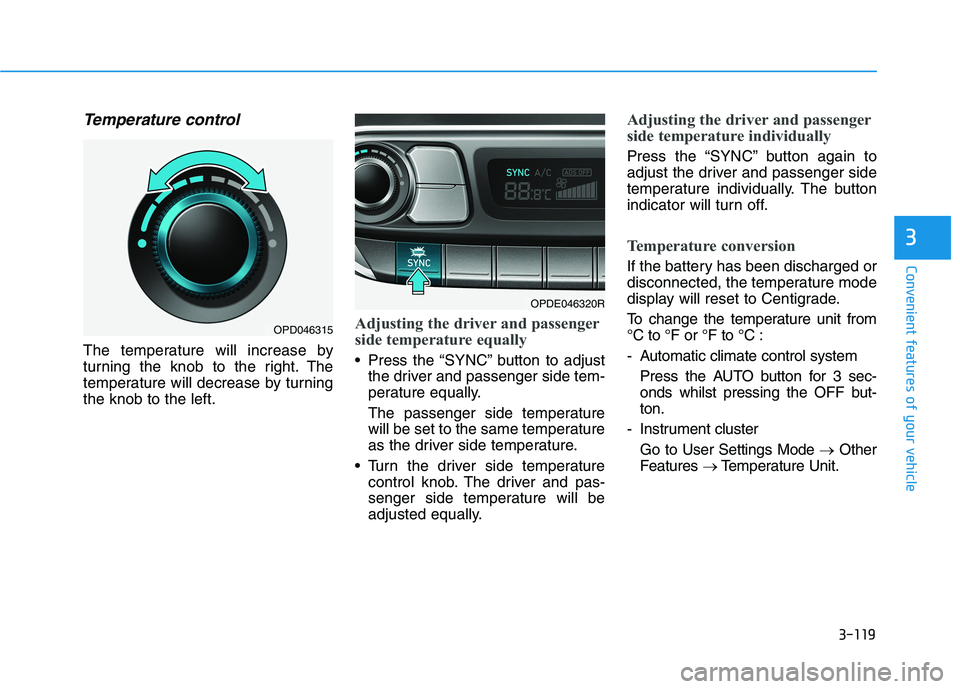
Press the “SYNC” button to adjust
the driver and passenger side tem-
perature equally.
The passenger side temperature
will be set to the same temperature
as the driver side temperature.
Turn the driver side temperature
control knob. The driver and pas-
senger side temperature will be
adjusted equally.
Adjusting the driver and passenger
side temperature individually
Press the “SYNC” button again to
adjust the driver and passenger side
temperature individually. The button
indicator will turn off.
Temperature conversion
If the battery has been discharged or
disconnected, the temperature mode
display will reset to Centigrade.
To change the temperature unit from
°C to °F or °F to °C :
- Automatic climate control system
Press the AUTO button for 3 sec-
onds whilst pressing the OFF but-
ton.
- Instrument cluster
Go to User Settings Mode →Other
Features →Temperature Unit.
OPDE046320R
OPD046315
Page 209 of 533

3-126
Convenient features of your vehicle
For maximum windscreen defrost-
ing, set the temperature control
knob to the highest temperature
setting and the blower speed con-
trol knob to the highest blower
speed. Select the front defrost but-
ton on the climate control display.
After the engine warm-up period,
warm air will be directed to the
front windscreen.
If warm air to the floor is desired
whilst defrosting or defogging, set the
mode to the floor-defrost position.
Before driving, clear all snow and
ice from the windscreen, rear win-
dow, outside rear view mirrors, and
all side windows.
Clear all snow and ice from the bon-
net and air inlet in the cowl grill to
improve heater and defroster effi-
ciency and to reduce the probability
of fogging up inside of the wind-
screen.
Information
If the engine temperature is still cold
after starting, then a brief engine
warm up period may be required for
the vented air flow to become warm or
hot.
Manual climate control system
To defog inside windscreen
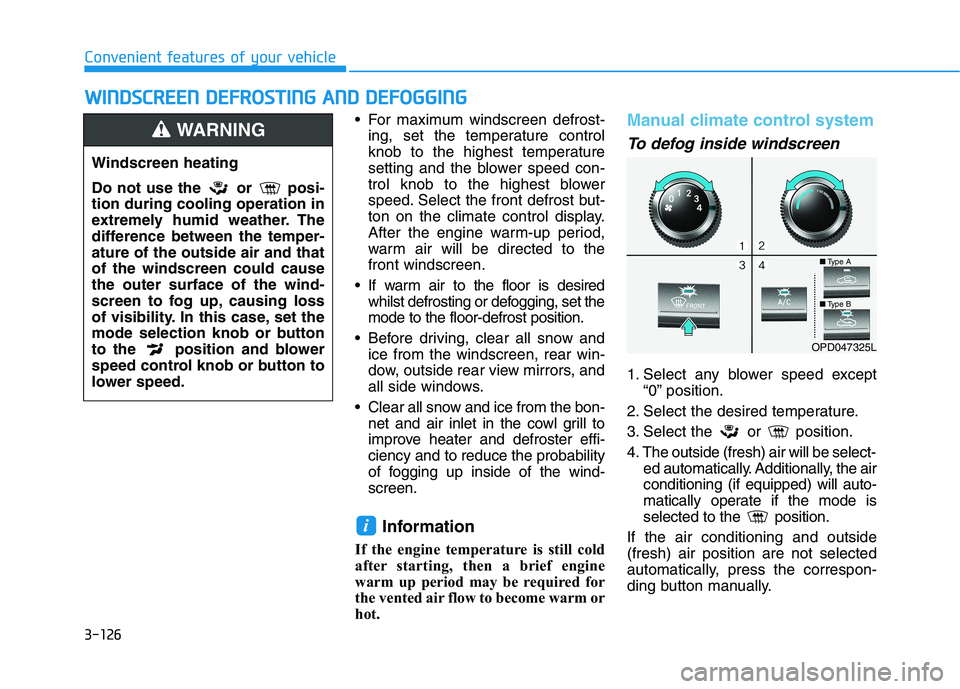
1. Select any blower speed except
“0” position.
2. Select the desired temperature.
3. Select the or position.
4. The outside (fresh) air will be select-
ed automatically. Additionally, the air
conditioning (if equipped) will auto-
matically operate if the mode is
selected to the position.
If the air conditioning and outside
(fresh) air position are not selected
automatically, press the correspon-
ding button manually.
i
W WI
IN
ND
DS
SC
CR
RE
EE
EN
N
D
DE
EF
FR
RO
OS
ST
TI
IN
NG
G
A
AN
ND
D
D
DE
EF
FO
OG
GG
GI
IN
NG
G
Windscreen heating
Do not use the or posi-
tion during cooling operation in
extremely humid weather. The
difference between the temper-
ature of the outside air and that
of the windscreen could cause
the outer surface of the wind-
screen to fog up, causing loss
of visibility. In this case, set the
mode selection knob or button
to the position and blower
speed control knob or button to
lower speed.
WARNING
OPD047325L
■Type A
■Type B
Page 212 of 533

3-129
Convenient features of your vehicle
3
Auto defogging system
(only for automatic climate
control system, if equipped)
Auto defogging reduces the possibil-
ity of fogging up the inside of the
windscreen by automatically sensing
the moisture on the inside of the
windscreen
The auto defogging system operates
when the heater or air conditioning is
on.
Information
The auto defogging system may not
operate normally, when the outside
temperature is below -10 °C.When the Auto Defogging
System operates, the indi-
cator will illuminate.
If high levels of moisture are sensed
in the vehicle, the Auto Defogging
System will operate in the following
order:
Step 1 : Outside air position
Step 2 :Operating the air conditioning
Step 3 : Blowing air toward the wind-
screen
Step 4 : Increasing air flow toward
the windscreen
If the air conditioning is off or recircu-
lated air position is manually selected
whilst Auto Defogging System is ON,
the Auto Defogging System Indicator
will blink 3 times to signal that the
manual operation has been can-
celled.
To cancel or reset the Auto Defogging
System
Press the front windscreen defroster
button for 3 seconds when the igni-
tion switch is in the ON position.
When the Auto Defogging System is
cancelled, the ADS OFF symbol will
blink 3 times and ADS OFF will be
displayed on the climate control
information screen.
When the Auto Defogging System is
reset, the ADS OFF symbol will blink
6 times without a signal.
Information
• When the air conditioning is turned on
by the Auto defogging system, if you
try to turn off the air conditioning, the
indicator will blink 3 times and the air
conditioning will not turn off.
• For efficiency, do not select recircu-
lated air position whilst the Auto
defogging system is operating.
Do not remove the sensor cover
located on the top of the wind-
screen glass.
Damage to system parts could
occur and may not be covered by
your vehicle warranty.
NOTICE
ii
Page 221 of 533

3-138
Convenient features of your vehicle
To charge a mobile phone
The wireless mobile phone charging
system charges only the Qi-enabled
mobile phones ( ). Read the label
on the mobile phone accessory
cover or visit your mobile phone
manufacturer’s website to check
whether your mobile phone supports
the Qi technology.
The wireless charging process starts
when you put a Qi-enabled mobile
phone on the wireless charging unit.
1. Remove other items, including the
smart key, from the wireless charg-
ing unit. If not, the wireless charg-
ing process may be interrupted.
2. The indicator illuminates in orange
during the charging process. The
indicator colour changes to green,
when the charging process is
completed.
3. You can turn ON or OFF the wire-
less charging function in the User
Settings mode on the instrument
cluster. For further information,
refer to “LCD display Modes” in
this chapter.Slightly change the mobile phone
position, when the mobile phone is
not being charged. Make sure that
the indicator illuminates in orange.
The indicator colour may not change
to green depending on the mobile
phone type, even though the charg-
ing process has been completed.
The indicator blinks orange for 10
seconds when there is a malfunction
with the wireless charging system.
In this case, temporarily stop the
charging process, and re-attempt to
wirelessly charge your mobile phone
again.
The system warns you with a mes-
sage on the LCD display if you do not
remove the cellular phone from the
wireless charging unit, when the front
door is open and the ignition switch is
in the OFF position.
The wireless mobile phone
charging system may not sup-
port certain mobile phones,
which are not verified for the Qi
specification ( ).
(Continued)(Continued)
Locate your mobile phone well in
the middle of the wireless mobile
phone charging system. Even
when your mobile phone locates
slightly to one side, the charging
speed may decrease.
The wireless charging process
may temporarily stop, when a
smart key function operates (i.e.
starting the engine, opening the
doors, closing the doors).
For certain mobile phones, the
indicator colour may not change
to green, even when the wireless
charging process is properly
completed.
The wireless charging process may
temporarily stop, when tempera-
ture abnormally increases inside
the wireless mobile phone charg-
ing system. The wireless charging
process restarts, when tempera-
ture falls to a certain level.
The wireless charging process
may temporarily stop when there
is any metallic item, such as a
coin, between the wireless
mobile phone charging system
and a mobile phone.
NOTICE
Page 222 of 533

3-139
Convenient features of your vehicle
3
Clock
Vehicles with Audio system
Ty p e A
H (Hour)
Each time you press the "H" button,
the clock will change by one hour.
Pressing and holding the "H" button
will change the clock continuously.
Release the button at the desired
time.
M (Minute)
Each time you press the "M" button ,
the clock will change by one minute.
Pressing and holding the "M" button
will change the clock continuously.
Release the button at the desired
time.
Display conversion
To change the 12 hour format to the
24 hour format, press the "H" and
"M" button simultaneously for more
than 4 seconds.
For example, if the "H" and "M" but-
ton is pressed when the time is 10:15
p.m., the display will change to
22:15.
Type B
Select the [SETUP/CLOCK ]button on
the audio system ➟Select [Date/Time].
Set time: Set the time displayed on
the audio screen.
Time format: Choose between 12-
hour and 24-hour time formats.
Vehicles with Navigation system
Select the Settings menu on the
Navigation system➟Select
[Date/Time].
GPS time: Displays time according
to the received GNSS time.
24-hour: Switches to 12 hour or 24
hour.
For more details, please refer to
the separate manual that was sup-
plied with your vehicle. Do not adjust the clock whilst
driving. You may lose your steer-
ing control and cause severe
personal injury or accidents.
WARNING
Page 236 of 533
![HYUNDAI I30 2023 Owners Manual 4-11
Multimedia System
4
(6)MEDIA
Select USB(iPod
®), AUX or My
Music.
Display the media menu when two
or more media are connected or
when the [MEDIA]button is
pressed in media mode.
(7) DISP
Turn HYUNDAI I30 2023 Owners Manual 4-11
Multimedia System
4
(6)MEDIA
Select USB(iPod
®), AUX or My
Music.
Display the media menu when two
or more media are connected or
when the [MEDIA]button is
pressed in media mode.
(7) DISP
Turn](/manual-img/35/56144/w960_56144-235.png)
4-11
Multimedia System
4
(6)MEDIA
Select USB(iPod
®), AUX or My
Music.
Display the media menu when two
or more media are connected or
when the [MEDIA]button is
pressed in media mode.
(7) DISP
Turn the display on or off.(8) SETUP
Access Display, Sound, Date/Time,
System, Screen Saver and Display
Off settings.
(9) TUNE knob
Turn to navigate through the sta-
tions/songs list.
Press to select an item.
■Type B
■Type A