Page 112 of 533

3-29
Convenient features of your vehicle
3
Remote window closing
function (if equipped)
You can still control the window
movement with the engine turned off
by pressing the door lock button (1)
for more than 3 seconds. The window
moves (up), as long as you press the
door lock button. The window move-
ment stops, when you release the
door lock button. The hazard warning
lights blink 3 times, when the window
is completely closed.
Information
• The remote window closing function
may abruptly stop, when you move
away from your vehicle during the
operation. Stay in close proximity of
your vehicle, whilst monitoring the
window movement.
• One of the windows may stop oper-
ating, when the window is interrupt-
ed by certain force. However, the
other windows will keep operating.
Thus, you should make sure that all
windows are closed, and that the
hazard warning lights blink 3 times.
i
NEVER leave the keys in your
vehicle with unsupervised
children, when the engine is
running.
NEVER leave any child unat-
tended in the vehicle. Even
very young children may inad-
vertently cause the vehicle to
move, entangle themselves in
the windows, or otherwise
injure themselves or others.
Always double check to make
sure arms, hands, head and
other obstructions are safely
out of the way before closing
a window.
Do not allow children to play
with the power windows. Keep
the driver’s door power window
lock switch in the LOCK posi-
tion (pressed). Serious injury
can result from unintentional
window operation by the child.
Do not extend your head,
arms or body outside the win-
dows whilst driving.
WARNING
OPD047044L
Page 117 of 533

3-34
Convenient features of your vehicle
3. Push and hold the sunroof control
lever forward (to close the sun-
shade) for about 10 seconds until
the sunroof moves slightly, then
release the control lever.
4. Push and hold the sunroof control
lever forward until the sunroof
operates as follows:
Sunshade Open →Glass Tilt Open
→Glass Slide Open →Glass Slide
Close →Sunshade Close
Then, release the control lever.
When this is complete, the sunroof
system is reset.
For more details, contact an autho-
rised HYUNDAI dealer.
Information
If you do not reset the sunroof, it may
not work properly.
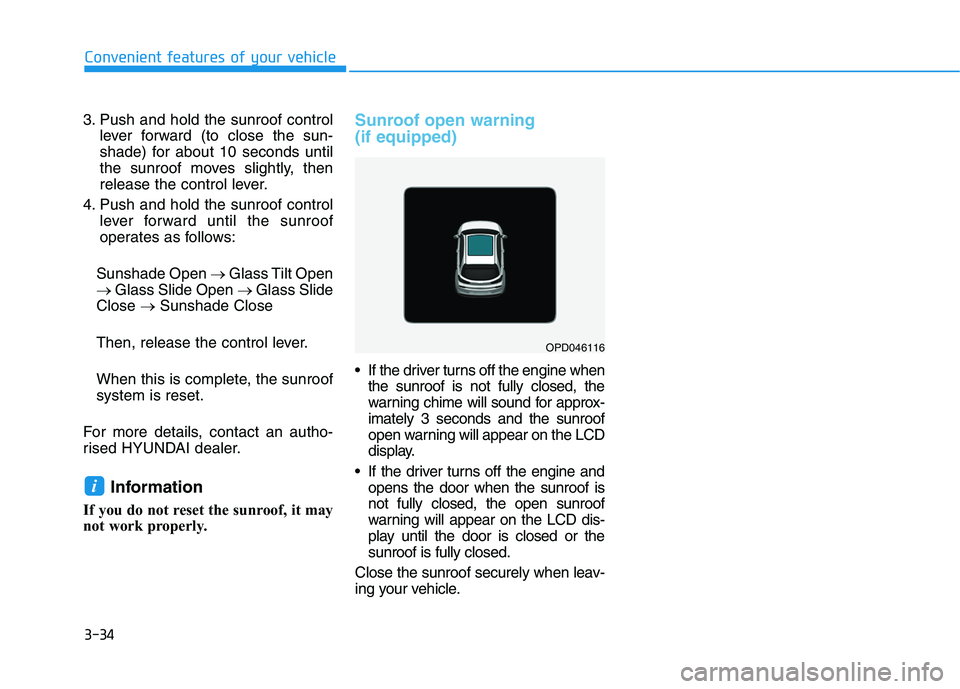
Sunroof open warning
(if equipped)
If the driver turns off the engine when
the sunroof is not fully closed, the
warning chime will sound for approx-
imately 3 seconds and the sunroof
open warning will appear on the LCD
display.
If the driver turns off the engine and
opens the door when the sunroof is
not fully closed, the open sunroof
warning will appear on the LCD dis-
play until the door is closed or the
sunroof is fully closed.
Close the sunroof securely when leav-
ing your vehicle.
i
OPD046116
Page 118 of 533
3-35
Convenient features of your vehicle
3
E EX
XT
TE
ER
RI
IO
OR
R
F
FE
EA
AT
TU
UR
RE
ES
S
Bonnet
Opening the bonnet
1. Park the vehicle and set the park-
ing brake.
2. Pull the release lever to unlatch
the bonnet. The bonnet should
pop open slightly.3. Go to the front of the vehicle, raise
the bonnet slightly, push the sec-
ondary latch up (1) inside of the
bonnet centre and lift the bonnet
(2).
4. Pull out the support rod.5. Hold the bonnet open with the
support rod (1).
OPDE046027R
OPDE046028
Grasp the support rod in the
area wrapped in rubber. The
rubber will help prevent you
from being burned by hot
metal when the engine is hot.
The support rod must be
inserted completely into the
hole provided whenever you
inspect the engine compart-
ment. This will prevent the
bonnet from falling and possi-
bly injuring you.
WARNING
OPD046030
Page 119 of 533

3-36
Convenient features of your vehicle
Closing the bonnet
1. Before closing the bonnet, check
the following:
partment must be correctly
installed.
bustible material must be removed
from the engine compartment.
2. Return the support rod to its clip to
prevent it from rattling.
3. Lower the bonnet halfway (lifted
approximately 30cm from the
closed position) and push down to
securely lock in place. Then double
check to be sure the bonnet is
secure.
If the bonnet can be raised slightly, it
is not securely locked. Open it again
and close it with more force.
Tailgate
Opening the tailgate
1. Make sure the shift lever is in P
(Park) and set the parking brake.
2. Then do one of the following :
- Press the Remote key or Smart
Key Tailgate Unlock button for
more than one second.
- Press the button on the tailgate
itself with the Smart Key in your
possession.
3. Lift the tailgate up.Before closing the bonnet,
ensure all obstructions are
removed from around the
bonnet opening.
Always double check to be
sure that the bonnet is firmly
latched before driving away.
Check there is no bonnet open
warning light or message dis-
played on the instrument clus-
ter. If the bonnet is not latched
whilst the vehicle is moving,
the chime will sound to warn
the driver the bonnet is not
fully latched. Driving with the
bonnet opened may cause a
total loss of visibility, which
might result in an accident.
Do not move the vehicle with
the bonnet in the raised posi-
tion, as vision is obstructed,
which might result in an acci-
dent, and the bonnet could fall
or be damaged.
WARNING
OPD047029L
Page 121 of 533
3-38
Convenient features of your vehicle
Fuel filler door
Opening the fuel filler door
1. Turn the engine off.
2. Push the centre edge of the fuel
filler door when the driver’s door is
unlocked.3. Pull the fuel filler door (1) out to
fully open.
4. To remove the fuel tank cap (2),
turn it anticlockwise. You may hear
a hissing noise as the pressure
inside the tank equalises.
5. Place the cap on the fuel filler door.
Information
If the fuel filler door does not open
because ice has formed around it, tap
lightly or push on the door to break
the ice and release the door. Do not
pry on the door. If necessary, spray
around the door with an approved de-
icer fluid (do not use radiator anti-
freeze) or move the vehicle to a warm
place and allow the ice to melt.
i
OPD047034N
OPD046033
Open
Close
Page 123 of 533

3-40
Convenient features of your vehicle
Information
Make sure to refuel your vehicle
according to the "Fuel Requirements"
suggested in the Introduction chapter.
Do not spill fuel on the exterior
surfaces of the vehicle. Any type
of fuel spilled on painted sur-
faces may damage the paint.
If the fuel filler cap requires
replacement, use only a genuine
HYUNDAI cap or the equivalent
specified for your vehicle. An
incorrect fuel filler cap can
result in a serious malfunction
of the fuel system or emission
control system.
NOTICE
i(Continued)
Use only approved portable
plastic fuel containers designed
to carry and store petrol.
Do not use matches or a
lighter and do not smoke or
leave a lit cigarette in your
vehicle whilst at a service sta-
tion, especially during refu-
elling.
Do not over-fill or top-off your
vehicle tank, which can cause
petrol spillage.
If a fire breaks out during refu-
elling, leave the vicinity of the
vehicle, and immediately con-
tact the manager of the service
station and then contact the
local fire department. Follow
any safety instructions they
provide.
(Continued)
(Continued)
If pressurised fuel sprays out,
it can cover your clothes or
skin and thus subject you to
the risk of fire and burns.
Always remove the fuel cap
carefully and slowly. If the cap
is venting fuel or if you hear a
hissing sound, wait until the
condition stops before com-
pletely removing the cap.
Always check that the fuel cap
is installed securely to prevent
fuel spillage in the event of an
accident.
Page 124 of 533
3-41
Convenient features of your vehicle
31. Tachometer
2. Speedometer
3. Engine coolant temperature gauge
4. Fuel gauge
5. Warning and indicator lights
6. LCD display (including Trip computer)
OPD047100E/OPD047101E
■ ■
Type B
■ ■
Type A
I IN
NS
ST
TR
RU
UM
ME
EN
NT
T
C
CL
LU
US
ST
TE
ER
R
The actual cluster in the vehicle may differ
from the illustration.
For more details, refer to the "Gauges" in
this chapter.
Page 125 of 533
3-42
Convenient features of your vehicle
Instrument cluster control
Instrument panel illumination
When the vehicle's position lights or
headlamps are on, press the illumi-
nation control button to adjust the
brightness of the instrument panel
illumination.
When pressing the illumination con-
trol button, the interior switch illumi-
nation intensity is also adjusted. The brightness of the instrument
panel illumination is displayed.
If the brightness reaches the maxi-
mum or minimum level, an chime
will sound. Never adjust the instrument clus-
ter whilst driving. This could
result in loss of control and lead
to an accident that may cause
death, serious injury, or vehicle
damage.
WARNING
OPDE046110
OPDE046049R