Page 452 of 543
Emergency Situations8-8
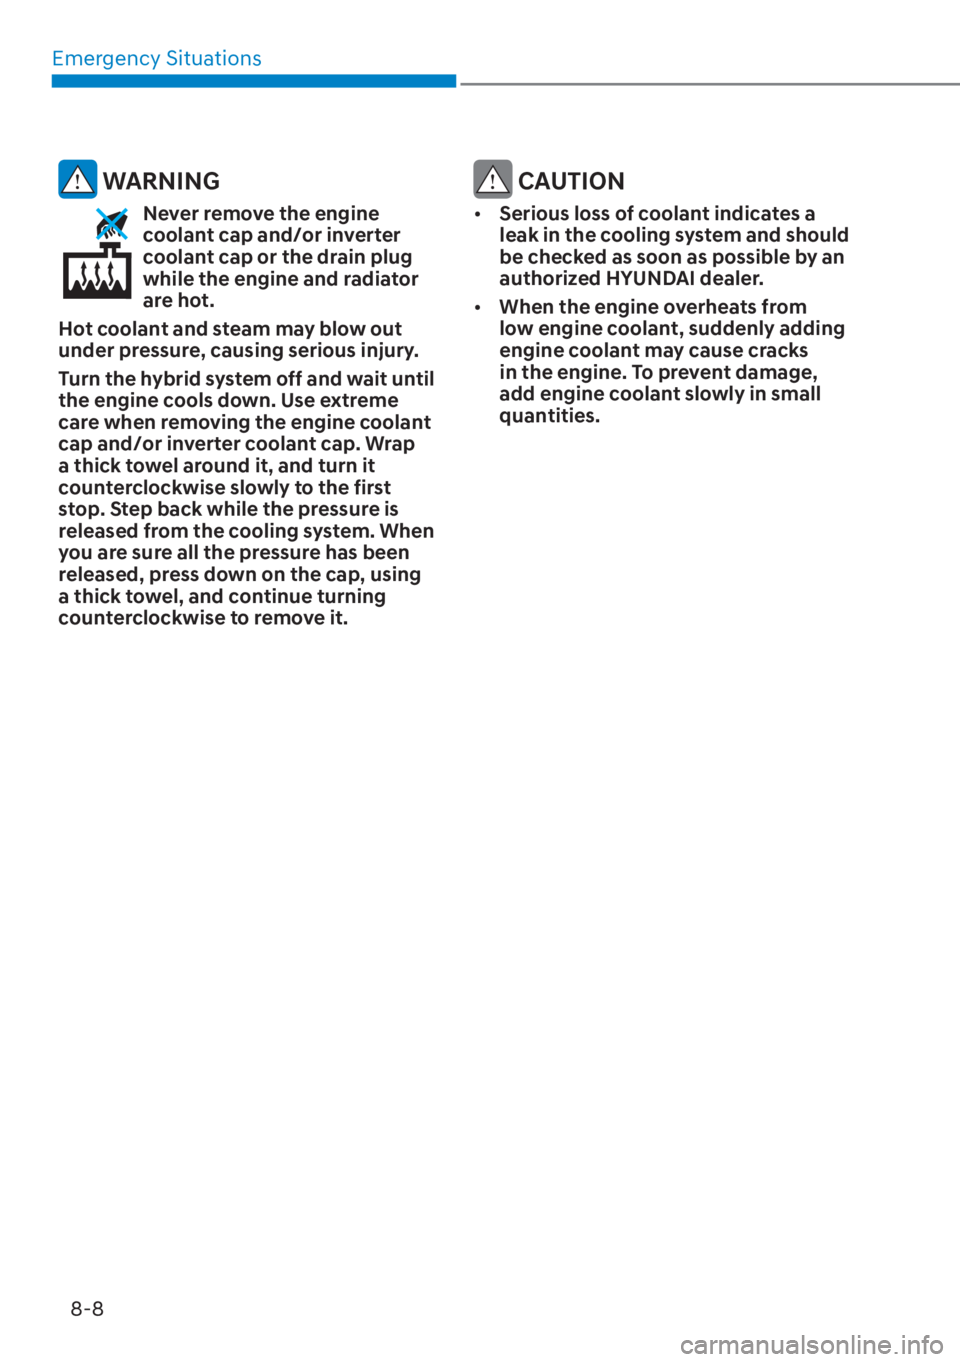
WARNING
Never remove the engine
coolant cap and/or inverter
coolant cap or the drain plug
while the engine and radiator
are hot.
Hot coolant and steam may blow out
under pressure, causing serious injury.
Turn the hybrid system off and wait until
the engine cools down. Use extreme
care when removing the engine coolant
cap and/or inverter coolant cap. Wrap
a thick towel around it, and turn it
counterclockwise slowly to the first
stop. Step back while the pressure is
released from the cooling system. When
you are sure all the pressure has been
released, press down on the cap, using
a thick towel, and continue turning
counterclockwise to remove it.
CAUTION
�[�� Serious loss of coolant indicates a
leak in the cooling system and should
be checked as soon as possible by an
authorized HYUNDAI dealer.
�[�� When the engine overheats from
low engine coolant, suddenly adding
engine coolant may cause cracks
in the engine. To prevent damage,
add engine coolant slowly in small
quantities.
Page 460 of 543

Emergency Situations8-16
Changing Tires
WARNING
A vehicle can slip or roll off of a jack
causing serious injury or death to you or
those nearby. Take the following safety
precautions:
�[�� Never place any portion of your body
under a vehicle that is supported by
a jack.
�[�� NEVER attempt to change a tire in
the lane of traffic. ALWAYS move the
vehicle completely off the road on
level, firm ground away from traffic
before trying to change a tire. If you
cannot find a level, firm place off
the road, call a towing service for
assistance.
�[�� Be sure to use the jack provided with
the vehicle.
�[�� ALWAYS place the jack on the
designated jacking positions on the
vehicle and NEVER on the bumpers
or any other part of the vehicle for
jacking support.
�[�� Do not start or run the engine while
the vehicle is on the jack.
�[�� Do not allow anyone to remain in the
vehicle while it is on the jack.
�[�� Keep children away from the road
and the vehicle. Follow these steps to change your
vehicle’s tire:
1. Park on a level, firm surface.
2. Shift the shift lever into P (Park).
3. Press the hazard warning flasher
button.
4. Remove the wheel lug nut wrench, jack, jack handle, and spare tire from
the vehicle.
OCN7080058L[A] : Block
5. Block both the front and rear of the tire diagonally opposite of the tire you
are changing.
OCN7080059L
6. Loosen the wheel lug nuts counterclockwise one turn each in
the order shown above, but do not
remove any lug nuts until the tire has
been raised off of the ground.
Page 461 of 543

08
8-17
OCN7080060L
7. Place the jack at the designated jacking position under the frame
closest to the tire you are changing.
The jacking positions are plates
welded to the frame with two
notches. Never jack at any other
position or part of the vehicle. Doing
so may damage the side sill molding
or other parts of the vehicle.
OCN7080061L
8. Insert the jack handle into the jack and turn it clockwise, raising the
vehicle until the tire clears the ground.
Make sure the vehicle is stable on the
jack.
9. Loosen the lug nuts with the wheel lug nut wrench and remove them with
your fingers. Remove the wheel from
the studs and lay it flat on the ground
out of the way. Remove any dirt or
debris from the studs, mounting
surfaces, and wheel.
10. Install the spare tire onto the studs of
the hub.
11. Tighten the lug nuts with your fingers
onto the studs with the smaller end of
the lug nuts closest to the wheel.
12. Lower the vehicle to the ground
by turning the jack handle
counterclockwise.
OCN7080062L
13. Use the wheel lug nut wrench to
tighten the lug nuts in the order
shown. Double-check each lug nut
until they are tight. After changing
tires, have an authorized HYUNDAI
dealer tighten the lug nuts to their
proper torque as soon as possible. The
wheel lug nut should be tightened to
79~94 lbf·ft (11~13 kgf·m).
Page 466 of 543
Emergency Situations8-22
WARNING
If your vehicle is equipped with a
rollover sensor, place the ignition
switch in the LOCK/OFF or ACC position
when the vehicle is being towed.
The side impact and curtain air bag
may deploy if the sensor detects the
situation as a rollover.
OCN7H080004
When towing your vehicle in an
emergency without wheel dollies:
1. Place the ignition switch in the ACC position.
2. Place the shift lever in N (Neutral).
3. Release the parking brake.
CAUTION
Failure to place the shift lever in N
(Neutral) when being towed with the
front wheels on the ground can cause
internal damage to the transmission.
Emergency Towing
If towing is necessary, we recommend
you have it done by an authorized
HYUNDAI dealer or a commercial tow
truck service.
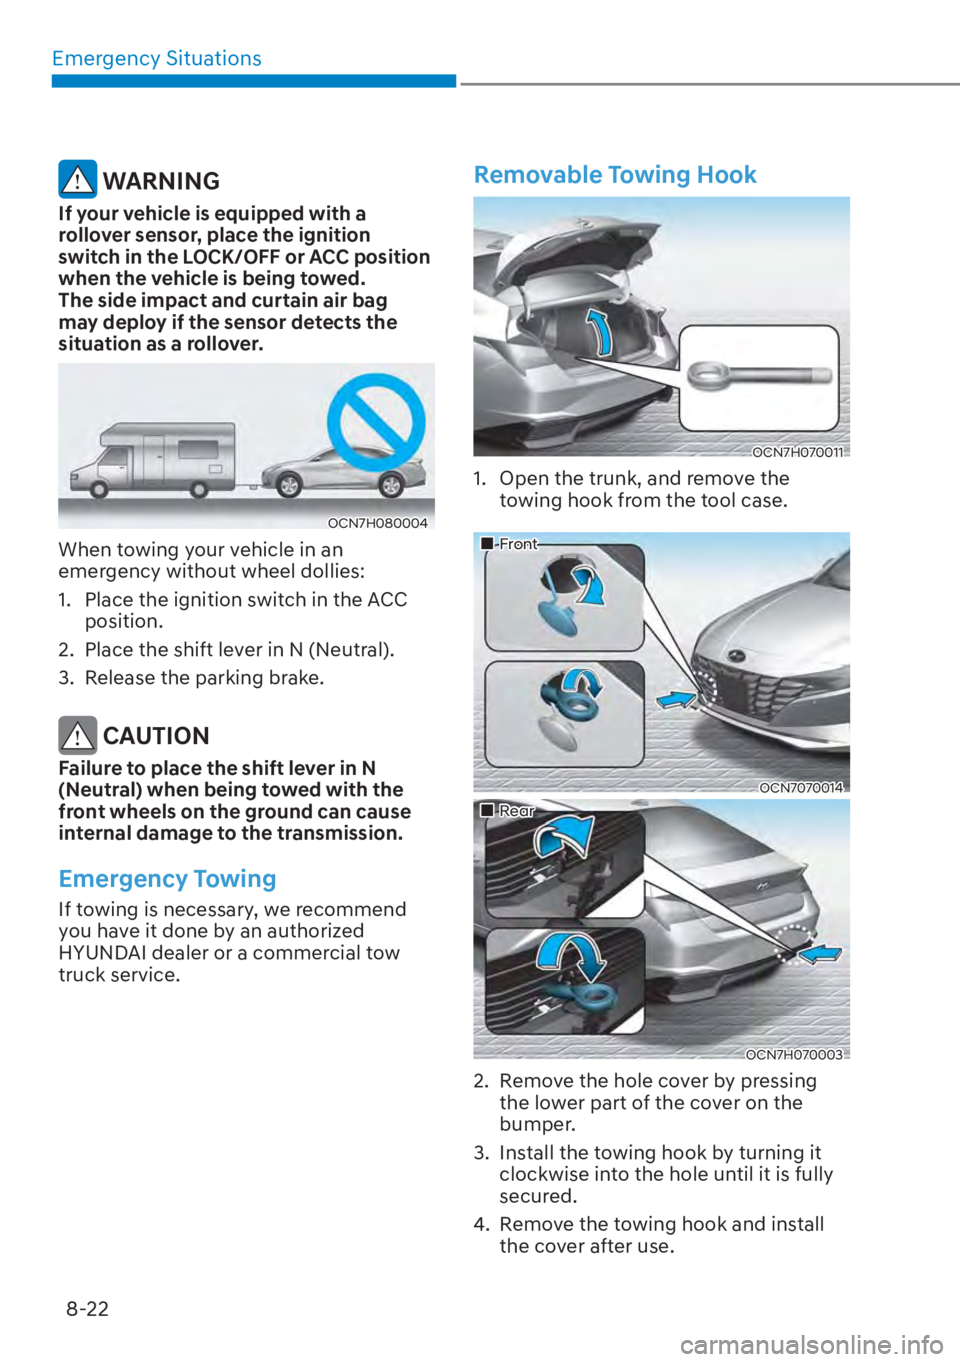
Removable Towing Hook
OCN7H070011
1. Open the trunk, and remove the towing hook from the tool case.
���„Front
OCN7070014
���„Rear
OCN7H070003
2. Remove the hole cover by pressing the lower part of the cover on the
bumper.
3. Install the towing hook by turning it clockwise into the hole until it is fully
secured.
4. Remove the towing hook and install the cover after use.
Page 488 of 543
Maintenance9-20
WARNING
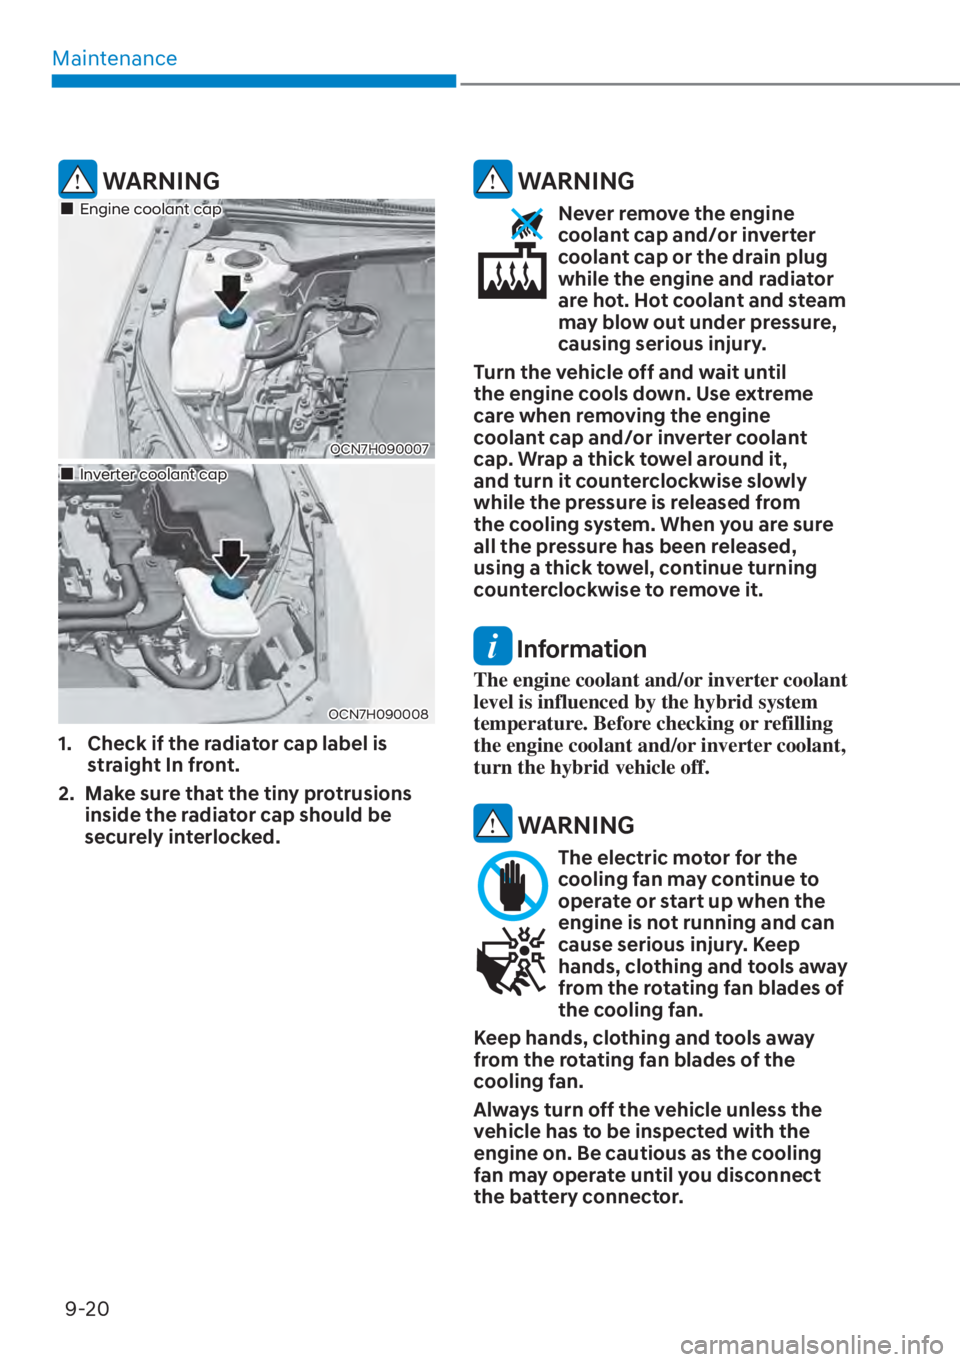
OCN7H090007
���„Engine coolant cap
OCN7H090008
���„Inverter coolant cap
1. Check if the radiator cap label is straight In front.
2. Make sure that the tiny protrusions inside the radiator cap should be
securely interlocked.
WARNING
Never remove the engine
coolant cap and/or inverter
coolant cap or the drain plug
while the engine and radiator
are hot. Hot coolant and steam
may blow out under pressure,
causing serious injury.
Turn the vehicle off and wait until
the engine cools down. Use extreme
care when removing the engine
coolant cap and/or inverter coolant
cap. Wrap a thick towel around it,
and turn it counterclockwise slowly
while the pressure is released from
the cooling system. When you are sure
all the pressure has been released,
using a thick towel, continue turning
counterclockwise to remove it.
Information
The engine coolant and/or inverter coolant
level is influenced by the hybrid system
temperature. Before checking or refilling
the engine coolant and/or inverter coolant,
turn the hybrid vehicle off.
WARNING
The electric motor for the
cooling fan may continue to
operate or start up when the
engine is not running and can
cause serious injury. Keep
hands, clothing and tools away
from the rotating fan blades of
the cooling fan.
Keep hands, clothing and tools away
from the rotating fan blades of the
cooling fan.
Always turn off the vehicle unless the
vehicle has to be inspected with the
engine on. Be cautious as the cooling
fan may operate until you disconnect
the battery connector.
Page 524 of 543
Maintenance9-56
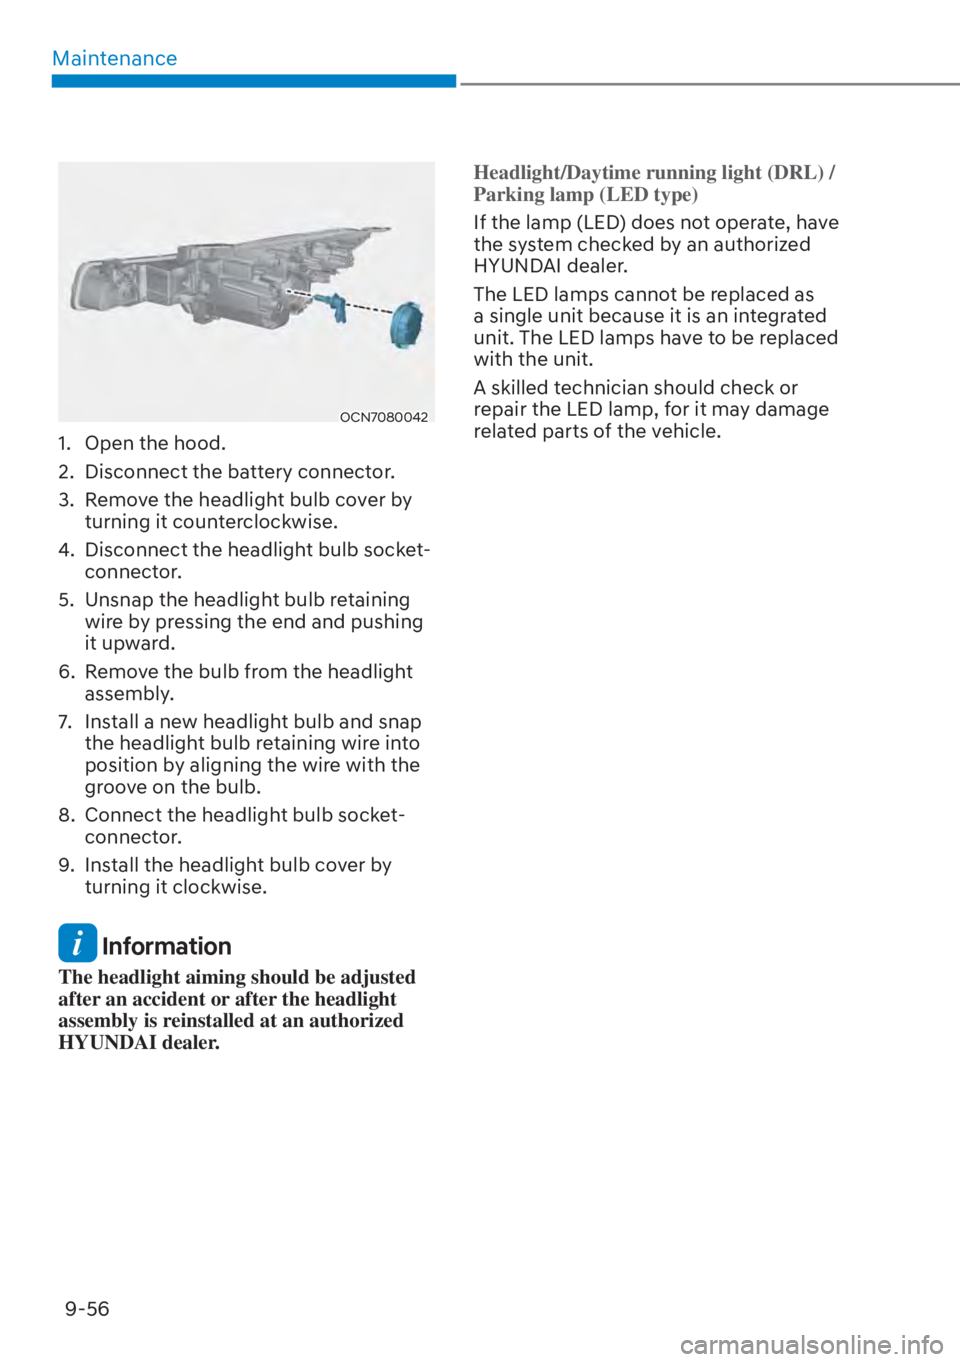
OCN7080042
1. Open the hood.
2. Disconnect the battery connector.
3. Remove the headlight bulb cover by turning it counterclockwise.
4. Disconnect the headlight bulb socket- connector.
5. Unsnap the headlight bulb retaining wire by pressing the end and pushing
it upward.
6. Remove the bulb from the headlight assembly.
7. Install a new headlight bulb and snap the headlight bulb retaining wire into
position by aligning the wire with the
groove on the bulb.
8. Connect the headlight bulb socket- connector.
9. Install the headlight bulb cover by turning it clockwise.
Information
The headlight aiming should be adjusted
after an accident or after the headlight
assembly is reinstalled at an authorized
HYUNDAI dealer. Headlight/Daytime running light (DRL) /
Parking lamp (LED type)
If the lamp (LED) does not operate, have
the s
ystem checked by an authorized
HYUNDAI dealer.
The LED lamps cannot be replaced as
a single unit because it is an integrated
unit. The LED lamps have to be replaced
with the unit.
A skilled technician should check or
repair the LED lamp, for it may damage
related parts of the vehicle.
Page 525 of 543
09
9-57
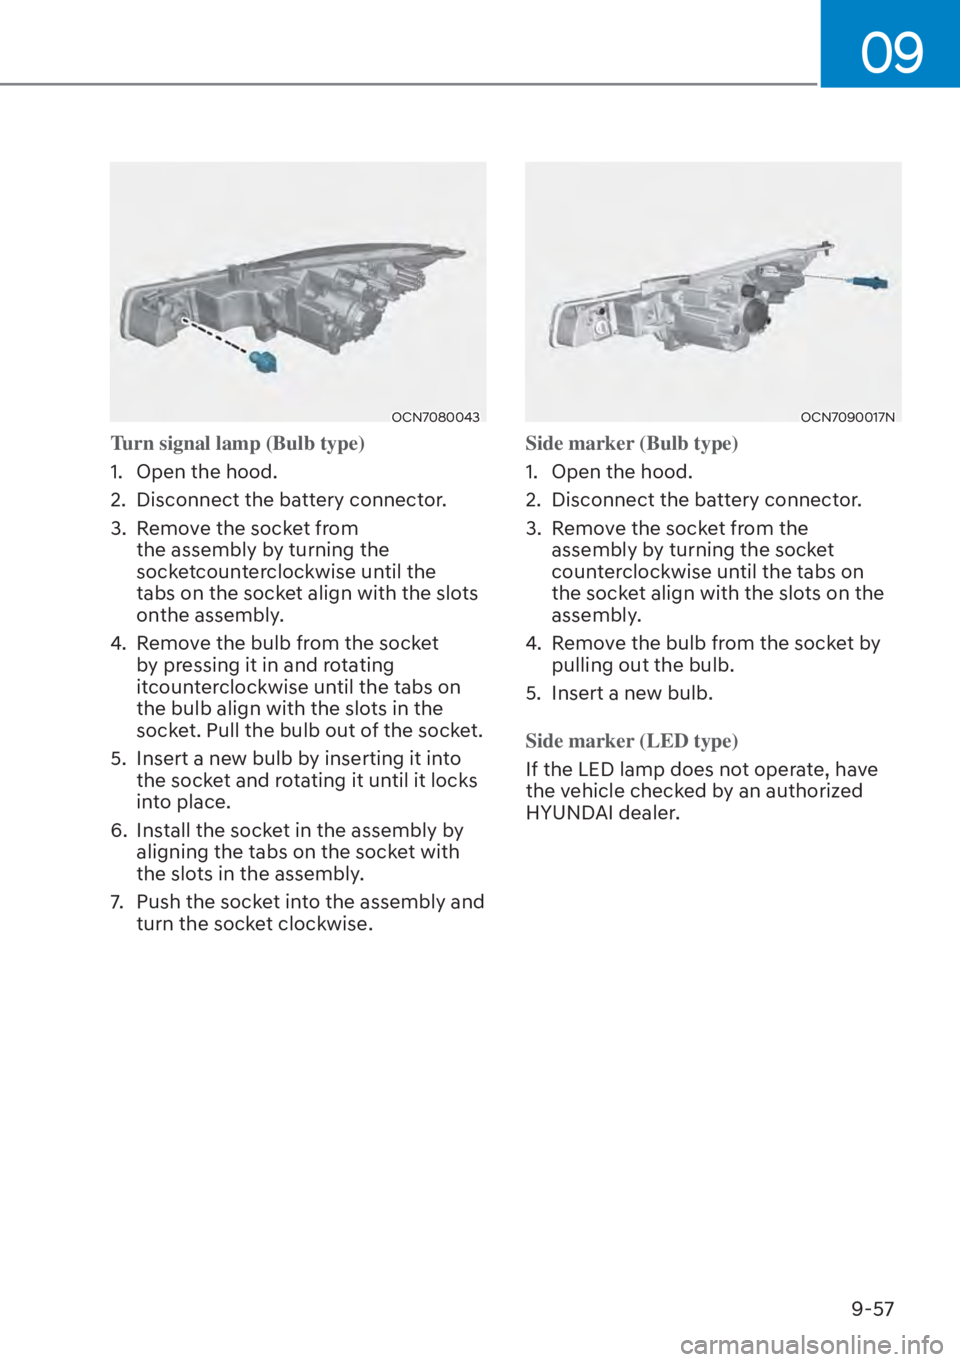
OCN7080043
Turn signal lamp (Bulb type)
1. Open the hood.
2.
Disconnect the battery connector.
3. Remove the socket from the assembly by turning the
socketcounterclockwise until the
tabs on the socket align with the slots
onthe assembly.
4. Remove the bulb from the socket by pressing it in and rotating
itcounterclockwise until the tabs on
the bulb align with the slots in the
socket. Pull the bulb out of the socket.
5. Insert a new bulb by inserting it into the socket and rotating it until it locks
into place.
6. Install the socket in the assembly by aligning the tabs on the socket with
the slots in the assembly.
7. Push the socket into the assembly and turn the socket clockwise.
OCN7090017N
Side marker (Bulb type)
1. Open the hood.
2.
Disconnect the battery connector.
3. Remove the socket from the assembly by turning the socket
counterclockwise until the tabs on
the socket align with the slots on the
assembly.
4. Remove the bulb from the socket by pulling out the bulb.
5. Insert a new bulb.
Side marker (LED type)
If the LED lamp does not operate, have
the v
ehicle checked by an authorized
HYUNDAI dealer.
Page 528 of 543
![HYUNDAI ELANTRA HYBRID 2023 Owners Manual Maintenance9-60
OCN7080075L
OCN7090019N
[A] : Tail/Stop lamp, [B] : Turn signal lamp,
[C] : Rear side marker
5. Remove the socket from the assembly by turning the socket
counterclockwise until the HYUNDAI ELANTRA HYBRID 2023 Owners Manual Maintenance9-60
OCN7080075L
OCN7090019N
[A] : Tail/Stop lamp, [B] : Turn signal lamp,
[C] : Rear side marker
5. Remove the socket from the assembly by turning the socket
counterclockwise until the](/manual-img/35/58880/w960_58880-527.png)
Maintenance9-60
OCN7080075L
OCN7090019N
[A] : Tail/Stop lamp, [B] : Turn signal lamp,
[C] : Rear side marker
5. Remove the socket from the assembly by turning the socket
counterclockwise until the tabs on
the socket align with the slots on the
assembly.
6. Remove the bulb from the socket by pressing it in and rotating it
counterclockwise until the tabs on the
bulb align with the slots in the socket.
Pull the bulb out of the socket.
7. Insert a new bulb by inserting it into the socket and rotating it until it locks
into place.
8. Install the socket in the assembly by aligning the tabs on the socket with
the slots in the assembly. Push the
socket into the assembly and turn the
socket clockwise.
Reverse lamp (Inner lamp)
(Bulb type)
1. Disconnect the connector and then remove the nuts by turning the nuts
counter clockwise.
2. Take the light assembly out.
OCN7080053
3. Remove the socket from the assembly by turning the socket
counterclockwise until the tabs on
the socket align with the slots on the
assembly.
4. Remove the bulb by pulling it out.
5. Insert a new bulb by inserting it into the socket.
6. Install the light assembly to the trunk.
7. Reinstall the trunk lid cover by pushing in the screw.
Stop/Tail lamp and rear side marker
(LED type)
If the LED lamp does not operate, we
recommend that you have the vehicle
checked by an authorized HYUNDAI
dealer.