Page 516 of 543

Maintenance9-48
Driver’s side fuse panel
Fuse Name Fuse Rating Circuit Protected
MEMORY1 10
AA/C Controller, Instrument Cluster,
A/C Control Module, Driver IMS Control Module
AIR BAG2 10A SRS Control Module
MODULE4 10AIBU, ATM Shift Lever Indicator, Front Console Switch,
ADAS Unit, Crash Pad Switch, LKA Unit, VESS Unit
MODULE7 7.5AIAU, ADAS Unit, Rear Seat Wamer Control Module,
Cooling Fan Motor
START 7.5ABurglar Alarm Relay, Transaxle Range Switch, IBU,
Ignition Switch
BATTERY
MANAGEMENT 10A BMS Control Module
CLUSTER 7.5A Instrument Cluster (IG1)
IBU2 7.5A IBU
A/C1 7.5AA/C Controller, A/C Control Module, PM Sensor,
E/R Junction Block (Blower Relay, PTC Heater1/2 Relay),
Electronic A/C Compressor
TRUNK 10A Trunk Relay
S/HEATER FRT 20AFront Ventilation Seat Control Module,
Front Seat Warmer Control Module
P/WINDOW LH 25A Power Window Main Switch
MULTIMEDIA 15A Audio, A/V & Navigation Head Unit
SPARE 1 (B+) 10A Not Used (Black Box)
FCA 10A Front Radar
MDPS 7.5A MDPS Unit
MODULE6 7.5A IBU
S/HEATER RR 20A Rear Seat Warmer Control Module
SAFETY P/
WINDOW DRV 25A Driver Safety Power Window Module
P/WINDOW RH 25APassenger Power Window Switch,
Power Window Main Switch
BRAKE SWITCH 10A IBU, Stop Lamp Switch
IBU1 15A IBU
Page 517 of 543

09
9-49
Driver’s side fuse panel
Fuse NameFuse Rating Circuit Protected
MODULE2 10
AA/V & Navigation Head Unit, AMP, ADAS Unit,
BMS Control Module, Power Outside Mirror Switch,
IBU, IAU, Audio, E/R Junction Block (Power Outlet Relay)
AIR BAG1 15APassenger Occupant Detection Sensor,
SRS Control Module
MODULE5 10AData Link Connector, Audio, ATM Shift Lever Indicator,
A/V & Navigation Head Unit, Wireless Charger, AMP,
A/C Control Module, Electro Chromic Mirror,
A/C Controller, Rear Seat Wamer Control Module,
Front Ventilation Seat Control Module, Front Seat
Wamer Control Module, Driver IMS Control Module
SPARE 2 (IG2) 10A Not Used (Black Box)
AMP 25A AMP
HEATED MIRROR 10A A/C Controller, Driver/Passenger Power Outside Mirror
DOOR LOCK 20A Door Lock/Unlock Switch, Two Turn Unlock Relay
IAU 10A IAU, BLE Unit, Driver/Passenger Door NFC Module
MODULE3 7.5A IAU, Stop Lamp Switch, Sport Mode Switch
A/BAG IND 7.5A Instrument Cluster, Overhead Console Lamp (MTS)
WASHER 15A Multifunction Switch
P/SEAT PASS 30A Not Used
P/SEAT DRV 30A Driver Power Seat Switch, Driver IMS Control Module
WIPER 10AIBU, ECM, Front Wiper Motor,
PCB Block (Front Wiper (LOW) Relay)
MODULE1 10AData Link Connector, Hazard Switch, Key Interlock,
Driver/Passenger Smart Key Outside Handle,
Sport Mode Switch
SUNROOF 20A Sunroof Motor
USB CHARGER 15A Front USB Charger, Console USB Charger
IG1 25A PCB Block (Fuse - IEB 4/ECU 3/TCU 2/EWP 3)
Page 519 of 543
09
9-51
Engine compartment fuse panel
Type Fuse NameFuse Rating Circuit Protected
MULTI
FUSE
-3 MDPS
80A MDPS Unit
MULTI
FUSE-2 COOLING FAN
60A Cooling Fan Motor
IEB 3 60A IDB Unit
PTC HEATER 2 50A PTC Heater 2 Relay
MULTI
FUSE-1 B+5
60APCB Block (Engine Control Relay, Fuse -
ECU 2/HORN/WIPER)
B+1 60AICU Junction Block (IPS2/IPS5/IPS6/IPS7/
IPS14)
B+2 60AICU Junction Block (IPS1/IPS4/IPS8/IPS9/
IPS10)
B+3 50AFuse - EWP 2, ICU Junction Block (Fuse -
SAFETY P/WINDOW DRV, TRUNK, AMP, P/
SEAT DRV, P/SEAT PASS, S/HEATER FRT, S/
HEATER RR, Long Term Load Latch Relay
(Fuse - MEMORY 1/MULTIMEDIA))
IEB 2 60A IDB Unit
PTC HEATER 1 50A PTC Heater 1 Relay
BLOWER 40ABlower Relay, Multipurpose Check
Connector
IG1 40A Ignition Switch, PDM (IG1/ACC) Relay
IG2 40A Ignition Switch, PDM (IG2) Relay
Page 520 of 543
Maintenance9-52
Engine compartment fuse panel
Type Fuse Name Fuse Rating Circuit Protected
FUSE B
ATTERY C/
FAN 1 15A Battery C/Fan Relay
IEB1 40A IDB Unit, Multipurpose Check Connector
CLUTCH
ACTUATOR 30A Clutch Actuator
POWER
OUTLET 1 40A Power Outlet Relay
EWP 2 10A Auxiliary Electric Water Pump
EWP 1 10A Electric Water Pump
POWER
OUTLET 2 20A Front Power Outlet
DCT 1 40A TCM
DCT 2 40A TCM
REAR
HEATED 40A Rear Heated Relay
B+4 40AICU Junction Block (Power Window Relay,
Fuse - AIR BAG 2, IBU 1, BRAKE SWITCH,
DOOR LOCK, MODULE 1, SUNROOF, IAU,
BMS)
HEV ECU 1 10A HPCU
IG3 20A IG3 Relay
TCU 1 10A TCM
FUEL PUMP 20A Fuel Pump Relay
HEV ECU 2 10A HPCU, BMS Control Module
Sub Block FUSE BATTERY C/
FAN 2 10A Battery C/Fan Relay
Page 521 of 543
09
9-53
Engine compartment fuse panel
Fuse NameFuse Rating Circuit Protected
WIPER 25A
Wiper Relay
HORN 15A Horn Relay
IGN COIL 20A Ignition Coil #1 ~ #4
ECU2 15A ECM
SENSOR3 10A E/R Junction Block (Fuel Pump Relay)
SENSOR2 10ACamshaft Position Sensor #1/#2 (Intake/Exhaust), Mass
Air Flow Sensor, ELCM, Oil Control Valve #1/#2 (Intake/
Exhaust),
Purge Control Solenoid Valve
ECU3 10A ECM, HPCU, Clutch Actuator
SENSOR1 15A Oxygen Sensor (Up/Down)
IEB 4 10A IDB Unit, Multipurpose Check Connector
EWP 3 10A Auxiliary Electric Water Pump
ECU1 20A ECM
TCU2 15A Transaxle Range Switch, TCM
Page 522 of 543

Maintenance9-54
Consult an authorized HYUNDAI dealer
to replace most vehicle light bulbs. It is
difficult to replace vehicle light bulbs
because other parts of the vehicle must
be removed before you can get to the
bulb. This is especially true for removing
the headlight assembly to get to the
bulb(s).
Removing/installing the headlight
assembly can result in damage to the
vehicle.
Information
The headlight and tail lamp lenses could
appear frosty if the vehicle is washed after
driving or the vehicle is driven at night in
wet weather. This condition is caused by
temperature difference between the lamp
inside and outside and does not indicate
a problem with your vehicle. When
moisture condenses in the lamp, it will be
removed after driving with the headlight
on. The removable level may differ
depending on lamp size, lamp position
and environmental condition. However, if
moisture is not removed, have the vehicle
inspected by an authorized HYUNDAI
dealer.
WARNING
�[�� Prior to replacing a lamp, depress the
foot brake, move the shift lever into P
(Park) apply the parking brake, place
the ignition switch to the LOCK/OFF
position, and take the key with you
when leaving the vehicle to avoid
sudden movement of the vehicle and
to prevent possible electric shock.
�[�� Be aware the bulbs may be hot and
may burn your fingers.
�[�� When the bulb is disconnected or the
lamp connector is removed while the
lamp is operating normally, the fuse
box electronics may recognize the
lamp as a malfunction. Therefore, a
fault record for the lamp may remain
in the Diagnostic Trouble Code (DTC)
recorded in the fuse box.
LIGHT BULBS
Page 524 of 543

Maintenance9-56
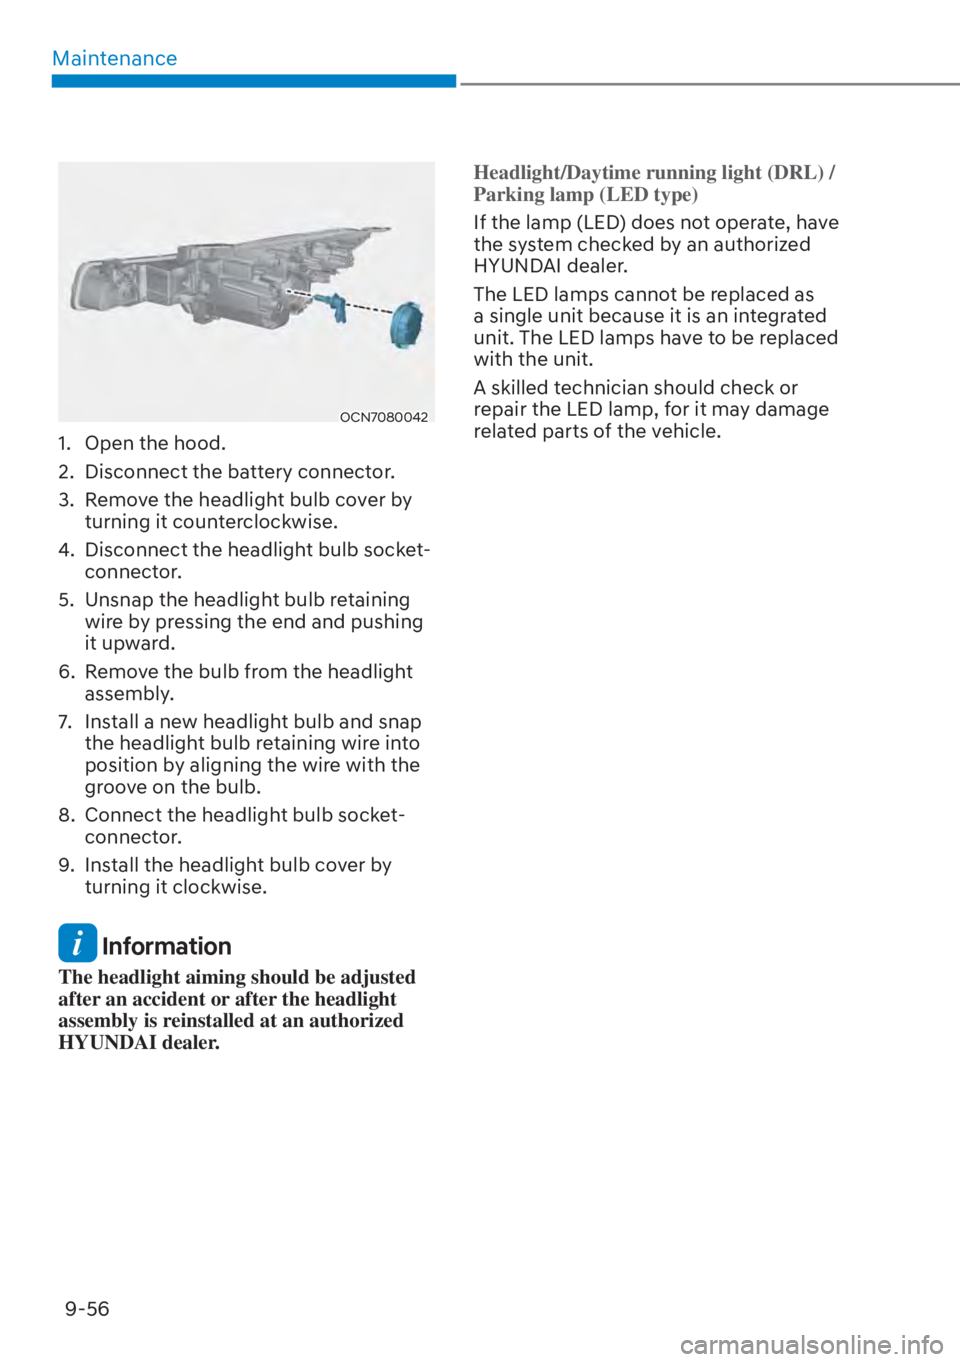
OCN7080042
1. Open the hood.
2. Disconnect the battery connector.
3. Remove the headlight bulb cover by turning it counterclockwise.
4. Disconnect the headlight bulb socket- connector.
5. Unsnap the headlight bulb retaining wire by pressing the end and pushing
it upward.
6. Remove the bulb from the headlight assembly.
7. Install a new headlight bulb and snap the headlight bulb retaining wire into
position by aligning the wire with the
groove on the bulb.
8. Connect the headlight bulb socket- connector.
9. Install the headlight bulb cover by turning it clockwise.
Information
The headlight aiming should be adjusted
after an accident or after the headlight
assembly is reinstalled at an authorized
HYUNDAI dealer. Headlight/Daytime running light (DRL) /
Parking lamp (LED type)
If the lamp (LED) does not operate, have
the s
ystem checked by an authorized
HYUNDAI dealer.
The LED lamps cannot be replaced as
a single unit because it is an integrated
unit. The LED lamps have to be replaced
with the unit.
A skilled technician should check or
repair the LED lamp, for it may damage
related parts of the vehicle.
Page 525 of 543

09
9-57
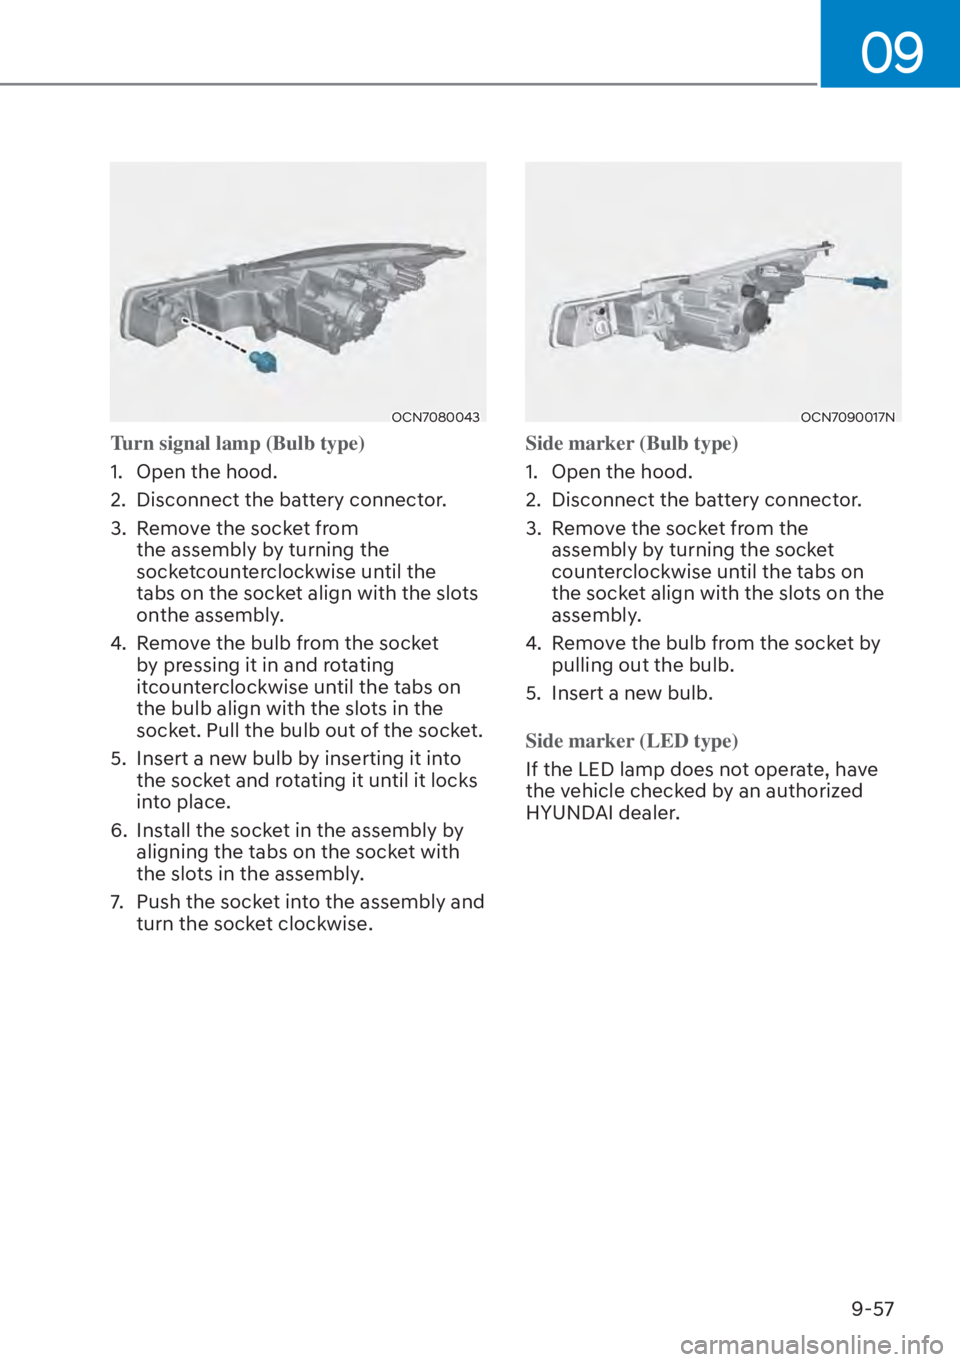
OCN7080043
Turn signal lamp (Bulb type)
1. Open the hood.
2.
Disconnect the battery connector.
3. Remove the socket from the assembly by turning the
socketcounterclockwise until the
tabs on the socket align with the slots
onthe assembly.
4. Remove the bulb from the socket by pressing it in and rotating
itcounterclockwise until the tabs on
the bulb align with the slots in the
socket. Pull the bulb out of the socket.
5. Insert a new bulb by inserting it into the socket and rotating it until it locks
into place.
6. Install the socket in the assembly by aligning the tabs on the socket with
the slots in the assembly.
7. Push the socket into the assembly and turn the socket clockwise.
OCN7090017N
Side marker (Bulb type)
1. Open the hood.
2.
Disconnect the battery connector.
3. Remove the socket from the assembly by turning the socket
counterclockwise until the tabs on
the socket align with the slots on the
assembly.
4. Remove the bulb from the socket by pulling out the bulb.
5. Insert a new bulb.
Side marker (LED type)
If the LED lamp does not operate, have
the v
ehicle checked by an authorized
HYUNDAI dealer.