2023 HONDA HRV warning light
[x] Cancel search: warning lightPage 89 of 664

87
uuIndicators u
Continued
Instrument Panel
Parking Brake and
Brake System
Indicator (Red)
Parking Brake and
Brake System
Indicator (Amber)
U.S.
Canada
U.S.
Canada Automatic Brake
Hold System Indicator
Automatic Brake Hold
Indicator
U.S.
Canada
*1 : When you set the power mode to ON, these indicators come on to indicate that system checks are being performed. They go off a few seconds later or after the engine
has started. If an indicator does not come on or turn off, ther e may be a malfunction in the corresponding system. To resolve the issue, follow the instructions in the
owner's manual.
P. 88*1
Malfunction Indicator
Lamp
Charging System
Indicator
Anti-lock Brake System
(ABS ) Indicator
Seat Belt Reminder
Indicator
Low Fuel Indicator
(Amber)
Vehicle Stability AssistTM
(VSA®) System Indicator
Vehicle Stability Assist
TM
(VSA®) OFF Indicator
Supplemental Restraint
System Indicator
Auto High-Beam
Indicator
Low Tire Pressure/TPMS
Indicator*
Electric Power Steering
(EPS) System Indicator
Turn Signal and Hazard
Warning Indicators
Lights On Indicator
High Beam Indicator
System Message Indicator
Adaptive Cruise Control
(ACC) with Low Speed
Follow Indicator (Amber)
Lane Keeping Assist System
(LKAS) Indicator (Amber)
Safety Support Indicator
(Green/Gray)
P. 90
P. 90
P. 90
P. 91
P. 91*1 *1
P. 95
*1
Shift Position Indicator P. 91
Transmission System
Indicator P. 91
P. 92
P. 92
P. 93
P. 93
P. 96
P. 94
*1
*1
P. 94
*1 P. 93
P. 99
*1
P. 96
P. 96
P. 96
Immobilizer System
Indicator
Security System Alarm
Indicator P. 97
P. 98
P. 100
P. 103
*1
Adaptive Cruise Control
(ACC) with Low Speed
Follow Indicator (White/
Green) P. 99
*1
Lane Keeping Assist
System (LKAS) Indicator
(White/Green) P. 100
*1Safety Support Indicator
(Amber) P. 101
*1
Cruise Mode Indicator
(White/Green) P. 99
*1
Low Temperature
Indicator P. 92
P. 97*1 *1
ECON
Mode Indicator P. 98
NORMAL Mode Indicator P. 98
SNOW Mode Indicator P. 98
Hill Descent Control System
Indicator (White/Green) P. 98*1
*1 *1
*1
*1
* Not available on all models
23 HR-V-313V06000_01.book 87 ページ 2022年4月4日 月曜日 午前10時49分
Page 98 of 664

96
uuIndicators u
Instrument Panel
IndicatorNameOn/BlinkingExplanation
Turn Signal and
Hazard Warning
Indicators•Blinks when you oper ate the turn signal
lever.
• Blinks along with all turn signals when you
press the hazard warning button.•Does not blink or blinks rapidly - Have your
vehicle checked by a dealer.
Lights On
Indicator• Comes on when the parking, tail, and other
external lights are on.2 Lights P. 166
High Beam
Indicator•Comes on when the high beam headlights
are on.—
Auto High-Beam
Indicator•Comes on when all the operating conditions
of the auto high-beam are met.2 Auto High-Beam P. 171
23 HR-V-313V06000_01.book 96 ページ 2022年4月4日 月曜日 午前10時49分
Page 100 of 664

98
uuIndicators u
Instrument Panel
IndicatorNameOn/BlinkingExplanation
ECON Mode
Indicator• Comes on when you set the drive mode to
ECON .2Drive Mode Switch P. 429
NORMAL Mode
Indicator• Comes on when you set the drive mode to
NORMAL .2Drive Mode Switch P. 429
SNOW Mode
Indicator• Comes on when you set the drive mode to
SNOW .2Drive Mode Switch P. 429
Hill Descent
Control System
Indicator (White/
Green)•Lights up in white when the hill descent
control system is on and ready to use.
• Lights up in green when the hill descent
control system is in operation.
2 Hill Descent Control System P. 432
System Message
Indicator
•Comes on along with a beep when a
problem is detected. A system message on
the driver information interface appears at
the same time.•While the indicator is on, press the (home)
button, and select Warnings to see the message
again.
2 Accessing contents in the display P. 107
•Refer to the Indicators in formation in this chapter
when a system message appears on the driver
information interface. Respond to the message
accordingly.
• The driver information interface will not return to
the normal screen unless the warning is canceled,
or the (home) button is pressed.
23 HR-V-313V06000_01.book 98 ページ 2022年4月4日 月曜日 午前10時49分
Page 128 of 664

126
uuGauges and Driver Information Interface uDriver Information Interface
Instrument Panel
*1:Default Setting Setup Group Customizable Features
Description Selectable Settings
Meter setup
Language selectionChanges the displayed language.English*1/Français /
Español
Adjust outside temp.
displayAdjusts the temperature reading by a few degrees.
-5°F ~ ±0°F*1 ~ +5°F
(U.S.)
-3°C ~ ±0°C
*1 ~ +3°C
(Canada)
“Trip A” reset timingChanges the setting of how to reset trip meter A,
average fuel economy A, average speed A, and elapsed
time A.When fully refueled /
IGN OFF /Manually reset*1
“Trip B” reset timing
Changes the setting of how to reset trip meter B,
average fuel economy B, av erage speed B, and elapsed
time B.When fully refueled /
IGN OFF /Manually reset*1
Adjust alarm volumeChanges the alarm volume, su ch as buzzers, warnings,
turn signal sound, and so on.High /Mid*1/Low
Fuel efficiency backlightTurns the ambient meter feature on and off.ON*1/OFF
Rear seat reminderTurns the Rear Seat Reminder feature on and off.ON*1/OFF
Speed/distance unitsSelects the trip meter units.
km/h∙km/ mph∙miles*1
(U.S.)
km/h∙km
*1/ mph∙miles
(Canada)
TachometerSelects whether the tachomet er is displayed on the
instrument panel.ON*1/ OFF
23 HR-V-313V06000_01.book 126 ページ 2022年4月4日 月曜日 午前10時49分
Page 161 of 664

159Continued
Controls
Windows
Opening/Closing the Power Windows
The power windows can be opened and closed when the power mode is in ON,
using the switches on the doors. The driver’s side switches can be used to open and
close all of the windows.
The power window lock button on the driver’s side must be switched off (not
pushed in, indicator off) to open and cl ose the windows from anywhere other than
the driver’s seat.
When the power window lock button is pushed in, the indicator comes on and you
can only operate the driver’s window. Turn the power window lock button on if a
child is in the vehicle.
■Manual operation
To open: Push the switch down lightly, and
hold it until the desired position is reached.
To close: Pull the switch up lightly, and hold it
until the desired position is reached.
■Automatic operation
To open: Push the switch down firmly.
To close: Pull the switch up firmly.
The window opens or closes completely. To
stop the window at any time, push or pull the
switch briefly.
■Opening/Closing the Windows with Auto-Open/Close
Function
1 Opening/Closing the Power Windows
The power windows can be operated for up to 10
minutes after you set the power mode to VEHICLE
OFF. Opening either front door cancels this function.
Auto Reverse
If a power window senses resistance when closing
automatically, it will stop closing and reverse
direction.
The driver’s window auto re verse function is disabled
when you continuously pull up the switch.
The auto reverse function stops sensing when the
window is almost closed to en sure that it fully closes.
3WARNING
Closing a power window on someone’s
hands or fingers can cause serious injury.
Make sure your passengers are away from
the windows before closing them.
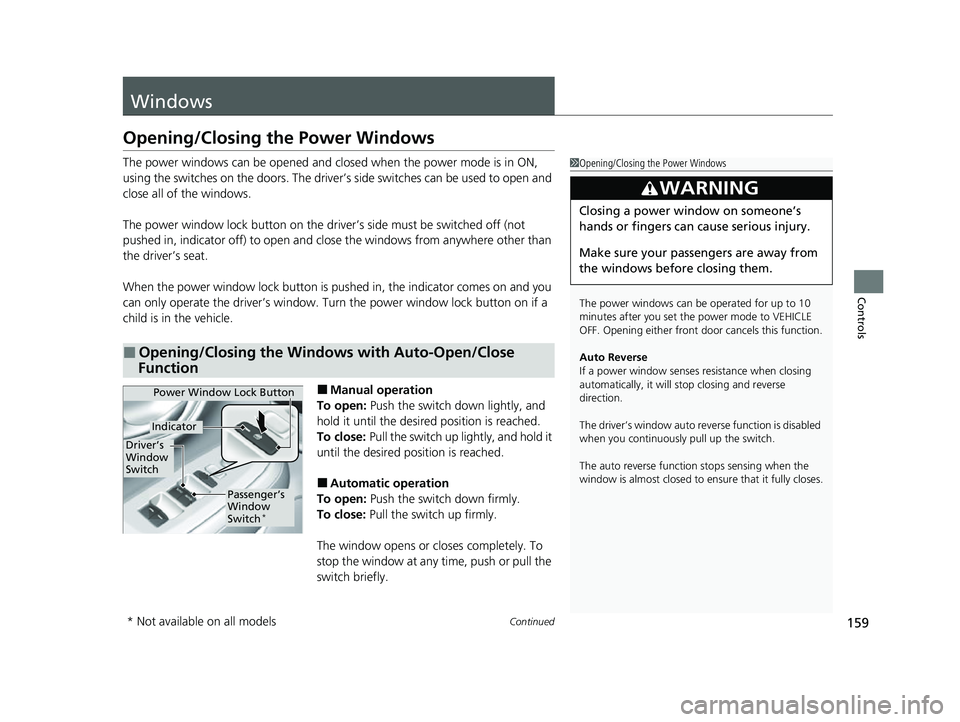
Power Window Lock Button
Driver’s
Window
Switch
Indicator
Passenger’s
Window
Switch
*
* Not available on all models
23 HR-V-313V06000_01.book 159 ページ 2022年4月4日 月曜日 午前10時49分
Page 164 of 664

162
Controls
Moonroof*
Opening/Closing the Moonroof
You can operate the moonroof when the power mode is in ON. Use the switch in
the front of the ceiling to open and close the moonroof.
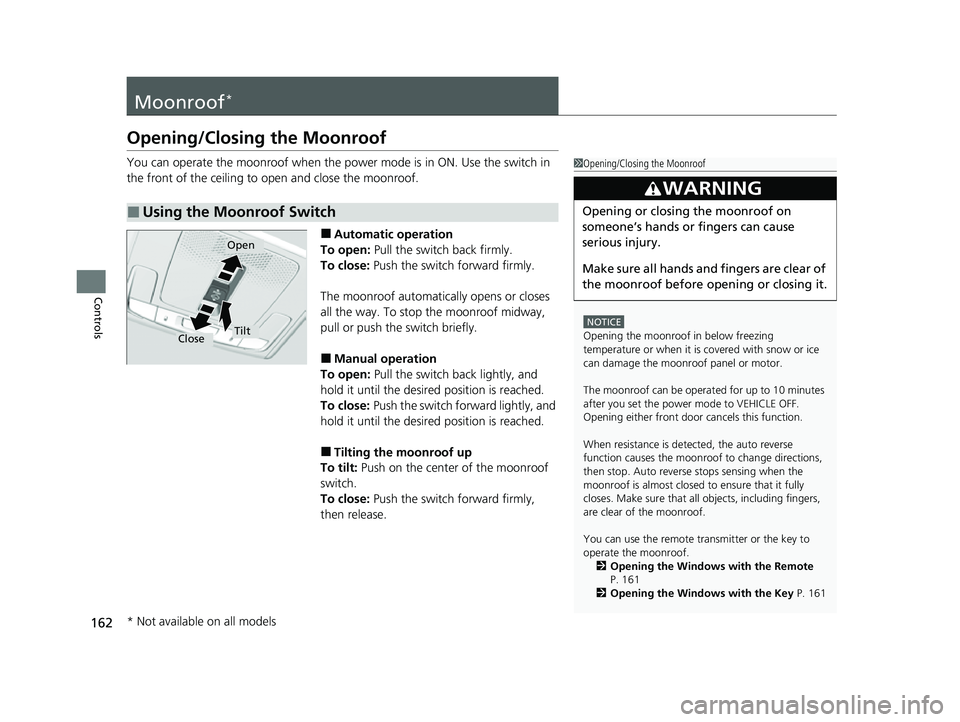
■Automatic operation
To open: Pull the switch back firmly.
To close: Push the switch forward firmly.
The moonroof automatica lly opens or closes
all the way. To stop the moonroof midway,
pull or push the switch briefly.
■Manual operation
To open: Pull the switch back lightly, and
hold it until the desired position is reached.
To close: Push the switch forward lightly, and
hold it until the desired position is reached.
■Tilting the moonroof up
To tilt: Push on the center of the moonroof
switch.
To close: Push the switch forward firmly,
then release.
■Using the Moonroof Switch
1 Opening/Closing the Moonroof
NOTICE
Opening the moonroof in below freezing
temperature or when it is covered with snow or ice
can damage the moonr oof panel or motor.
The moonroof can be opera ted for up to 10 minutes
after you set the power mode to VEHICLE OFF.
Opening either front door cancels this function.
When resistance is detected, the auto reverse
function causes the moonroof to change directions,
then stop. Auto reverse stops sensing when the
moonroof is almost closed to ensure that it fully
closes. Make sure that al l objects, including fingers,
are clear of the moonroof.
You can use the remote transmitter or the key to
operate the moonroof.
2 Opening the Windows with the Remote
P. 161
2 Opening the Windows with the Key P. 161
3WARNING
Opening or closing the moonroof on
someone’s hands or fingers can cause
serious injury.
Make sure all hands and fingers are clear of
the moonroof before opening or closing it.
Open
CloseTilt
* Not available on all models
23 HR-V-313V06000_01.book 162 ページ 2022年4月4日 月曜日 午前10時49分
Page 189 of 664

187
uuSeats uHead Restraints
Controls
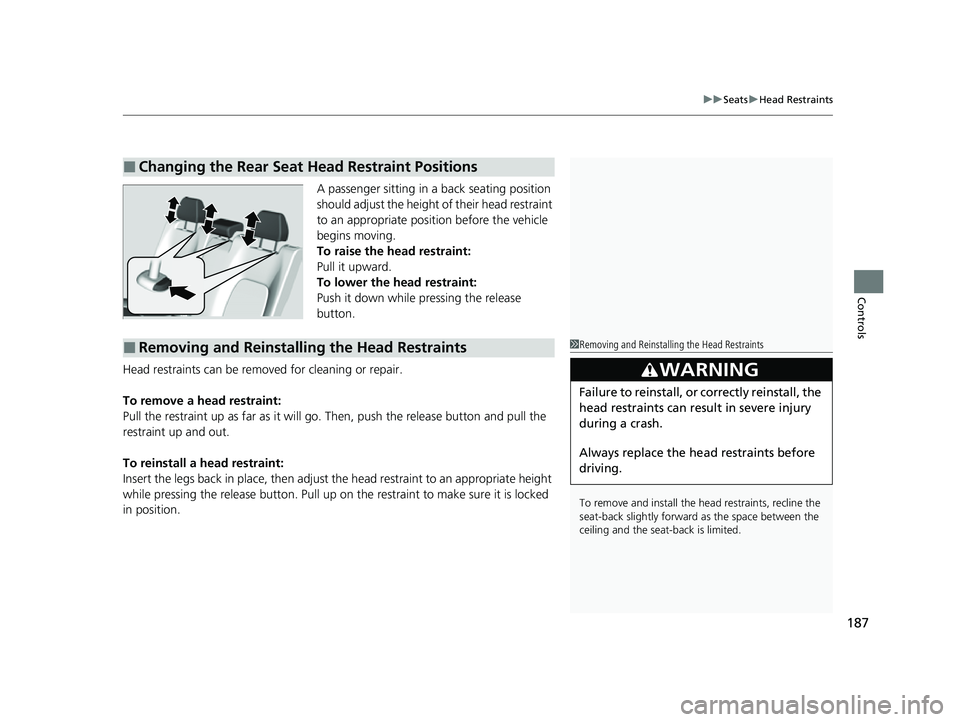
A passenger sitting in a back seating position
should adjust the height of their head restraint
to an appropriate position before the vehicle
begins moving.
To raise the head restraint:
Pull it upward.
To lower the head restraint:
Push it down while pressing the release
button.
Head restraints can be removed for cleaning or repair.
To remove a head restraint:
Pull the restraint up as far as it will go. Then, push the release button and pull the
restraint up and out.
To reinstall a head restraint:
Insert the legs back in place, then adjust the head restraint to an appropriate height
while pressing the release button. Pull up on the restraint to make sure it is locked
in position.
■Changing the Rear Seat Head Restraint Positions
■Removing and Reinstalling the Head Restraints1 Removing and Reinstalling the Head Restraints
To remove and install the head restraints, recline the
seat-back slightly forward as the space between the
ceiling and the seat -back is limited.
3WARNING
Failure to reinstall, or correctly reinstall, the
head restraints can result in severe injury
during a crash.
Always replace the he ad restraints before
driving.
23 HR-V-313V06000_01.book 187 ページ 2022年4月4日 月曜日 午前10時49分
Page 365 of 664

363
uuCustomized Features u
Continued
Features
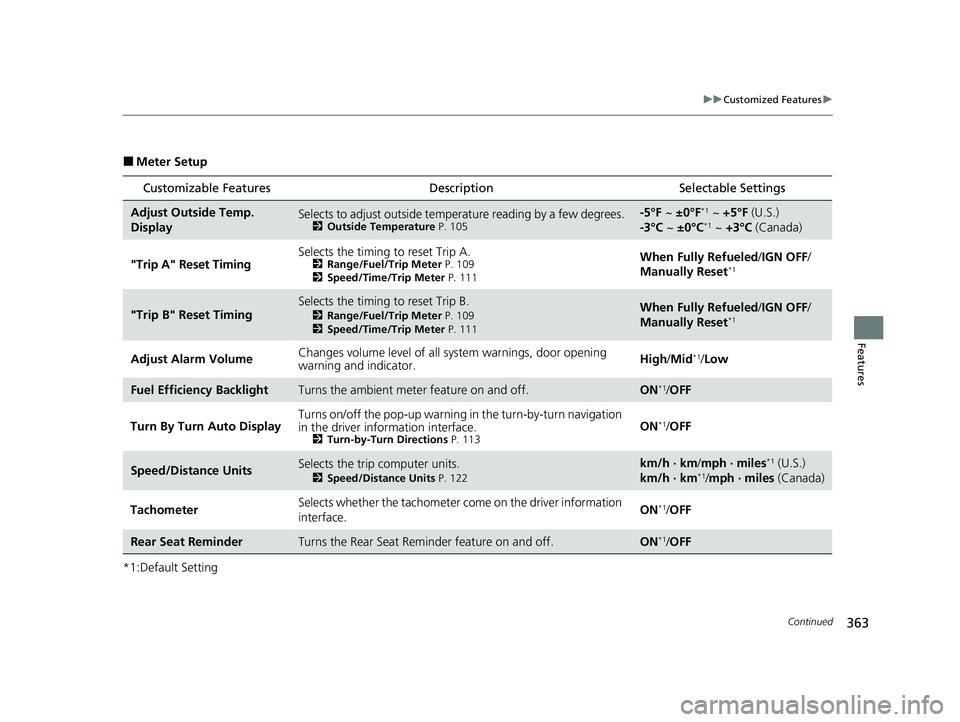
■Meter Setup
*1:Default Setting
Customizable Features Description Selectable Settings
Adjust Outside Temp.
DisplaySelects to adjust outside temperature reading by a few degrees.2Outside Temperature P. 105
-5°F ~ ±0°F*1 ~ +5°F (U.S.)
-3°C ~ ±0°C*1 ~ +3°C (Canada)
"Trip A" Reset Timing Selects the timing
to reset Trip A.
2Range/Fuel/Trip Meter P. 109
2 Speed/Time/Trip Meter P. 111When Fully Refueled/IGN OFF /
Manually Reset*1
"Trip B" Reset TimingSelects the timing to reset Trip B.
2 Range/Fuel/Trip Meter P. 109
2 Speed/Time/Trip Meter P. 111When Fully Refueled/IGN OFF /
Manually Reset*1
Adjust Alarm Volume Changes volume level of all system warnings, door opening
warning and indicator. High
/Mid*1/Low
Fuel Efficien cy BacklightTurns the ambient meter feature on and off.ON*1/OFF
Turn By Turn Auto Display Turns on/off the pop-up warning in
the turn-by-turn navigation
in the driver information interface.
2 Turn-by-Turn Directions P. 113ON*1/OFF
Speed/Distance UnitsSelects the trip computer units.
2 Speed/Distance Units P. 122
km/h · km/mph · miles*1 (U.S.)
km/h · km*1/ mph · miles (Canada)
Tachometer Selects whether the tachometer
come on the driver information
interface. ON
*1/
OFF
Rear Seat ReminderTurns the Rear Seat Reminder feature on and off.ON*1/OFF
23 HR-V-313V06000_01.book 363 ページ 2022年4月4日 月曜日 午前10時49分