Page 262 of 664
260
uuAudio System Basic Operation uSystem Updates
Features
■View the update history
Use the following procedure to confirm the update history.
1. Press the button.
2. Select System Updates .
u If System Updates is not displayed on th e home screen, select All Apps.
3. Select Settings .
4. Select Update History .
23 HR-V-313V06000_01.book 260 ページ 2022年4月4日 月曜日 午前10時49分
Page 263 of 664

261
uuAudio System Basic Operation uSystem Updates
Continued
Features
■Wireless connecti on mode setup
1. Press the button.
2. Select System Updates .
u If System Updates is not displayed on the home screen, select All Apps.
3. Select Settings .
4. Select Connection Setup .
5. Select OK.
6. Select an access point from the network list.
u To connect to a hotspot that is not automatically detected, select Options
then Add Network .
7. Enter the password.
u If you check the Use this network to automatically download system
updates box, you can set the network to be used for system updates.
8. Select Connect .
■How to update
1. Press the button.
2. Select System Updates .
u If System Updates is not displayed on the home screen, select All Apps.
3. Select via Wireless .
4. Select Download .
u A notification appears on the screen for the user to accept the download.
5. Select Install Now or Install While Vehicle Off .
u A notification appears on the screen if the update is successful.
■How to Update Wirelessly
23 HR-V-313V06000_01.book 261 ページ 2022年4月4日 月曜日 午前10時49分
Page 264 of 664

uuAudio System Basic Operation uSystem Updates
262
Features
■Download the update files from the server
1. Press the button.
2. Select System Updates .
u If System Updates is not displayed on th e home screen, select All Apps.
3. Select Other Methods .
4. Select Via USB .
u A notification appears on the screen.
5. Connect a USB device into the USB port.
u The inventory data is copied into the USB device.
2 USB Ports P. 213
6.Remove the USB device from the USB port.
7. Connect the USB device into your comp uter, and then download the update files.
u Follow the link to downlo ad the required software update files. Refer to
https://usb.honda.com for instructions.
■Update the audio system
1. Press the button.
2. Select System Updates .
3. Select Other Methods .
4. Select Via USB .
u A notification appears on the screen.
5. Connect the USB device with the update files into the USB port.
u A notification appears on the screen.
2 USB Ports P. 213
6.Select Install Now .
u A notification appears on the screen if the update is successful.
■How to Update with a USB Device1How to Update with a USB Device
A USB device with a minimum of 8 GB of free space
or more is recommended.
Be sure to delete any pr evious inventory or update
files from the USB before starting the USB update
process.
23 HR-V-313V06000_01.book 262 ページ 2022年4月4日 月曜日 午前10時49分
Page 266 of 664
264
uuAudio System Basic Operation uDisplay Setup
Features
Display Setup
You can set the screen brightness.
Select Display Mode.
u The brightness bar is displayed for a few
seconds.
u Select or to adjust the brightness.
u Select Display OFF to turn off the
screen. To turn on the screen, press the
or button.
■Switching Display Mode Manually
1 Display Setup
You can adjust the screen brightness by sliding or
tapping on the brightness bar.
You can also change the screen brightness on the
following procedures.
1. Press the button.
2. Select General Settings .
3. Select Display .
4. Select the setting you want.
To reset the settings, select Default.
23 HR-V-313V06000_01.book 264 ページ 2022年4月4日 月曜日 午前10時49分
Page 267 of 664
265
uuAudio System Basic Operation uDisplay Setup
FeaturesSelect Audio Source in the header area, then select an icon on the source list to
switch the audio source.
Certain manual functions are disabled or inoperable while the vehicle is in motion.
You cannot select a grayed-out option until the vehicle is stopped.
■Selecting an Audio Source
■Limitations for Manual Operation
Select Audio Source
Source Select Screen
Source List Icons
23 HR-V-313V06000_01.book 265 ページ 2022年4月4日 月曜日 午前10時49分
Page 269 of 664

267
uuAudio System Basic Operation uVoice Control Operation
Continued
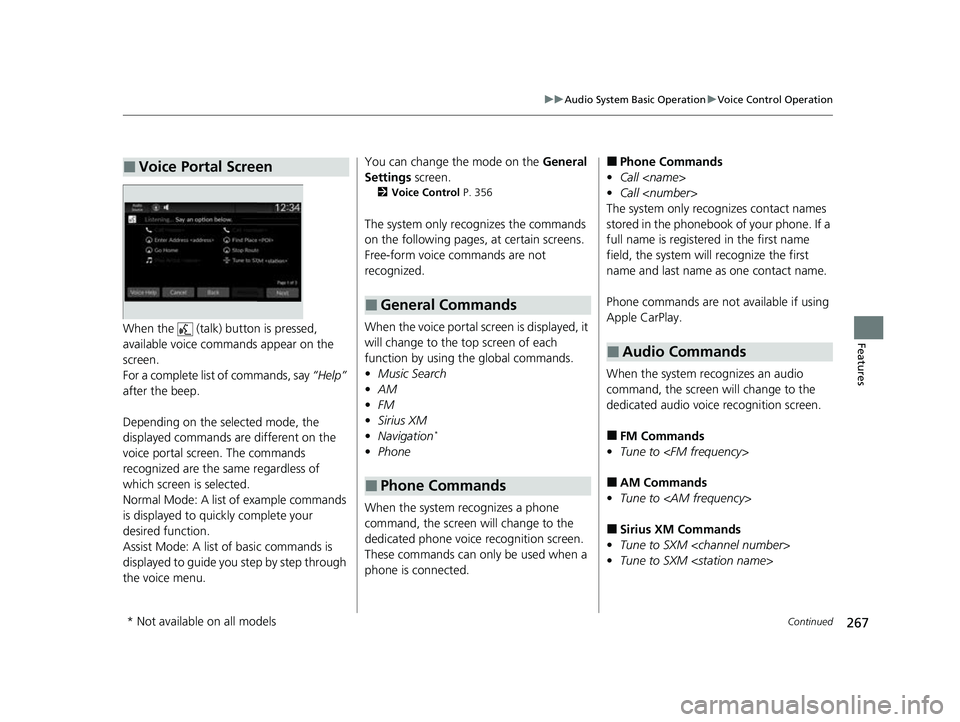
FeaturesWhen the (talk) button is pressed,
available voice comma nds appear on the
screen.
For a complete list of commands, say “Help”
after the beep.
Depending on the selected mode, the
displayed commands are different on the
voice portal screen. The commands
recognized are the same regardless of
which screen is selected.
Normal Mode: A list of example commands
is displayed to quickly complete your
desired function.
Assist Mode: A list of basic commands is
displayed to guide you step by step through
the voice menu.
■Voice Portal ScreenYou can change the mode on the General
Settings screen.
2Voice Control P. 356
The system only re cognizes the commands
on the following pages, at certain screens.
Free-form voice commands are not
recognized.
When the voice portal scr een is displayed, it
will change to the top screen of each
function by using the global commands.
• Music Search
• AM
• FM
• Sirius XM
• Navigation
*
•Phone
When the system recognizes a phone
command, the screen will change to the
dedicated phone voice recognition screen.
These commands can only be used when a
phone is connected.
■General Commands
■Phone Commands
■Phone Commands
• Call
• Call
The system only recognizes contact names
stored in the phonebook of your phone. If a
full name is registered in the first name
field, the system will recognize the first
name and last name as one contact name.
Phone commands are not available if using
Apple CarPlay.
When the system re cognizes an audio
command, the screen will change to the
dedicated audio voice recognition screen.
■FM Commands
• Tune to
■AM Commands
• Tune to
■Sirius XM Commands
• Tune to SXM
• Tune to SXM
■Audio Commands
* Not available on all models
23 HR-V-313V06000_01.book 267 ページ 2022年4月4日 月曜日 午前10時49分
Page 271 of 664
269
uuAudio System Basic Operation uPlaying AM/FM Radio
Continued
Features
Playing AM/FM Radio
(Back) Button
Press to go back to the previous
display.
Seek Buttons
Press or to search the selected band up
or down for a station with a strong signal.
VOL/ AUDIO (Volume/Power) Knob
Press to turn the audio system on and
off.
Turn to adjust the volume.
Settings Icon
Select whether to tune to HD
Radio
TM automatically.
Tune Icon
Select to use the on-scr een keyboard for entering
the radio frequency directly. Audio/Information Screen
Scan Icon
Select to sca n each
station with a strong signal.Preset Icons
Tune the radio frequency for preset
memory.
Select and hold the preset icon to
store that station. Select to
display beyond preset 5.
>
23 HR-V-313V06000_01.book 269 ページ 2022年4月4日 月曜日 午前10時49分
Page 272 of 664

uuAudio System Basic Operation uPlaying AM/FM Radio
270
Features
To store a station:
1. Tune to the selected station.
2. Select and hold the preset ic on to store that station.
u Selecting Press & Hold can be set a new preset station.
Lists the strongest stations on the selected band.
1. Select Station List to display a list.
2. Select the station.
■Manual update
Updates your available station list at any time.
1. Select Station List to display a list.
2. Select Refresh .
■Preset Memory
■Station List
1Preset Memory
The ST indicator appears on the display indicating
stereo FM broadcasts.
Stereo reproduction in AM is not available.
Switching the Audio Mode
Roll the left selector wheel or select Audio Source
on the screen. 2 Audio Remote Controls P. 215
You can store 12 AM/FM st ations into preset
memory.
HD Radio Technology manufactured under license
from iBiquity Digi tal Corporation. U.S. and Foreign
Patents. For patents see http://dts.com/patents. HD
Radio, Artist Experience, and the HD, HD Radio, and
“ARC” logos are registered trademarks or
trademarks of iBiquity Di gital Corporation in the
United States and/ or other countries.
23 HR-V-313V06000_01.book 270 ページ 2022年4月4日 月曜日 午前10時49分