Page 56 of 719

Continued55
uuSeat Belts uFastening a Seat Belt
Safe Driving
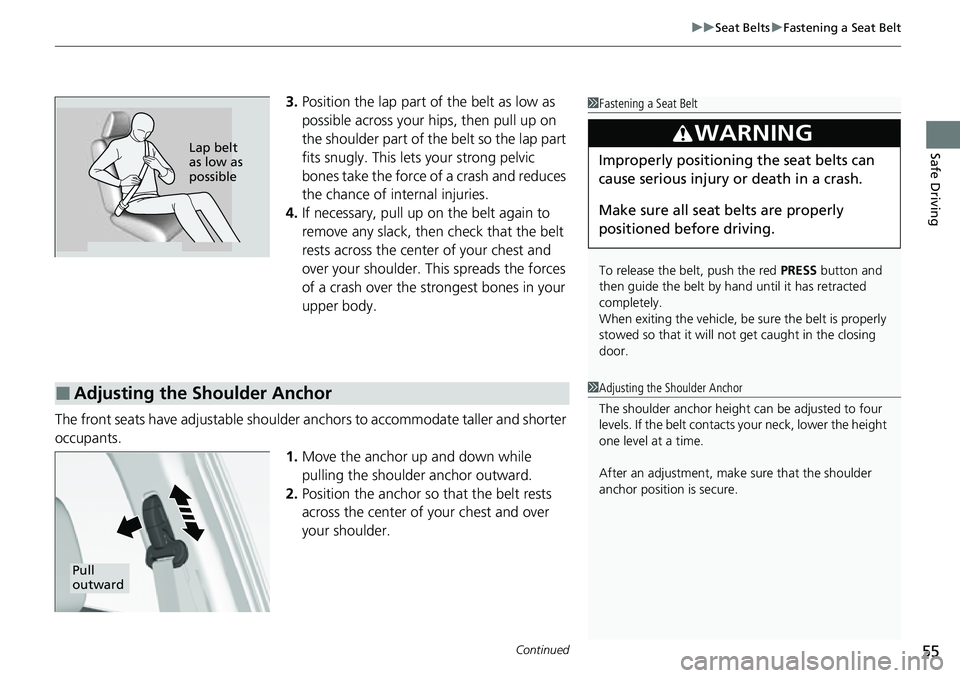
3. Position the lap part of the belt as low as
possible across your hips, then pull up on
the shoulder part of the belt so the lap part
fits snugly. This lets your strong pelvic
bones take the force of a crash and reduces
the chance of internal injuries.
4. If necessary, pull up on the belt again to
remove any slack, then check that the belt
rests across the center of your chest and
over your shoulder. This spreads the forces
of a crash over the strongest bones in your
upper body.
The front seats have adjustab le shoulder anchors to accommodate taller and shorter
occupants. 1.Move the anchor up and down while
pulling the shoulder anchor outward.
2. Position the anchor so that the belt rests
across the center of your chest and over
your shoulder.1 Fastening a Seat Belt
To release the belt, push the red PRESS button and
then guide the belt by hand until it has retracted
completely.
When exiting the vehicle, be sure the belt is properly
stowed so that it will not get caught in the closing
door.
3WARNING
Improperly positioning the seat belts can
cause serious injury or death in a crash.
Make sure all seat belts are properly
positioned be fore driving.Lap belt
as low as
possible
■Adjusting the Shoulder Anchor1Adjusting the Shoulder Anchor
The shoulder anchor height can be adjusted to four
levels. If the belt contacts your neck, lower the height
one level at a time.
After an adjustment, make sure that the shoulder
anchor position is secure.
Pull
outward
Page 79 of 719

78
uuAirbags uAirbag Care
Safe Driving
Airbag Care
You do not need to, and should not, perform any maintenance on or replace any
airbag system components yourself. However, you should have your vehicle
inspected by a dealer in the following situations:
■When the airbags have deployed
If an airbag has inflated, th e control unit and other related parts must be replaced.
Similarly, once an automatic seat belt te nsioner has been activated, it must be
replaced.
■When the vehicl e has been in a moderate-to-severe collision
Even if the airbags did not inflate, have your dealer inspect the following: the driver’s
seat position sensor, weight sensors in the passenger’s seat, seat belt tensioners for
the front seats and outer rear seats, and each seat belt that was worn during the
crash.
■Do not remove or modify a front seat without consulting a dealer
This would likely disable or affect the prop er operation of the driver’s seat position
sensor or the weight sensors in the passenger ’s seat. If it is necessary to remove or
modify a front seat to accommodate a pe rson with disabilities, contact a Honda
dealer, or for U.S. vehicles, American H onda Automobile Customer Service at 1-800-
999-1009 and for Canadian vehicles, Hond a Canada Customer Relations at 1-888-
9-HONDA-9.
1 Airbag Care
We recommend against the use of salvaged airbag
system components, includi ng the airbag, tensioners,
sensors, and control unit.
Page 211 of 719

uuSeats uRear Seats
210
Controls
1. Store the center seat belt first. Insert the
latch plate into the slot on the side of the
anchor buckle.
2. Retract the seat belt into the holder on the
ceiling.
2 Seat Belt with Detachable Anchor P. 56
3.Lower the rear seat head restraint to its
lowest position. Put the armrest back into
the seat-back.
4. Pull the release lever and fold down the
seat.
■Folding Down the Rear Seats
Latch
Plate
Anchor Buckle
1 Folding Down the Rear Seats
The rear seat-backs can be folded down to
accommodate bulkier items in the cargo area.
Remove any items from th e rear seat cushion and
floor before you fold down the rear seat.
When returning the seat-back to its original position,
push it firmly back. Also, m ake sure all rear shoulder
belts are positioned in front of the seat-back.
Make sure all items in the cargo area or items
extending through the opening into the rear
seats are properly secured. Loose items can fly
forward if you have to brake hard.
Make sure that the folded seat-back does not press
against the front passenger seat, as this can cause the
weight sensors in the front passenger seat to work
improperly. 2 Passenger Airbag Off Indicator P. 76
Make sure the seat-back, head restraints and seat
cushion are securely latche d back into place before
driving.
Release Lever
Page 214 of 719

213
uuSeats uHead Restraints
Continued
Controls
Head Restraints
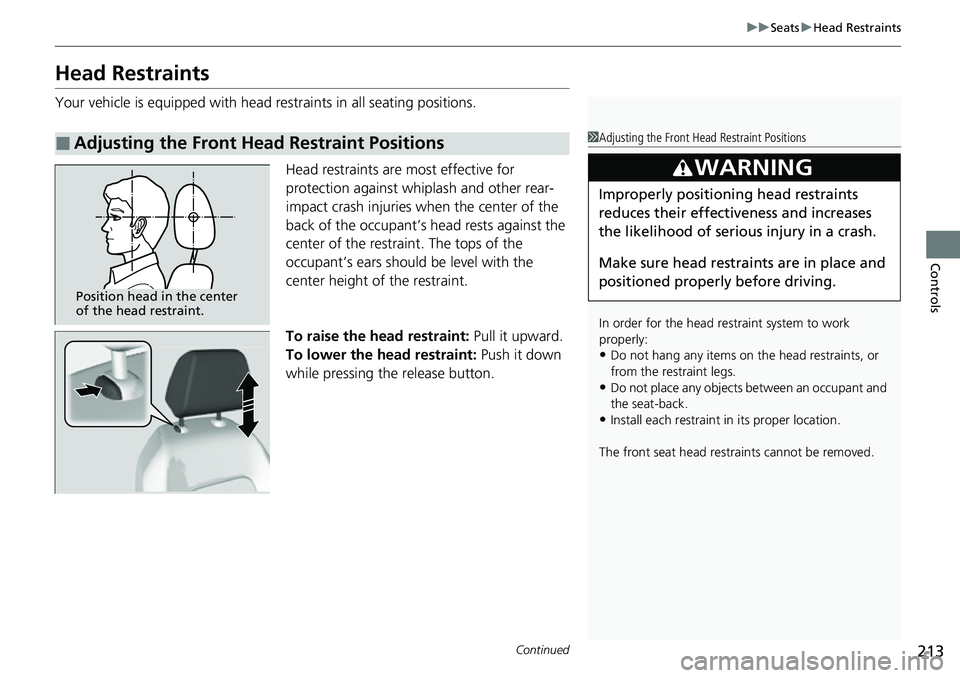
Your vehicle is equipped with head restraints in all seating positions.
Head restraints are most effective for
protection against whiplash and other rear-
impact crash injuries when the center of the
back of the occupant’s head rests against the
center of the restraint. The tops of the
occupant’s ears should be level with the
center height of the restraint.
To raise the head restraint: Pull it upward.
To lower the head restraint: Push it down
while pressing the release button.
■Adjusting the Front Head Restraint Positions1 Adjusting the Front Head Restraint Positions
In order for the head restraint system to work
properly:
•Do not hang any items on the head restraints, or
from the restraint legs.
•Do not place any objects between an occupant and
the seat-back.
•Install each restraint in its proper location.
The front seat head res traints cannot be removed.
3WARNING
Improperly positioning head restraints
reduces their effectiveness and increases
the likelihood of serious injury in a crash.
Make sure head restraints are in place and
positioned properly before driving.
Position head in the center
of the head restraint.
Page 215 of 719

uuSeats uHead Restraints
214
Controls
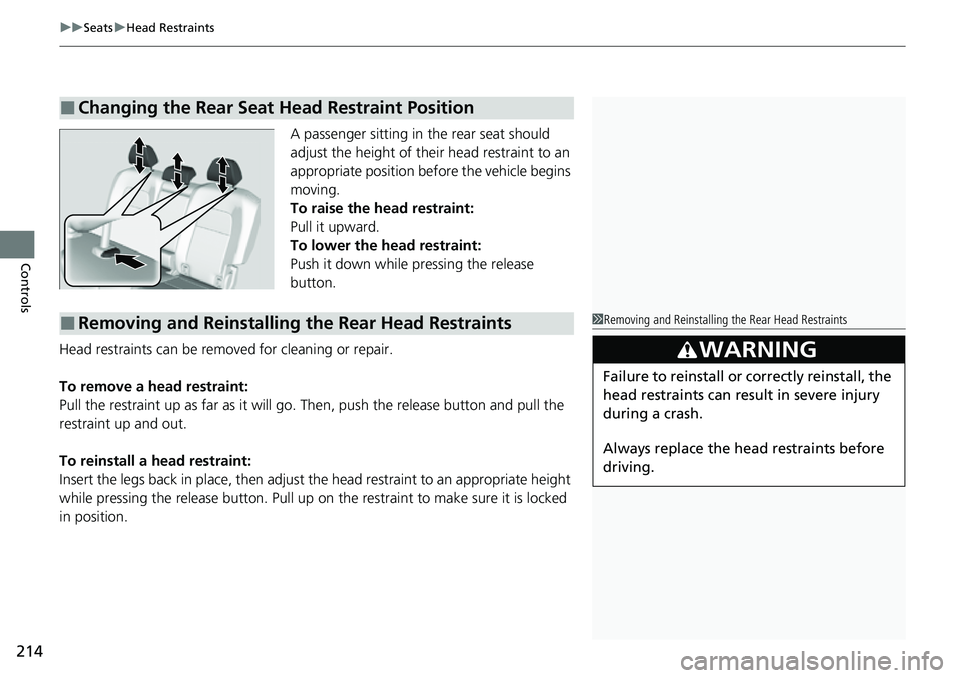
A passenger sitting in the rear seat should
adjust the height of their head restraint to an
appropriate position befo re the vehicle begins
moving.
To raise the head restraint:
Pull it upward.
To lower the head restraint:
Push it down while pressing the release
button.
Head restraints can be removed for cleaning or repair.
To remove a head restraint:
Pull the restraint up as far as it will go. Then, push the release button and pull the
restraint up and out.
To reinstall a head restraint:
Insert the legs back in place, then adjust the head restraint to an appropriate height
while pressing the release button. Pull up on the restraint to make sure it is locked
in position.
■Changing the Rear Seat Head Restraint Position
■Removing and Reinstalling the Rear Head Restraints1 Removing and Reinstalling the Rear Head Restraints
3WARNING
Failure to reinstall or correctly reinstall, the
head restraints can result in severe injury
during a crash.
Always replace the he ad restraints before
driving.
Page 646 of 719

645
uuCleaning uInterior Care
Maintenance
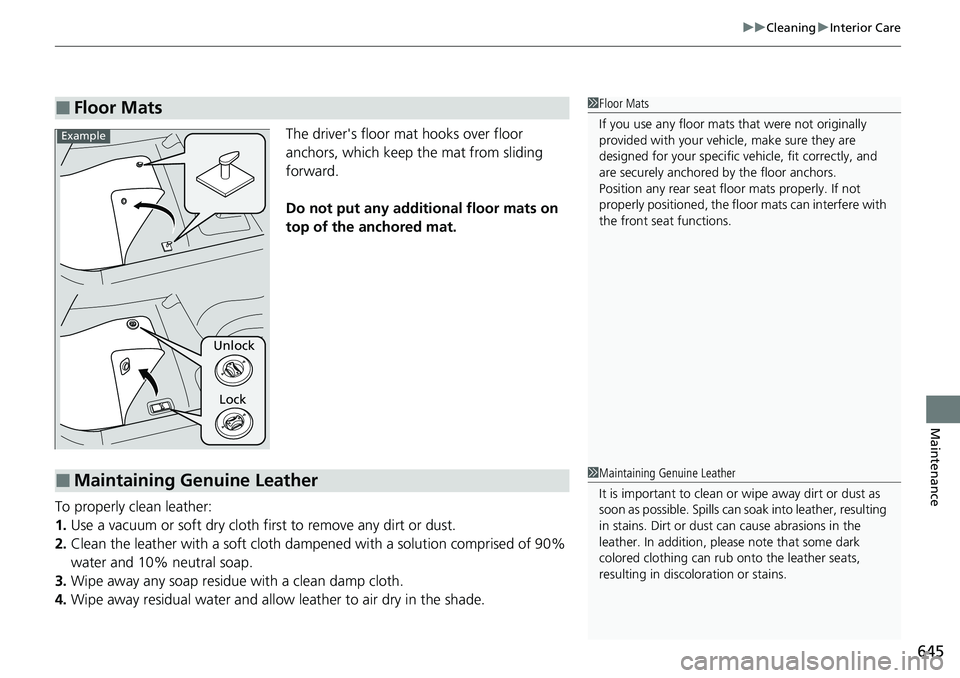
The driver's floor mat hooks over floor
anchors, which keep the mat from sliding
forward.
Do not put any additi onal floor mats on
top of the anchored mat.
To properly clean leather:
1. Use a vacuum or soft dry cloth first to remove any dirt or dust.
2. Clean the leather with a soft cloth dampen ed with a solution comprised of 90%
water and 10% neutral soap.
3. Wipe away any soap residu e with a clean damp cloth.
4. Wipe away residual water and allo w leather to air dry in the shade.
■Floor Mats1Floor Mats
If you use any floor mats that were not originally
provided with your vehicle, make sure they are
designed for your specific ve hicle, fit correctly, and
are securely anchored by the floor anchors.
Position any rear seat floor mats properly. If not
properly positioned, the floor mats can interfere with
the front seat functions.
Lock
Unlock
Example
■Maintaining Genuine Leather1
Maintaining Genuine Leather
It is important to clean or wipe away dirt or dust as
soon as possible. Spills can soak into leather, resulting
in stains. Dirt or dust ca n cause abrasions in the
leather. In addition, pl ease note that some dark
colored clothing can rub onto the leather seats,
resulting in discol oration or stains.