2023 HONDA CRV remove seat
[x] Cancel search: remove seatPage 56 of 719
Continued55
uuSeat Belts uFastening a Seat Belt
Safe Driving
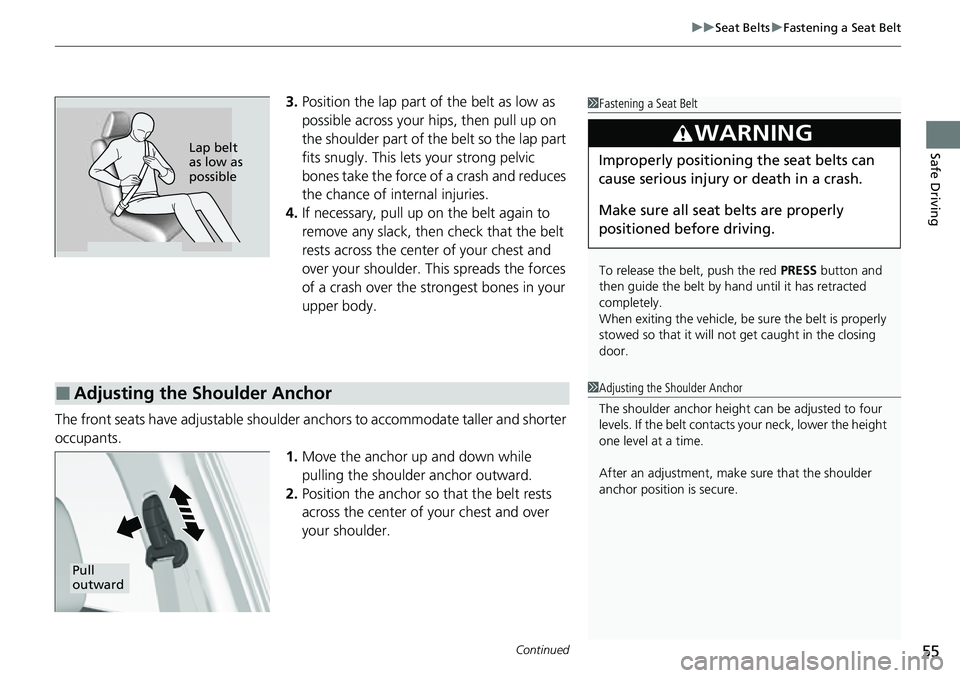
3. Position the lap part of the belt as low as
possible across your hips, then pull up on
the shoulder part of the belt so the lap part
fits snugly. This lets your strong pelvic
bones take the force of a crash and reduces
the chance of internal injuries.
4. If necessary, pull up on the belt again to
remove any slack, then check that the belt
rests across the center of your chest and
over your shoulder. This spreads the forces
of a crash over the strongest bones in your
upper body.
The front seats have adjustab le shoulder anchors to accommodate taller and shorter
occupants. 1.Move the anchor up and down while
pulling the shoulder anchor outward.
2. Position the anchor so that the belt rests
across the center of your chest and over
your shoulder.1 Fastening a Seat Belt
To release the belt, push the red PRESS button and
then guide the belt by hand until it has retracted
completely.
When exiting the vehicle, be sure the belt is properly
stowed so that it will not get caught in the closing
door.
3WARNING
Improperly positioning the seat belts can
cause serious injury or death in a crash.
Make sure all seat belts are properly
positioned be fore driving.Lap belt
as low as
possible
■Adjusting the Shoulder Anchor1Adjusting the Shoulder Anchor
The shoulder anchor height can be adjusted to four
levels. If the belt contacts your neck, lower the height
one level at a time.
After an adjustment, make sure that the shoulder
anchor position is secure.
Pull
outward
Page 79 of 719

78
uuAirbags uAirbag Care
Safe Driving
Airbag Care
You do not need to, and should not, perform any maintenance on or replace any
airbag system components yourself. However, you should have your vehicle
inspected by a dealer in the following situations:
■When the airbags have deployed
If an airbag has inflated, th e control unit and other related parts must be replaced.
Similarly, once an automatic seat belt te nsioner has been activated, it must be
replaced.
■When the vehicl e has been in a moderate-to-severe collision
Even if the airbags did not inflate, have your dealer inspect the following: the driver’s
seat position sensor, weight sensors in the passenger’s seat, seat belt tensioners for
the front seats and outer rear seats, and each seat belt that was worn during the
crash.
■Do not remove or modify a front seat without consulting a dealer
This would likely disable or affect the prop er operation of the driver’s seat position
sensor or the weight sensors in the passenger ’s seat. If it is necessary to remove or
modify a front seat to accommodate a pe rson with disabilities, contact a Honda
dealer, or for U.S. vehicles, American H onda Automobile Customer Service at 1-800-
999-1009 and for Canadian vehicles, Hond a Canada Customer Relations at 1-888-
9-HONDA-9.
1 Airbag Care
We recommend against the use of salvaged airbag
system components, includi ng the airbag, tensioners,
sensors, and control unit.
Page 88 of 719
Continued87
uuChild Safety uSafety of Infants and Small Children
Safe Driving
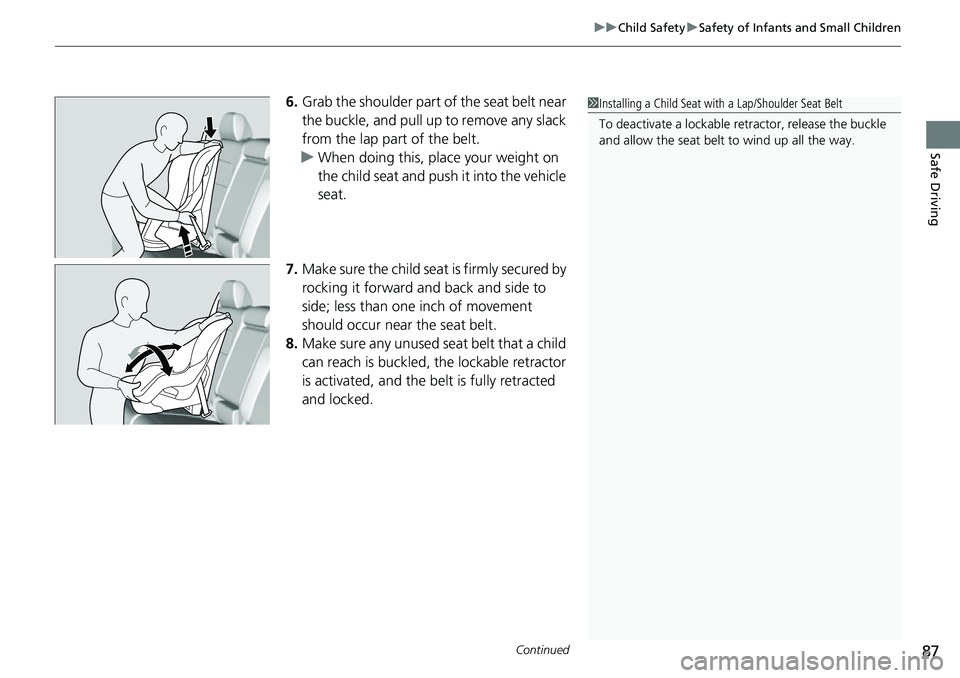
6. Grab the shoulder part of the seat belt near
the buckle, and pull up to remove any slack
from the lap part of the belt.
u When doing this, place your weight on
the child seat and push it into the vehicle
seat.
7. Make sure the child seat is firmly secured by
rocking it forward and back and side to
side; less than one inch of movement
should occur near the seat belt.
8. Make sure any unused seat belt that a child
can reach is buckled, the lockable retractor
is activated, and the be lt is fully retracted
and locked.1 Installing a Child Seat with a Lap/Shoulder Seat Belt
To deactivate a lockable retractor, release the buckle
and allow the seat belt to wind up all the way.
Page 211 of 719

uuSeats uRear Seats
210
Controls
1. Store the center seat belt first. Insert the
latch plate into the slot on the side of the
anchor buckle.
2. Retract the seat belt into the holder on the
ceiling.
2 Seat Belt with Detachable Anchor P. 56
3.Lower the rear seat head restraint to its
lowest position. Put the armrest back into
the seat-back.
4. Pull the release lever and fold down the
seat.
■Folding Down the Rear Seats
Latch
Plate
Anchor Buckle
1 Folding Down the Rear Seats
The rear seat-backs can be folded down to
accommodate bulkier items in the cargo area.
Remove any items from th e rear seat cushion and
floor before you fold down the rear seat.
When returning the seat-back to its original position,
push it firmly back. Also, m ake sure all rear shoulder
belts are positioned in front of the seat-back.
Make sure all items in the cargo area or items
extending through the opening into the rear
seats are properly secured. Loose items can fly
forward if you have to brake hard.
Make sure that the folded seat-back does not press
against the front passenger seat, as this can cause the
weight sensors in the front passenger seat to work
improperly. 2 Passenger Airbag Off Indicator P. 76
Make sure the seat-back, head restraints and seat
cushion are securely latche d back into place before
driving.
Release Lever
Page 214 of 719
213
uuSeats uHead Restraints
Continued
Controls
Head Restraints
Your vehicle is equipped with head restraints in all seating positions.
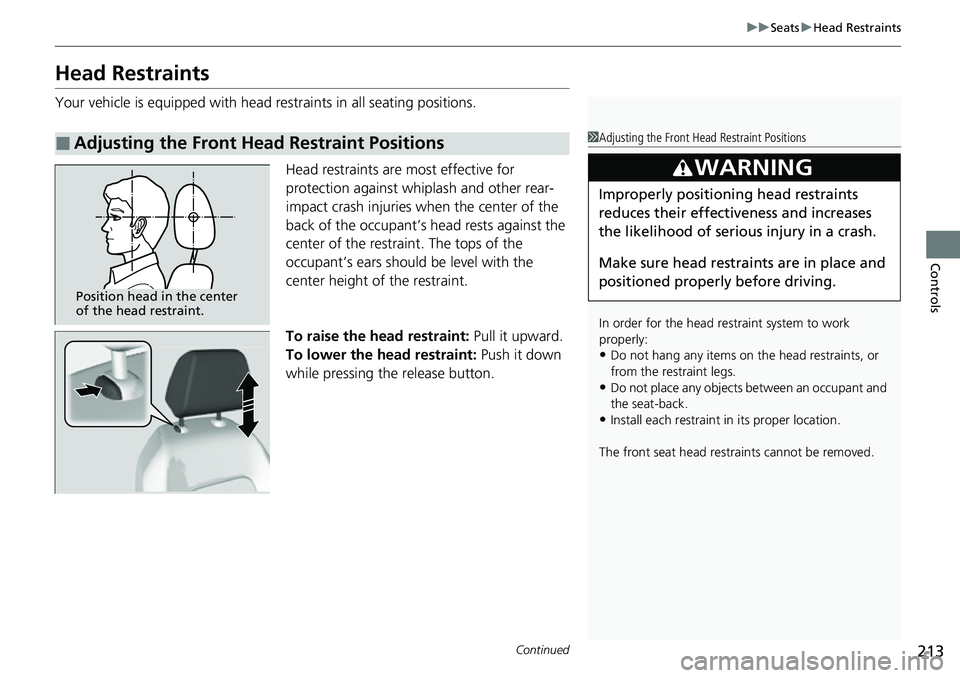
Head restraints are most effective for
protection against whiplash and other rear-
impact crash injuries when the center of the
back of the occupant’s head rests against the
center of the restraint. The tops of the
occupant’s ears should be level with the
center height of the restraint.
To raise the head restraint: Pull it upward.
To lower the head restraint: Push it down
while pressing the release button.
■Adjusting the Front Head Restraint Positions1 Adjusting the Front Head Restraint Positions
In order for the head restraint system to work
properly:
•Do not hang any items on the head restraints, or
from the restraint legs.
•Do not place any objects between an occupant and
the seat-back.
•Install each restraint in its proper location.
The front seat head res traints cannot be removed.
3WARNING
Improperly positioning head restraints
reduces their effectiveness and increases
the likelihood of serious injury in a crash.
Make sure head restraints are in place and
positioned properly before driving.
Position head in the center
of the head restraint.
Page 215 of 719
uuSeats uHead Restraints
214
Controls
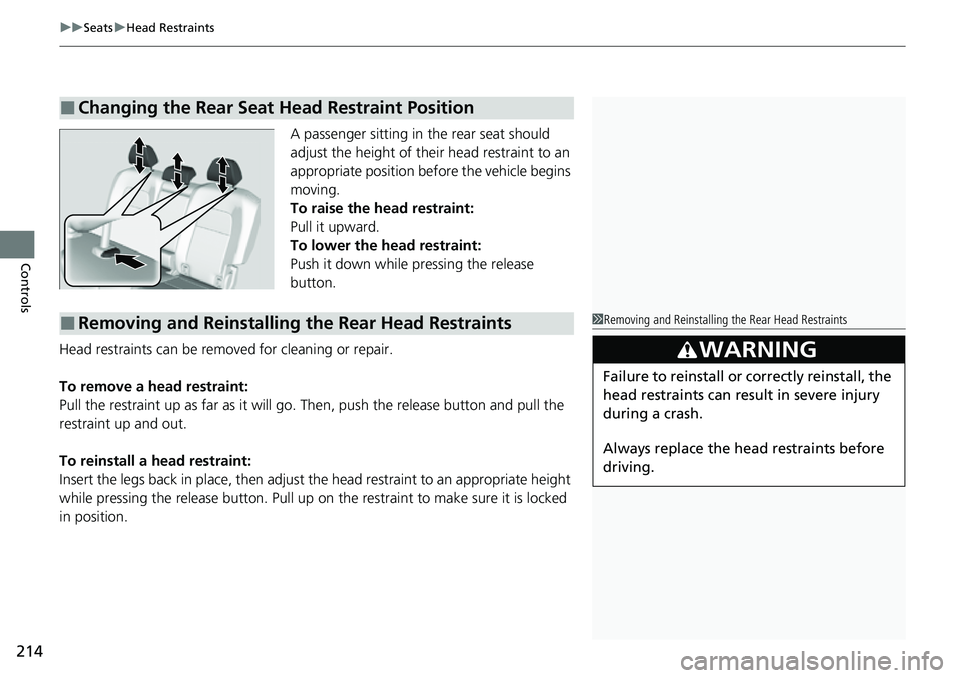
A passenger sitting in the rear seat should
adjust the height of their head restraint to an
appropriate position befo re the vehicle begins
moving.
To raise the head restraint:
Pull it upward.
To lower the head restraint:
Push it down while pressing the release
button.
Head restraints can be removed for cleaning or repair.
To remove a head restraint:
Pull the restraint up as far as it will go. Then, push the release button and pull the
restraint up and out.
To reinstall a head restraint:
Insert the legs back in place, then adjust the head restraint to an appropriate height
while pressing the release button. Pull up on the restraint to make sure it is locked
in position.
■Changing the Rear Seat Head Restraint Position
■Removing and Reinstalling the Rear Head Restraints1 Removing and Reinstalling the Rear Head Restraints
3WARNING
Failure to reinstall or correctly reinstall, the
head restraints can result in severe injury
during a crash.
Always replace the he ad restraints before
driving.
Page 294 of 719
293
uuAudio System Basic Operation uVoice Control Operation
Continued
Features
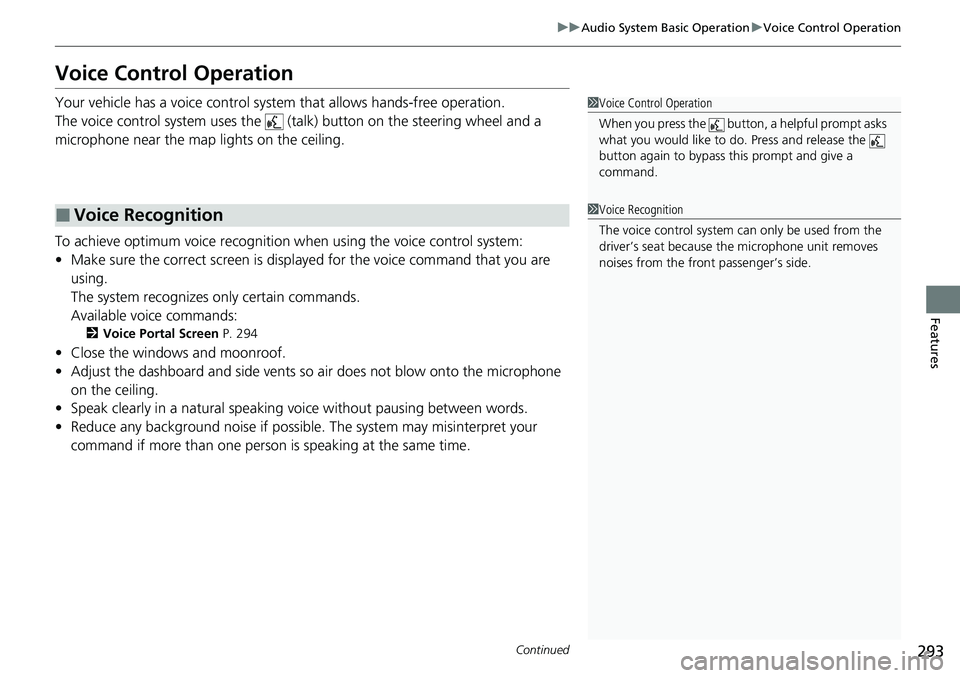
Voice Control Operation
Your vehicle has a voice control syst em that allows hands-free operation.
The voice control system uses the (t alk) button on the steering wheel and a
microphone near the map lights on the ceiling.
To achieve optimum voice recognition when using the voice control system:
• Make sure the correct screen is displa yed for the voice command that you are
using.
The system recognizes only certain commands.
Available voice commands:
2 Voice Portal Screen P. 294
•Close the windows and moonroof.
• Adjust the dashboard and side vents so air does not blow onto the microphone
on the ceiling.
• Speak clearly in a natural speaking vo ice without pausing between words.
• Reduce any background noise if possible. The system may misinterpret your
command if more than one person is speaking at the same time.
■Voice Recognition
1Voice Control Operation
When you press the button, a helpful prompt asks
what you would like to do. Press and release the
button again to bypass this prompt and give a
command.
1 Voice Recognition
The voice control system can only be used from the
driver’s seat because the microphone unit removes
noises from the front passenger’s side.
Page 578 of 719
Continued577
uuBraking uBrake System
Driving
Keeps the brake applied after releasing the brake pedal until the accelerator pedal is
pressed. You can use this system while th e vehicle is temporarily stopped, like at
traffic lights and in heavy traffic.
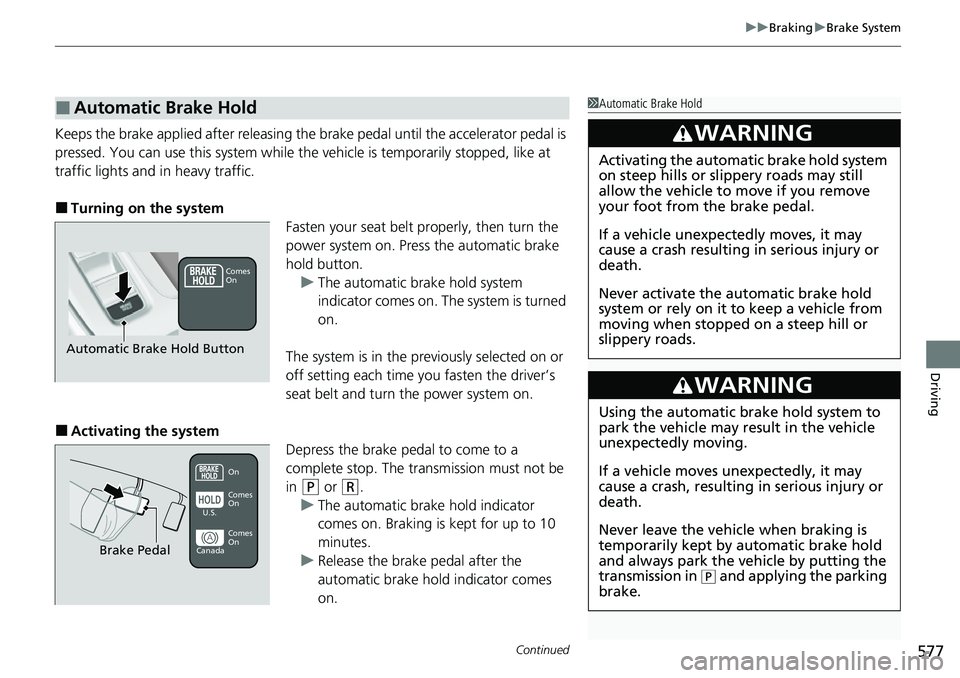
■Turning on the system Fasten your seat belt properly, then turn the
power system on. Press the automatic brake
hold button.u The automatic brake hold system
indicator comes on. The system is turned
on.
The system is in the prev iously selected on or
off setting each time you fasten the driver’s
seat belt and turn the power system on.
■Activating the system Depress the brake pedal to come to a
complete stop. The transmission must not be
in
(P or (R.
u The automatic brake hold indicator
comes on. Braking is kept for up to 10
minutes.
u Release the brake pedal after the
automatic brake hold indicator comes
on.
■Automatic Brake Hold1Automatic Brake Hold
3WARNING
Activating the automatic brake hold system
on steep hills or slippery roads may still
allow the vehicle to move if you remove
your foot from the brake pedal.
If a vehicle unexpectedly moves, it may
cause a crash resulting in serious injury or
death.
Never activate the automatic brake hold
system or rely on it to keep a vehicle from
moving when stopped on a steep hill or
slippery roads.
3WARNING
Using the automatic brake hold system to
park the vehicle may result in the vehicle
unexpectedly moving.
If a vehicle moves unexpectedly, it may
cause a crash, resulting in serious injury or
death.
Never leave the vehicle when braking is
temporarily kept by automatic brake hold
and always park the vehicle by putting the
transmission in
( P and applying the parking
brake.
Comes
On
Automatic Brake Hold Button
On
Brake Pedal
Comes
On Comes
On
U.S.
Canada