Page 610 of 719

609
uuMaintenance MinderTMuTo Use Maintenance MinderTM
Continued
Maintenance
Canadian models
· Adjust the valves during services A, 0, 9, 1, 2, or 3 if they are noisy.
*1: If a Maintenance Minder message does not appear more than 12 months after the display is reset,
change the engine oil every year.
*2: If you drive in dusty conditions, replace the air cleaner element every 24,000 km (15,000 miles).
*3: If you drive primarily in urban areas that have high concentrations of soot in the air from industry and from diesel-powered vehicles, replace the dust and pollen filter every 24,000 km (15,000 miles).
*4: Driving in mountainous areas at very low vehicle speeds results in higher transmission temperatures. This requires transmission fluid changes more frequently than recommended by the Maintenance
Minder. If you regularly drive your vehicle under these conditions, have the transmission fluid changed
every 76,000 km (47,500 miles) or 3 years.
*5: If a Maintenance Minder message does not appear more than 36 months after the display for item 7 is reset, change the brake fluid every 3 years.
# : See information on maintenance and emissions warranty in the first column on page 701.
CODEMaintenance Main Items
A
●Replace engine oil*1
0●Replace engine oil*1 and oil filter
CODEMaintenance Sub Items
1
●Rotate tires
2●Replace air cleaner element*2
●Replace dust and pollen filter*3
3●Replace transmission fluid*4
4●Replace spark plugs
5
●Replace engine coolant
6●Replace rear differential fluid
7
●Replace brake fluid*5
9●Service front and rear brakes●Check expiration date for temporary tire repair kit
bottle
●Inspect these items: • Tie rod ends, steering gearbox, and boots
• Suspension components
• Driveshaft boots
• Brake hoses and lines (including ABS/VSA ®)
• All fluid levels and condition of fluids
• Exhaust system
#
•Fuel lines and connections#
Page 612 of 719
611
Maintenance
Maintenance Under the Hood
Maintenance Items Under the Hood
Brake Fluid
(Black Cap)
Engine Coolant
Reserve Tank
Radiator Cap Washer Fluid
(Blue Cap)
Engine Oil Dipstick
(Orange) Engine Oil Fill Cap12-Volt Battery
Page 614 of 719

613
uuMaintenance Under the Hood uRecommended Engine Oil
Maintenance
Recommended Engine Oil
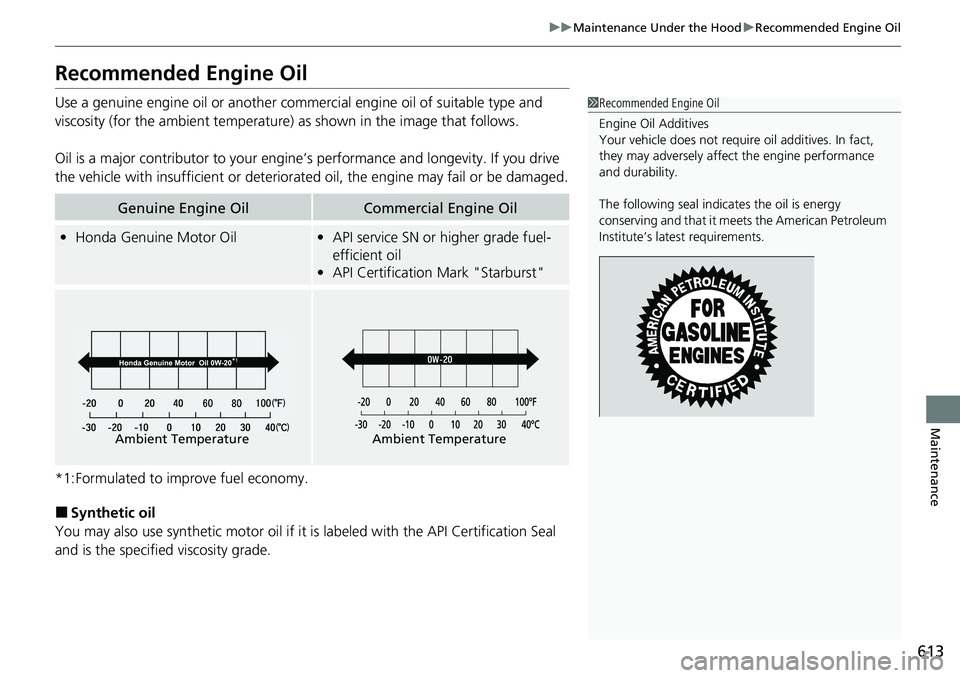
Use a genuine engine oil or another commercial engine oil of suitable type and
viscosity (for the ambient temperature) as shown in the image that follows.
Oil is a major contributor to your engine’s performance and longevity. If you drive
the vehicle with insufficient or deteriorated oil, the engine may fail or be damaged.
*1:Formulated to improve fuel economy.
■Synthetic oil
You may also use synthetic motor oil if it is labeled with the API Certification Seal
and is the specified viscosity grade.
Genuine Engine OilCommercial Engine Oil
• Honda Genuine Motor Oil•API service SN or higher grade fuel-
efficient oil
• API Certification Mark "Starburst"
1Recommended Engine Oil
Engine Oil Additives
Your vehicle does not require oil additives. In fact,
they may adversely affect the engine performance
and durability.
The following seal indicates the oil is energy
conserving and that it meets the American Petroleum
Institute’s late st requirements.
Ambient Temperature
0W-20
Ambient Temperature
Page 615 of 719
614
uuMaintenance Under the Hood uOil Check
Maintenance
Oil Check
We recommend that you check the engi ne oil level every time you refuel.
Park the vehicle on level ground.
Turn off the power system. You can check the oil level without the engine having
run beforehand. If the engine has been running, wait approximately three minutes
before you check the oil. 1.Remove the dipstick (orange).
2. Wipe the dipstick with a clean cloth or
paper towel.
3. Insert the dipstick back all the way into its
hole.
4. Remove the dipstick again, and check the
level. It should be between the upper and
lower marks. Add oil if necessary.1Oil Check
If the oil level is near or below the lower mark, slowly
add oil, being carefu l not to overfill.
Upper Mark
Lower Mark
Page 616 of 719
615
uuMaintenance Under the Hood uAdding Engine Oil
Maintenance
Adding Engine Oil
1. Unscrew and remove the engine oil fill cap.
2. Add oil slowly.
3. Reinstall the engine oil fill cap, and tighten
it securely.
4. Wait for three minutes and recheck the
engine oil dipstick.1Adding Engine Oil
NOTICE
Do not fill the engine oil above the upper mark.
Overfilling the engine oil may result in leaks and
engine damage.
If any oil spills, wipe it away immediately. Spilled oil
may damage the engine compartment components.
Use a neutral detergent to remove it if it spills on the
engine cover. Do not use organic solvents such as
brake cleaner.
Engine Oil
Fill Cap
Page 617 of 719

616
uuMaintenance Under the Hood uChanging the Engine Oil and Oil Filter
Maintenance
Changing the Engine Oil and Oil Filter
You must change the engine oil and oil f ilter regularly in order to maintain the
engine's lubrication. The engine may be damaged if they are not changed regularly.
Turn the power system off before changing the engine oil or oil filter.
Change the oil and filter in accordance with the maintenance message on the driver
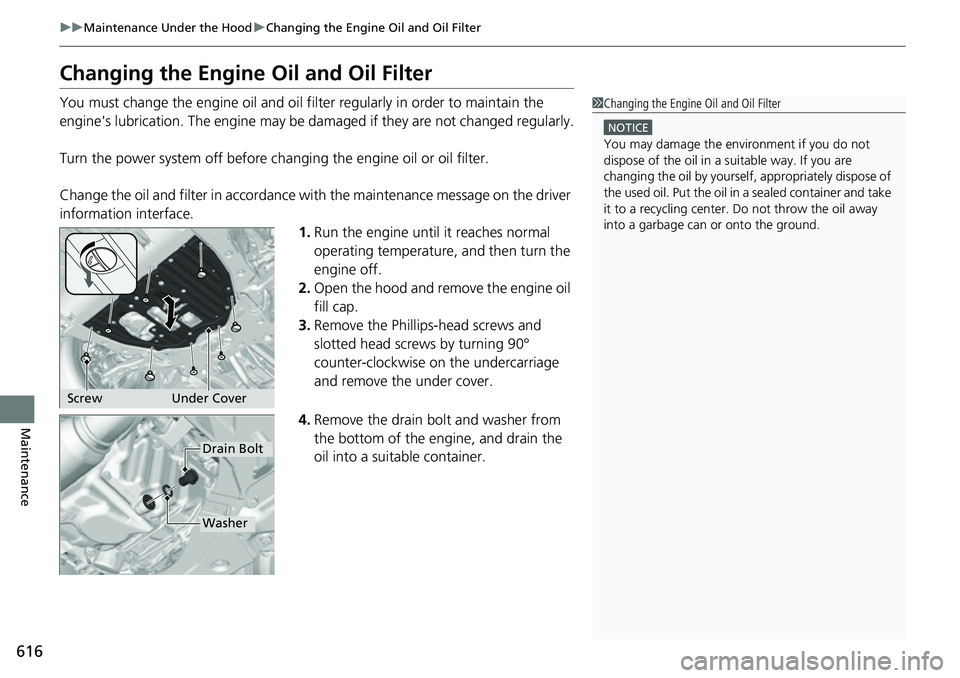
information interface. 1.Run the engine until it reaches normal
operating temperature, and then turn the
engine off.
2. Open the hood and remove the engine oil
fill cap.
3. Remove the Phillips-head screws and
slotted head screws by turning 90°
counter-clockwise on the undercarriage
and remove the under cover.
4. Remove the drain bolt and washer from
the bottom of the engine, and drain the
oil into a suitable container.1Changing the Engine Oil and Oil Filter
NOTICE
You may damage the environment if you do not
dispose of the oil in a suitable way. If you are
changing the oil by yourself , appropriately dispose of
the used oil. Put the oil in a sealed container and take
it to a recycling center. Do not throw the oil away
into a garbage can or onto the ground.
Screw Under Cover
Drain Bolt
Washer
Page 618 of 719

617
uuMaintenance Under the Hood uChanging the Engine Oil and Oil Filter
Maintenance
5. Remove the oil filter and dispose of the
remaining oil.
6. Check that the filter gasket is not stuck to
the engine contact surface.
u If it is stuck, you must detach it.
7. Wipe away dirt and dust adhering to the
contact surface of the engine block, and
install a new oil filter.
u Apply a light coat of new engine oil to
the filter gasket.
8. Put a new washer on the drain bolt, then
reinstall the drain bolt.
u Tightening torque:
30 lbf∙ft (40 N∙m, 4.0 kgf∙m)
9. Pour the recommended engine oil into the
engine.
u Engine oil change capacity (including filter):
4.2 US qt (4.0 L)
10. Reinstall the engine oil fill cap securely and
start the engine.
11. Run the engine for a few minutes, and
then check that there is no leak from the
drain bolt or oil filter.
12. Stop the engine, wait for three minutes,
and then check the oil level on the
dipstick.
u If necessary, add more engine oil.
13. Reinstall the under cover in the same order
it was removed.1Changing the Engine Oil and Oil Filter
You will need a special wrench to replace the oil
filter. You can buy this wrench from a dealer.
When installing the new oil filter, follow the
instructions supplied with the oil filter.
Reinstall the engine oil fill cap. Start the engine. If the
Engine oil pressure low warning appears, turn off
the engine, and check your work.
Oil Filter
Page 644 of 719

643
Maintenance
Climate Control System Maintenance
Air Conditioning
To ensure proper and safe operation, the Society of Automotive Engineers (SAE
J2845) recommends that the refrigerant system only be serviced by trained and
certified technicians.
Never repair or replace the air conditio ning evaporator (cooling coil) with one
removed from a used or salvaged vehicle.
New replacement mobile air conditioning evaporators must be certified (and
labeled) as meeting SAE Standard J2842.
Dust and Pollen Filter
The climate control system is equipped with a dust and pollen filter that collects
pollen, dust, and other debris in the air. The Maintenance MinderTM messages will let
you know when to replace the filter.
We recommend that you repl ace the dust and pollen filter sooner when using your
vehicle in areas with high concentrations of dust.
1 Climate Control System Maintenance
NOTICE
Vented refrigerant is harmful to the environment.
To avoid refrigerant from venting, never replace the
evaporator with one re moved from a used or
salvaged vehicle.
Refrigerant in your vehicle’ s air conditioning system is
flammable and can be igni ted during servicing if
proper procedures are not followed.
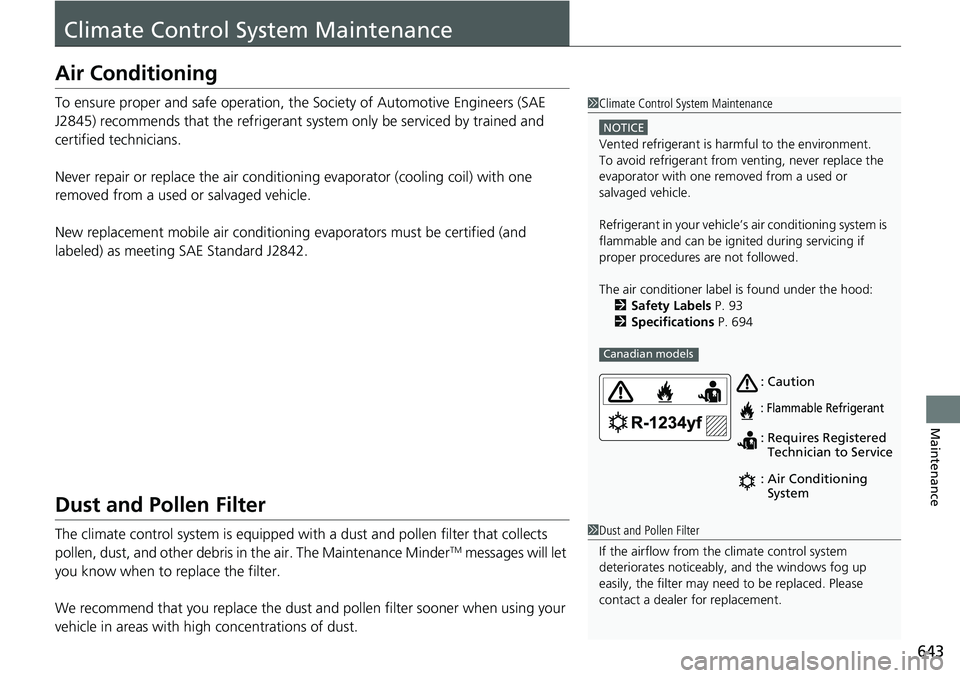
The air conditioner labe l is found under the hood:
2 Safety Labels P. 93
2 Specifications P. 694
Canadian models
: Caution
: Flammable Refrigerant
:
: Requires Registered
Technician to Service
Air Conditioning
System
1
Dust and Pollen Filter
If the airflow from the climate control system
deteriorates noticeably, and the windows fog up
easily, the filter may need to be replaced. Please
contact a dealer for replacement.