2023 FORD F650/750 engine hours
[x] Cancel search: engine hoursPage 75 of 378

Trip 1 or 2
Displays the following of an individual
journey.
• Digital speed.
• Distance.
• Time.
• Distance to empty.
• Average fuel economy.
Note:Hold OK to reset fuel history and
average fuel economy.
Fuel Economy
Displays the following:• Instant fuel economy.
• Average fuel economy.
• Average speed.
• Distance to empty.
Note:Hold OK to reset fuel history and
average fuel economy.
Driver Assist
Displays the following:
• Progressive range select.
• Engine hours.
• Voltmeter.
• Maintenance monitor.
• Oil Temp.
Settings
Settings
Select Your Setting Auto Regen Vehicle
Lighting
Locks
FordPass
Windows
Wiper Controls
Select Your Setting Units Displ. Settings
Temperature
Language
8 Inch Display Menu
Note:Some options could appear slightly
different or not at all if the items are
optional.
71
Information Displays
Page 77 of 378

Truck Info
Truck Info
Gauge View
Digital Speedometer
Engine Information
Maintenance Monitor
Transmission Temperature
• Engine Information - Shows engine hours, engine idle hours and engine oil temp and
oil life.
Settings
Settings
Select Your Setting Lighting Vehicle Advanced
Settings
Easy Entry/Exit
Locks
FordPass
Windows
Wiper Controls
Select Your Setting Measurement
Units Displ.
Settings
Temperature
Units
Tire Pressure
Language
73
Information Displays
Page 108 of 378
• Make sure the heater, heater cord and
extension cord are firmly connected.
• Check for heat anywhere in the
electrical hookup once the system has
been operating for approximately 30
minutes.
• Make sure the system is unplugged and
properly stowed before starting and
driving your vehicle. Make sure the
protective cover seals the prongs of the
block heater cord plug when not in use.
• Make sure the heater system is
checked for proper operation before
winter.
Using the Engine Block Heater
Make sure the receptacle terminals are
clean and dry prior to use. Clean them with
a dry cloth if necessary.
The heater uses 0.4 to 1.0 kilowatt-hours
of energy per hour of use. The system does
not have a thermostat. It achieves
maximum temperature after
approximately three hours of operation.
Using the heater longer than three hours
does not improve system performance and
unnecessarily uses electricity.
104
Starting and Stopping the Engine
Page 109 of 378
SAFETY PRECAUTIONS
WARNING: Do not overfill the fuel
tank. The pressure in an overfilled tank
may cause leakage and lead to fuel spray
and fire.
WARNING: The fuel system may
be under pressure. If you hear a hissing
sound near the fuel filler inlet, do not
refuel until the sound stops. Otherwise,
fuel may spray out, which could cause
serious personal injury.
WARNING: Fuels can cause serious
injury or death if misused or mishandled.
WARNING: Gasoline may contain
benzene, which is a cancer-causing
agent.
WARNING: When refueling always
shut the engine off and never allow
sparks or open flames near the fuel tank
filler valve. Never smoke or use a cell
phone while refueling. Fuel vapor is
extremely hazardous under certain
conditions. Avoid inhaling excess fumes.
WARNING: Flow of fuel through a
fuel pump nozzle can produce static
electricity. This can cause a fire if you are
filling an ungrounded fuel container.
WARNING: Stop refueling after the
fuel pump nozzle automatically shuts
off for the second time. Failure to follow
this will fill the expansion space in the
fuel tank and could lead to fuel
overflowing.Observe the following guidelines when
handling automotive fuel:
• Extinguish all smoking materials and
any open flames before refueling your
vehicle.
• Automotive fuels can be harmful or
fatal if swallowed. Fuel such as
gasoline is highly toxic and if
swallowed can cause death or
permanent injury. If swallowed, call a
physician immediately, even if no
symptoms are immediately apparent.
The toxic effects of fuel may not be
visible for hours.
• Avoid inhaling fuel vapors. Inhaling too
much fuel vapor of any kind can lead
to eye and respiratory tract irritation.
In severe cases, excessive or prolonged
breathing of fuel vapor can cause
serious illness and permanent injury.
• Avoid getting fuel liquid in your eyes. If
you splash fuel in your eyes, remove
contact lenses (if worn), flush with
water for 15 minutes and seek medical
attention. Failure to seek proper
medical attention could lead to
permanent injury.
• Fuels can also be harmful if absorbed
through the skin. If you splash fuel on
your skin, clothing or both, promptly
remove contaminated clothing and
wash your skin thoroughly with soap
and water. Repeated or prolonged skin
contact with fuel liquid or vapor causes
skin irritation.
• Be particularly careful if you are taking
“Antabuse” or other forms of disulfiram
for the treatment of alcoholism.
Breathing gasoline vapors, or skin
contact could cause an adverse
reaction. In sensitive individuals, serious
105
Fuel and Refueling
Page 117 of 378

1. When your vehicle has stopped, shift
into neutral (N) or park (P).
2. Apply the parking brake and switch the
ignition off.
3. Turn the fuel filler cap
counterclockwise and remove it.
4. Refuel your vehicle as required.
5. Replace the fuel filler cap, turn it
clockwise until you feel a strong
resistance.
If the fuel cap warning lamp or a warning
message appears in the instrument cluster,
you may not have installed the fuel filler
cap correctly.
If the fuel cap warning lamp remains on,
at the next opportunity, safely pull off of
the road, remove the fuel filler cap, align
the cap properly and reinstall it. The check
fuel cap warning lamp or warning message
may not reset immediately. It may take
several driving cycles for the indicators to
turn off. A driving cycle consists of an
engine start-up (after four or more hours
with the engine off) followed by normal
city and highway driving.
FUEL CONSUMPTION
The advertised capacity is the maximum
amount of fuel that you can add to the fuel
tank after running out of fuel. Included in
the advertised capacity is an empty
reserve. The empty reserve is an
unspecified amount of fuel that remains
in the fuel tank when the fuel gauge
indicates empty.
Note:The amount of fuel in the empty
reserve varies and should not be relied upon
to increase driving range.
Filling the Fuel Tank
For consistent results when refueling:
• Turn the ignition off before fueling; an
inaccurate reading results if the engine
is left running.
• Use the same fill rate
(low-medium-high) each time the tank
is filled.
• Allow no more than one automatic
shut-off when refueling.
Results are most accurate when the filling
method is consistent.
Calculating Fuel Economy
Do not measure fuel economy during the
first 1,000 mi (1,600 km) of driving (this is
your engine’s break-in period). A more
accurate measurement is obtained after
2,000 mi (3,200 km) to 3,000 mi
(4,800 km). Also, fuel expense, frequency
of fill ups or fuel gauge readings are not
accurate ways to measure fuel economy.
1. Fill the fuel tank completely and record
the initial odometer reading.
2. Each time you fill the fuel tank, record
the amount of fuel added.
3. After at least three fill ups, fill the fuel
tank and record the current odometer
reading.
4. Subtract your initial odometer reading
from the current odometer reading.
To calculate L/100 km (liters per 100
kilometers) fuel consumption, multiply the
liters used by 100, then divide by kilometers
traveled. To calculate MPG (miles per
gallon) fuel consumption, divide miles
traveled by gallons used.
113
Fuel and Refueling
Page 122 of 378

Your vehicle may not pass the I/M test if
the service engine soon indicator is on or
not working properly (bulb is burned out),
or if the OBD-II system has determined
that some of the emission control systems
have not been properly checked. In this
case, the vehicle is not ready for I/M
testing.
If the vehicle’s engine or transmission has
just been serviced, or the battery has
recently run down or been replaced, the
OBD-II system may indicate that the
vehicle is not ready for I/M testing. To
determine if the vehicle is ready for I/M
testing, turn the ignition key to the on
position for 15 seconds without cranking
the engine. If the service engine soon
indicator blinks eight times, it means that
the vehicle is not ready for I/M testing; if
the service engine soon indicator stays on
solid, it means that your vehicle is ready
for I/M testing.
The OBD-II system checks the emission
control system during normal driving. A
complete check may take several days.
If the vehicle is not ready for I/M testing,
you can perform the following driving cycle
consisting of mixed city and highway
driving:
1. 15 minutes of steady driving on an
expressway or highway followed by 20
minutes of stop-and-go driving with at
least four 30-second idle periods.
2. Allow your vehicle to sit for at least
eight hours with the ignition off. Then,
start the vehicle and complete the
above driving cycle. The vehicle must
warm up to its normal operating
temperature. Once started, do not turn
off the vehicle until the above driving
cycle is complete.
If the vehicle is still not ready for I/M
testing, you need to repeat the above
driving cycle.SELECTIVE CATALYTIC
REDUCTANT SYSTEM - DIESEL
Your vehicle may have a selective catalytic
reduction system. This system helps
reduce emission levels of oxides of
nitrogen from the exhaust system. The
system automatically injects diesel
exhaust fluid into the exhaust system to
enable correct selective catalytic reduction
system function.
Note:Selective catalytic reduction systems
are not fitted to vehicles in markets where
only high-sulfur diesel fuel is available.
Diesel Exhaust Fluid Level
In order for the system to operate correctly
you must maintain the diesel exhaust fluid
level.
The system has a sensor to monitor fluid
level and quality/concentration. A warning
message appears in the information
display when the diesel exhaust fluid level
is low. If a warning message appears, refill
the diesel exhaust fluid tank as soon as
possible. See Information Messages
(page 74).
Filling the Diesel Exhaust Fluid
Tank
WARNING: Keep diesel exhaust
fluid out of reach of children. Avoid
contact with skin, eyes or clothing. In
case of contact with your eyes, flush
immediately with water and get prompt
medical attention. In case of contact
with your skin, clean immediately with
soap and water. If you swallow any
diesel exhaust fluid, drink plenty of
water, call a physician immediately.
118
Engine Emission Control
Page 193 of 378
Vehicles Sold in Canada: Getting
Roadside Assistance
To fully assist you should you have a
vehicle concern, Ford Motor Company of
Canada, Limited offers a complimentary
roadside assistance program. This program
is eligible within Canada or the continental
United States.
The service is available 24 hours a day,
seven days a week.
This program is separate from the New
Vehicle Limited Warranty, but the coverage
is concurrent with the powertrain coverage
period of your vehicle. Canadian roadside
coverage and benefits may differ from the
U.S. coverage.
If you require more information, please call
us in Canada at 1-800-665-2006, or visit
our website at www.ford.ca.
HAZARD FLASHERS
Note:If used when the vehicle is not
running, the battery loses charge. As a result,
there may be insufficient power to restart
your vehicle.
E304635E304635
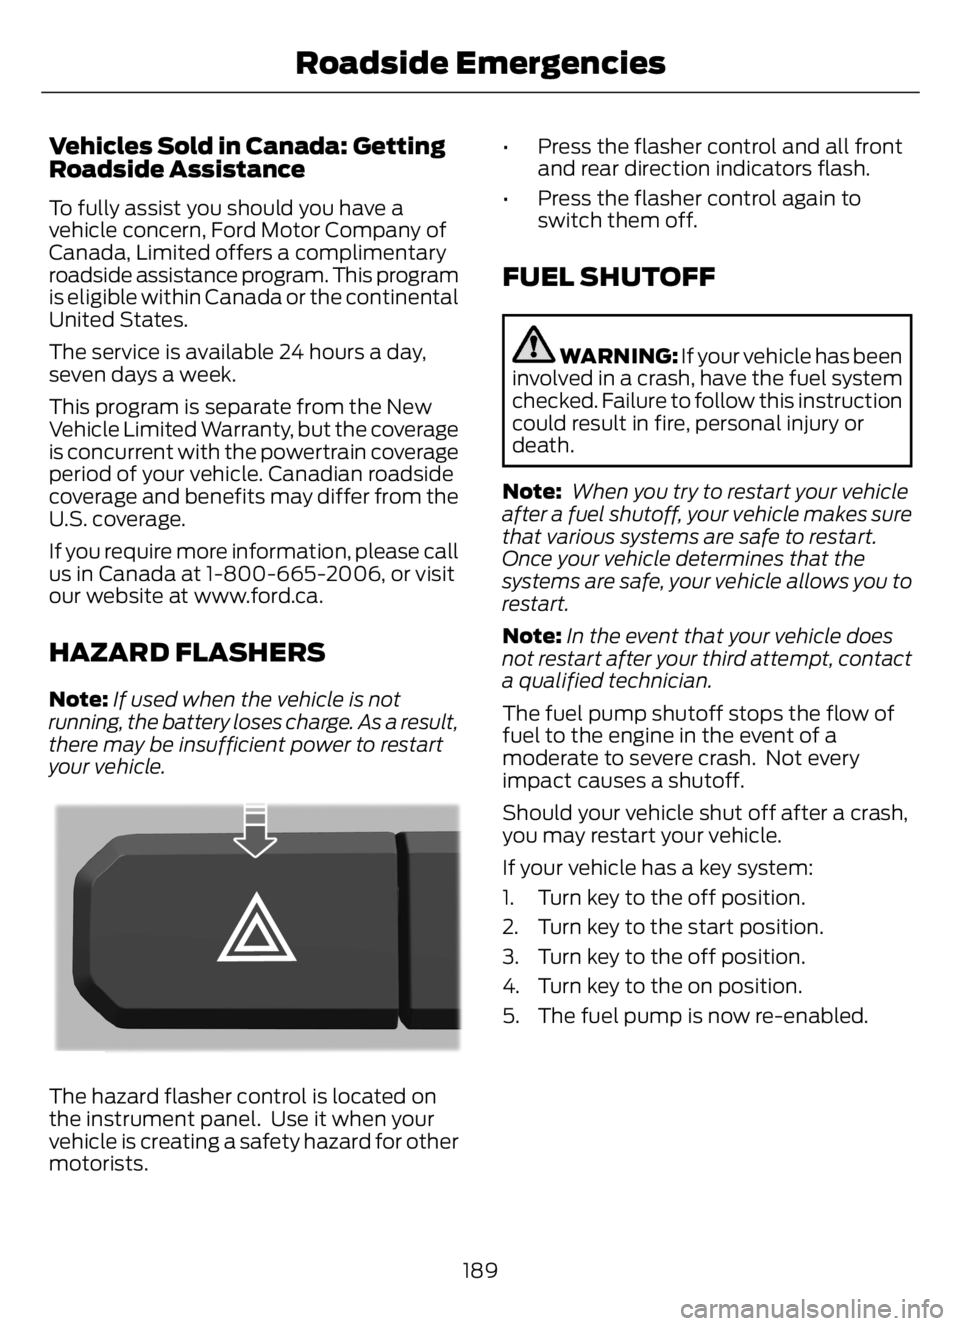
The hazard flasher control is located on
the instrument panel. Use it when your
vehicle is creating a safety hazard for other
motorists.• Press the flasher control and all front
and rear direction indicators flash.
• Press the flasher control again to
switch them off.
FUEL SHUTOFF
WARNING: If your vehicle has been
involved in a crash, have the fuel system
checked. Failure to follow this instruction
could result in fire, personal injury or
death.
Note: When you try to restart your vehicle
after a fuel shutoff, your vehicle makes sure
that various systems are safe to restart.
Once your vehicle determines that the
systems are safe, your vehicle allows you to
restart.
Note:In the event that your vehicle does
not restart after your third attempt, contact
a qualified technician.
The fuel pump shutoff stops the flow of
fuel to the engine in the event of a
moderate to severe crash. Not every
impact causes a shutoff.
Should your vehicle shut off after a crash,
you may restart your vehicle.
If your vehicle has a key system:
1. Turn key to the off position.
2. Turn key to the start position.
3. Turn key to the off position.
4. Turn key to the on position.
5. The fuel pump is now re-enabled.
189
Roadside Emergencies
Page 251 of 378

5. Turn the air conditioning (if equipped)
on and allow the engine to idle for at
least one minute.
6. Release the parking brake. With your
foot on the brake pedal and with the
air conditioning on, put the vehicle in
drive (D) and allow the engine to idle
for at least one minute.
• If you do not allow the engine to
relearn its idle trim, the idle quality
of your vehicle may be adversely
affected until the idle trim is
eventually relearned.
7. Drive the vehicle to complete the
relearning process
• The vehicle may need to be driven
10 mi (16 km) or more to relearn the
idle and fuel trim strategy along
with the ethanol content for flexible
fuel vehicles.
If the battery has been disconnected or a
new battery has been installed, the clock
and radio settings must be reset once the
battery is reconnected.
Always dispose of automotive
batteries in a responsible manner.
Follow your local authorized standards
for disposal. Call your local authorized
recycling center to find out more about
recycling automotive batteries.
Battery Management System (If
Equipped)
The battery management system (BMS)
monitors battery conditions and takes
actions to extend battery life. If excessive
battery drain is detected, the system may
temporarily disable certain electrical
features to protect the battery. Those
electrical accessories affected include the
rear defrost, heated/cooled seats, climate
control fan, heated steering wheel, audio
and navigation system. A message may be
shown in the information displays to alertthe driver that battery protection actions
are active. These messages are only for
notification that an action is taking place,
and not intended to indicate an electrical
problem or that the battery requires
replacement.
Electrical accessory installation
To ensure proper operation of the BMS,
any electrical devices that are added to
the vehicle should not have their ground
connection made directly at the negative
battery post. A connection at the negative
battery post can cause inaccurate
measurements of the battery condition
and potential incorrect system operation.
Note:Electrical or electronic accessories
added to the vehicle by the dealer or the
owner may adversely affect battery
performance and durability, and may also
affect the performance of other electrical
systems in the vehicle.
When a battery replacement is required,
the battery should only be replaced with
a Ford recommended replacement battery
which matches the electrical requirements
of the vehicle. After battery replacement,
or in some cases after charging the battery
with the external charger, the BMS requires
eight hours of vehicle sleep time (key off
with doors closed) to relearn the new
battery state of charge. Prior to relearning
the state of charge, the BMS may disable
electrical features (to protect the battery)
earlier than normal.
ADJUSTING THE HEADLAMPS
Vertical Aim Adjustment
The headlamps on your vehicle are
properly aimed at the assembly plant. If
your vehicle has been in an accident, the
alignment of your headlamps should be
checked by your authorized dealer.
247
Maintenance