2023 FORD EXPEDITION turn signal
[x] Cancel search: turn signalPage 296 of 658
LANE CENTERING AUTOMATICCANCELLATION
When an external condition cancels thesystem, and your hands are on the steeringwheel, a tone sounds and a messageappears in the instrument cluster display.
When an external condition cancels thesystem, and your hands are not on thesteering wheel, the system immediatelyalerts you to take control of the vehicle. Ifthis alert is ignored, the system slows thevehicle while maintaining steeringassistance when lane markings areavailable. When no lane markings areavailable, the vehicle comes to a stop.
If your vehicle starts to slowdown after system cancellation,you must take full control of thevehicle. To re-enable adaptive cruisecontrol with lane centering aftercancellation, press and release the resumebutton.
Automatic cancellation can also occur if:
•The lane becomes too wide or narrow.
•The system cannot detect valid lanemarkings.
•Lane markings cross over one another.
•The curve of the road is too sharp.
Note:If your vehicle slows down due to yourinactivity twice within a key cycle, thesystem disables. To reset the system, whenthe vehicle is stationary, return the gearselector to park (P) and turn the vehicle off.Then, restart the vehicle with your foot onthe brake pedal.
LANE CENTERING MANUALCANCELLATION
When you perform the following actions,adaptive cruise control with lane centeringwill cancel:
•The brake pedal is pressed.
•Adaptive cruise control button isswitched off on the steering wheel.
The lane centering system is momentarilysuppressed when either of the followingactions are performed:
•Turn signal indicator is latched ortapped.
•You steer the vehicle out of lane.
LANE CENTERING INDICATORS
Illuminates when you switchlane centering on. The color ofthe indicator changes to indicatethe system status.
Gray status indicates the system is on butin standby mode.
Green status indicates the system isenabled and applying steering assistanceto keep the vehicle in the center of the lane.
Amber status with an audible tone, thatthen changes to gray status, indicates asystem automatic cancellation.
INTELLIGENT ADAPTIVE
CRUISE CONTROL
HOW DOES INTELLIGENTADAPTIVE CRUISE CONTROLWORK
Intelligent adaptive cruise controlcombines speed sign recognition andnavigation map data with adaptive cruisecontrol to adjust the cruise set speed tothe speed limit detected by the speed signrecognition system. As the system detectsnew speed signs, the set speed updates.
292
2023 Expedition (TB8) Canada/United States of America, enUSA, Edition date: 202207, DOMAdaptive Cruise Control (If Equipped)E308130 E297977
Page 314 of 658
The lane keeping system may not correctlyoperate in any of the following conditions:
•The lane keeping system does notdetect at least one lane marking.
•You switch the turn signal on.
•You apply direct steering, acceleratefast or brake hard.
•The vehicle speed is less than 40 mph(64 km/h).
•The anti-lock brake, stability control ortraction control system activates.
•The lane is too narrow.
•Something is obscuring the camera orit is unable to detect the lane markingsdue to environment, traffic or vehicleconditions.
•Entering or exiting a tight curve whendriving at high speeds.
The lane keeping system may not correctlane positioning in any of the followingconditions:
•High winds.
•Uneven road surfaces.
•Heavy or uneven loads.
•Incorrect tire pressure.
SWITCHING THE LANE
KEEPING SYSTEM ON AND
OFF
To activate the lane keepingsystem, press the button on thesteering wheel.
To deactivate the lane keeping system,press the button again.
Note:When switching the system on or offa message appears in the information andentertainment display to show the status.
Note:The system stores the on or offsetting until manually changed, unless itdetects a MyKey™. If the system detects aMyKey™, it defaults to the last setting forthat MyKey™.
Note: If the system detects a MyKey™,pressing the button does not affect the onor off status of the system. You can onlychange the mode and intensity settings.
SWITCHING THE LANE
KEEPING SYSTEM MODE -
VEHICLES WITH: 12 INCH
SCREEN
The lane keeping system has differentsettings that you can view or adjust usingthe information display.
The system stores the last known selectionfor each of these settings. You do not needto readjust your settings each time youswitch on the system.
To change the lane keeping system mode,use the touchscreen:
1.Press Features on the touchscreen.
2.Press Driver Assistance.
3.Press Lane-Keeping System.
4.Press Lane-Keeping Mode.
5.Select a mode.
Note:The system remembers the lastsetting when you start your vehicle. If thesystem detects a MyKey™, it defaults to thelast setting for that MyKey™.
310
2023 Expedition (TB8) Canada/United States of America, enUSA, Edition date: 202207, DOMLane Keeping SystemE334922
Page 327 of 658
Note:The system only supportsconventional trailers.
2.Do you want to set up blind spot withtrailer screen? If no, the system turnsoff. If yes, the menu goes to the nextscreen.
3.Is the width less than 9 ft (2.7 m) andlength less than 33 ft (10.1 m)? If no,the system turns off. If yes, the menugoes to the next screen.
4.Trailer width measurement. Measurethe width at the front of the trailer. It isnot measured at the widest point ofthe trailer. The maximum width at thefront of the trailer the system cansupport is 8.5 ft (2.6 m).
Note:You do not need to enter an exacttrailer width measurement. You only needto confirm that the width of the trailer is lessthan 9 ft (2.7 m).
5.Trailer length measurement. The trailerlength is the distance between thetrailer hitch ball and the rear of thetrailer. The maximum length that thesystem can support is 33 ft (10.1 m).
6.Enter the length of trailer. The defaultsetting is 18 ft (5.5 m). Toggling up ordown using the menu buttonsincreases or decreases themeasurement by 1 ft (0.3 m). Select alength that is equal to or within 1 ft(0.3 m) of the actual measured length.For example, if the actual measurelength is 23 ft (7 m), toggle the lengthin the menu to 24 ft (7.2 m). Thesystem setup saves when you enter thelength of the trailer.
Note:If the trailer is a bike rack or cargorack with electrical lighting, enter a lengthof around 3 ft (1 m). Cross traffic alertremains on for trailers with a length of 3 ft(1 m) or less.
Note:The system requires propermeasurement and measure entry to functionproperly.
SELECTING A TRAILER
When you connect a trailer to your vehicle,the trailer set up menu appears in thetouchscreen. This menu allows you to setup a new trailer or choose from apreviously set up trailer. A warningmessage appears and the system turns offif you do not choose or add a new trailer.
Note:The warning message may notappear until your vehicle reaches 22 mph(35 km/h).
BLIND SPOT INFORMATION
SYSTEM INDICATORS
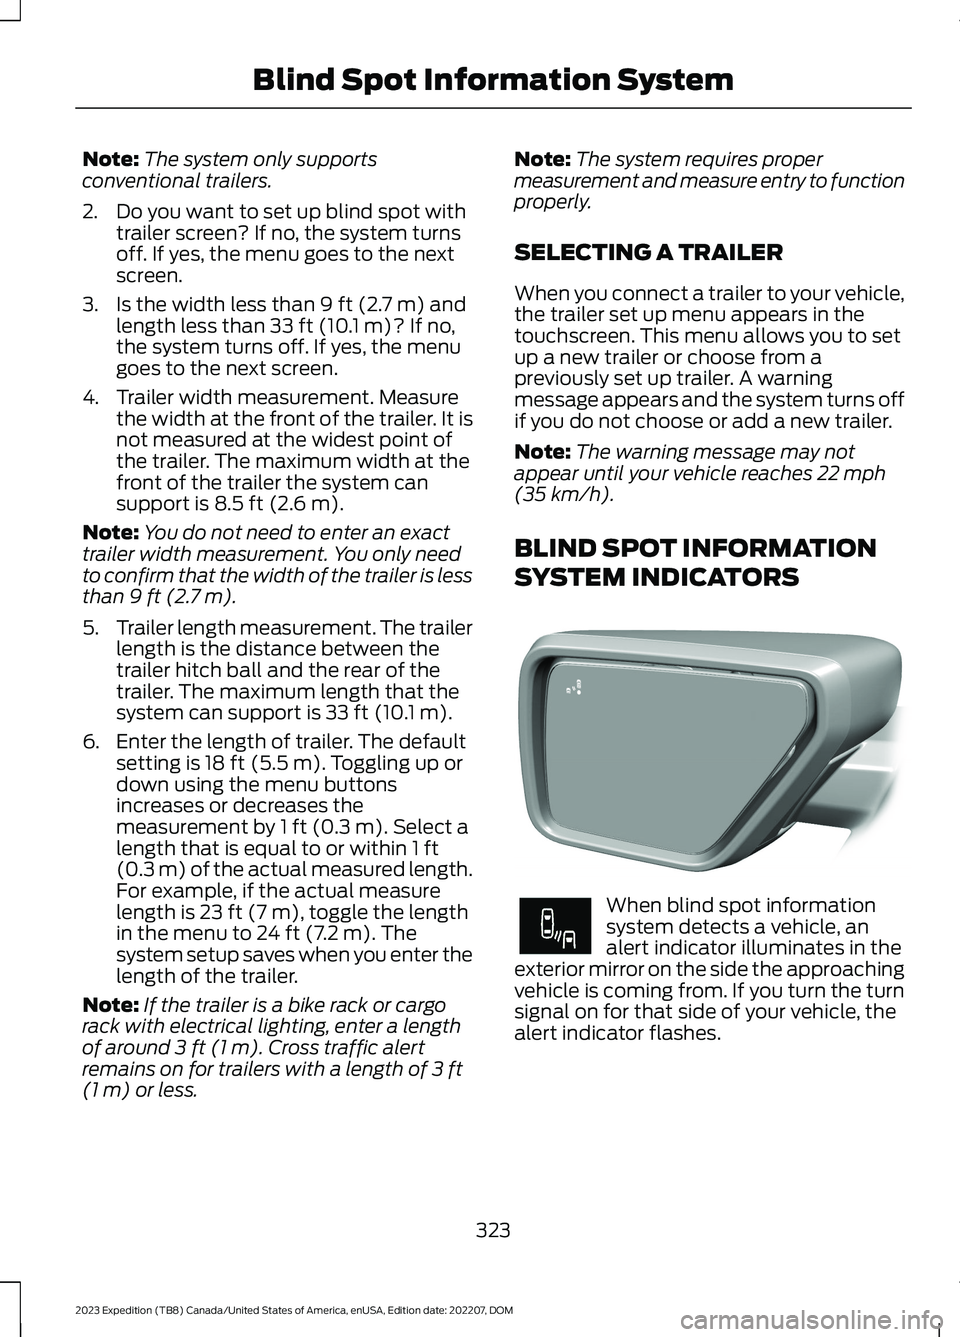
When blind spot informationsystem detects a vehicle, analert indicator illuminates in theexterior mirror on the side the approachingvehicle is coming from. If you turn the turnsignal on for that side of your vehicle, thealert indicator flashes.
323
2023 Expedition (TB8) Canada/United States of America, enUSA, Edition date: 202207, DOMBlind Spot Information SystemE309137 E249861E249861
Page 335 of 658

Adjusting the Pre-Collision AssistSettings
You can adjust the following settings byusing the touchscreen controls in thepre-collision assist menu:
•Change alert and distance alertsensitivity to one of three possiblesettings.
•Switch distance indication and alert onor off.
•If required, switch automaticemergency braking on or off.
•If required, switch the entirepre-collision assist feature on or off.
•If required, switch evasive steeringassist on or off.
Note:Automatic emergency braking andevasive steering assist automatically turnon every time you switch the ignition on.
Note:If your vehicle has a radar sensor, werecommend that you switch the system offif you install a snow plow or similar objectin such a way that it may block the radarsensor. Your vehicle remembers the selectedsetting across key cycles.
Note:If you switch automatic emergencybraking off, evasive steering assist switchesoff.
LOCATING THE PRE-
COLLISION ASSIST SENSORS
Camera.1.
Radar sensor (if equipped).2.
If a message regarding a blocked sensoror camera appears in the informationdisplay, something is obstructing the radarsignals or camera images. The radar sensoris behind the fascia cover in the center ofthe lower grille. With a blocked sensor orcamera, the system may not function, orperformance may reduce. SeePre-Collision Assist – InformationMessages (page 337).
Note:Proper system operation requires aclear view of the road by the camera. Haveany windshield damage in the area of thecamera's field of view repaired.
Note:If something hits the front end of yourvehicle or damage occurs and your vehiclehas a radar sensor, the radar sensing zonecould change. This could cause missed orfalse vehicle detections. Have your vehicleserviced to have the radar checked forproper coverage and operation.
331
2023 Expedition (TB8) Canada/United States of America, enUSA, Edition date: 202207, DOMPre-Collision AssistE355942
Page 359 of 658
HOOKING UP A TRAILER USING AWEIGHT-DISTRIBUTING HITCH
WARNING: Do not adjust the springbars so that your vehicle's rear bumperis higher than before attaching the trailer.Doing so will defeat the function of theweight-distributing hitch, which maycause unpredictable handling, and couldresult in serious personal injury.
A weight-distributing hitch helps distributetongue load to all towing vehicle and trailerwheels. For more information, visit the linksin the following table.
WebsiteMarket
https://www.fleet.ford.com/towing-guides/
United States ofAmerica
https://www.fleet.ford.ca/towing-guides/
Canada
CONNECTING A TRAILER
Recognizing a Trailer
1.Attach the trailer and wiring connectorto your vehicle.
2.Switch on your vehicle.
3.Set up a profile for the trailer using thetouchscreen.
Note:If your vehicle does not recognize thetrailer, press and hold the brake pedal for afew seconds.
Note:Trailer profiles store trailer types,dimensions, preferences, trailer specificmileage and fuel economy.
Note:Disabling the trailer detectionnotification makes the default trailer profileactive when a connection is detected.
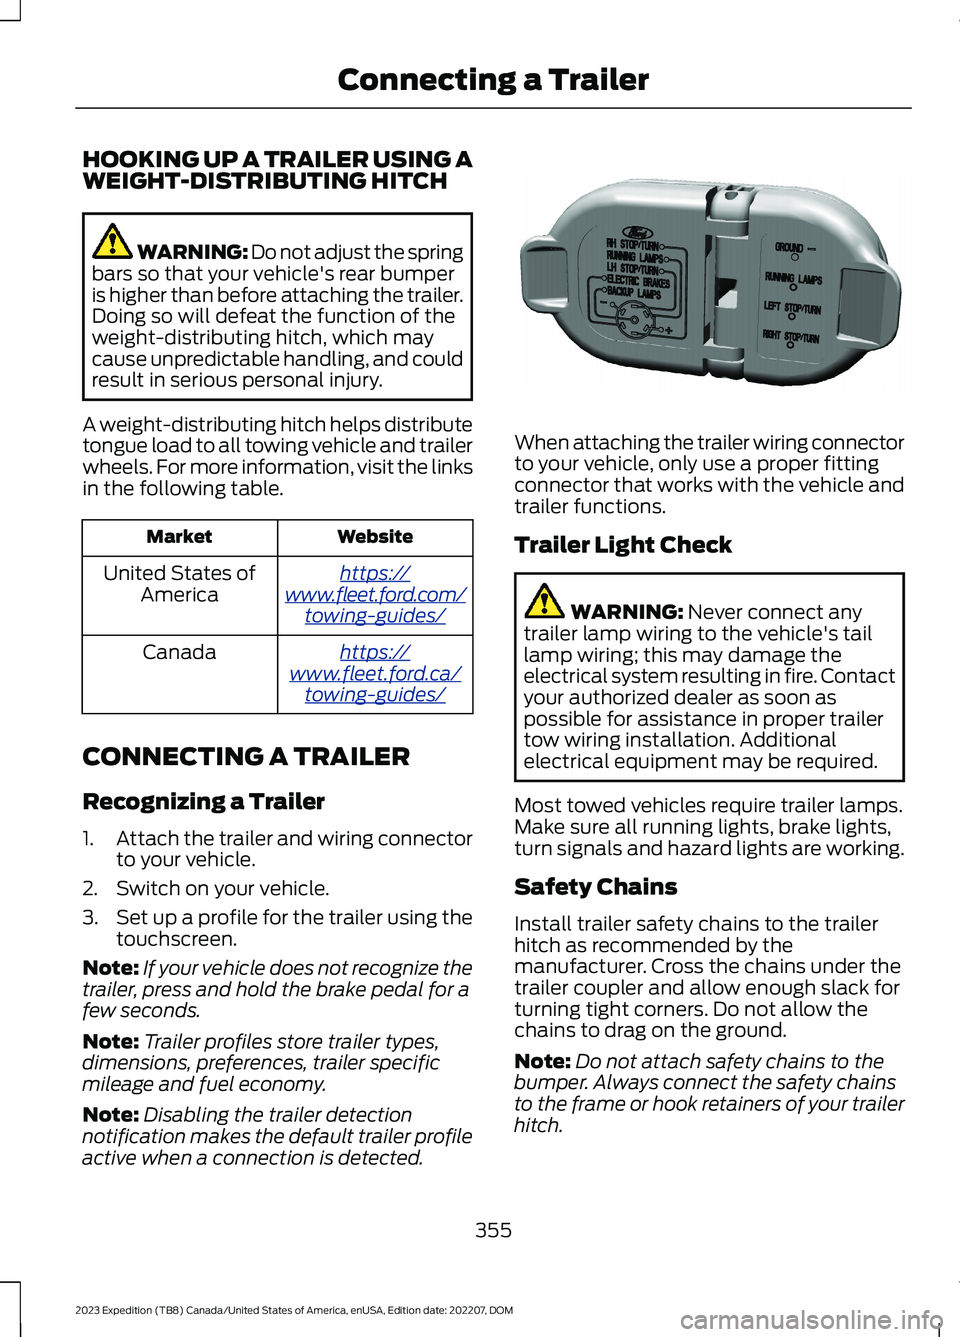
When attaching the trailer wiring connectorto your vehicle, only use a proper fittingconnector that works with the vehicle andtrailer functions.
Trailer Light Check
WARNING: Never connect anytrailer lamp wiring to the vehicle's taillamp wiring; this may damage theelectrical system resulting in fire. Contactyour authorized dealer as soon aspossible for assistance in proper trailertow wiring installation. Additionalelectrical equipment may be required.
Most towed vehicles require trailer lamps.Make sure all running lights, brake lights,turn signals and hazard lights are working.
Safety Chains
Install trailer safety chains to the trailerhitch as recommended by themanufacturer. Cross the chains under thetrailer coupler and allow enough slack forturning tight corners. Do not allow thechains to drag on the ground.
Note:Do not attach safety chains to thebumper. Always connect the safety chainsto the frame or hook retainers of your trailerhitch.
355
2023 Expedition (TB8) Canada/United States of America, enUSA, Edition date: 202207, DOMConnecting a TrailerE163167
Page 427 of 658
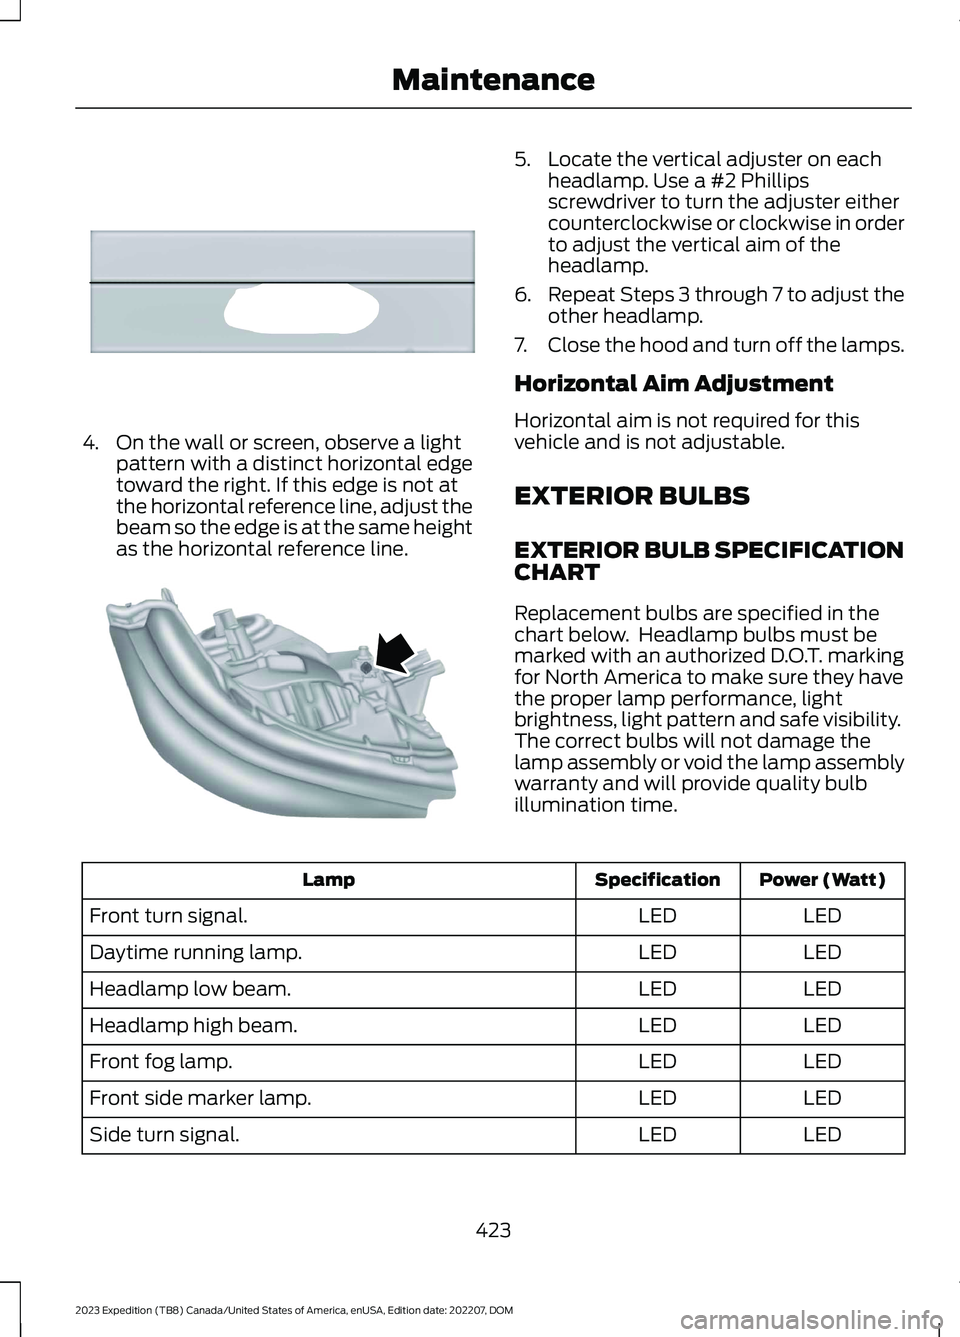
4.On the wall or screen, observe a lightpattern with a distinct horizontal edgetoward the right. If this edge is not atthe horizontal reference line, adjust thebeam so the edge is at the same heightas the horizontal reference line.
5.Locate the vertical adjuster on eachheadlamp. Use a #2 Phillipsscrewdriver to turn the adjuster eithercounterclockwise or clockwise in orderto adjust the vertical aim of theheadlamp.
6.Repeat Steps 3 through 7 to adjust theother headlamp.
7.Close the hood and turn off the lamps.
Horizontal Aim Adjustment
Horizontal aim is not required for thisvehicle and is not adjustable.
EXTERIOR BULBS
EXTERIOR BULB SPECIFICATIONCHART
Replacement bulbs are specified in thechart below. Headlamp bulbs must bemarked with an authorized D.O.T. markingfor North America to make sure they havethe proper lamp performance, lightbrightness, light pattern and safe visibility.The correct bulbs will not damage thelamp assembly or void the lamp assemblywarranty and will provide quality bulbillumination time.
Power (Watt)SpecificationLamp
LEDLEDFront turn signal.
LEDLEDDaytime running lamp.
LEDLEDHeadlamp low beam.
LEDLEDHeadlamp high beam.
LEDLEDFront fog lamp.
LEDLEDFront side marker lamp.
LEDLEDSide turn signal.
423
2023 Expedition (TB8) Canada/United States of America, enUSA, Edition date: 202207, DOMMaintenanceE167358 E163806
Page 428 of 658
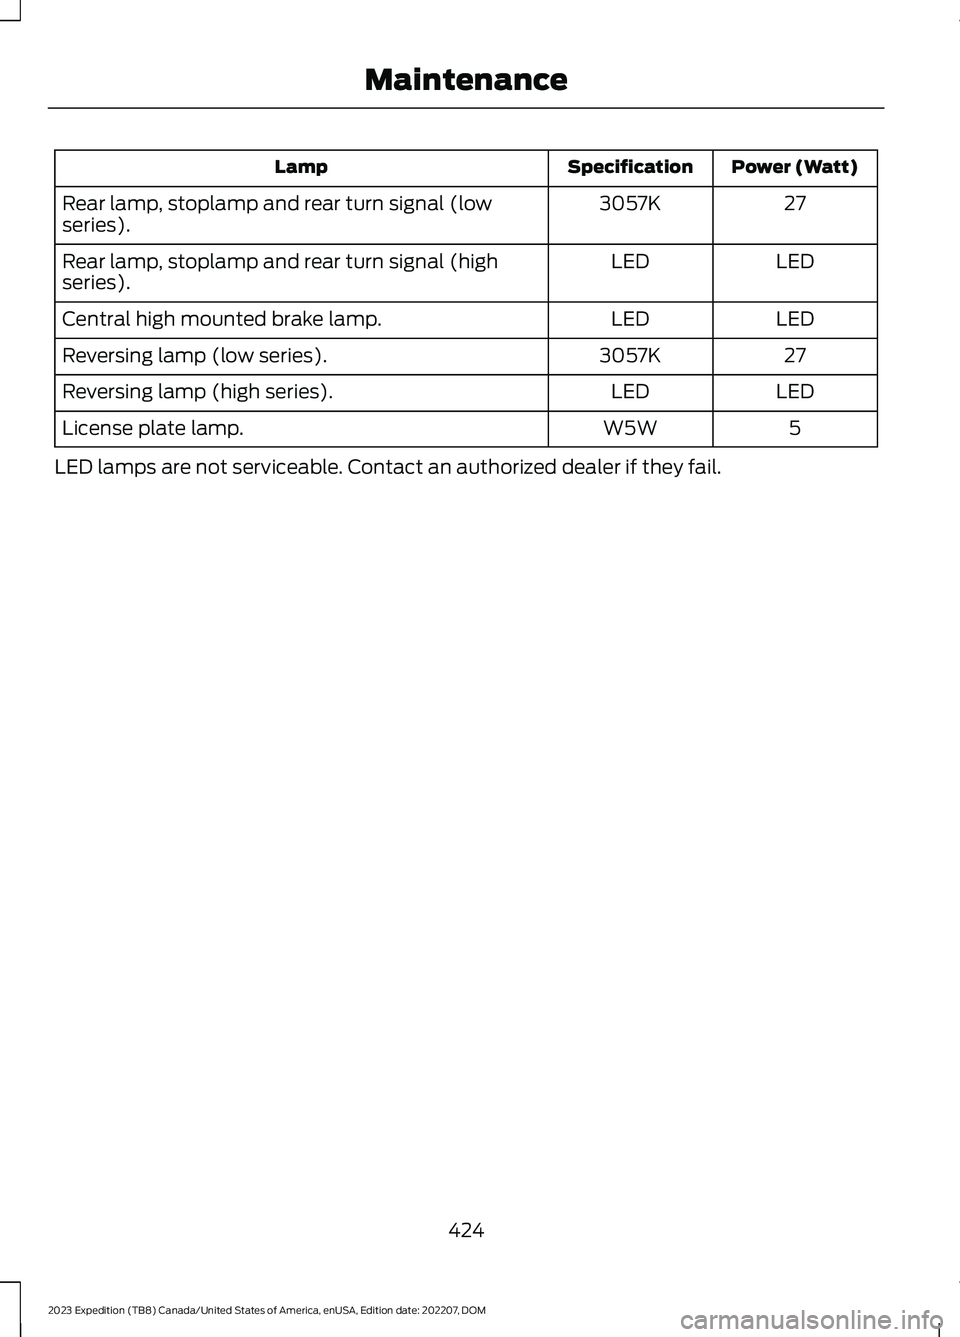
Power (Watt)SpecificationLamp
273057KRear lamp, stoplamp and rear turn signal (lowseries).
LEDLEDRear lamp, stoplamp and rear turn signal (highseries).
LEDLEDCentral high mounted brake lamp.
273057KReversing lamp (low series).
LEDLEDReversing lamp (high series).
5W5WLicense plate lamp.
LED lamps are not serviceable. Contact an authorized dealer if they fail.
424
2023 Expedition (TB8) Canada/United States of America, enUSA, Edition date: 202207, DOMMaintenance
Page 429 of 658
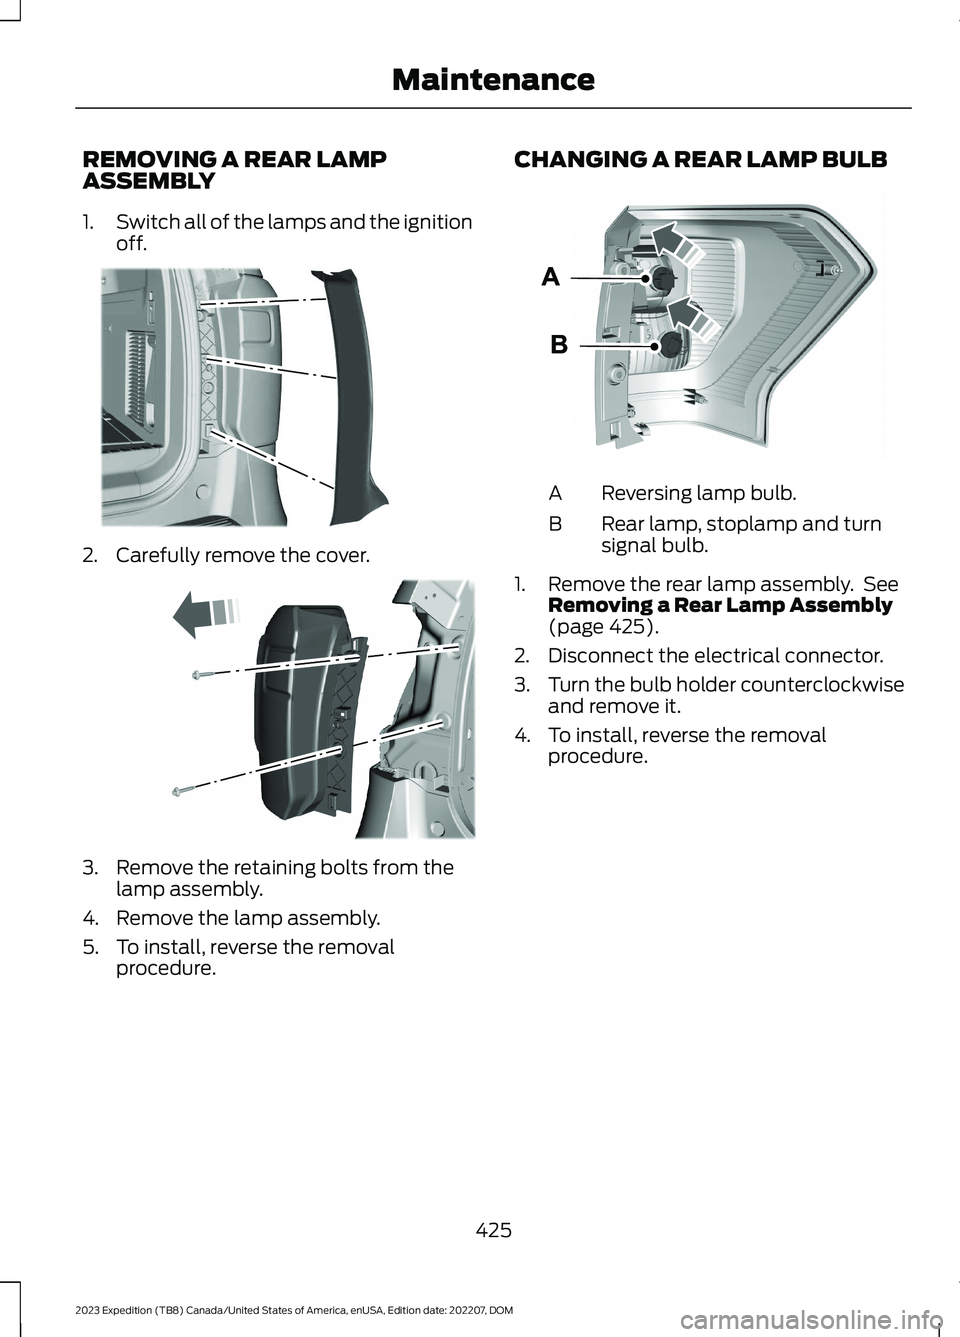
REMOVING A REAR LAMPASSEMBLY
1.Switch all of the lamps and the ignitionoff.
2.Carefully remove the cover.
3.Remove the retaining bolts from thelamp assembly.
4.Remove the lamp assembly.
5.To install, reverse the removalprocedure.
CHANGING A REAR LAMP BULB
Reversing lamp bulb.A
Rear lamp, stoplamp and turnsignal bulb.B
1.Remove the rear lamp assembly. SeeRemoving a Rear Lamp Assembly(page 425).
2.Disconnect the electrical connector.
3.Turn the bulb holder counterclockwiseand remove it.
4.To install, reverse the removalprocedure.
425
2023 Expedition (TB8) Canada/United States of America, enUSA, Edition date: 202207, DOMMaintenanceE249669 E248886 E248889