2023 DODGE CHARGER jump start
[x] Cancel search: jump startPage 7 of 292

5
SAFETY TIPS .................................................................... 199Transporting Passengers .......................................... 199
Transporting Pets ................................................... 199
Connected Vehicles .................................................. 199
Safety Checks You Should Make Inside
The Vehicle ................................................................ 199
Periodic Safety Checks You Should Make
Outside The Vehicle .................................................. 201
Exhaust Gas .............................................................. 201Carbon Monoxide Warnings .................................... 201
IN CASE OF EMERGENCY
HAZARD WARNING FLASHERS .................................. 202
ASSIST AND SOS MIRROR — IF EQUIPPED .................. 202
JACKING AND TIRE CHANGING — IF EQUIPPED .......... 205 Preparations For Jacking ......................................... 205Jack Location/Spare Tire Stowage ......................... 206Jacking Instructions .................................................. 207
TIRE SERVICE KIT — IF EQUIPPED ................................. 209 Tire Service Kit Storage ............................................ 209
Tire Service Kit Components And Operation ........... 210Tire Service Kit Usage Precautions .......................... 210Sealing A Tire With Tire Service Kit .......................... 211
JUMP STARTING .............................................................. 213 Preparations For Jump Start .................................... 214
Jump Starting Procedure .......................................... 214
REFUELING IN EMERGENCY .......................................... 215
IF YOUR ENGINE OVERHEATS ....................................... 216 MANUAL PARK RELEASE–8–SPEED
TRANSMISSION................................................................ 216
FREEING A STUCK VEHICLE .......................................... 218
TOWING A DISABLED VEHICLE ...................................... 219 All-Wheel Drive (AWD) Models — If Equipped ......... 220
Rear-Wheel Drive (RWD) Models ............................ 220Without The Key Fob ................................................ 220
ENHANCED ACCIDENT RESPONSE
SYSTEM (EARS) ............................................................... 220
EVENT DATA RECORDER (EDR) ..................................... 220
SERVICING AND MAINTENANCE
SCHEDULED SERVICING ................................................ 221 3.6L And 5.7L Engines ............................................ 221
ENGINE COMPARTMENT ............................................... 225 3.6L Engine ............................................................... 2255.7L Engine .............................................................. 226
Checking Oil Level .................................................... 227
Adding Washer Fluid ................................................ 227
Maintenance-Free Battery ...................................... 228
Pressure Washing ..................................................... 228
VEHICLE MAINTENANCE ................................................. 228 Engine Oil ................................................................. 228Engine Oil Filter ........................................................ 229Engine Air Cleaner Filter ........................................ 229
Air Conditioner Maintenance ................................ 230
Accessory Drive Belt Inspection............................... 231 Body Lubrication........................................................ 231
Windshield Wiper Blades .......................................... 232
Exhaust System ......................................................... 233
Cooling System ......................................................... 234
Brake System ........................................................... 236
Automatic Transmission ........................................... 237
Rear Axle .................................................................... 237
Fuses .......................................................................... 238Bulb Replacement .................................................... 246
TIRES ..................................................................................248 Tire Safety Information ............................................. 248
Tires — General Information .................................... 255
Tire Types ................................................................... 258Spare Tires — If Equipped ......................................... 259
Wheel And Wheel Trim Care ..................................... 260
Snow Traction Devices ............................................. 262
Tire Rotation Recommendations ............................. 263
DEPARTMENT OF TRANSPORTATION UNIFORM
TIRE QUALITY GRADES ................................................... 263 Treadwear .................................................................. 263
Traction Grades ......................................................... 264
Temperature Grades ................................................. 264
STORING THE VEHICLE ....................................................264
BODYWORK ......................................................................264 Protection From Atmospheric Agents ...................... 264
Body And Underbody Maintenance.......................... 265
Preserving The Bodywork ......................................... 265
INTERIORS ........................................................................ 265 Seats And Fabric Parts.............................................. 265Plastic And Coated Parts .......................................... 266
Leather Surfaces ....................................................... 266
Glass Surfaces .......................................................... 266
23_LD_OM_EN_USC_t.book Page 5
Page 80 of 292

78STARTING AND OPERATING
(Continued)
ALWAYS DO A VISUAL CHECK
that your vehicle is in PARK
by looking for the "P" in the instrument cluster display and
on the gear selector. As an added precaution, always apply
the parking brake when exiting the vehicle.
KEYLESS ENTER ‘N GO™ — IGNITION
This feature allows the driver to operate the ignition switch
with the push of a button, as long as the Remote Start/
Keyless Enter ’n Go™ key fob is in the passenger
compartment.
EXTENDED PARK STARTING
NOTE:Extended Park condition occurs when the vehicle has not
been started or driven for at least 30 days.
1. Install a battery charger or jumper cables to the battery to ensure a full battery charge during the
crank cycle.
2. Place the ignition in the START position and release it when the engine starts. For Keyless Enter ‘n Go™
ignition systems, press and hold the brake pedal
while pushing the ENGINE START/STOP button once.
3. If the engine fails to start within 10 seconds, place the ignition in the OFF position, wait 10 to 15 seconds
to allow the starter to cool, then repeat the “Extended
Park Starting” procedure.
4. If the engine fails to start after eight attempts, allow the starter to cool for at least 10 minutes, then repeat
the procedure.
IF ENGINE FAILS TO START
If the engine fails to start after you have followed the
"Normal Starting" procedure and has not experienced an
extended park condition as previously defined, it may be
flooded. Push the accelerator pedal all the way to the floor
and hold it there. Crank the engine for no more than 10
seconds. This should clear any excess fuel in case the
engine is flooded. Leave the ignition key in the ON/RUN
position, release the accelerator pedal and repeat the
“Normal Starting” procedure.
COLD WEATHER OPERATION (BELOW
–22°F O
R −30°C)
To ensure reliable starting at these temperatures, use of
an externally powered electric engine block heater
(available from an authorized dealer) is recommended.
AFTER STARTING
The idle speed is controlled automatically, and it will
decrease as the engine warms up.
CAUTION!
To prevent damage to the starter, do not crank
continuously for more than 10 seconds at a time. Wait
10 to 15 seconds before trying again.
WARNING!
Never pour fuel or other flammable liquid into the
throttle body air inlet opening in an attempt to start
the vehicle. This could result in flash fire causing
serious personal injury.
Do not attempt to push or tow your vehicle to get it
started. Vehicles equipped with an automatic trans -
mission cannot be started this way. Unburned fuel
could enter the catalytic converter and once the
engine has started, ignite and damage the converter
and vehicle.
If the vehicle has a discharged battery, booster
cables may be used to obtain a start from a booster
battery or the battery in another vehicle. This type of
start can be dangerous if done improperly
Úpage 213.
CAUTION!
To prevent damage to the starter, do not continuously
crank the engine for more than 10 seconds at a time.
Wait 10 to 15 seconds before trying again.
WARNING!
23_LD_OM_EN_USC_t.book Page 78
Page 215 of 292

IN CASE OF EMERGENCY213
If the tire pressure is 19 psi (1.3 Bar) or higher:
1. Push the Power Button to turn on Tire Service Kit
and inflate the tire to the pressure indicated on the
tire and loading information label on the driver-side
door opening.
NOTE:If the tire becomes overinflated, push the Deflation Button
to reduce the tire pressure to the recommended inflation
pressure before continuing.
2. Disconnect the Tire Service Kit from the valve stem, reinstall the cap on the valve stem and unplug from
12 Volt outlet.
3. Place the Tire Service Kit in its proper storage area in the vehicle.
4. Have the tire inspected and repaired or replaced at the earliest opportunity at an authorized dealer or tire
service center.
5. Remove the Speed Limit sticker from the instrument panel after the tire has been repaired.
6. Replace the Sealant Bottle and Sealant Hose assembly at an authorized dealer as soon as
possible.
NOTE:When having the tire serviced, advise the authorized
dealer or service center that the tire has been sealed
using the Tire Service Kit.
(F) Sealant Bottle And Hose Replacement:
1. Replace the Tire Service Kit Sealant Bottle and Sealant Hose prior to the expiration date (printed at
the upper left hand corner on the bottle label) to
assure optimum operation of the system
Ú
page 213.
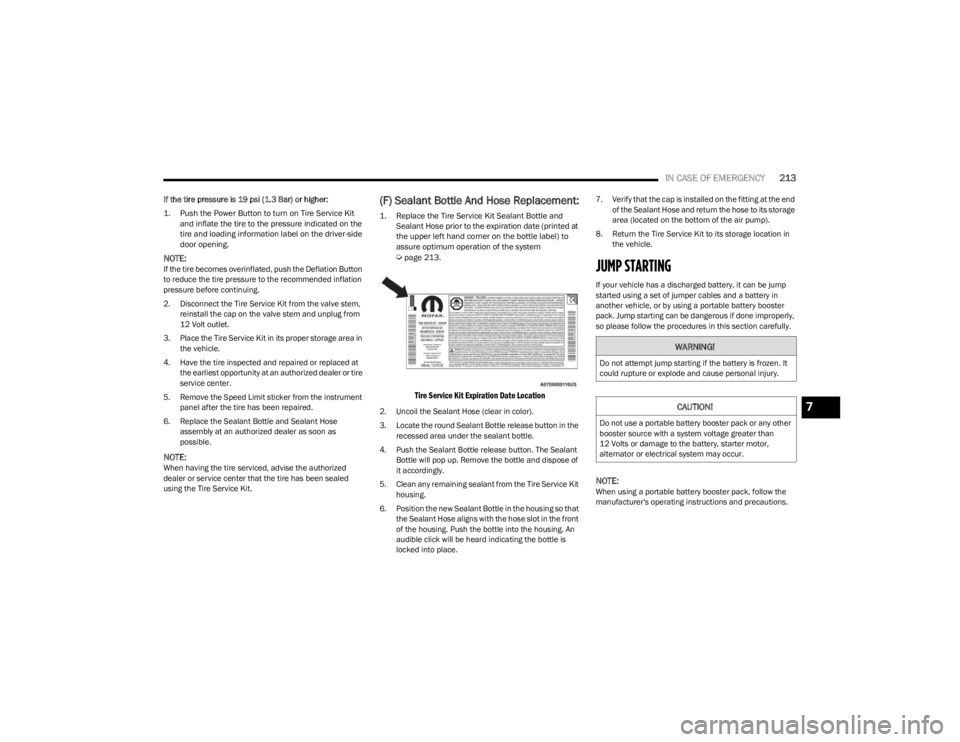
Tire Service Kit Expiration Date Location
2. Uncoil the Sealant Hose (clear in color).
3. Locate the round Sealant Bottle release button in the
recessed area under the sealant bottle.
4. Push the Sealant Bottle release button. The Sealant Bottle will pop up. Remove the bottle and dispose of
it accordingly.
5. Clean any remaining sealant from the Tire Service Kit housing.
6. Position the new Sealant Bottle in the housing so that the Sealant Hose aligns with the hose slot in the front
of the housing. Push the bottle into the housing. An
audible click will be heard indicating the bottle is
locked into place. 7. Verify that the cap is installed on the fitting at the end
of the Sealant Hose and return the hose to its storage
area (located on the bottom of the air pump).
8. Return the Tire Service Kit to its storage location in the vehicle.
JUMP STARTING
If your vehicle has a discharged battery, it can be jump
started using a set of jumper cables and a battery in
another vehicle, or by using a portable battery booster
pack. Jump starting can be dangerous if done improperly,
so please follow the procedures in this section carefully.
NOTE:When using a portable battery booster pack, follow the
manufacturer's operating instructions and precautions.
WARNING!
Do not attempt jump starting if the battery is frozen. It
could rupture or explode and cause personal injury.
CAUTION!
Do not use a portable battery booster pack or any other
booster source with a system voltage greater than
12 Volts or damage to the battery, starter motor,
alternator or electrical system may occur.
7
23_LD_OM_EN_USC_t.book Page 213
Page 216 of 292

214IN CASE OF EMERGENCY
PREPARATIONS FOR JUMP START
The battery is stored under an access cover in the trunk.
Remote battery posts are located on the right side of the
engine compartment for jump starting.
Jump Starting Locations
NOTE:
The remote battery posts are viewed by standing on the
right side of the vehicle looking over the fender. The
positive battery post may be covered with a protective cap.
Lift up on the cap to gain access to the positive battery
post. Do not jump off fuses. Only jump directly off the
remote positive post which has a positive (+) symbol on or
around the post. See the following steps to prepare for jump starting:
1. Apply the parking brake, shift the automatic
transmission into PARK and place the ignition in the
OFF position.
2. Turn off the heater, radio, and all electrical accessories.
3. If using another vehicle to jump start the battery, park the vehicle within the reach of the jumper cables,
apply the parking brake, and make sure the ignition is
OFF.
JUMP STARTING PROCEDURE
Connecting The Jumper Cables
1. Connect the positive
(+) end of the jumper cable to
the remote positive (+)
post of the vehicle with the
discharged battery.
2. Connect the opposite end of the positive (+) jumper
cable to the positive (+) post of the booster battery.
3. Connect the negative (-) end of the jumper cable to
the negative (-) post of the booster battery.
Remote Negative
(-) Post
Remote Positive (+) Post
WARNING!
Take care to avoid the radiator cooling fan whenever
the hood is raised. It can start anytime the ignition
switch is ON. You can be injured by moving fan
blades.
Remove any metal jewelry such as rings, watch
bands and bracelets that could make an inadvertent
electrical contact. You could be seriously injured.
Batteries contain sulfuric acid that can burn your
skin or eyes and generate hydrogen gas which is
flammable and explosive. Keep open flames or
sparks away from the battery.
Do not allow vehicles to touch each other as this
could establish a ground connection and personal
injury could result.
WARNING!
Failure to follow this jump starting procedure could
result in personal injury or property damage due to
battery explosion.
CAUTION!
Failure to follow these procedures could result in
damage to the charging system of the booster vehicle
or the discharged vehicle.
23_LD_OM_EN_USC_t.book Page 214
Page 217 of 292

IN CASE OF EMERGENCY215
4. Connect the opposite end of the negative (-) jumper
cable to the remote negative (-) post (exposed
metallic/unpainted post of the discharge vehicle)
located directly behind the underhood fuse box.
5. Start the engine in the vehicle that has the booster battery, let the engine idle a few minutes, and then
start the engine in the vehicle with the discharged
battery.
6. Once the engine is started, follow the disconnection procedure.
Disconnecting The Jumper Cables
1. Disconnect the negative
(-) end of the jumper cable
from the remote negative (-)
post of the vehicle with
the discharged battery.
2. Disconnect the opposite end of the negative (-)
jumper cable from the negative (-) post of the booster
battery. 3. Disconnect the positive
(+) end of the jumper cable
from the positive (+) post of the booster battery.
4. Disconnect the opposite end of the positive (+)
jumper cable from the remote positive (+) post of the
vehicle with the discharged battery, and reinstall the
protective cap.
If frequent jump starting is required to start your vehicle
you should have the battery and charging system
inspected at an authorized dealer.
REFUELING IN EMERGENCY
The vehicle is equipped with a refueling funnel for a
Cap-Less Fuel System. The funnel is located under the
access cover in the trunk. If refueling is necessary, while
using an approved gas can, insert the refueling funnel into
the filler neck opening. Take care to open both flappers
with the funnel to avoid spills.
NOTE:In certain cold conditions, ice may prevent the fuel door
from opening. If this occurs, lightly push on the fuel door
to break the ice buildup and re-release the fuel door using
the inside release button. Do not pry on the door.
Fuel Funnel Location
Emergency Refueling Funnel
Most gas cans will not open the flapper doors. A funnel is
provided to allow emergency refueling with a gas can.
See the following steps for refueling:
1. Retrieve funnel from the spare tire storage area.
2. Insert funnel into same filler pipe opening as the fuel nozzle.
Inserting Funnel
WARNING!
Do not connect the jumper cable to the negative (-) post
of the discharged battery. The resulting electrical spark
could cause the battery to explode and could result in
personal injury.
CAUTION!
Do not run the booster vehicle engine above 2,000
RPM since it provides no charging benefit, wastes fuel,
and can damage booster vehicle engine.
CAUTION!
Accessories plugged into the vehicle power outlets draw
power from the vehicle’s battery, even when not in use
(i.e., cellular devices, etc.). Eventually, if plugged in long
enough without engine operation, the vehicle’s battery
will discharge sufficiently to degrade battery life and/or
prevent the engine from starting.
7
23_LD_OM_EN_USC_t.book Page 215
Page 230 of 292

228SERVICING AND MAINTENANCE
MAINTENANCE-FREE BATTERY
Your vehicle is equipped with a maintenance-free battery.
Water will never have to be added, and periodic
maintenance is not required.
NOTE:The battery is stored under an access cover in the trunk.
Remote battery terminals are located in the engine
compartment for jump starting
Úpage 213.
PRESSURE WASHING
Cleaning the engine compartment with a high pressure
washer is not recommended.
VEHICLE MAINTENANCE
An authorized dealer has the qualified service personnel,
special tools, and equipment to perform all service
operations in an expert manner. Service Manuals are available which include detailed
service information for your vehicle. Refer to these Service
Manuals before attempting any procedure yourself.
NOTE:Intentional tampering with emissions control systems may
void your warranty and could result in civil penalties being
assessed against you.
ENGINE OIL
Engine Oil Selection — 3.6L/5.7L Engines
Use only the manufacturer's recommended fluids Úpage 271.
NOTE:Hemi engines at times can tick right after startup and then
quiet down after approximately 30 seconds. This is normal
and will not harm the engine. This characteristic can be
caused by short drive cycles. For example, if the vehicle is
started then shut off after driving a short distance. Upon
restarting, you may experience a ticking sound. Other
causes could be if the vehicle is unused for an extended
period of time, incorrect oil, extended oil changes or
extended idling. If the engine continues to tick or if the
Malfunction Indicator Light (MIL) comes on, see the
nearest authorized dealer.
WARNING!
Battery fluid is a corrosive acid solution and can burn
or even blind you. Do not allow battery fluid to
contact your eyes, skin, or clothing. Do not lean over
a battery when attaching clamps. If acid splashes in
eyes or on skin, flush the area immediately with large
amounts of water
Úpage 213.
Battery gas is flammable and explosive. Keep flame
or sparks away from the battery. Do not use a
booster battery or any other booster source with an
output greater than 12 Volts. Do not allow cable
clamps to touch each other.
Battery posts, terminals, and related accessories
contain lead and lead compounds. Wash hands after
handling.
The battery in this vehicle has a vent hose that
should not be disconnected and should only be
replaced with a battery of the same type (vented).
CAUTION!
It is essential when replacing the cables on the
battery that the positive cable is attached to the posi -
tive post and the negative cable is attached to the
negative post. Battery posts are marked positive (+)
and negative (-) and are identified on the battery
case. Cable clamps should be tight on the terminal
posts and free of corrosion.
If a “fast charger” is used while the battery is in the
vehicle, disconnect both vehicle battery cables
before connecting the charger to the battery. Do not
use a “fast charger” to provide starting voltage.
CAUTION!
Precautions have been taken to safeguard all parts and
connections however, the pressures generated by these
machines is such that complete protection against
water ingress cannot be guaranteed.
WARNING!
You can be badly injured working on or around a motor
vehicle. Only do service work for which you have the
knowledge and the proper equipment. If you have any
doubt about your ability to perform a service job, take
your vehicle to a competent mechanic.
23_LD_OM_EN_USC_t.book Page 228
Page 233 of 292

SERVICING AND MAINTENANCE231
(Continued)
3. Remove the used filter.
4. Install the new filter with arrows pointing in the
direction of airflow, which is toward the rear of the
vehicle (text and arrows on the filter will indicate this).
Cabin Air Filter
5. Close the filter access cover.
For the proper maintenance intervals
Úpage 221.
ACCESSORY DRIVE BELT INSPECTION
When inspecting accessory drive belts, small cracks that
run across ribbed surface of belt from rib to rib, are
considered normal. These are not a reason to replace belt.
However, cracks running along a rib (not across) are not
normal. Any belt with cracks running along a rib must be
replaced. Also have the belt replaced if it has excessive
wear, frayed cords or severe glazing.
Accessory Belt (Serpentine Belt)
Conditions that would require replacement:
Rib chunking (one or more ribs has separated from
belt body)
Rib or belt wear
Longitudinal belt cracking (cracks between two ribs)
Belt slips
Groove jumping (belt does not maintain correct
position on pulley)
Belt broken (identify and correct problem before new
belt is installed)
Noise (objectionable squeal, squeak, or rumble is
heard or felt while drive belt is in operation)
Some conditions can be caused by a faulty component
such as a belt pulley. Belt pulleys should be carefully
inspected for damage and proper alignment.
Belt replacement on some models requires the use of
special tools, we recommend having your vehicle serviced
at an authorized dealer.
BODY LUBRICATION
Locks and all body pivot points, including such items as
seat tracks, door hinge pivot points and rollers, liftgate,
tailgate, decklid, sliding doors and hood hinges, should be
lubricated periodically with a lithium-based grease, such
as Mopar® Spray White Lube to ensure quiet, easy
operation and to protect against rust and wear. Prior to the
application of any lubricant, the parts concerned should
be wiped clean to remove dust and grit; after lubricating,
excess oil and grease should be removed.
WARNING!
Do not attempt to inspect an accessory drive belt
with vehicle running.
When working near the radiator cooling fan, discon -
nect the fan motor lead. The fan is temperature
controlled and can start at any time regardless of
ignition position. You could be injured by the moving
fan blades.
You can be badly injured working on or around a
motor vehicle. Only do service work for which you
have the knowledge and the proper equipment. If
you have any doubt about your ability to perform a
service job, take your vehicle to a competent
mechanic.
WARNING!
8
23_LD_OM_EN_USC_t.book Page 231
Page 276 of 292

274CUSTOMER ASSISTANCE
What to Do
If your vehicle requires jump start assistance, out of
gas/fuel delivery, tire service, lockout service or towing as
a result of a mechanical breakdown, dial toll-free: USA:
1-800-521-2779/Canada: 1-800-363-4869. Provide your
name, Vehicle Identification Number (VIN) required for
covered services, license plate number, and your location,
including the telephone number from which you are
calling. Briefly describe the nature of the problem and
answer a few simple questions. You will be given the name
of the service provider and an estimated time of arrival.
If you feel you are in an unsafe situation, please let us
know. With your consent, we will contact local police or
safety authorities.
If Unable to Contact Roadside Assistance
If you are unable to contact Roadside Assistance or
unable to provide a valid Vehicle Identification Number
(VIN), and you obtain towing services on your own, you may
submit your original receipts from the licensed towing or
service facility, for services rendered within30 days of the
occurrence. Be sure to include your VIN, odometer
mileage at the time of service, and current mailing
address. We will process the claim based on vehicle and
service eligibility. If eligible, we will reimburse you for the
reasonable amount actually paid, based on the usual and
customary charges for that service in the area where they
were provided. FCA US LLC’s determination relating to
reimbursement is final. Correspondence should be mailed to:
FCA US LLC Customer Assistance
P.O. Box 9145
Medford, MA 02155
Attention Claims Department
FCA US LLC reserves the right to modify the terms or
discontinue the Roadside Assistance Program at any time.
The Roadside Assistance program is subject to restrictions
and conditions of use, which are determined solely by
FCA US LLC.
Flat Tire Service
If you are inconvenienced by a flat tire, we will dispatch a
service provider to use your vehicle’s temporary spare tire
(if equipped) as recommended in your Owner’s Manual.
This is not a permanent flat tire repair.
Out of Gas/Fuel Delivery
Drivers cannot always count on a gas station being
nearby, especially when traveling away from home. We will
dispatch a service provider to deliver a small amount of
fuel (maximum two gallons) to get you to a nearby station.
This service is limited to two occurrences in a 12-month
period.
Battery Jump Assistance
No time is a good time for a depleted battery. With
Roadside Assistance, you do not have to worry about
being stranded. We will dispatch a service provider to
provide you with a battery jump anytime, day or night.Lockout Service
Whether the keys are locked in your vehicle or frozen locks
are keeping you from getting on your way, help is just a
phone call away. This service is limited to providing access
to the vehicle’s seating area. It does not cover the cost of
replacement keys.
Towing Service
Our towing service gives you peace of mind and
confidence. If your vehicle becomes disabled as a result of
a mechanical breakdown, Roadside Assistance will
dispatch a towing service to transport your vehicle to the
closest authorized Chrysler, Dodge, Jeep®, or Ram dealer.
If you choose to go to another dealer, you will be
responsible for the cost if the extra distance exceeds
10 miles.
FCA U S LLC CUSTOMER CENTER
P.O. Box 21–8004
Auburn Hills, MI 48321–8004
Phone: (800) 423-6343
FCA CANADA INC. CUSTOMER CENTER
P.O. Box 1621
Windsor, Ontario N9A 4H6
Phone: (800) 465-2001 English / (800) 387-9983 French
23_LD_OM_EN_USC_t.book Page 274