2023 DODGE CHARGER auto park
[x] Cancel search: auto parkPage 207 of 292
IN CASE OF EMERGENCY205
(Continued)
NOTE:
Your vehicle may be transmitting data as authorized by
the subscriber.
Never place anything on or near the vehicle’s LTE
(voice/data) or 4G (data) and GPS antennas. You could
prevent LTE (voice/data) or 4G (data) and GPS signal
reception, which can prevent your vehicle from placing
an emergency call. An operable LTE (voice/data) or 4G
(data) network connection and a GPS signal is required
for the SOS Call system to function properly.
NOTE:Changes or modifications not expressly approved by the
party responsible for compliance could void the user's
authority to operate the equipment.
Automatic SOS — If Equipped
Automatic SOS is a hands-free safety service that can
immediately connect you with help in the event that your
vehicle’s airbags deploy. Please refer to your provided
radio supplement for complete information.
JACKING AND TIRE CHANGING —
IF EQUIPPED
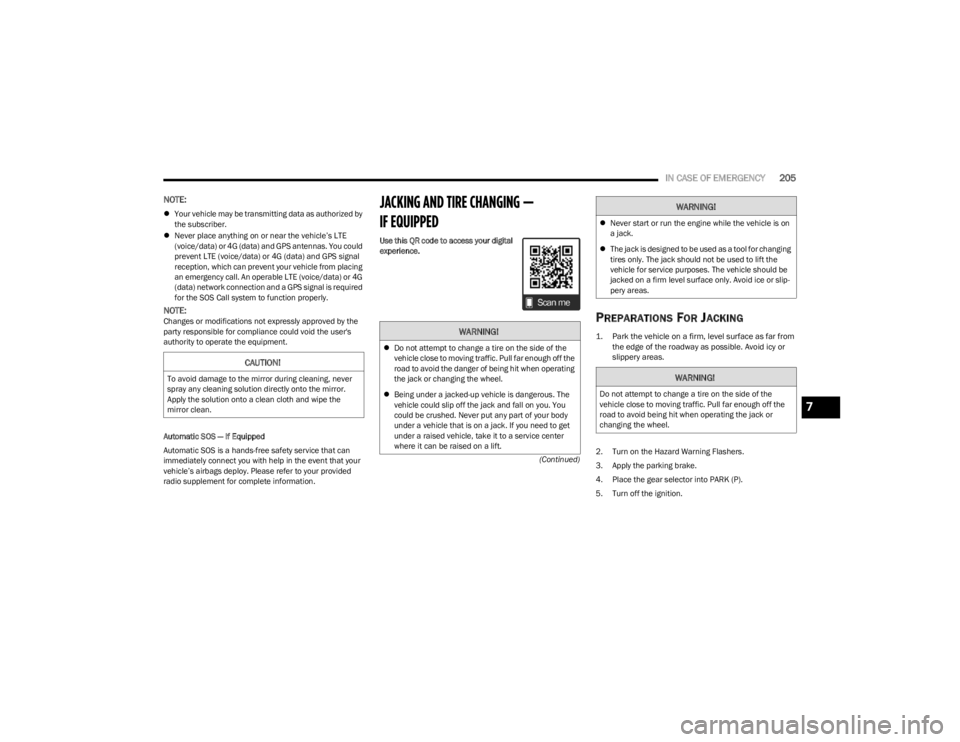
Use this QR code to access your digital
experience.
PREPARATIONS FOR JACKING
1. Park the vehicle on a firm, level surface as far from
the edge of the roadway as possible. Avoid icy or
slippery areas.
2. Turn on the Hazard Warning Flashers.
3. Apply the parking brake.
4. Place the gear selector into PARK (P).
5. Turn off the ignition.
CAUTION!
To avoid damage to the mirror during cleaning, never
spray any cleaning solution directly onto the mirror.
Apply the solution onto a clean cloth and wipe the
mirror clean.
WARNING!
Do not attempt to change a tire on the side of the
vehicle close to moving traffic. Pull far enough off the
road to avoid the danger of being hit when operating
the jack or changing the wheel.
Being under a jacked-up vehicle is dangerous. The
vehicle could slip off the jack and fall on you. You
could be crushed. Never put any part of your body
under a vehicle that is on a jack. If you need to get
under a raised vehicle, take it to a service center
where it can be raised on a lift.
Never start or run the engine while the vehicle is on
a jack.
The jack is designed to be used as a tool for changing
tires only. The jack should not be used to lift the
vehicle for service purposes. The vehicle should be
jacked on a firm level surface only. Avoid ice or slip -
pery areas.
WARNING!
Do not attempt to change a tire on the side of the
vehicle close to moving traffic. Pull far enough off the
road to avoid being hit when operating the jack or
changing the wheel.
WARNING!
7
23_LD_OM_EN_USC_t.book Page 205
Page 209 of 292
IN CASE OF EMERGENCY207
(Continued)
6. Remove the wheel chocks, jack and lug wrench
assembly from under the spare tire. Turn the jack
screw to the left to loosen the lug wrench, and remove
the wrench from the jack assembly.
JACKING INSTRUCTIONS
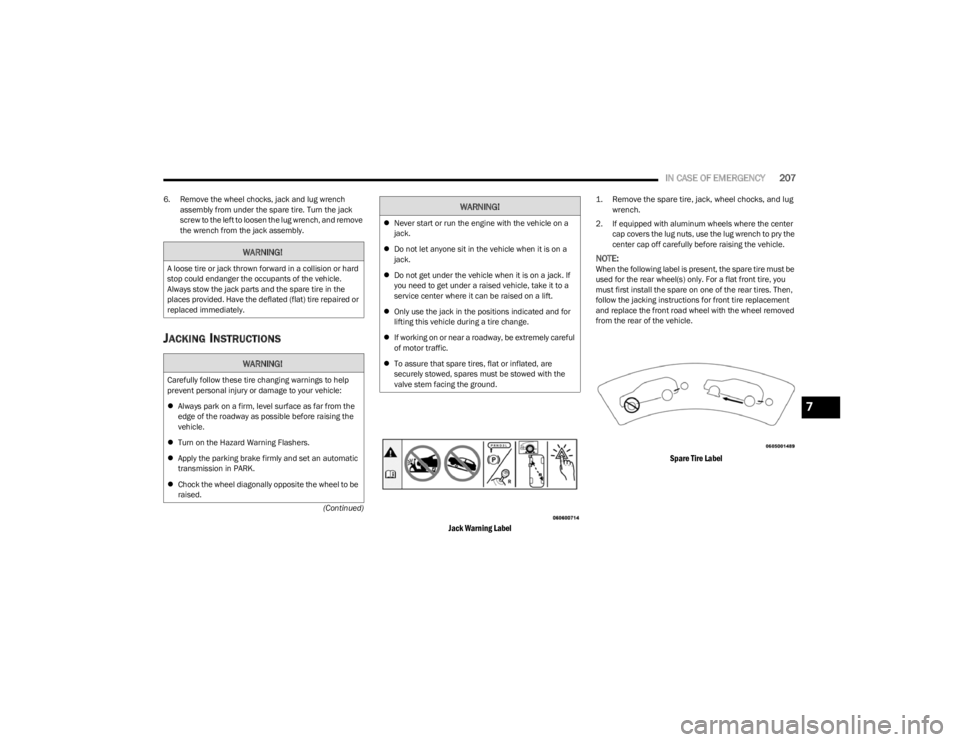
Jack Warning Label
1. Remove the spare tire, jack, wheel chocks, and lug wrench.
2. If equipped with aluminum wheels where the center cap covers the lug nuts, use the lug wrench to pry the
center cap off carefully before raising the vehicle.
NOTE:When the following label is present, the spare tire must be
used for the rear wheel(s) only. For a flat front tire, you
must first install the spare on one of the rear tires. Then,
follow the jacking instructions for front tire replacement
and replace the front road wheel with the wheel removed
from the rear of the vehicle.
Spare Tire Label
WARNING!
A loose tire or jack thrown forward in a collision or hard
stop could endanger the occupants of the vehicle.
Always stow the jack parts and the spare tire in the
places provided. Have the deflated (flat) tire repaired or
replaced immediately.
WARNING!
Carefully follow these tire changing warnings to help
prevent personal injury or damage to your vehicle:
Always park on a firm, level surface as far from the
edge of the roadway as possible before raising the
vehicle.
Turn on the Hazard Warning Flashers.
Apply the parking brake firmly and set an automatic
transmission in PARK.
Chock the wheel diagonally opposite the wheel to be
raised.
Never start or run the engine with the vehicle on a
jack.
Do not let anyone sit in the vehicle when it is on a
jack.
Do not get under the vehicle when it is on a jack. If
you need to get under a raised vehicle, take it to a
service center where it can be raised on a lift.
Only use the jack in the positions indicated and for
lifting this vehicle during a tire change.
If working on or near a roadway, be extremely careful
of motor traffic.
To assure that spare tires, flat or inflated, are
securely stowed, spares must be stowed with the
valve stem facing the ground.
WARNING!
7
23_LD_OM_EN_USC_t.book Page 207
Page 213 of 292
IN CASE OF EMERGENCY211
SEALING A TIRE WITH TIRE SERVICE KIT
(A) Whenever You Stop To Use Tire Service
Kit:
1. Pull over to a safe location and turn on the vehicle’s
Hazard Warning flashers.
2. Verify that the valve stem (on the wheel with the deflated tire) is in a position that is near to the
ground. This will allow the Tire Service Kit Hoses and
to reach the valve stem and keep the Tire Service Kit
flat on the ground. This will provide the best
positioning of the kit when injecting the sealant into
the deflated tire and running the air pump. Move the
vehicle as necessary to place the valve stem in this
position before proceeding.
3. Place the transmission in PARK (auto transmission) or in Gear (manual transmission) and place the
ignition in the OFF position.
4. Apply the parking brake.
(B) Setting Up To Use Tire Service Kit:
1. Push in the Mode Select Knob and turn to the Sealant Mode position.
2. Uncoil the Sealant Hose and then remove the cap from the fitting at the end of the hose.
3. Place the Tire Service Kit flat on the ground next to the deflated tire.
4. Remove the cap from the valve stem and then screw the fitting at the end of the Sealant Hose onto the
valve stem. 5. Uncoil the Power Plug and insert the plug into the
vehicle’s 12 Volt power outlet.
NOTE:Do not remove foreign objects (e.g., screws or nails) from
the tire.
(C) Injecting Tire Service Kit Sealant Into
The Deflated Tire:
Always start the engine before turning ON the Tire
Service Kit.
NOTE:Manual transmission vehicles must have the parking
brake engaged and the gear selector in NEUTRAL.
After pushing the Power Button, the sealant (white
fluid) will flow from the Sealant Bottle (1) through the
Sealant Hose and into the tire.
NOTE:Sealant may leak out through the puncture in the tire.
If the sealant (white fluid) does not flow within
0 – 10 seconds through the Sealant Hose :
1. Push the Power Button to turn Off the Tire Service
Kit. Disconnect the Sealant Hose from the valve
stem. Make sure the valve stem is free of debris.
Reconnect the Sealant Hose to the valve stem.
Check that the Mode Select Knob is in the Sealant
Mode position and not Air Mode. Push the Power
Button to turn On the Tire Service Kit.
2. Connect the Power Plug to a different 12 Volt power outlet in your vehicle or another vehicle, if available.
Make sure the engine is running before turning ON
the Tire Service Kit.
If the tire has any damage from driving on a flat
tire.
If the wheel has any damage.
If you are unsure of the condition of the tire or
the wheel.
Keep Tire Service Kit away from open flames or heat
source.
A loose Tire Service Kit thrown forward in a collision
or hard stop could endanger the occupants of the
vehicle. Always stow the Tire Service Kit in the place
provided. Failure to follow these warnings can result
in injuries that are serious or fatal to you, your
passengers, and others around you.
Take care not to allow the contents of Tire Service Kit
to come in contact with hair, eyes, or clothing. Tire
Service Kit sealant is harmful if inhaled, swallowed,
or absorbed through the skin. It causes skin, eye, and
respiratory irritation. Flush immediately with plenty of
water if there is any contact with eyes or skin. Change
clothing as soon as possible, if there is any contact
with clothing.
Tire Service Kit Sealant solution contains latex. In
case of an allergic reaction or rash, consult a physi -
cian immediately. Keep Tire Service Kit out of reach
of children. If swallowed, rinse mouth immediately
with plenty of water and drink plenty of water. Do not
induce vomiting! Consult a physician immediately.
WARNING!
7
23_LD_OM_EN_USC_t.book Page 211
Page 216 of 292

214IN CASE OF EMERGENCY
PREPARATIONS FOR JUMP START
The battery is stored under an access cover in the trunk.
Remote battery posts are located on the right side of the
engine compartment for jump starting.
Jump Starting Locations
NOTE:
The remote battery posts are viewed by standing on the
right side of the vehicle looking over the fender. The
positive battery post may be covered with a protective cap.
Lift up on the cap to gain access to the positive battery
post. Do not jump off fuses. Only jump directly off the
remote positive post which has a positive (+) symbol on or
around the post. See the following steps to prepare for jump starting:
1. Apply the parking brake, shift the automatic
transmission into PARK and place the ignition in the
OFF position.
2. Turn off the heater, radio, and all electrical accessories.
3. If using another vehicle to jump start the battery, park the vehicle within the reach of the jumper cables,
apply the parking brake, and make sure the ignition is
OFF.
JUMP STARTING PROCEDURE
Connecting The Jumper Cables
1. Connect the positive
(+) end of the jumper cable to
the remote positive (+)
post of the vehicle with the
discharged battery.
2. Connect the opposite end of the positive (+) jumper
cable to the positive (+) post of the booster battery.
3. Connect the negative (-) end of the jumper cable to
the negative (-) post of the booster battery.
Remote Negative
(-) Post
Remote Positive (+) Post
WARNING!
Take care to avoid the radiator cooling fan whenever
the hood is raised. It can start anytime the ignition
switch is ON. You can be injured by moving fan
blades.
Remove any metal jewelry such as rings, watch
bands and bracelets that could make an inadvertent
electrical contact. You could be seriously injured.
Batteries contain sulfuric acid that can burn your
skin or eyes and generate hydrogen gas which is
flammable and explosive. Keep open flames or
sparks away from the battery.
Do not allow vehicles to touch each other as this
could establish a ground connection and personal
injury could result.
WARNING!
Failure to follow this jump starting procedure could
result in personal injury or property damage due to
battery explosion.
CAUTION!
Failure to follow these procedures could result in
damage to the charging system of the booster vehicle
or the discharged vehicle.
23_LD_OM_EN_USC_t.book Page 214
Page 220 of 292
218IN CASE OF EMERGENCY
3. Pull up gently on the tether strap to confirm that the
lever is locked in its stowed position.
4. Tuck the tether strap into the base of the console. Reinstall the Manual Park Release cover and the
console storage bin.
When the lever is in the release position the access cover
cannot be reinstalled.
FREEING A STUCK VEHICLE
If your vehicle becomes stuck in mud, sand, or snow, it can
often be moved using a rocking motion. Turn the steering
wheel right and left to clear the area around the front
wheels. For vehicles with automatic transmission, push
and hold the lock button on the gear selector. Then shift
back and forth between DRIVE and REVERSE (with
automatic transmission) or FIRST gear and REVERSE
(with manual transmission), while gently pressing the
accelerator. Use the least amount of accelerator pedal
pressure that will maintain the rocking motion, without
spinning the wheels or racing the engine.NOTE:For vehicles with automatic transmission: Shifts between
DRIVE and REVERSE can only be achieved at wheel
speeds of 5 mph (8 km/h) or less. Whenever the trans -
mission remains in NEUTRAL for more than two seconds,
you must press the brake pedal to engage DRIVE or
REVERSE.
Push the ESC OFF button to place the Electronic Stability
Control (ESC) system in “Partial OFF” mode, before rocking
the vehicle
Úpage 166. Once the vehicle has been freed,
push the ESC OFF button again to restore “ESC On” mode.
CAUTION!
Racing the engine or spinning the wheels may lead to
transmission overheating and failure. Allow the engine
to idle with the transmission in NEUTRAL for at least
one minute after every five rocking-motion cycles. This
will minimize overheating and reduce the risk of clutch
or transmission failure during prolonged efforts to free
a stuck vehicle.
WARNING!
Fast spinning tires can be dangerous. Forces generated
by excessive wheel speeds may cause damage, or even
failure, of the axle and tires. A tire could explode and
injure someone. Do not spin your vehicle's wheels
faster than 30 mph (48 km/h) or for longer than 30
seconds continuously without stopping when you are
stuck and do not let anyone near a spinning wheel, no
matter what the speed.
CAUTION!
Racing the engine or spinning the wheels may lead to
transmission overheating and failure. Allow the
engine to idle with the transmission in NEUTRAL for
at least one minute after every five rocking-motion
cycles. This will minimize overheating and reduce the
risk of transmission failure during prolonged efforts
to free a stuck vehicle.
When “rocking” a stuck vehicle by shifting between
DRIVE and REVERSE, do not spin the wheels faster
than 15 mph (24 km/h), or drivetrain damage may
result.
Revving the engine or spinning the wheels too fast
may lead to transmission overheating and failure. It
can also damage the tires. Do not spin the wheels
above 30 mph (48 km/h) while in gear (no transmis -
sion shifting occurring).
23_LD_OM_EN_USC_t.book Page 218
Page 236 of 292
234SERVICING AND MAINTENANCE
(Continued)
To minimize the possibility of catalytic converter damage:
Do not shut off the engine or interrupt the ignition when
the transmission is in gear and the vehicle is in motion.
Do not try to start the engine by pushing or towing the
vehicle.
Do not idle the engine with any spark plug wires discon -
nected or removed, such as when diagnostic testing, or
for prolonged periods during very rough idle or malfunc -
tioning operating conditions.
NOTE:The vehicle exhaust system may be equipped with an Elec -
tronic Exhaust Valve (EEV) system, if the exhaust system is
replaced with aftermarket products a Malfunction Indi -
cator Light (MIL) will illuminate.
COOLING SYSTEM
Coolant Checks
Check engine coolant (antifreeze) protection every
12 months (before the onset of freezing weather, where
applicable). If the engine coolant is dirty, the system
should be drained, flushed, and refilled with fresh Organic
Additive Technology (OAT) coolant (conforming to
MS.90032) by an authorized dealer. Check the front of the
radiator for any accumulation of bugs, leaves, etc. If dirty,
clean by gently spraying water from a garden hose
vertically down the face of the condenser.
Check the coolant recovery bottle tubing for brittle rubber,
cracking, tears, cuts, and tightness of the connection at
the bottle and radiator. Inspect the entire system for
leaks. DO NOT REMOVE THE COOLANT PRESSURE CAP
WHEN THE COOLING SYSTEM IS HOT.
Cooling System — Drain, Flush And Refill
NOTE:Some vehicles require special tools to add coolant
properly. Failure to fill these systems properly could lead
to severe internal engine damage. If any coolant is needed
to be added to the system please contact an authorized
dealer. If the engine coolant (antifreeze) is dirty or contains visible
sediment, have an authorized dealer clean and flush with
Organic Additive Technology (OAT) coolant (conforming to
MS.90032).
For the proper maintenance intervals
Úpage 221.
Selection Of Coolant
For further information Úpage 271.
NOTE:
Mixing of engine coolant (antifreeze) other than speci-
fied Organic Additive Technology (OAT) engine coolant,
may result in engine damage and may decrease corro -
sion protection. OAT engine coolant is different and
should not be mixed with Hybrid Organic Additive Tech -
nology (HOAT) engine coolant or any “globally compat -
ible” coolant. If a non-OAT engine coolant is introduced
into the cooling system in an emergency, the cooling
system will need to be drained, flushed, and refilled
with fresh OAT coolant (conforming to MS.90032), by
an authorized dealer as soon as possible.
Do not use water alone or alcohol-based engine
coolant products. Do not use additional rust inhibitors
or anti-rust products, as they may not be compatible
with the radiator engine coolant and may plug the radi -
ator.
This vehicle has not been designed for use with
propylene glycol-based engine coolant. Use of
propylene glycol-based engine coolant is not recom -
mended.
WARNING!
You or others can be badly burned by hot engine
coolant (antifreeze) or steam from your radiator. If
you see or hear steam coming from under the hood,
do not open the hood until the radiator has had time
to cool. Never open a cooling system pressure cap
when the radiator or coolant bottle is hot.
Keep hands, tools, clothing, and jewelry away from
the radiator cooling fan when the hood is raised. The
fan starts automatically and may start at any time,
whether the engine is running or not.
When working near the radiator cooling fan, discon -
nect the fan motor lead or turn the ignition to the OFF
position. The fan is temperature controlled and can
start at any time the ignition is in the ON/RUN
position.
WARNING!
23_LD_OM_EN_USC_t.book Page 234
Page 263 of 292

SERVICING AND MAINTENANCE261
Your wheels are susceptible to deterioration caused by
salt, sodium chloride, magnesium chloride, calcium
chloride, etc., and other road chemicals used to melt ice
or control dust on dirt roads. Use a soft cloth or sponge
and mild soap to wipe away promptly. Do not use harsh
chemicals or a stiff brush. They can damage the wheel’s
protective coating that helps keep them from corroding
and tarnishing. When cleaning extremely dirty wheels including excessive
brake dust, care must be taken in the selection of tire and
wheel cleaning chemicals and equipment to prevent
damage to the wheels. Mopar® Wheel Treatment or
Mopar® Chrome Cleaner or their equivalent is
recommended or select a non-abrasive, non-acidic
cleaner for aluminum or chrome wheels.NOTE:If you intend parking or storing your vehicle for an
extended period after cleaning the wheels with wheel
cleaner, drive your vehicle and apply the brakes to remove
the water droplets from the brake components. This
activity will remove the red rust on the brake rotors and
prevent vehicle vibration when braking.
Dark Vapor Chrome, Black Satin Chrome, or Low Gloss
Clear Coat Wheels
CAUTION!
Avoid products or automatic car washes that use acidic
solutions or strong alkaline additives or harsh brushes.
Many aftermarket wheel cleaners and automatic car
washes may damage the wheel's protective finish. Such
damage is not covered by the New Vehicle Limited
Warranty. Only car wash soap, Mopar® Wheel Cleaner
or equivalent is recommended.
CAUTION!
Do not use scouring pads, steel wool, a bristle brush,
metal polishes or oven cleaner. These products may
damage the wheel's protective finish. Such damage is
not covered by the New Vehicle Limited Warranty. Only
car wash soap, Mopar® Wheel Cleaner or equivalent is
recommended.CAUTION!
If your vehicle is equipped with these specialty wheels,
DO NOT USE wheel cleaners, abrasives, or polishing
compounds. They will permanently damage this finish
and such damage is not covered by the New Vehicle
Limited Warranty. HAND WASH ONLY USING MILD SOAP
AND WATER WITH A SOFT CLOTH. Used on a regular
basis; this is all that is required to maintain this finish.
8
23_LD_OM_EN_USC_t.book Page 261
Page 280 of 292

278
INDEX
AAbout Your Brakes ....................................................... 267
Adaptive Cruise Control (ACC) (Cruise Control) ............. 87
Adding Engine Coolant (Antifreeze) ............................ 235
Adding Fuel................................................................... 101
Adding Washing Fluid .................................................. 227
Additives, Fuel .............................................................. 268
AdjustForward ...................................................................... 30
Rearward ....................................................................30
Advance Phone Connectivity ....................................... 147
Air Bag........................................................................... 184 Advance Front Air Bag ............................................ 184
Air Bag Operation.................................................... 185
Air Bag Warning Light ............................................. 183
Driver Knee Air Bag ................................................ 186
Enhanced Accident Response ...................... 188
, 220
Event Data Recorder (EDR).................................... 220 Front Air Bag ........................................................... 184
If Deployment Occurs ............................................. 188
Knee Impact Bolsters ............................................. 186
Maintaining Your Air Bag System .......................... 189
Maintenance ........................................................... 189
Redundant Air Bag Warning Light ......................... 184
Side Air Bags ........................................................... 186
Air Bag Light ................................................. 68
, 183, 200
Air Cleaner, Engine (Engine Air Cleaner Filter) ........... 229
Air Conditioner Maintenance ...................................... 230
Air Conditioner Refrigerant .......................................... 230
Air Conditioner System ................................................ 230
Air Conditioning ........................................................ 47
, 49 Air Conditioning Filter ............................................52
, 230
Air Conditioning, Operating Tips .................................... 51
Air Filter ......................................................................... 229
Air Pressure Tires.......................................................................... 255
Alarm Arm The System......................................................... 19
Panic........................................................................... 13
Rearm The System .................................................... 19
Security Alarm..................................................... 18
, 70
Alarm System Security Alarm............................................................ 18
All Wheel Drive Towing ...................................................................... 220
Alterations/Modifications Vehicle.......................................................................... 8
Android Auto........................................................ 149
, 150
Android auto™
b
........................................................ 149
Antifreeze (Engine Coolant) ............................... 234, 270
Disposal ...................................................................235
Anti-Lock Brake System (ABS) ..................................... 164
Anti-Lock Warning Light.................................................. 71
Apple CarPlay ...................................................... 149
, 152
Apple carplay®
b
....................................................... 151
Arming System Security Alarm............................................................ 18
Assist, Hill Start ............................................................. 167
Audio Settings ............................................................... 136
Audio Systems (Radio) ................................................. 111
Auto Down Power Windows............................................ 56
Automatic Door Locks .................................................... 23 Automatic Headlights ..................................................... 42
Automatic High Beams .................................................. 41
Automatic Temperature Control (ATC) ................... 47
, 51
Automatic Transmission ....................................... 81, 237
Adding Fluid .................................................... 237, 272
Fluid And Filter Change........................................... 237
Fluid Change ........................................................... 237
Fluid Level Check .................................................... 237
Fluid Type .......................................................237
, 272
Special Additives ..................................................... 237
Automatic Transmission Limp Home Mode .......... 23
, 83
AutoPark ......................................................................... 77
Autostick Operation ................................................................... 83
AUX ................................................................................ 199
AUX Cord ......................................................................... 54
Auxiliary Electrical Outlet (Power Outlet) ...................... 55
AWD Towing...................................................................... 220
Axle Fluid....................................................................... 272
Axle Lubrication ............................................................ 272
BBack-Up ......................................................................... 100
Battery.................................................................... 69, 228
Charging System Light .............................................. 69
Keyless Key Fob Replacement................................. 13
Location ................................................................... 228
Battery Saver Feature .................................................... 43
Belts, Seat..................................................................... 199
23_LD_OM_EN_USC_t.book Page 278