2023 DODGE CHARGER trunk
[x] Cancel search: trunkPage 24 of 292

22GETTING TO KNOW YOUR VEHICLE
KEYLESS ENTER ‘N GO™ — PASSIVE
E
NTRY
The Passive Entry system is an enhancement to the
vehicle’s key fob and a feature of Keyless Enter ‘n Go™ —
Passive Entry. This feature allows you to lock and unlock
the vehicle’s door(s) without having to push the key fob
lock or unlock buttons.
NOTE:
Passive Entry may be programmed on/off through
Uconnect Settings Úpage 112.
The key fob may not be able to be detected by the
vehicle Passive Entry system if it is located next to a
mobile phone, laptop, or other electronic device; these
devices may block the key fob’s wireless signal and
prevent the Passive Entry system from locking/
unlocking the vehicle.
Passive Entry Unlock initiates illuminated approach
(low beams, license plate lamp, position lamps) for
whichever time is set between 0, 30, 60 or 90 seconds.
Passive Entry Unlock also initiates two flashes of the
turn signal lights.
If wearing gloves, if it has been raining/snowing, or
there is salt/dirt covering the Passive Entry door
handle, the unlock sensitivity can be affected, resulting
in a slower response time.
The doors may unlock when water is sprayed on the
Passive Entry door handles, if the key fob is located
outside of the vehicle within 5 ft (1.5 m) of the handle.
If the vehicle is unlocked by Passive Entry and no door
is opened within 60 seconds, the vehicle will relock and
(if equipped) will arm the Vehicle Security system. To Unlock From The Driver Or Passenger Side
With a valid Passive Entry key fob within 5 ft (1.5 m) of the
door handle, grab the handle to unlock the vehicle.
Grabbing the driver’s door handle will unlock the driver
door automatically. Grabbing the passenger door handle
will unlock all doors and the trunk automatically.
Grab The Door Handle To Unlock
NOTE:
Either the driver door only or all doors will unlock when
you grab hold of the front driver’s door handle,
depending on the selected setting in the Uconnect
system
Úpage 112.
All doors will unlock when the front passenger door
handle is grabbed regardless of the driver’s door
unlock preference setting. Frequency Operated Button Integrated Key (FOBIK-Safe)
To minimize the possibility of unintentionally locking a
Passive Entry key fob inside your vehicle, the Passive Entry
system is equipped with an automatic door unlock feature
which will function if the ignition switch is in the OFF
position.
The following situations will trigger a FOBIK-Safe search in
any Passive Entry vehicle:
A lock request is made by a valid Passive Entry key fob
while a door is open.
A lock request is made by the Passive Entry door
handle while a door is open.
A lock request is made by the door panel switch while
the door is open.
When any of these situations occur, after all open doors
are shut, the FOBIK-Safe search will be executed. If it
detects a Passive Entry key fob inside the vehicle, the
vehicle will unlock and alert the customer.
NOTE:The vehicle will only unlock the doors when a valid Passive
Entry key fob is detected inside the vehicle. The vehicle will
not unlock the doors when any of the following conditions
are true:
The doors are manually locked using the door lock
knobs.
Three attempts are made to lock the doors using the
door panel switch and then the doors are closed.
There is a valid Passive Entry key fob outside the
vehicle within 5 ft. (1.5 m) of a Passive Entry door
handle.
23_LD_OM_EN_USC_t.book Page 22
Page 25 of 292
GETTING TO KNOW YOUR VEHICLE23
To Lock The Vehicle’s Doors And Trunk
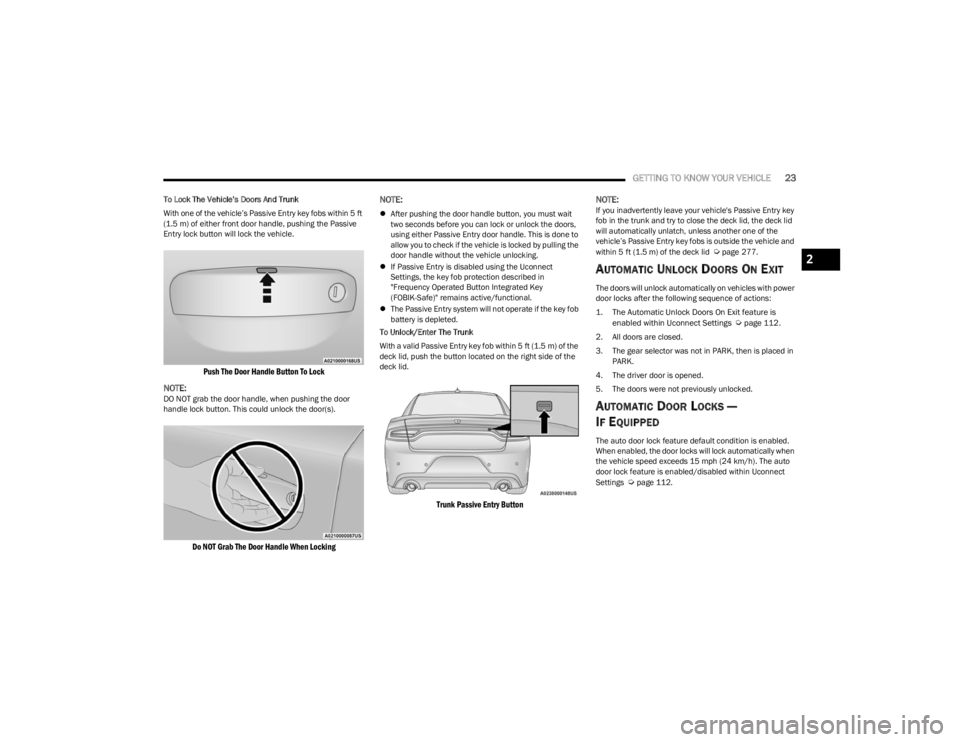
With one of the vehicle’s Passive Entry key fobs within 5 ft
(1.5 m) of either front door handle, pushing the Passive
Entry lock button will lock the vehicle.
Push The Door Handle Button To Lock
NOTE:
DO NOT grab the door handle, when pushing the door
handle lock button. This could unlock the door(s).
Do NOT Grab The Door Handle When Locking
NOTE:
After pushing the door handle button, you must wait
two seconds before you can lock or unlock the doors,
using either Passive Entry door handle. This is done to
allow you to check if the vehicle is locked by pulling the
door handle without the vehicle unlocking.
If Passive Entry is disabled using the Uconnect
Settings, the key fob protection described in
"Frequency Operated Button Integrated Key
(FOBIK-Safe)" remains active/functional.
The Passive Entry system will not operate if the key fob
battery is depleted.
To Unlock/Enter The Trunk
With a valid Passive Entry key fob within 5 ft (1.5 m) of the deck lid, push the button located on the right side of the
deck lid.
Trunk Passive Entry Button
NOTE:
If you inadvertently leave your vehicle's Passive Entry key
fob in the trunk and try to close the deck lid, the deck lid
will automatically unlatch, unless another one of the
vehicle’s Passive Entry key fobs is outside the vehicle and
within 5 ft (1.5 m) of the deck lid
Úpage 277.
AUTOMATIC UNLOCK DOORS ON EXIT
The doors will unlock automatically on vehicles with power
door locks after the following sequence of actions:
1. The Automatic Unlock Doors On Exit feature is
enabled within Uconnect Settings
Ú
page 112.
2. All doors are closed.
3. The gear selector was not in PARK, then is placed in PARK.
4. The driver door is opened.
5. The doors were not previously unlocked.
AUTOMATIC DOOR LOCKS —
I
F EQUIPPED
The auto door lock feature default condition is enabled.
When enabled, the door locks will lock automatically when
the vehicle speed exceeds 15 mph (24 km/h). The auto
door lock feature is enabled/disabled within Uconnect
Settings
Úpage 112.
2
23_LD_OM_EN_USC_t.book Page 23
Page 31 of 292
GETTING TO KNOW YOUR VEHICLE29
(Continued)
Manual Front Seat Forward/Rearward
Adjustment
Some models may be equipped with a manual front
passenger seat. The seat can be adjusted forward or
rearward by using a bar located by the front of the seat
cushion, near the floor.
Manual Seat Adjusting Bar
While sitting in the seat, lift up on the bar located under
the seat cushion and move the seat forward or rearward.
Release the bar once you have reached the desired
position. Then, using body pressure, move forward and
rearward on the seat to be sure that the seat adjusters
have latched.
Manual Front Seat Recline
To adjust the seatback, lift the lever located on the
outboard side of the seat, lean back to the desired
position and release the lever. To return the seatback, lift
the lever, lean forward and release the lever.
Manual Recline Lever
MANUAL ADJUSTMENT (REAR SEATS)
Folding Rear Seat
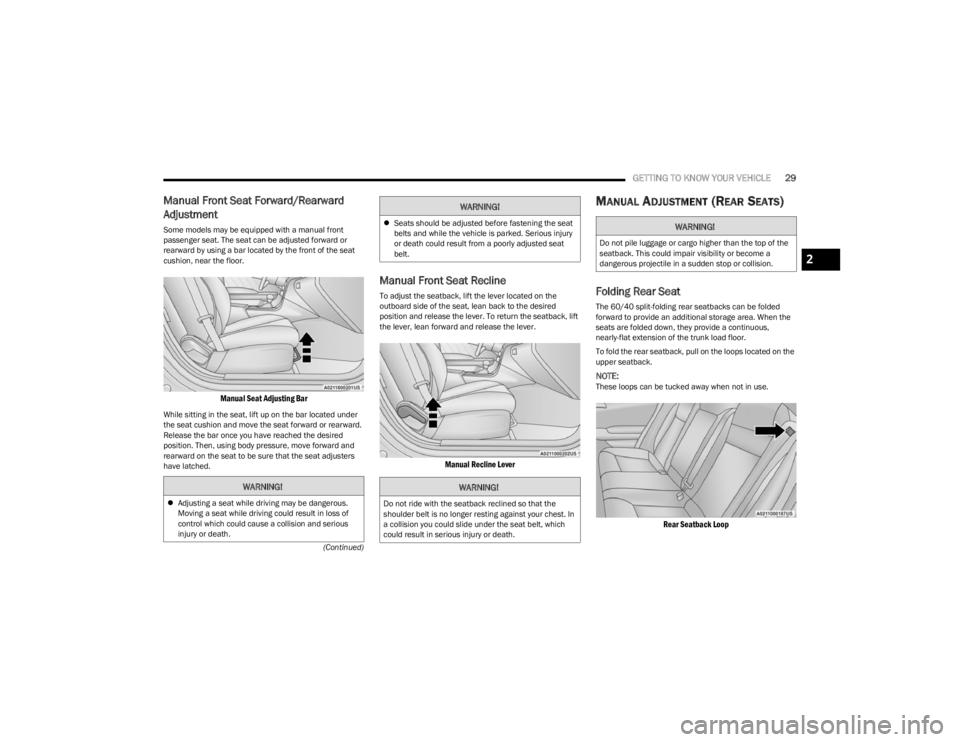
The 60/40 split-folding rear seatbacks can be folded
forward to provide an additional storage area. When the
seats are folded down, they provide a continuous,
nearly-flat extension of the trunk load floor.
To fold the rear seatback, pull on the loops located on the
upper seatback.
NOTE:These loops can be tucked away when not in use.
Rear Seatback Loop
WARNING!
Adjusting a seat while driving may be dangerous.
Moving a seat while driving could result in loss of
control which could cause a collision and serious
injury or death.
Seats should be adjusted before fastening the seat
belts and while the vehicle is parked. Serious injury
or death could result from a poorly adjusted seat
belt.
WARNING!
Do not ride with the seatback reclined so that the
shoulder belt is no longer resting against your chest. In
a collision you could slide under the seat belt, which
could result in serious injury or death.
WARNING!
WARNING!
Do not pile luggage or cargo higher than the top of the
seatback. This could impair visibility or become a
dangerous projectile in a sudden stop or collision.
2
23_LD_OM_EN_USC_t.book Page 29
Page 61 of 292
GETTING TO KNOW YOUR VEHICLE59
HOOD
OPENING THE HOOD
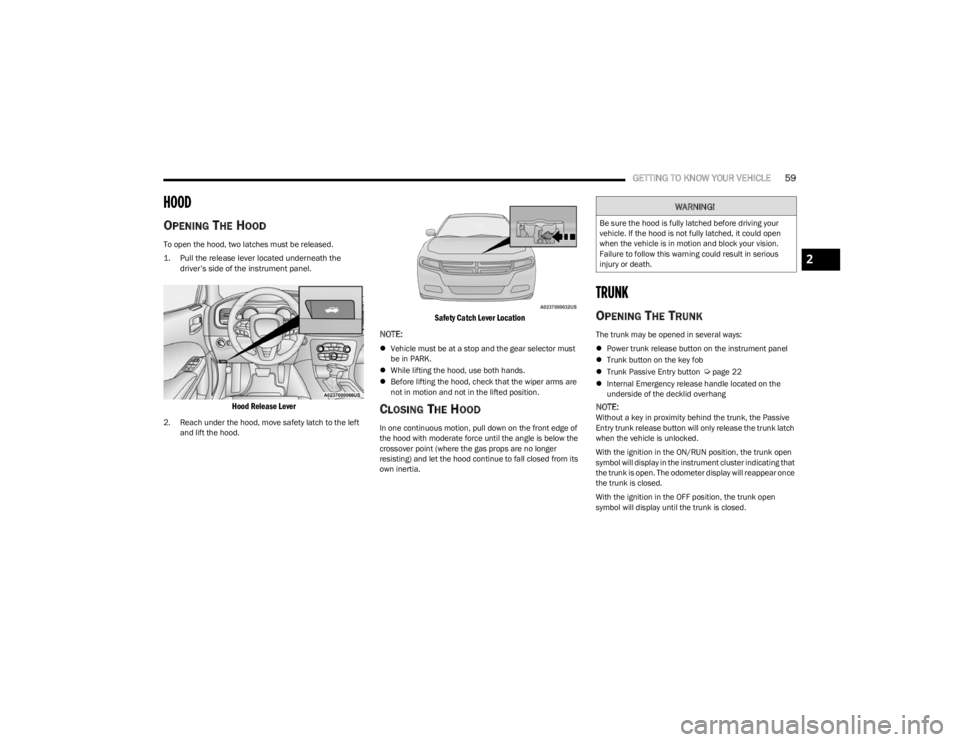
To open the hood, two latches must be released.
1. Pull the release lever located underneath the
driver’s side of the instrument panel.
Hood Release Lever
2. Reach under the hood, move safety latch to the left and lift the hood.
Safety Catch Lever Location
NOTE:
Vehicle must be at a stop and the gear selector must
be in PARK.
While lifting the hood, use both hands.
Before lifting the hood, check that the wiper arms are
not in motion and not in the lifted position.
CLOSING THE HOOD
In one continuous motion, pull down on the front edge of
the hood with moderate force until the angle is below the
crossover point (where the gas props are no longer
resisting) and let the hood continue to fall closed from its
own inertia.
TRUNK
OPENING THE TRUNK
The trunk may be opened in several ways:
Power trunk release button on the instrument panel
Trunk button on the key fob
Trunk Passive Entry button
Úpage 22
Internal Emergency release handle located on the
underside of the decklid overhang
NOTE:Without a key in proximity behind the trunk, the Passive
Entry trunk release button will only release the trunk latch
when the vehicle is unlocked.
With the ignition in the ON/RUN position, the trunk open
symbol will display in the instrument cluster indicating that
the trunk is open. The odometer display will reappear once
the trunk is closed.
With the ignition in the OFF position, the trunk open
symbol will display until the trunk is closed.
WARNING!
Be sure the hood is fully latched before driving your
vehicle. If the hood is not fully latched, it could open
when the vehicle is in motion and block your vision.
Failure to follow this warning could result in serious
injury or death.
2
23_LD_OM_EN_USC_t.book Page 59
Page 62 of 292
60GETTING TO KNOW YOUR VEHICLE
Power Trunk Release Button
The trunk can be opened from inside the
vehicle using the power trunk release button
located on the instrument panel to the left of
the steering wheel.
NOTE:The gear selector must be in PARK before the button will
operate.
Key Fob Trunk Release ButtonPush the power trunk button on the key fob
twice within five seconds to release the trunk.
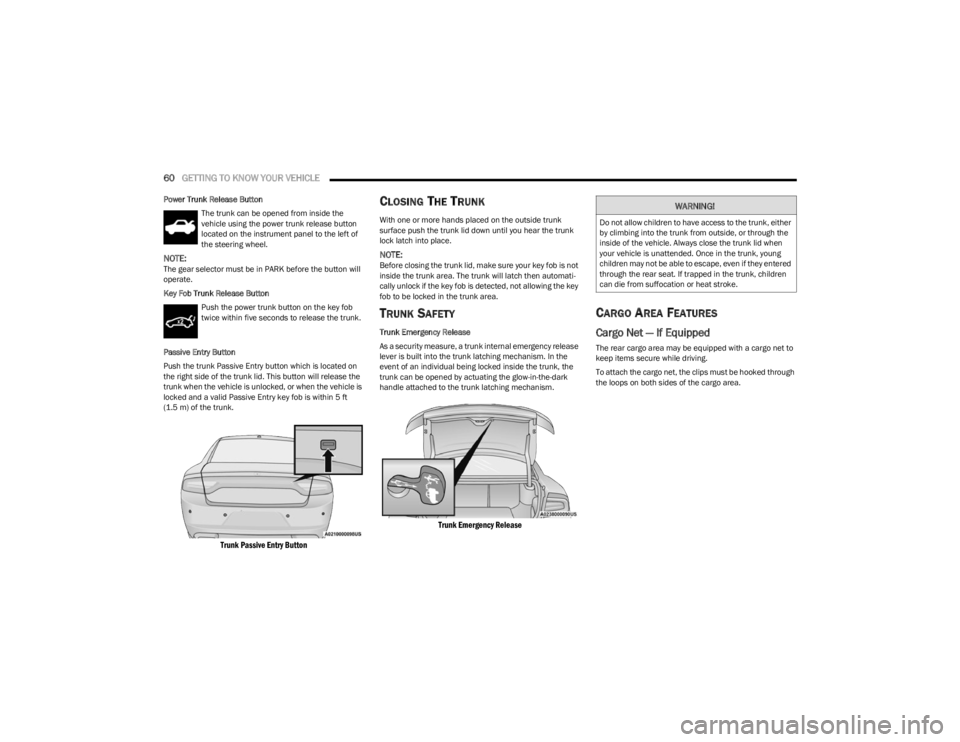
Passive Entry Button
Push the trunk Passive Entry button which is located on
the right side of the trunk lid. This button will release the
trunk when the vehicle is unlocked, or when the vehicle is
locked and a valid Passive Entry key fob is within 5 ft
(1.5 m) of the trunk.
Trunk Passive Entry Button
CLOSING THE TRUNK
With one or more hands placed on the outside trunk
surface push the trunk lid down until you hear the trunk
lock latch into place.
NOTE:Before closing the trunk lid, make sure your key fob is not
inside the trunk area. The trunk will latch then automati -
cally unlock if the key fob is detected, not allowing the key
fob to be locked in the trunk area.
TRUNK SAFETY
Trunk Emergency Release
As a security measure, a trunk internal emergency release
lever is built into the trunk latching mechanism. In the
event of an individual being locked inside the trunk, the
trunk can be opened by actuating the glow-in-the-dark
handle attached to the trunk latching mechanism.
Trunk Emergency Release
CARGO AREA FEATURES
Cargo Net — If Equipped
The rear cargo area may be equipped with a cargo net to
keep items secure while driving.
To attach the cargo net, the clips must be hooked through
the loops on both sides of the cargo area.
WARNING!
Do not allow children to have access to the trunk, either
by climbing into the trunk from outside, or through the
inside of the vehicle. Always close the trunk lid when
your vehicle is unattended. Once in the trunk, young
children may not be able to escape, even if they entered
through the rear seat. If trapped in the trunk, children
can die from suffocation or heat stroke.
23_LD_OM_EN_USC_t.book Page 60
Page 72 of 292

70GETTING TO KNOW YOUR INSTRUMENT PANEL
If the light continues to flash when the vehicle is running,
immediate service is required and you may experience
reduced performance, an elevated/rough idle, or engine
stall and your vehicle may require towing. The light will
come on when the ignition is placed in the ON/RUN or
ACC/ON/RUN position and remain on briefly as a bulb
check. If the light does not come on during starting, have
the system checked by an authorized dealer.
Engine Coolant Temperature Warning
Light
This warning light warns of an overheated
engine condition. If the engine coolant
temperature is too high, this indicator will
illuminate and a single chime will sound. If the
temperature reaches the upper limit, a continuous chime
will sound for four minutes or until the engine is able to
cool: whichever comes first.
If the light turns on while driving, safely pull over and stop
the vehicle. If the Air Conditioning (A/C) system is on, turn
it off. Also, shift the transmission into NEUTRAL and idle
the vehicle. If the temperature reading does not return to
normal, turn the engine off immediately and call for
service
Úpage 216.
Oil Pressure Warning Light
This warning light will illuminate to indicate low
engine oil pressure. If the light turns on while
driving, stop the vehicle, shut off the engine as
soon as possible, and contact an authorized
dealer. A chime will sound when this light turns on. Do not operate the vehicle until the cause is corrected.
This light does not indicate how much oil is in the engine.
The engine oil level must be checked under the hood.
Oil Temperature Warning Light
This warning light will illuminate to indicate the
engine oil temperature is high. If the light turns
on while driving, stop the vehicle and shut off
the engine as soon as possible. Wait for oil
temperature to return to normal levels.
Seat Belt Reminder Warning Light
This warning light indicates when the driver or
passenger seat belt is unbuckled. When the
ignition is first placed in the ON/RUN or ACC/
ON/RUN position and if the driver’s seat belt is
unbuckled, a chime will sound and the light will turn on.
When driving, if the driver or front passenger seat belt
remains unbuckled, the Seat Belt Reminder Light will flash
or remain on continuously and a chime will sound
Úpage 177.
Transmission Temperature Warning Light
This warning light will illuminate to warn of a
high transmission fluid temperature. This may
occur with strenuous usage such as trailer
towing. If this light turns on, stop the vehicle
and run the engine at idle or slightly faster, with the
transmission in PARK or NEUTRAL, until the light turns off.
Once the light turns off, you may continue to drive
normally.
Trunk Open Warning Light
This indicator will illuminate when the trunk is
open and not fully closed.
NOTE:If the vehicle is moving, there will also be a single chime.
Vehicle Security Warning Light —
If Equipped
This light will flash at a fast rate for
approximately 15 seconds when the vehicle
security system is arming, and then will flash
slowly until the vehicle is disarmed.
WARNING!
If you continue operating the vehicle when the
Transmission Temperature Warning Light is illuminated
you could cause the fluid to boil over, come in contact
with hot engine or exhaust components and cause a
fire.
CAUTION!
Continuous driving with the Transmission Temperature
Warning Light illuminated will eventually cause severe
transmission damage or transmission failure.
23_LD_OM_EN_USC_t.book Page 70
Page 103 of 292
STARTING AND OPERATING101
NOTE:If snow, ice, mud, or any foreign substance builds up on
the camera lens, clean the lens, rinse with water, and dry
with a soft cloth. Do not cover the lens.
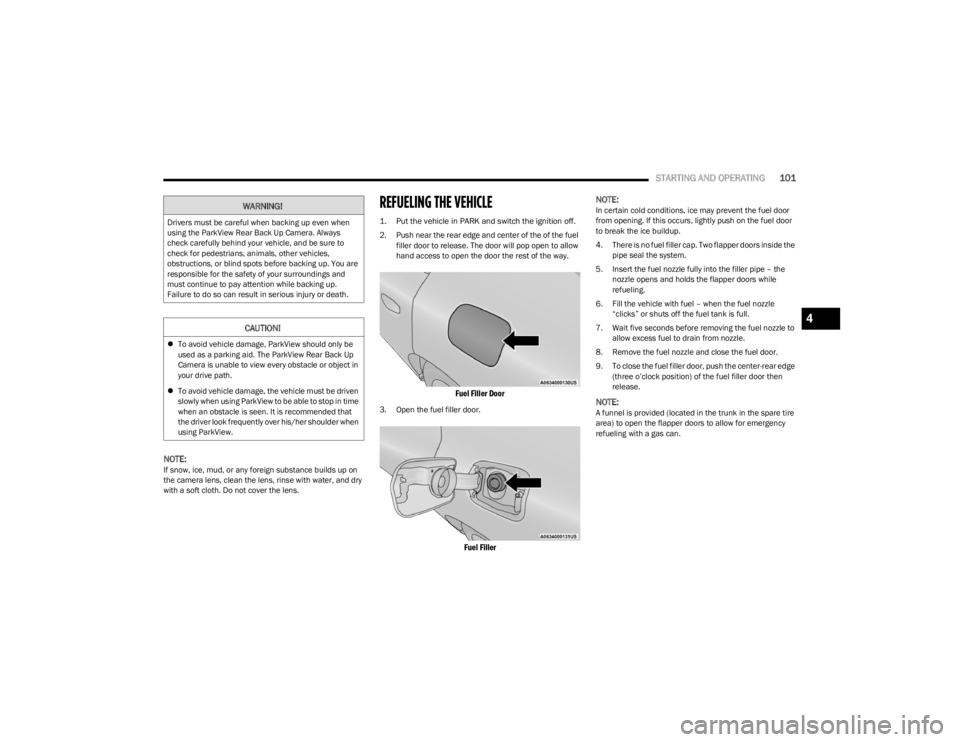
REFUELING THE VEHICLE
1. Put the vehicle in PARK and switch the ignition off.
2. Push near the rear edge and center of the of the fuel
filler door to release. The door will pop open to allow
hand access to open the door the rest of the way.
Fuel Filler Door
3. Open the fuel filler door.
Fuel Filler
NOTE:
In certain cold conditions, ice may prevent the fuel door
from opening. If this occurs, lightly push on the fuel door
to break the ice buildup.
4. There is no fuel filler cap. Two flapper doors inside the
pipe seal the system.
5. Insert the fuel nozzle fully into the filler pipe – the nozzle opens and holds the flapper doors while
refueling.
6. Fill the vehicle with fuel – when the fuel nozzle “clicks” or shuts off the fuel tank is full.
7. Wait five seconds before removing the fuel nozzle to allow excess fuel to drain from nozzle.
8. Remove the fuel nozzle and close the fuel door.
9. To close the fuel filler door, push the center-rear edge (three o’clock position) of the fuel filler door then
release.
NOTE:A funnel is provided (located in the trunk in the spare tire
area) to open the flapper doors to allow for emergency
refueling with a gas can.
WARNING!
Drivers must be careful when backing up even when
using the ParkView Rear Back Up Camera. Always
check carefully behind your vehicle, and be sure to
check for pedestrians, animals, other vehicles,
obstructions, or blind spots before backing up. You are
responsible for the safety of your surroundings and
must continue to pay attention while backing up.
Failure to do so can result in serious injury or death.
CAUTION!
To avoid vehicle damage, ParkView should only be
used as a parking aid. The ParkView Rear Back Up
Camera is unable to view every obstacle or object in
your drive path.
To avoid vehicle damage, the vehicle must be driven
slowly when using ParkView to be able to stop in time
when an obstacle is seen. It is recommended that
the driver look frequently over his/her shoulder when
using ParkView.
4
23_LD_OM_EN_USC_t.book Page 101
Page 202 of 292
200SAFETY
(Continued)
(Continued)
If your vehicle is involved in a collision, or if you have
questions regarding the seat belt or retractor conditions,
take your vehicle to an authorized FCA dealer or
authorized FCA Certified Collision Care Program facility for
inspection.
Air Bag Warning Light
The Air Bag Warning Light will turn on for four to
eight seconds as a bulb check when the
ignition switch is first placed in the ON/RUN
position. If the light is either not on during
starting, stays on, or turns on while driving, have the
system inspected at an authorized dealer as soon as
possible. After the bulb check, this light will illuminate with
a single chime when a fault with the Air Bag System has
been detected. It will stay on until the fault is removed. If
the light comes on intermittently or remains on while
driving, have an authorized dealer service the vehicle
immediately
Úpage 177.
Defroster
Check operation by selecting the defrost mode and place
the blower control on high speed. You should be able to
feel the air directed against the windshield. See an
authorized dealer for service if your defroster is
inoperable.
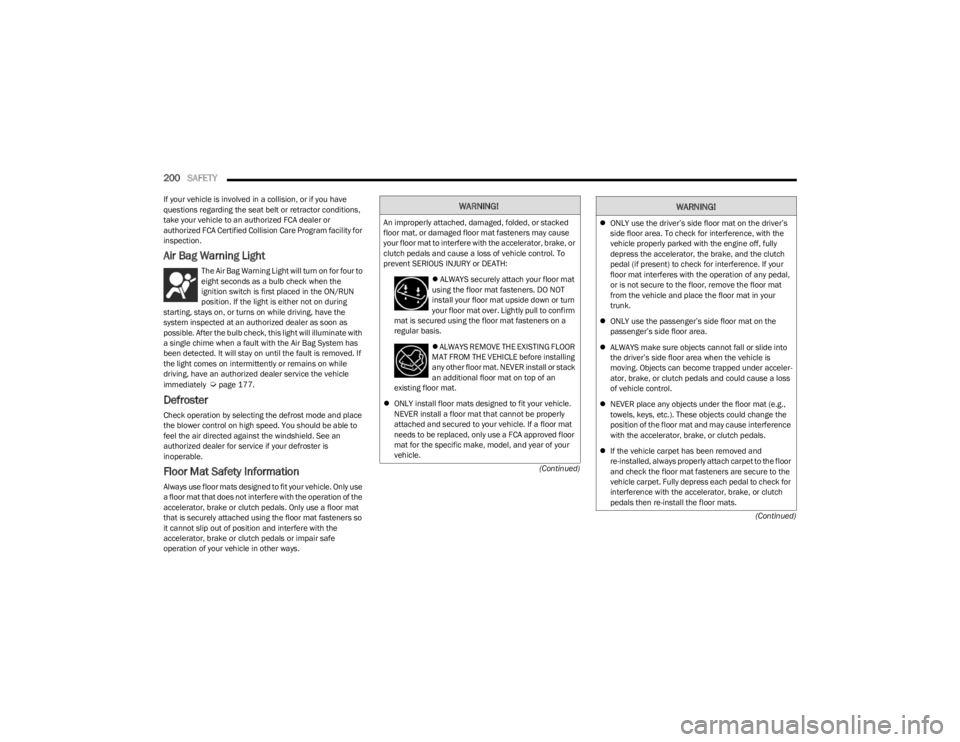
Floor Mat Safety Information
Always use floor mats designed to fit your vehicle. Only use
a floor mat that does not interfere with the operation of the
accelerator, brake or clutch pedals. Only use a floor mat
that is securely attached using the floor mat fasteners so
it cannot slip out of position and interfere with the
accelerator, brake or clutch pedals or impair safe
operation of your vehicle in other ways.
WARNING!
An improperly attached, damaged, folded, or stacked
floor mat, or damaged floor mat fasteners may cause
your floor mat to interfere with the accelerator, brake, or
clutch pedals and cause a loss of vehicle control. To
prevent SERIOUS INJURY or DEATH:
ALWAYS securely attach your floor mat
using the floor mat fasteners. DO NOT
install your floor mat upside down or turn
your floor mat over. Lightly pull to confirm
mat is secured using the floor mat fasteners on a
regular basis.
ALWAYS REMOVE THE EXISTING FLOOR
MAT FROM THE VEHICLE before installing
any other floor mat. NEVER install or stack
an additional floor mat on top of an
existing floor mat.
ONLY install floor mats designed to fit your vehicle.
NEVER install a floor mat that cannot be properly
attached and secured to your vehicle. If a floor mat
needs to be replaced, only use a FCA approved floor
mat for the specific make, model, and year of your
vehicle.ONLY use the driver’s side floor mat on the driver’s
side floor area. To check for interference, with the
vehicle properly parked with the engine off, fully
depress the accelerator, the brake, and the clutch
pedal (if present) to check for interference. If your
floor mat interferes with the operation of any pedal,
or is not secure to the floor, remove the floor mat
from the vehicle and place the floor mat in your
trunk.
ONLY use the passenger’s side floor mat on the
passenger’s side floor area.
ALWAYS make sure objects cannot fall or slide into
the driver’s side floor area when the vehicle is
moving. Objects can become trapped under acceler -
ator, brake, or clutch pedals and could cause a loss
of vehicle control.
NEVER place any objects under the floor mat (e.g.,
towels, keys, etc.). These objects could change the
position of the floor mat and may cause interference
with the accelerator, brake, or clutch pedals.
If the vehicle carpet has been removed and
re-installed, always properly attach carpet to the floor
and check the floor mat fasteners are secure to the
vehicle carpet. Fully depress each pedal to check for
interference with the accelerator, brake, or clutch
pedals then re-install the floor mats.
WARNING!
23_LD_OM_EN_USC_t.book Page 200