2023 DODGE CHARGER display
[x] Cancel search: displayPage 29 of 292

GETTING TO KNOW YOUR VEHICLE27
Uconnect Voice Command Buttons
ADDITIONAL INFORMATION
© 2022 FCA US LLC. All rights reserved. Mopar and
Uconnect are registered trademarks and Mopar Owner
Connect is a trademark of FCA US LLC. SiriusXM® and all
related marks and logos are trademarks of SiriusXM®
Radio Inc.
Úpage 277.
Uconnect System Support:
US residents visit www.DriveUconnect.com or call:
1-877-855-8400 (24 hours a day 7 days a week)
Canadian residents visit www.DriveUconnect.ca or call:
1-800-465-2001 (English) or 1-800-387-9983
(French) SiriusXM Guardian™ services support:
US residents visit www.driveuconnect.com/
sirius-xm-guardian or call: 1-844-796-4827
Canadian residents visit https://www.driveucon -
nect.ca/en/sirius-xm-guardian or call:
1-877-324-9091
DRIVER MEMORY SETTINGS — IF EQUIPPED
This feature allows the driver to save up to two different
memory profiles for easy recall through a memory switch.
Each memory profile saves desired position settings for
the following features:
Driver seat
Easy Entry/Exit seat (if equipped)
Side mirrors
Power tilt/telescoping steering column (if equipped)
A set of desired radio station presets
NOTE:
Your vehicle is equipped with two key fobs, each can be
linked to either memory position 1 or 2.
Be sure to program the radio presets prior to program -
ming the memory settings.
The memory settings switch is located on the driver’s door
trim panel. The switch consists of three buttons:
The set (S) button, which is used to activate the
memory save function.
The (1) and (2) buttons which are used to recall either
of two saved memory profiles.
Memory Setting Switch
PROGRAMMING THE MEMORY FEATURE
To create a new memory profile, perform the following:
NOTE:Saving a new memory profile will erase the selected profile
from memory.
1. Place the vehicle’s ignition in the ON/RUN position
(do not start the engine).
2. Adjust all memory profile settings to desired preferences (i.e., seat, side mirror, power tilt and
telescopic steering column [if equipped], and radio
station presets).
3. Push and release the set (S) button on the memory switch, and then push the desired memory button
(1 or 2) within five seconds. The instrument cluster
display will display which memory position has been
set.
NOTE:Memory profiles can be set without the vehicle in PARK,
but the vehicle must be in PARK to recall a memory profile.
1 — Push To Start Or Answer A Phone Call And Send Or
Receive A Text
2 — Push The Voice Recognition Button To Begin Radio,
Media, Navigation And Climate Functions
2
23_LD_OM_EN_USC_t.book Page 27
Page 30 of 292

28GETTING TO KNOW YOUR VEHICLE
(Continued)
LINKING AND UNLINKING THE KEY FOB
T
O MEMORY
Your key fobs can be programmed to recall one of two
saved memory profiles.
NOTE:Before programming your key fobs you must select the
“Memory Linked To Fob” feature through the Uconnect
system
Úpage 112.
To program your key fobs, perform the following:
1. Place the vehicle’s ignition in the OFF position.
2. Select a desired memory profile, 1 or 2.
3. Once the profile has been recalled, push and release the set (S) button on the memory switch.
4. Within five seconds, push and release button (1) or (2) accordingly. “Memory Profile Set” (1 or 2) will
display in the instrument cluster.
5. Push and release the lock button on the key fob within 10 seconds.
NOTE:Your key fob can be unlinked from your memory settings
by pushing the set (S) button, followed by pushing the
unlock button on the key fob within 10 seconds.
MEMORY POSITION RECALL
NOTE:If a recall is attempted when the vehicle is not in PARK, a
message will be displayed in the instrument cluster
display.
To recall the memory settings for driver one or two, push
the desired memory button number (1 or 2) or the unlock
button on the key fob linked to the desired memory
position.
A recall can be canceled by pushing any of the memory
buttons (S, 1, or 2) during a recall. When a recall is
canceled, the driver seat will stop moving. A delay of one
second will occur before another recall can be selected.
NOTE:If the vehicle is equipped with Passive Entry, the memory
settings are recalled when using Passive Entry to unlock
the driver's door with a linked key fob.
SEATS
Seats are a part of the Occupant Restraint system of the
vehicle.
MANUAL ADJUSTMENT
(F
RONT SEATS) — IF EQUIPPED
WARNING!
It is dangerous to ride in a cargo area, inside or
outside of a vehicle. In a collision, people riding in
these areas are more likely to be seriously injured or
killed.
Do not allow people to ride in any area of your vehicle
that is not equipped with seats and seat belts. In a
collision, people riding in these areas are more likely
to be seriously injured or killed.
Be sure everyone in your vehicle is in a seat and
using a seat belt properly.
WARNING!
Adjusting a seat while the vehicle is moving is
dangerous. The sudden movement of the seat could
cause you to lose control. The seat belt might not be
adjusted properly and you could be injured. Adjust
the seat only while the vehicle is parked.
Do not ride with the seatback reclined so that the
shoulder belt is no longer resting against your chest.
In a collision you could slide under the seat belt and
be seriously or even fatally injured. Use the recliner
only when the vehicle is parked.
WARNING!
23_LD_OM_EN_USC_t.book Page 28
Page 34 of 292

32GETTING TO KNOW YOUR VEHICLE
Front Heated Seats
The front heated seats control buttons are
located within the Uconnect system. You can
gain access to the control buttons through the
climate screen and the controls screen.
You can choose from HI, LO, or OFF heat settings. The
indicator arrows in the touchscreen buttons indicate the
level of heat in use. Two indicator arrows will illuminate for
HI, and one for LO. Turning the heating elements off will
return the user to the radio screen.
Press the heated seat button once to turn the HI setting
on.
Press the heated seat button a second time to turn the
LO setting on.
Press the heated seat button a third time to turn the
heating elements off.
If the HI-level setting is selected, the system will
automatically switch to LO-level after approximately
60 minutes of continuous operation. At that time, the
display will change from HI to LO, indicating the change.
The LO-level setting will turn off automatically after
approximately 45 minutes.
NOTE:
Once a heat setting is selected, heat will be felt within
two to five minutes.
The engine must be running for the heated seats to
operate. For information on use with the Remote Start system, see
Úpage 18.
Rear Heated Seats
On some models, the two rear outboard seats
may be equipped with heated seats. There are
two heated seat switches that allow the rear
passengers to operate the seats
independently. The heated seat switches for each heater
are located on the rear of the center console.
You can choose from HI, LO, or OFF heat settings. The
indicator lights in each switch indicate the level of heat in
use. Two indicator lights will illuminate for HI, one for LO,
and none for off.
Push the switch once to turn the HI setting on.
Push the switch a second time to turn the LO
setting on.
Push the switch a third time to turn the heating
elements off.
If the HI-level setting is selected, the system will
automatically switch to LO-level after approximately
60 minutes of continuous operation. At that time, the
number of illuminated LEDs changes from two to one,
indicating the change. The LO-level setting will turn off
automatically after approximately 45 minutes.
NOTE:
Once a heat setting is selected, heat will be felt within
two to five minutes.
The engine must be running for the heated seats to
operate.
FRONT VENTILATED SEATS —
I
F EQUIPPED
The ventilated seats are equipped with fans
that can be controlled through the climate and
control screen in the Uconnect system. The
fans operate at two speeds: HI and LO.
Press the ventilated seat button once to choose HI.
Press the ventilated seat button a second time to
choose LO.
Press the ventilated seat button a third time to turn the
ventilated seat off.
WARNING!
Persons who are unable to feel pain to the skin
because of advanced age, chronic illness, diabetes,
spinal cord injury, medication, alcohol use, exhaus -
tion or other physical condition must exercise care
when using the seat heater. It may cause burns even
at low temperatures, especially if used for long
periods of time.
Do not place anything on the seat or seatback that
insulates against heat, such as a blanket or cushion.
This may cause the seat heater to overheat. Sitting in
a seat that has been overheated could cause serious
burns due to the increased surface temperature of
the seat.
23_LD_OM_EN_USC_t.book Page 32
Page 47 of 292

GETTING TO KNOW YOUR VEHICLE45
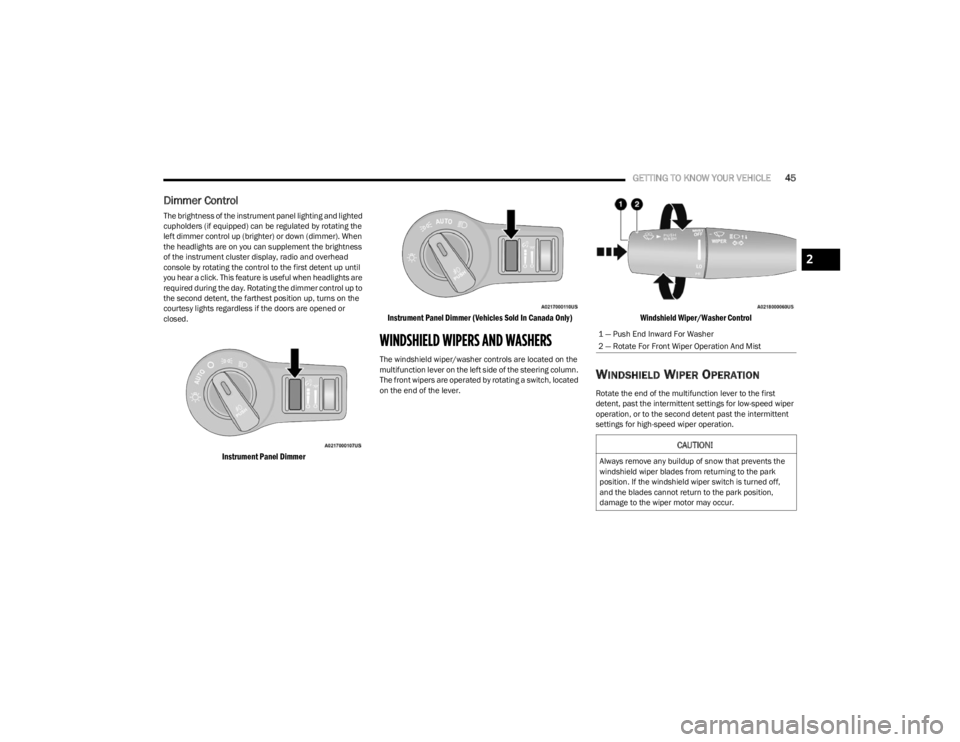
Dimmer Control
The brightness of the instrument panel lighting and lighted
cupholders (if equipped) can be regulated by rotating the
left dimmer control up (brighter) or down (dimmer). When
the headlights are on you can supplement the brightness
of the instrument cluster display, radio and overhead
console by rotating the control to the first detent up until
you hear a click. This feature is useful when headlights are
required during the day. Rotating the dimmer control up to
the second detent, the farthest position up, turns on the
courtesy lights regardless if the doors are opened or
closed.
Instrument Panel Dimmer Instrument Panel Dimmer (Vehicles Sold In Canada Only)
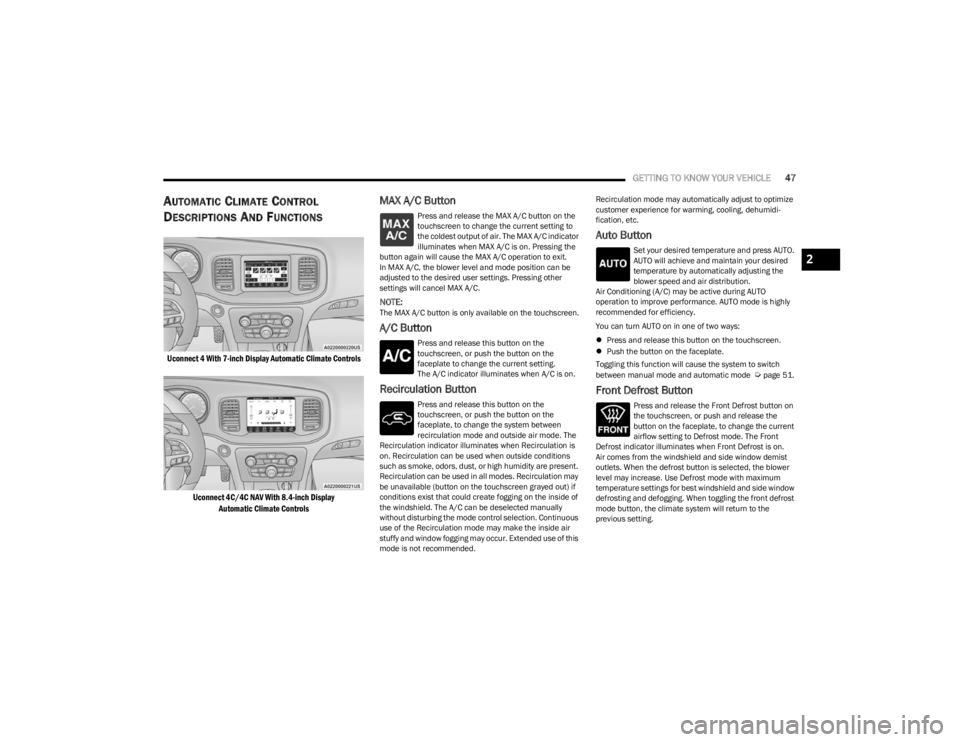
WINDSHIELD WIPERS AND WASHERS
The windshield wiper/washer controls are located on the
multifunction lever on the left side of the steering column.
The front wipers are operated by rotating a switch, located
on the end of the lever.
Windshield Wiper/Washer Control
WINDSHIELD WIPER OPERATION
Rotate the end of the multifunction lever to the first
detent, past the intermittent settings for low-speed wiper
operation, or to the second detent past the intermittent
settings for high-speed wiper operation.
1 — Push End Inward For Washer
2 — Rotate For Front Wiper Operation And Mist
CAUTION!
Always remove any buildup of snow that prevents the
windshield wiper blades from returning to the park
position. If the windshield wiper switch is turned off,
and the blades cannot return to the park position,
damage to the wiper motor may occur.
2
23_LD_OM_EN_USC_t.book Page 45
Page 49 of 292

GETTING TO KNOW YOUR VEHICLE47
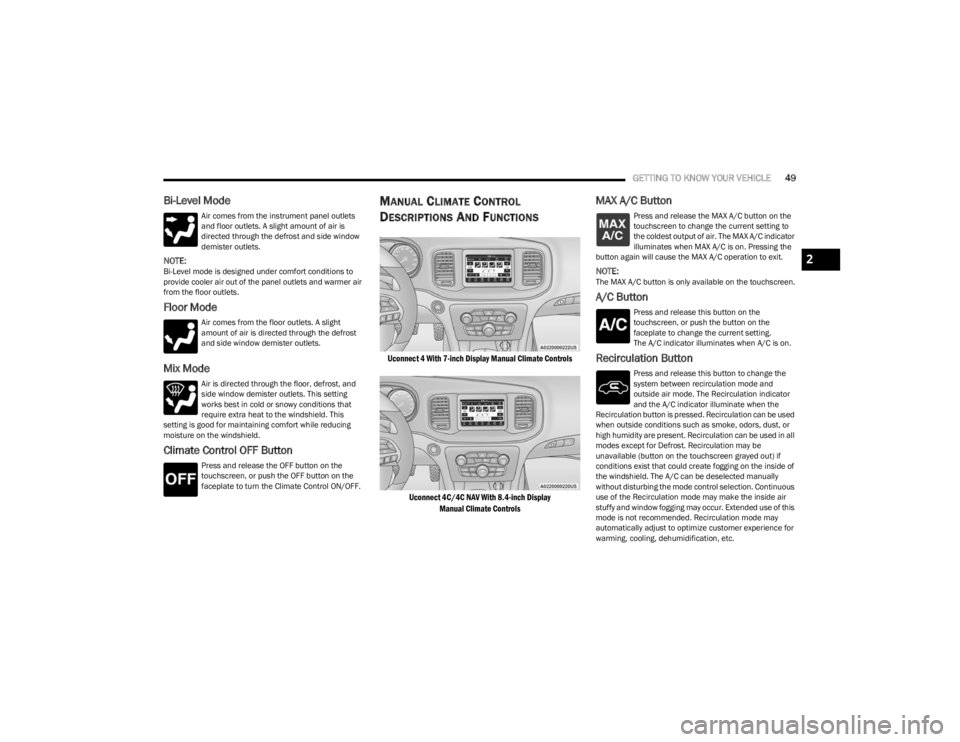
AUTOMATIC CLIMATE CONTROL
D
ESCRIPTIONS AND FUNCTIONS
Uconnect 4 With 7-inch Display Automatic Climate Controls
Uconnect 4C/4C NAV With 8.4-inch DisplayAutomatic Climate Controls
MAX A/C Button
Press and release the MAX A/C button on the
touchscreen to change the current setting to
the coldest output of air. The MAX A/C indicator
illuminates when MAX A/C is on. Pressing the
button again will cause the MAX A/C operation to exit.
In MAX A/C, the blower level and mode position can be
adjusted to the desired user settings. Pressing other
settings will cancel MAX A/C.
NOTE:The MAX A/C button is only available on the touchscreen.
A/C Button
Press and release this button on the
touchscreen, or push the button on the
faceplate to change the current setting.
The A/C indicator illuminates when A/C is on.
Recirculation Button
Press and release this button on the
touchscreen, or push the button on the
faceplate, to change the system between
recirculation mode and outside air mode. The
Recirculation indicator illuminates when Recirculation is
on. Recirculation can be used when outside conditions
such as smoke, odors, dust, or high humidity are present.
Recirculation can be used in all modes. Recirculation may
be unavailable (button on the touchscreen grayed out) if
conditions exist that could create fogging on the inside of
the windshield. The A/C can be deselected manually
without disturbing the mode control selection. Continuous
use of the Recirculation mode may make the inside air
stuffy and window fogging may occur. Extended use of this
mode is not recommended. Recirculation mode may automatically adjust to optimize
customer experience for warming, cooling, dehumidi
-
fication, etc.
Auto Button
Set your desired temperature and press AUTO.
AUTO will achieve and maintain your desired
temperature by automatically adjusting the
blower speed and air distribution.
Air Conditioning (A/C) may be active during AUTO
operation to improve performance. AUTO mode is highly
recommended for efficiency.
You can turn AUTO on in one of two ways:
Press and release this button on the touchscreen.
Push the button on the faceplate.
Toggling this function will cause the system to switch
between manual mode and automatic mode
Úpage 51.
Front Defrost Button
Press and release the Front Defrost button on
the touchscreen, or push and release the
button on the faceplate, to change the current
airflow setting to Defrost mode. The Front
Defrost indicator illuminates when Front Defrost is on.
Air comes from the windshield and side window demist
outlets. When the defrost button is selected, the blower
level may increase. Use Defrost mode with maximum
temperature settings for best windshield and side window
defrosting and defogging. When toggling the front defrost
mode button, the climate system will return to the
previous setting.
2
23_LD_OM_EN_USC_t.book Page 47
Page 51 of 292

GETTING TO KNOW YOUR VEHICLE49
Bi-Level Mode
Air comes from the instrument panel outlets
and floor outlets. A slight amount of air is
directed through the defrost and side window
demister outlets.
NOTE:Bi-Level mode is designed under comfort conditions to
provide cooler air out of the panel outlets and warmer air
from the floor outlets.
Floor Mode
Air comes from the floor outlets. A slight
amount of air is directed through the defrost
and side window demister outlets.
Mix Mode
Air is directed through the floor, defrost, and
side window demister outlets. This setting
works best in cold or snowy conditions that
require extra heat to the windshield. This
setting is good for maintaining comfort while reducing
moisture on the windshield.
Climate Control OFF Button
Press and release the OFF button on the
touchscreen, or push the OFF button on the
faceplate to turn the Climate Control ON/OFF.
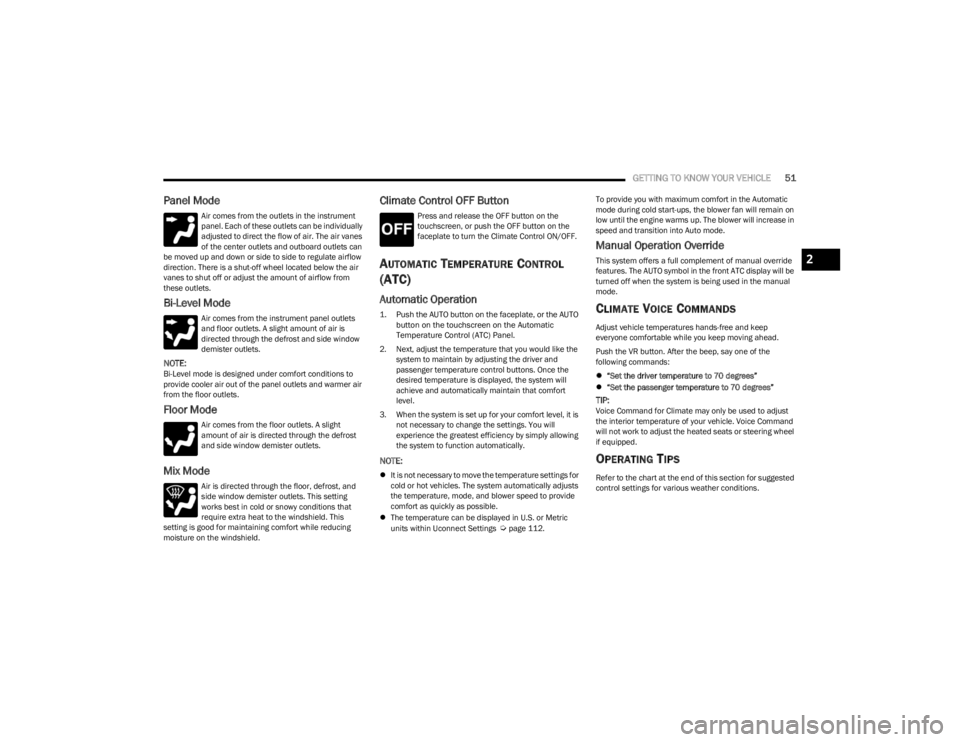
MANUAL CLIMATE CONTROL
D
ESCRIPTIONS AND FUNCTIONS
Uconnect 4 With 7-inch Display Manual Climate Controls
Uconnect 4C/4C NAV With 8.4-inch Display Manual Climate Controls
MAX A/C Button
Press and release the MAX A/C button on the
touchscreen to change the current setting to
the coldest output of air. The MAX A/C indicator
illuminates when MAX A/C is on. Pressing the
button again will cause the MAX A/C operation to exit.
NOTE:The MAX A/C button is only available on the touchscreen.
A/C Button
Press and release this button on the
touchscreen, or push the button on the
faceplate to change the current setting.
The A/C indicator illuminates when A/C is on.
Recirculation Button
Press and release this button to change the
system between recirculation mode and
outside air mode. The Recirculation indicator
and the A/C indicator illuminate when the
Recirculation button is pressed. Recirculation can be used
when outside conditions such as smoke, odors, dust, or
high humidity are present. Recirculation can be used in all
modes except for Defrost. Recirculation may be
unavailable (button on the touchscreen grayed out) if
conditions exist that could create fogging on the inside of
the windshield. The A/C can be deselected manually
without disturbing the mode control selection. Continuous
use of the Recirculation mode may make the inside air
stuffy and window fogging may occur. Extended use of this
mode is not recommended. Recirculation mode may
automatically adjust to optimize customer experience for
warming, cooling, dehumidification, etc.
2
23_LD_OM_EN_USC_t.book Page 49
Page 53 of 292

GETTING TO KNOW YOUR VEHICLE51
Panel Mode
Air comes from the outlets in the instrument
panel. Each of these outlets can be individually
adjusted to direct the flow of air. The air vanes
of the center outlets and outboard outlets can
be moved up and down or side to side to regulate airflow
direction. There is a shut-off wheel located below the air
vanes to shut off or adjust the amount of airflow from
these outlets.
Bi-Level Mode
Air comes from the instrument panel outlets
and floor outlets. A slight amount of air is
directed through the defrost and side window
demister outlets.
NOTE:Bi-Level mode is designed under comfort conditions to
provide cooler air out of the panel outlets and warmer air
from the floor outlets.
Floor Mode
Air comes from the floor outlets. A slight
amount of air is directed through the defrost
and side window demister outlets.
Mix Mode
Air is directed through the floor, defrost, and
side window demister outlets. This setting
works best in cold or snowy conditions that
require extra heat to the windshield. This
setting is good for maintaining comfort while reducing
moisture on the windshield.
Climate Control OFF Button
Press and release the OFF button on the
touchscreen, or push the OFF button on the
faceplate to turn the Climate Control ON/OFF.
AUTOMATIC TEMPERATURE CONTROL
(ATC)
Automatic Operation
1. Push the AUTO button on the faceplate, or the AUTO
button on the touchscreen on the Automatic
Temperature Control (ATC) Panel.
2. Next, adjust the temperature that you would like the system to maintain by adjusting the driver and
passenger temperature control buttons. Once the
desired temperature is displayed, the system will
achieve and automatically maintain that comfort
level.
3. When the system is set up for your comfort level, it is not necessary to change the settings. You will
experience the greatest efficiency by simply allowing
the system to function automatically.
NOTE:
It is not necessary to move the temperature settings for
cold or hot vehicles. The system automatically adjusts
the temperature, mode, and blower speed to provide
comfort as quickly as possible.
The temperature can be displayed in U.S. or Metric
units within Uconnect Settings
Úpage 112. To provide you with maximum comfort in the Automatic
mode during cold start-ups, the blower fan will remain on
low until the engine warms up. The blower will increase in
speed and transition into Auto mode.
Manual Operation Override
This system offers a full complement of manual override
features. The AUTO symbol in the front ATC display will be
turned off when the system is being used in the manual
mode.
CLIMATE VOICE COMMANDS
Adjust vehicle temperatures hands-free and keep
everyone comfortable while you keep moving ahead.
Push the VR button. After the beep, say one of the
following commands:
“Set the driver temperature to 70 degrees”
“Set the passenger temperature to 70 degrees”
TIP:Voice Command for Climate may only be used to adjust
the interior temperature of your vehicle. Voice Command
will not work to adjust the heated seats or steering wheel
if equipped.
OPERATING TIPS
Refer to the chart at the end of this section for suggested
control settings for various weather conditions.
2
23_LD_OM_EN_USC_t.book Page 51
Page 56 of 292

54GETTING TO KNOW YOUR VEHICLE
USB/AUX CONTROL
This feature allows an external USB device to be plugged
into the USB port.
Plugging in a smartphone device to a USB port may
activate Android Auto™ or Apple CarPlay® features, if
equipped. For further information, refer to “Android
Auto™” or “Apple CarPlay®” in the Uconnect Radio
Instruction Manual.
AUX/USB Ports
Located on the rear of the front center console are dual
USB charge only ports. The USB charge only ports will
recharge battery operated USB devices when connected.
Rear USB Charging Ports
NOTE:
Charge unsupported devices with the charge only USB
ports. If an unsupported device is plugged into a Media
USB port, a message will display on the touchscreen that
the device is not supported by the system.
ILLUMINATED CUPHOLDERS —
I
F EQUIPPED
On some vehicles the front and/or rear cupholders are
equipped with a light ring that illuminates the cupholders.
The brightness of the light rings are controlled by the
Dimmer Control
Úpage 45.
Light Ring Around Front Cupholders
Light Ring Around Rear Cupholders
1 — USB 1 Port
2 — AUX Jack
3 — USB 2 Port
23_LD_OM_EN_USC_t.book Page 54