2023 CHRYSLER PACIFICA remove seats
[x] Cancel search: remove seatsPage 79 of 328

GETTING TO KNOW YOUR VEHICLE77
POWER INVERTER — IF EQUIPPED
There is a 115 Volt, 150 W Power Inverter outlet located
on the right side of the vehicle, before the third row of
seats to convert DC current to AC current. The Power
Inverter can power cellular phones, electronics and other
low power devices requiring up to 150 W. Certain video
game consoles will exceed this power limit, as will most
power tools.
Power Inverter
The Power Inverter turns on when the device is plugged in,
and the ignition is in ON/RUN position. It turns off when
the device is unplugged or the ignition is no longer in ON/
RUN position.
The Power Inverter is designed with built-in overload
protection. If the power rating of 150 W is exceeded, the
Power Inverter shuts down. Once the electrical device has
been removed from the Power Inverter, it resets. To avoid
overloading the circuit, check the power ratings on
electrical devices prior to using the Power Inverter.
WIRELESS CHARGING PAD —
I
F EQUIPPED
Wireless Charging Pad Location
Your vehicle may be equipped with a 15W 3A Qi wireless
charging pad located inside of the storage area below the
climate controls. This charging pad is designed to
wirelessly charge your Qi enabled mobile phone. Qi is a
standard that allows wireless charging of your mobile
phone.
Your mobile phone must be designed for Qi wireless
charging. If the phone is not equipped with Qi wireless
charging functionality, an aftermarket sleeve or a
specialized back plate can be purchased from your mobile
phone provider or a local electronics retailer. Please see
your phone’s owner’s manual for further information.
The wireless charging pad is equipped with an anti-slip
mat to hold your mobile phone in place, and an LED
indicator light.
CAUTION!
Many accessories that can be plugged in draw power
from the vehicle's battery, even when not in use (i.e.,
cellular phones, etc.). Eventually, if plugged in long
enough, the vehicle's battery will discharge suffi -
ciently to degrade battery life and/or prevent the
engine from starting.
Accessories that draw higher power (i.e., coolers,
vacuum cleaners, lights, etc.) will degrade the
battery even more quickly. Only use these intermit -
tently and with greater caution.
After the use of high power draw accessories, or long
periods of the vehicle not being started (with acces -
sories still plugged in), the vehicle must be driven a
sufficient length of time to allow the generator to
recharge the vehicle's battery.
WARNING!
To avoid serious injury or death:
Do not insert any objects into the receptacles.
Do not touch with wet hands.
Close the lid when not in use.
If this outlet is mishandled, it may cause an electric
shock and failure.
2
23_RUP_OM_EN_USC_t.book Page 77
Page 88 of 328

86GETTING TO KNOW YOUR VEHICLE
(Continued)
CARGO AREA FEATURES
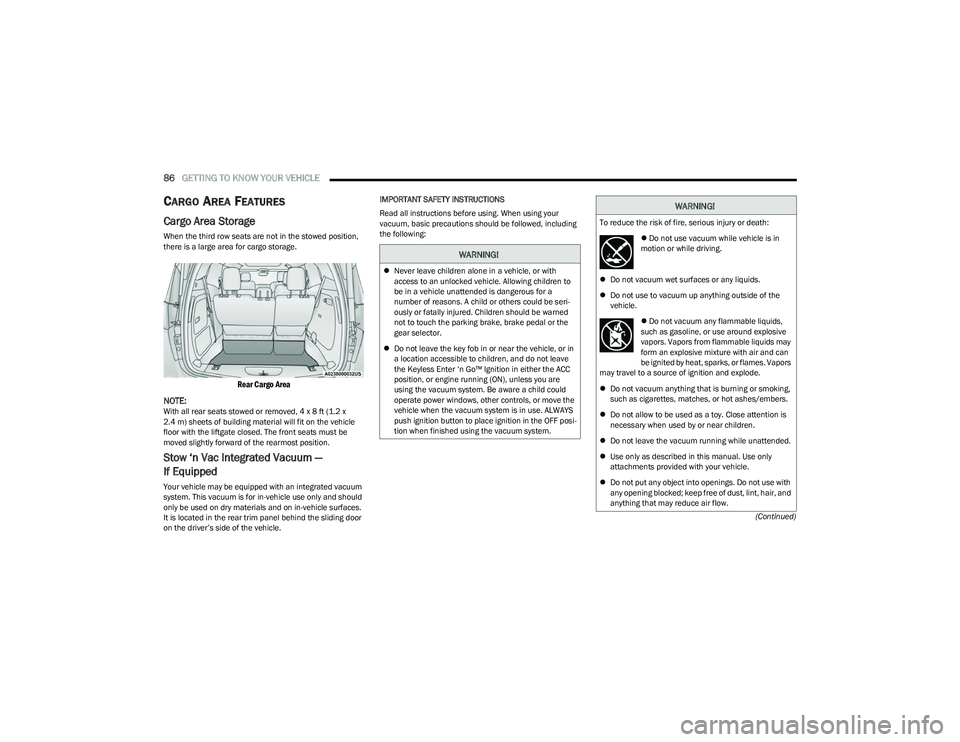
Cargo Area Storage
When the third row seats are not in the stowed position,
there is a large area for cargo storage.
Rear Cargo Area
NOTE:
With all rear seats stowed or removed, 4 x 8 ft (1.2 x
2.4 m) sheets of building material will fit on the vehicle
floor with the liftgate closed. The front seats must be
moved slightly forward of the rearmost position.
Stow ‘n Vac Integrated Vacuum —
If Equipped
Your vehicle may be equipped with an integrated vacuum
system. This vacuum is for in-vehicle use only and should
only be used on dry materials and on in-vehicle surfaces.
It is located in the rear trim panel behind the sliding door
on the driver’s side of the vehicle. IMPORTANT SAFETY INSTRUCTIONS
Read all instructions before using. When using your
vacuum, basic precautions should be followed, including
the following:
WARNING!
Never leave children alone in a vehicle, or with
access to an unlocked vehicle. Allowing children to
be in a vehicle unattended is dangerous for a
number of reasons. A child or others could be seri -
ously or fatally injured. Children should be warned
not to touch the parking brake, brake pedal or the
gear selector.
Do not leave the key fob in or near the vehicle, or in
a location accessible to children, and do not leave
the Keyless Enter ‘n Go™ Ignition in either the ACC
position, or engine running (ON), unless you are
using the vacuum system. Be aware a child could
operate power windows, other controls, or move the
vehicle when the vacuum system is in use. ALWAYS
push ignition button to place ignition in the OFF posi -
tion when finished using the vacuum system.
WARNING!
To reduce the risk of fire, serious injury or death:
Do not use vacuum while vehicle is in
motion or while driving.
Do not vacuum wet surfaces or any liquids.
Do not use to vacuum up anything outside of the
vehicle.
Do not vacuum any flammable liquids,
such as gasoline, or use around explosive
vapors. Vapors from flammable liquids may
form an explosive mixture with air and can
be ignited by heat, sparks, or flames. Vapors
may travel to a source of ignition and explode.
Do not vacuum anything that is burning or smoking,
such as cigarettes, matches, or hot ashes/embers.
Do not allow to be used as a toy. Close attention is
necessary when used by or near children.
Do not leave the vacuum running while unattended.
Use only as described in this manual. Use only
attachments provided with your vehicle.
Do not put any object into openings. Do not use with
any opening blocked; keep free of dust, lint, hair, and
anything that may reduce air flow.
23_RUP_OM_EN_USC_t.book Page 86
Page 193 of 328

SAFETY191
(Continued)
Disabling And Enabling HSA
This feature can be turned on or turned off. To change the
current setting, proceed as follows: Úpage 157.
Towing With HSA
HSA will also provide assistance to mitigate roll back while
towing a trailer.
Rain Brake Support (RBS)
RBS may improve braking performance in wet conditions.
It will periodically apply a small amount of brake pressure
to remove any water buildup on the front brake rotors. It
functions when the windshield wipers are in LO or HI
speed. When RBS is active, there is no notification to the
driver and no driver interaction is required.
Ready Alert Braking (RAB)
RAB may reduce the time required to reach full braking
during emergency braking situations. It anticipates when
an emergency braking situation may occur by monitoring
how fast the throttle is released by the driver. The
Electronic Brake Control (EBC) system will prepare the
brake system for a panic stop.
Rear Seat Reminder Alert (RSRA)
RSRA alerts you through a visual and auditory notification
of the possible presence of an object, passenger, or pet in
the rear seats if a rear door was opened up to 10 minutes
before the ignition was placed in the ON/RUN position.
RSRA does not directly detect objects, passengers, or pets
in the rear seats. When the previous conditions are met,
RSRA displays the message “Check Rear Seat” on the
instrument cluster display and sounds an auditory alert
upon the driver placing the ignition in the OFF position to
exit the vehicle.
To enable or disable RSRA, see
Úpage 157.
Traction Control System (TCS)
The TCS monitors the amount of wheel spin of each of the
driven wheels. If wheel spin is detected, the TCS may apply
brake pressure to the spinning wheel(s) and/or reduce
vehicle power to provide enhanced acceleration and
stability. A feature of the TCS, Brake Limited Differential
(BLD) functions similarly to a limited slip differential and
controls the wheel spin across a driven axle. If one wheel
on a driven axle is spinning faster than the other, the
system will apply the brake of the spinning wheel. This will
allow more vehicle torque to be applied to the wheel that
is not spinning. BLD may remain enabled even if TCS and
the Electronic Stability Control (ESC) are in reduced
modes.
WARNING!
If you use a trailer brake controller with your trailer,
the trailer brakes may be activated and deactivated
with the brake switch. If so, there may not be enough
brake pressure to hold both the vehicle and the
trailer on a hill when the brake pedal is released. In
order to avoid rolling down an incline while resuming
acceleration, manually activate the trailer brake or
apply more vehicle brake pressure prior to releasing
the brake pedal.
HSA is not a parking brake. Always apply the parking
brake fully when exiting your vehicle. Also, be certain
to place the transmission in PARK.
Failure to follow these warnings can result in a colli -
sion or serious personal injury.
WARNING!
Before exiting a vehicle, always come to a complete
stop, then shift the automatic transmission into
PARK and apply the parking brake.
Always make sure the keyless ignition node is in the
OFF position, key fob is removed from the vehicle
and vehicle is locked.
Never leave children alone in a vehicle, or with
access to an unlocked vehicle. Leaving children in a
vehicle unattended is dangerous for a number of
reasons. A child or others could be seriously or fatally
injured. Children should be warned not to touch the
parking brake, brake pedal or the gear selector.
Do not leave children or animals inside parked vehi -
cles in hot weather. Interior heat buildup may cause
serious injury or death.
WARNING!
6
23_RUP_OM_EN_USC_t.book Page 191
Page 210 of 328

208SAFETY
How To Engage The Automatic Locking Mode
1. Buckle the combination lap and shoulder belt.
2. Grab the shoulder portion and pull downward until
the entire seat belt is extracted.
3. Allow the seat belt to retract. As the seat belt retracts, you will hear a clicking sound. This indicates the seat
belt is now in the Automatic Locking Mode.
How To Disengage The Automatic Locking Mode
Unbuckle the combination lap/shoulder belt and allow it
to retract completely to disengage the Automatic Locking
Mode and activate the vehicle sensitive (emergency)
locking mode.
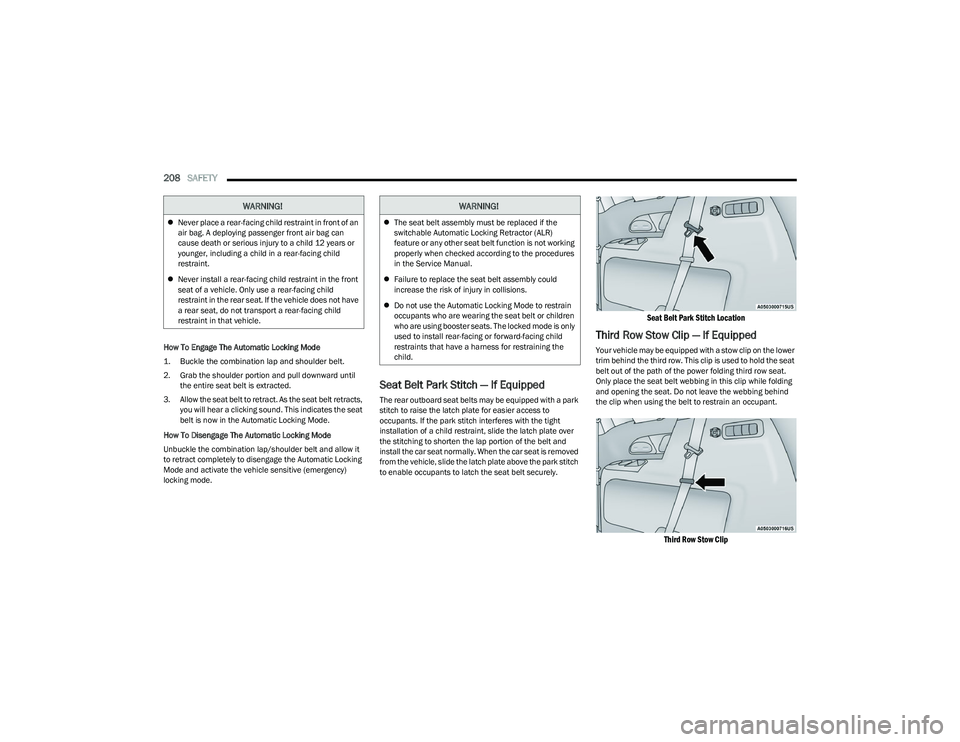
Seat Belt Park Stitch — If Equipped
The rear outboard seat belts may be equipped with a park
stitch to raise the latch plate for easier access to
occupants. If the park stitch interferes with the tight
installation of a child restraint, slide the latch plate over
the stitching to shorten the lap portion of the belt and
install the car seat normally. When the car seat is removed
from the vehicle, slide the latch plate above the park stitch
to enable occupants to latch the seat belt securely.
Seat Belt Park Stitch Location
Third Row Stow Clip — If Equipped
Your vehicle may be equipped with a stow clip on the lower
trim behind the third row. This clip is used to hold the seat
belt out of the path of the power folding third row seat.
Only place the seat belt webbing in this clip while folding
and opening the seat. Do not leave the webbing behind
the clip when using the belt to restrain an occupant.
Third Row Stow Clip
WARNING!
Never place a rear-facing child restraint in front of an
air bag. A deploying passenger front air bag can
cause death or serious injury to a child 12 years or
younger, including a child in a rear-facing child
restraint.
Never install a rear-facing child restraint in the front
seat of a vehicle. Only use a rear-facing child
restraint in the rear seat. If the vehicle does not have
a rear seat, do not transport a rear-facing child
restraint in that vehicle.
WARNING!
The seat belt assembly must be replaced if the
switchable Automatic Locking Retractor (ALR)
feature or any other seat belt function is not working
properly when checked according to the procedures
in the Service Manual.
Failure to replace the seat belt assembly could
increase the risk of injury in collisions.
Do not use the Automatic Locking Mode to restrain
occupants who are wearing the seat belt or children
who are using booster seats. The locked mode is only
used to install rear-facing or forward-facing child
restraints that have a harness for restraining the
child.
23_RUP_OM_EN_USC_t.book Page 208
Page 223 of 328

SAFETY221
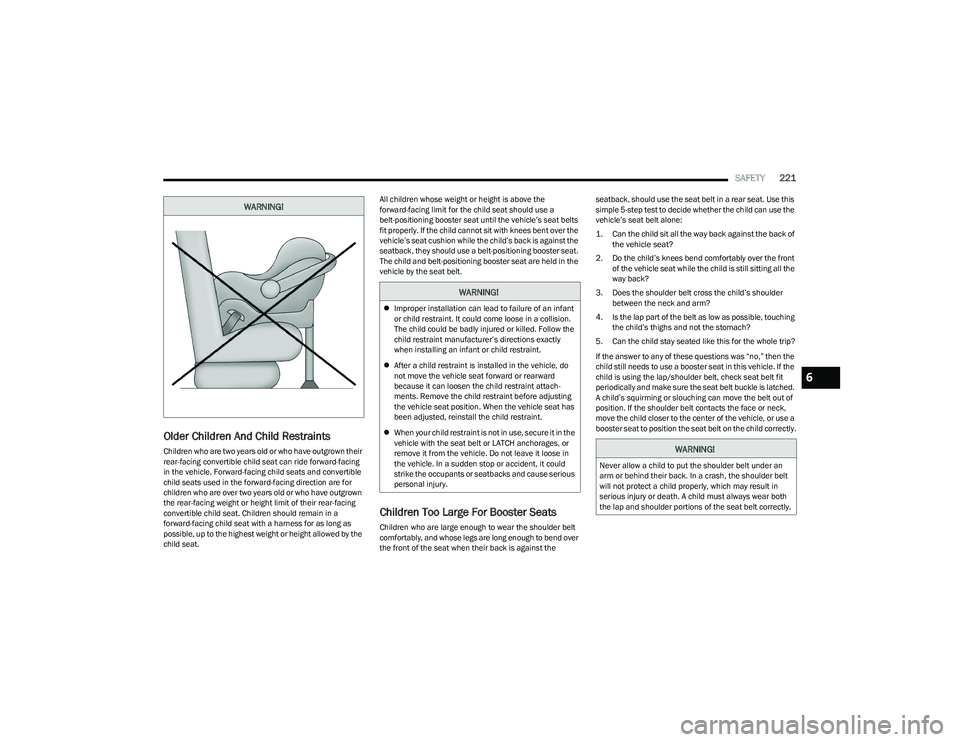
Older Children And Child Restraints
Children who are two years old or who have outgrown their
rear-facing convertible child seat can ride forward-facing
in the vehicle. Forward-facing child seats and convertible
child seats used in the forward-facing direction are for
children who are over two years old or who have outgrown
the rear-facing weight or height limit of their rear-facing
convertible child seat. Children should remain in a
forward-facing child seat with a harness for as long as
possible, up to the highest weight or height allowed by the
child seat. All children whose weight or height is above the
forward-facing limit for the child seat should use a
belt-positioning booster seat until the vehicle’s seat belts
fit properly. If the child cannot sit with knees bent over the
vehicle’s seat cushion while the child’s back is against the
seatback, they should use a belt-positioning booster seat.
The child and belt-positioning booster seat are held in the
vehicle by the seat belt.
Children Too Large For Booster Seats
Children who are large enough to wear the shoulder belt
comfortably, and whose legs are long enough to bend over
the front of the seat when their back is against the seatback, should use the seat belt in a rear seat. Use this
simple 5-step test to decide whether the child can use the
vehicle’s seat belt alone:
1. Can the child sit all the way back against the back of
the vehicle seat?
2. Do the child’s knees bend comfortably over the front of the vehicle seat while the child is still sitting all the
way back?
3. Does the shoulder belt cross the child’s shoulder between the neck and arm?
4. Is the lap part of the belt as low as possible, touching the child’s thighs and not the stomach?
5. Can the child stay seated like this for the whole trip?
If the answer to any of these questions was “no,” then the
child still needs to use a booster seat in this vehicle. If the
child is using the lap/shoulder belt, check seat belt fit
periodically and make sure the seat belt buckle is latched.
A child’s squirming or slouching can move the belt out of
position. If the shoulder belt contacts the face or neck,
move the child closer to the center of the vehicle, or use a
booster seat to position the seat belt on the child correctly.
WARNING!
WARNING!
Improper installation can lead to failure of an infant
or child restraint. It could come loose in a collision.
The child could be badly injured or killed. Follow the
child restraint manufacturer’s directions exactly
when installing an infant or child restraint.
After a child restraint is installed in the vehicle, do
not move the vehicle seat forward or rearward
because it can loosen the child restraint attach-
ments. Remove the child restraint before adjusting
the vehicle seat position. When the vehicle seat has
been adjusted, reinstall the child restraint.
When your child restraint is not in use, secure it in the
vehicle with the seat belt or LATCH anchorages, or
remove it from the vehicle. Do not leave it loose in
the vehicle. In a sudden stop or accident, it could
strike the occupants or seatbacks and cause serious
personal injury.
WARNING!
Never allow a child to put the shoulder belt under an
arm or behind their back. In a crash, the shoulder belt
will not protect a child properly, which may result in
serious injury or death. A child must always wear both
the lap and shoulder portions of the seat belt correctly.
6
23_RUP_OM_EN_USC_t.book Page 221
Page 226 of 328

224SAFETY
Frequently Asked Questions About Installing Child Restraints With LATCH
What is the weight limit (child’s weight + weight of the child
restraint) for using the LATCH anchorage system to attach
the child restraint? 65 lb (29.5 kg)Use the LATCH anchorage system until the combined
weight of the child and the child restraint is 65 lb
(29.5 kg). Use the seat belt and tether anchor instead of
the LATCH system once the combined weight is more than
65 lb (29.5 kg).
Can the LATCH anchorages and the seat belt be used
together to attach a rear-facing or forward-facing child
restraint? NoDo not use the seat belt when you use the LATCH
anchorage system to attach a rear-facing or forward-facing
child restraint.
Booster seats may be attached to the LATCH anchorages if
allowed by the booster seat manufacturer. See your
booster seat owner’s manual for more information.
Can two child restraints be attached using a common
lower LATCH anchorage? NoNever “share” a LATCH anchorage with two or more child
restraints. If the center position does not have dedicated
LATCH lower anchorages, use the seat belt to install a child
seat in the center position next to a child seat using the
LATCH anchorages in an outboard position.
Can the rear-facing child restraint touch the back of the
front passenger seat? YesThe child seat may touch the back of the front passenger
seat if the child restraint manufacturer also allows
contact. See your child restraint owner’s manual for more
information.
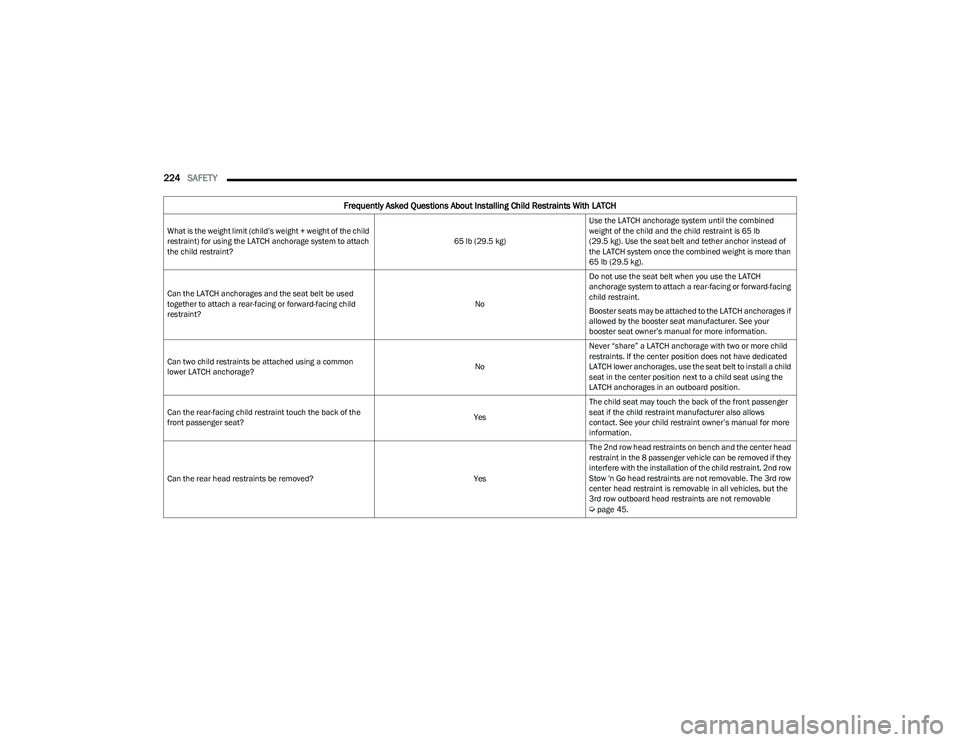
Can the rear head restraints be removed? YesThe 2nd row head restraints on bench and the center head
restraint in the 8 passenger vehicle can be removed if they
interfere with the installation of the child restraint. 2nd row
Stow 'n Go head restraints are not removable. The 3rd row
center head restraint is removable in all vehicles, but the
3rd row outboard head restraints are not removable
Úpage 45.
23_RUP_OM_EN_USC_t.book Page 224
Page 232 of 328

230SAFETY
Car Seat With Head Restraint Folded
Installing A Child Restraint With A
Switchable Automatic Locking Retractor
(ALR):
Child restraint systems are designed to be secured in
vehicle seats by lap belts or the lap belt portion of a lap/
shoulder belt.
1. Place the child seat in the center of the seating
position. If the second row seat can be reclined, you
may recline the seat and/or raise the head restraint
(if adjustable) to get a better fit. If the rear seat can
be moved forward and rearward in the vehicle, you
may wish to move it to its rear-most position to make
room for the child seat. You may also move the front
seat forward to allow more room for the child seat.
2. Pull enough of the seat belt webbing from the retractor to pass it through the belt path of the child restraint. Do
not twist the belt webbing in the belt path.
3. Slide the latch plate into the buckle until you hear a “click.”
4. Pull on the webbing to make the lap portion tight against the child seat.
5. To lock the seat belt, pull down on the shoulder part of the belt until you have pulled all the seat belt
webbing out of the retractor. Then, allow the webbing
to retract back into the retractor. As the webbing
retracts, you will hear a clicking sound. This means
the seat belt is now in the Automatic Locking mode.
6. Try to pull the webbing out of the retractor. If it is locked, you should not be able to pull out any
webbing. If the retractor is not
locked, repeat step 5.
7. Finally, pull up on any excess webbing to tighten the lap portion around the child restraint while you push
the child restraint rearward and downward into the
vehicle seat.
8. If the child restraint has a top tether strap and the seating position has a top tether anchorage, connect
the tether strap to the anchorage and tighten the tether strap. See
Úpage 231 for directions to attach
a tether anchor.
9. Test that the child restraint is installed tightly by pulling back and forth on the child seat at the belt
path. It should not move more than 1 inch (25.4 mm) in any direction.
Any seat belt system will loosen with time, so check the
belt occasionally, and pull it tight if necessary.
Seat Belt Park Stitch — If Equipped
The rear outboard seat belts may be equipped with a park
stitch to raise the latch plate for easier access to
occupants. If the park stitch interferes with the tight
installation of a child restraint, slide the latch plate over
the stitching to shorten the lap portion of the belt and
install the car seat following the steps above. When the
car seat is removed from the vehicle, slide the latch plate
above the park stitch to enable occupants to latch the
seatbelt securely.
Seat Belt Park Stitch Location
1 — Folded Headrest
2 — Child Restraint
WARNING!
Improper installation or failure to properly secure a
child restraint can lead to failure of the restraint. The
child could be badly injured or killed.
Follow the child restraint manufacturer’s directions
exactly when installing an infant or child restraint.
23_RUP_OM_EN_USC_t.book Page 230
Page 235 of 328

SAFETY233
SAFETY TIPS
TRANSPORTING PASSENGERS
NEVER TRANSPORT PASSENGERS IN THE CARGO AREA.
TRANSPORTING PETS
Air Bags deploying in the front seat could harm your pet.
An unrestrained pet will be thrown about and possibly
injured, or injure a passenger during panic braking or in a
collision.
Pets should be restrained in the rear seat (if equipped) in
pet harnesses or pet carriers that are secured by seat
belts.
CONNECTED VEHICLES
Privacy of any wireless and wired communications cannot
be assured. Third parties may unlawfully intercept
information and private communications without your
consent. For further information, refer to “Data Collection
& Privacy” in your Uconnect Owner’s Manual Supplement
or “Onboard Diagnostic System (OBD II) Cybersecurity”
Úpage 109.
SAFETY CHECKS YOU SHOULD MAKE
I
NSIDE THE VEHICLE
Seat Belts
Inspect the seat belt system periodically, checking for
cuts, frays, and loose parts. Damaged parts must be
replaced immediately. Do not disassemble or modify the
system.
If your vehicle is involved in a collision, or if you have
questions regarding seat belt or retractor conditions, take
your vehicle to an authorized FCA dealer or authorized FCA
Certified Collision Care Program facility for inspection.
Air Bag Warning Light
The Air Bag Warning Light will turn on for four to
eight seconds as a bulb check when the
ignition switch is first placed in the ON/RUN
mode. If the light is either not on during
starting, stays on, or turns on while driving, have the
system inspected at an authorized dealer as soon as
possible. After the bulb check, this light will illuminate with
a single chime when a fault with the Air Bag System has
been detected. It will stay on until the fault is removed. If
the light comes on intermittently or remains on while
driving, have an authorized dealer service the vehicle
immediately
Úpage 200.
WARNING!
Do not leave children or animals inside parked vehi -
cles in hot weather. Interior heat buildup may cause
serious injury or death.
It is extremely dangerous to ride in a cargo area,
inside or outside of a vehicle. In a collision, people
riding in these areas are more likely to be seriously
injured or killed.
Do not allow people to ride in any area of your vehicle
that is not equipped with seats and seat belts.
Be sure everyone in your vehicle is in a seat and
using a seat belt properly.
WARNING!
It is not possible to know or to predict all of the possible
outcomes if your vehicle’s systems are breached. It may
be possible that vehicle systems, including safety
related systems, could be impaired or a loss of vehicle
control could occur that may result in an accident
involving serious injury or death.
6
23_RUP_OM_EN_USC_t.book Page 233