2023 CHEVROLET TAHOE ECO mode
[x] Cancel search: ECO modePage 265 of 443
Chevrolet Tahoe/Suburban Owner Manual (GMNA-Localizing-U.S./Canada/
Mexico-16416971) - 2023 - CRC - 5/16/22
264 Driving and Operating
Touch the camera view buttons along the
bottom of the infotainment display to
access each view (if equipped):
1. Front/Rear Standard View
Displays an image of the area in front
or behind the vehicle. To select, touch
Front/Rear Standard View on the
infotainment display when a camera
view is active.
When the hitch guidance is selected,
Rear Standard View will remain visible
across gear changes, otherwise the
view will toggle between Front and
Rear Standard View based on gear
position.
If equipped, the front view camera
also displays when the Park Assist
system detects an object within
30 cm (12 in).
To access this view when in a forward
gear above 12 km/h (8 mph), select
CAMERA on the infotainment display
and select Rear Standard View. The
view will close after 8 seconds and
can be closed early by selecting X,
Home or Back.
2. Front/Rear Top-Down View
Displays a front or rear overhead view
of the vehicle. To view, select Front/
Rear Top-Down View on the
infotainment display when the camera
app is active.
3. Front/Rear side View
Displays a view that shows objects
next to the front or rear sides of the
vehicle. To select, touch Front/Rear
Side View on the infotainment display
when a camera view is active. Touch
the button to toggle between front
and rear camera views. Park Assist and
RCTA overlays are not available when
Front/Rear Side View is active.
4. Hitch View
Displays a zoomed-in view of the hitch
area to assist with aligning the
vehicle’s hitch ball with the trailer
coupler and monitoring the trailer
connection. To view, select Hitch View
on the infotainment display when the
Camera App is active. To access this
view when in a forward gear above
12 km/h (8 mph), select CAMERA on
the infotainment display and select
Hitch View. The view will close after
eight seconds and can be closed earlyby selecting X, Home or Back. Shifting
into P (Park) while in this view will
automatically engage the Electric
Parking Brake (EPB).
5. Surround View
Displays an image of the area
surrounding the vehicle. Surround
View is displayed alongside the
currently selected view when below 12
kph (8 mph). Surround View is
disabled when above 12 kph (8 mph).
6. Camera App Guidance Lines
The Camera App supports three
possible guidance modes: No
Guidance, Vehicle Guidance and
Trailering Guidance. To change
guidance mode, select the appropriate
guidance icon. Depending on the
guidance mode and view selected,
different guidance lines may appear.
A grayed-out icon indicates that
guidance lines are not available.
Certain views do not support Guidance
lines.
.Standard Guidance Lines are
available in Front/Rear Standard
Views, Front/Rear Top-Down Views
and Surround View when the
Page 266 of 443
Chevrolet Tahoe/Suburban Owner Manual (GMNA-Localizing-U.S./Canada/
Mexico-16416971) - 2023 - CRC - 5/16/22
Driving and Operating 265
vehicle guidance mode is selected.
Standard Guidance Lines show
current and intended vehicle path.
.Hitch Guidance Line is available in
Rear Standard View when the
Trailering Guidance mode is
selected. Hitch Guidance displays a
single centered guidance line on
the infotainment display to assist
with aligning the vehicle’s hitch
with a trailer coupler. Align the
Hitch Guidance Line with the
trailer coupler by continuously
steering the vehicle to keep the
guidance line centered on the
coupler when backing. Park Assist
overlays will not display when the
Hitch Guidance Line is active.
.Rear Trailer Guidance Lines are
available in the Rear Trailer View
when the Trailering Guidance
mode is selected and the rear
trailer camera calibration has been
successfully completed. Rear Trailer
Guidance Lines show the intended
path (yellow) and the current path
(blue) of the trailer. The current
path guidance lines will converge
with the intended path guidance
lines.
7. Interior Trailer View
Displays a view of the interior of the
trailer. The feature is available when a
trailer is connected. The feature
requires user installation of an
accessory trailer camera on the
interior of the trailer per the accessory
trailer camera installation instructions
(see your dealer for accessory trailer
camera(s) and information). To view,
select Interior Trailer View on the
infotainment display when the Camera
App is active. To access this view
when in a forward gear above
12 km/h (8 mph), select CAMERA on
the infotainment display and select
Interior Trailer View. The view will
close after 8 seconds and can be
closed early by selecting X, Home
or Back.
8. Transparent Trailer View
Displays a view that allows the driver
to virtually“see through” the trailer.
The feature is available when a
compatible trailer is connected, a valid
profile is selected and the vehicle is
not in Reverse. The feature requires
user installation of an accessory trailer
camera on the rear exterior surface of
the trailer per the accessory trailer camera installation instructions (see
your dealer for accessory trailer
camera(s) and information). To view,
select Transparent Trailer View on the
infotainment display when the Camera
App is active. To access this view
when in a forward gear above
12 km/h (8 mph), select CAMERA on
the infotainment display and select
Transparent Trailer View. The view can
be closed by selecting X, Home
or Back.
When the system is calibrated and
trailer position is known one of three
views will be shown; Transparent
Trailer View, Left Transparent Trailer
View or Right Transparent Trailer
View. The Transparent Trailer View is
shown when the position of the trailer
is relatively straight behind the
vehicle. The Left or Right Transparent
Trailer view is shown when the
position of the trailer is too far to the
left or right. When the system is not
calibrated or trailer position is not
known the Transparent Trailer
Picture-in-Picture View will be shown.
Page 278 of 443

Chevrolet Tahoe/Suburban Owner Manual (GMNA-Localizing-U.S./Canada/
Mexico-16416971) - 2023 - CRC - 5/16/22
Driving and Operating 277
Following Distance Indicator
The following distance to a moving vehicle
ahead in your path is indicated in following
time in seconds on the Driver Information
Center (DIC). SeeDriver Information Center
(DIC) (Uplevel) 0126 orDriver Information
Center (DIC) (Base Level) 0123. The
minimum following time is 0.5 seconds
away. If there is no vehicle detected ahead,
or the vehicle ahead is out of sensor range,
dashes will be displayed.
Unnecessary Alerts
FCA may provide unnecessary alerts for
turning vehicles, vehicles in other lanes,
objects that are not vehicles, or shadows.
These alerts are normal operation and the
vehicle does not need service.
Cleaning the System
If the FCA system does not seem to operate
properly, this may correct the issue:
.Clean the outside of the windshield in
front of the rearview mirror.
.Clean the entire front of the vehicle.
.Clean the headlamps.
For cleaning instructions, see “Washing the
Vehicle” underExterior Care 0390. System operation may also be limited under
snow, heavy rain, or road spray conditions.
Automatic Emergency
Braking (AEB)
If equipped, the AEB system may help avoid
or reduce the harm caused by front-end
crashes. AEB also includes Intelligent Brake
Assist (IBA). When the system detects a
vehicle ahead in your path that is traveling
in the same direction that you may be
about to crash into, it can provide a boost
to braking or automatically brake the
vehicle. This can help avoid or lessen the
severity of crashes when driving in a
forward gear. Depending on the situation,
the vehicle may automatically brake
moderately or hard. This automatic
emergency braking can only occur if a
vehicle is detected. This is shown by the FCA
vehicle ahead indicator being lit. See
Forward Collision Alert (FCA) System
0275.
The system works when driving in a forward
gear between 8 km/h (5 mph) and 80 km/h
(50 mph), or on vehicles with Adaptive
Cruise Control (ACC), above 4 km/h (2 mph).
It can detect vehicles up to approximately
60 m (197 ft).
{Warning
AEB is an emergency crash preparation
feature and is not designed to avoid
crashes. Do not rely on AEB to brake the
vehicle. AEB will not brake outside of its
operating speed range and only responds
to detected vehicles.
AEB may not:
.Detect a vehicle ahead on winding or
hilly roads.
.Detect all vehicles, especially vehicles
with a trailer, tractors, muddy
vehicles, etc.
.Detect a vehicle when weather limits
visibility, such as in fog, rain, or snow.
.Detect a vehicle ahead if it is partially
blocked by pedestrians or other
objects.
Complete attention is always required
while driving, and you should be ready to
take action and apply the brakes and/or
steer the vehicle to avoid crashes.
Page 289 of 443

Chevrolet Tahoe/Suburban Owner Manual (GMNA-Localizing-U.S./Canada/
Mexico-16416971) - 2023 - CRC - 5/16/22
288 Driving and Operating
Warning (Continued)
.Do not fill a container while it is
inside a vehicle, in a vehicle's trunk, in
a pickup bed, or on any surface other
than the ground.
.Bring the fill nozzle in contact with
the inside of the fill opening before
operating the nozzle. Maintain contact
until filling is complete.
.Keep sparks, flames, and smoking
materials away from fuel.
.Avoid using electronic devices while
pumping fuel.
Trailer Towing
General Towing Information
Only use towing equipment that has been
designed for the vehicle. Contact your dealer
or trailering dealer for assistance with
preparing the vehicle to tow a trailer. Read
the entire section before towing a trailer.
To tow a disabled vehicle, seeTransporting
a Disabled Vehicle 0386. To tow the vehicle
behind another vehicle such as a motor
home, see Recreational Vehicle Towing
0 387.
Driving Characteristics and
Towing Tips
{Warning
You can lose control when towing a
trailer if the correct equipment is not
used or the vehicle is not driven properly.
For example, if the trailer is too heavy or
the trailer brakes are inadequate for the
load, the vehicle may not stop as
expected. You and others could be
seriously injured. The vehicle may also be
damaged, and the repairs would not be
covered by the vehicle warranty. Pull a
trailer only if all the steps in this section
have been followed. Ask your dealer for
advice and information about towing a
trailer with the vehicle.
Driving with a Trailer
Trailering is different than just driving the
vehicle by itself. Trailering means changes in
handling, acceleration, braking, durability,
and fuel economy. Successful, safe trailering
requires the proper use of correct
equipment. The following information has many
time-tested, important trailering tips and
safety rules. Many of these are important
for your safety and that of your passengers.
Read this section carefully before towing a
trailer.
When towing a trailer:
.Become familiar with, and follow all state
and local laws that apply to trailer
towing. These requirements vary from
state to state.
.State laws may require the use of
extended side view mirrors. If your
visibility is limited or restricted while
towing, install extended side view mirrors
on your vehicle, even if not required.
.Do not tow a trailer during the first 800
km (500 mi) of vehicle use to prevent
damage to the engine, axle, or other
parts.
.Perform the first oil change before heavy
towing.
.Do not drive over 800 km/h (50 mph) and
do not make starts at full throttle during
the first 800 km (500 mi) of trailer
towing.
.Tow in D (Drive). Tow/Haul Mode is
recommended for heavier trailers. See
Driver Mode Control
0228. If the
Page 292 of 443

Chevrolet Tahoe/Suburban Owner Manual (GMNA-Localizing-U.S./Canada/
Mexico-16416971) - 2023 - CRC - 5/16/22
Driving and Operating 291
2. Let up on the brake pedal.
3. Drive slowly until the trailer is clear ofthe chocks.
4. Stop and have someone pick up and store the chocks.
Launching and Retrieving a Boat
Backing the Trailer into the Water
{Warning
.Have all passengers get out of the
vehicle before backing onto the sloped
part of the ramp. Lower the driver and
passenger side windows before
backing onto the ramp. This will
provide a means of escape in the
unlikely event the vehicle slides into
the water.
.If the boat launch surface is slippery,
have the driver remain in the vehicle
with the brake pedal applied while the
boat is being launched. The boat
launch can be especially slippery at
low tide when part of the ramp was
previously submerged at high tide. Do
not back onto the ramp to launch the
boat if you are not sure the vehicle
can maintain traction.
(Continued)
Warning (Continued)
.Do not move the vehicle if someone is
in the path of the trailer. Some parts
of the trailer might be underwater and
not visible to people who are assisting
in launching the boat.
Disconnect the wiring to the trailer before
backing the trailer into the water to prevent
damage to the electrical circuits on the
trailer. Reconnect the wiring to the trailer
after removing the trailer from the water.
If the trailer has electric brakes that can
function when the trailer is submerged, it
might help to leave the electrical trailer
connector attached to maintain trailer brake
functionality while on the boat ramp.
To back the trailer into the water: 1. If equipped, place the vehicle in Four-Wheel Drive High or Automatic
Four-Wheel Drive.
2. Slowly back down the boat ramp until the boat is floating, but no further than
necessary.
3. Press and hold the brake pedal, but do not shift into P (Park) yet.
4. Have someone place chocks under the front wheels of the vehicle. 5. Gradually release the brake pedal to
allow the chocks to absorb the load of
the trailer.
6. Reapply the brake pedal. Then apply the parking brake and shift into P (Park).
7. Release the brake pedal.
Pulling the Trailer from the Water 1. Press and hold the brake pedal.
2. Start the engine and shift into a gear.
3. Release the parking brake.
4. Let up on the brake pedal.
5. Drive slowly until the tires are clear of the chocks.
6. Stop and have someone pick up and store the chocks.
7. Slowly pull the trailer from the water.
8. Once the vehicle and trailer have been driven from the sloped part of the boat
ramp, the vehicle can be shifted from
four-wheel-drive high. Shift into the drive
mode that is appropriate for the road
conditions.
Page 300 of 443
Chevrolet Tahoe/Suburban Owner Manual (GMNA-Localizing-U.S./Canada/
Mexico-16416971) - 2023 - CRC - 5/16/22
Driving and Operating 299
MeasurementHeight Example 1500 (mm)
H1 1000
H2 1050
H2-H1 50
(H2-H1)/2 25
H2- [(H2-H1)/2] 1025
Towing with the Four Corner Air Suspension
System 1. Adjust the vehicle air suspension to "Normal Ground Clearance Height."
2. Position the truck so that the trailer is ready to connect (Keep trailer detached).
3. Enable air suspension ‘Service Mode’in
the center infotainment screen under
Settings/Vehicle/Suspension.
4. Measure the height of the top of the front wheel opening at the fender to the
ground (H1).
5. Attach the vehicle to the trailer, do not attach weight distribution bars at
this time. 6. Measure the height of the top of the
front wheel opening on the fender to
the ground (H2).
7. Install and adjust the tension in the weight distributing bars per the
manufacturers’ recommendations so that
the height of the front fender is
approximately H2- [(H2-H1)/3] (1/3
between the two measured ride heights,
below the secondary ride height {H2}). 8. Disable air suspension air suspension
"Service Mode."
9. Air suspension will automatically adjust ride height following step 8.
10. Visually inspect the trailer and weight-distributing hitch to ensure that
the manufacturers’ recommendations
have been met.
Page 303 of 443
Chevrolet Tahoe/Suburban Owner Manual (GMNA-Localizing-U.S./Canada/
Mexico-16416971) - 2023 - CRC - 5/16/22
302 Driving and Operating
towing a trailer, the arrows on the
instrument cluster illuminate even if the
trailer is not properly connected or the bulbs
are burned out.
Tow/Haul Mode
For instructions on how to enter Tow/Haul
mode, seeDriver Mode Control 0228.
Tow/Haul assists when pulling a heavy
trailer or a large or heavy load.
Tow/Haul Mode is designed to be most
effective when the vehicle and trailer
combined weight is at least 75% of the
vehicle's Gross Combined Weight Rating
(GCWR). See “Maximum Trailer Weight”
under Trailer Towing 0292.
Tow/Haul Mode is most useful when towing
a heavy trailer or carrying a large or
heavy load:
.through rolling terrain
.in stop-and-go traffic
.in busy parking lots
Operating the vehicle in Tow/Haul Mode
when lightly loaded or not towing will not
cause damage; however, it is not
recommended and may result in unpleasant
engine and transmission driving
characteristics and reduced fuel economy.
Integrated Trailer Brake Control System
The vehicle may have an Integrated Trailer
Brake Control (ITBC) system for use with
electric trailer brakes or most electric over
hydraulic trailer brake systems. These
instructions apply to both types of electric
trailer brakes.
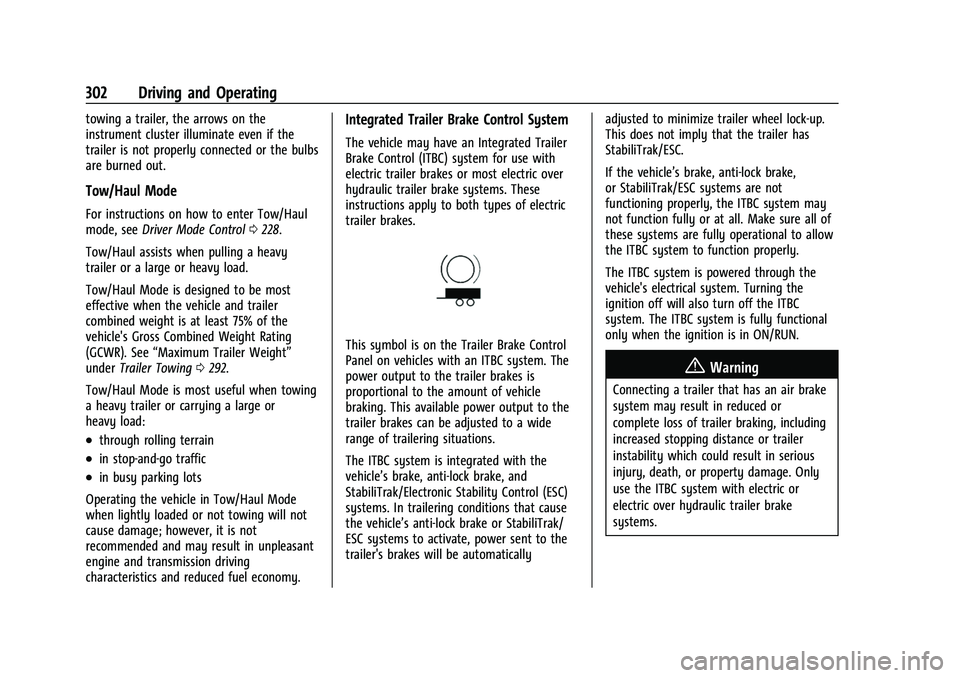
This symbol is on the Trailer Brake Control
Panel on vehicles with an ITBC system. The
power output to the trailer brakes is
proportional to the amount of vehicle
braking. This available power output to the
trailer brakes can be adjusted to a wide
range of trailering situations.
The ITBC system is integrated with the
vehicle’s brake, anti-lock brake, and
StabiliTrak/Electronic Stability Control (ESC)
systems. In trailering conditions that cause
the vehicle’s anti-lock brake or StabiliTrak/
ESC systems to activate, power sent to the
trailer's brakes will be automatically adjusted to minimize trailer wheel lock-up.
This does not imply that the trailer has
StabiliTrak/ESC.
If the vehicle’s brake, anti-lock brake,
or StabiliTrak/ESC systems are not
functioning properly, the ITBC system may
not function fully or at all. Make sure all of
these systems are fully operational to allow
the ITBC system to function properly.
The ITBC system is powered through the
vehicle's electrical system. Turning the
ignition off will also turn off the ITBC
system. The ITBC system is fully functional
only when the ignition is in ON/RUN.
{Warning
Connecting a trailer that has an air brake
system may result in reduced or
complete loss of trailer braking, including
increased stopping distance or trailer
instability which could result in serious
injury, death, or property damage. Only
use the ITBC system with electric or
electric over hydraulic trailer brake
systems.
Page 307 of 443
Chevrolet Tahoe/Suburban Owner Manual (GMNA-Localizing-U.S./Canada/
Mexico-16416971) - 2023 - CRC - 5/16/22
306 Driving and Operating
Warning (Continued)
configuration, or improperly inflated or
incorrect vehicle or trailer tires. See
Towing Equipment0296 for trailer
ratings and hitch setup recommendations.
Aftermarket Electronic Trailer Sway
Control Devices
Some trailers may come equipped with an
electronic device designed to reduce or
control trailer sway. Aftermarket equipment
manufacturers also offer similar devices that
connect to the wiring between the trailer
and the vehicle. These devices may interfere
with the vehicle’s trailer brake systems or
other systems, including integrated
anti-sway systems, if equipped. Messages
related to trailer connections or trailer
brakes could appear on the DIC. The effects
of these aftermarket devices on vehicle
handling or trailer brake performance is not
known.
{Warning
Use of aftermarket electronic trailer sway
control devices could result in reduced
trailer brake performance, loss of trailer (Continued)
Warning (Continued)
brakes, or other malfunctions, and result
in a crash. You or others could be
seriously injured or killed. Before using
one of these devices:
.Ask the device or trailer manufacturer
if the device has been thoroughly
tested for compatibility with the
make, model, and year of your vehicle
and any optional equipment installed
on your vehicle.
.Before driving, check the trailer brakes
are working properly, if equipped.
Drive the vehicle with the trailer
attached on a level road surface that
is free of traffic at about 32-40 km/h
(20-25 mph) and fully apply the
manual trailer brake apply lever. Also,
check the trailer brake lamps and
other lamps are functioning correctly.
.If the trailer brakes are not operating
properly at any time, or if a DIC
message indicates problems with the
trailer connections or trailer brakes,
carefully pull the vehicle over to the
side of the road when traffic
conditions allow.
Trailer Tires
Special Trailer (ST) tires differ from vehicle
tires. Trailer tires are designed with stiff
sidewalls to help prevent sway and to
support heavy loads. These features can
make it difficult to determine if the trailer
tire pressures are low only based on a visual
inspection.
Always check all trailer tire pressures before
each trip when the tires are cool. Low trailer
tire pressure is a leading cause of trailer tire
blow-outs.
If the vehicle is equipped with a trailer tire
pressure monitoring system, see the trailer
tire pressure monitoring system description
and the trailering app.
Trailer tires deteriorate over time. The trailer
tire sidewall will show the week and year
the tire was manufactured. Many trailer tire
manufacturers recommend replacing tires
more than six years old.
Overloading is another leading cause of
trailer tire blow-outs. Never load your trailer
with more weight than the tires are
designed to support. The load rating is
located on the trailer tire sidewall.