2023 CHEVROLET SUBURBAN instrument panel
[x] Cancel search: instrument panelPage 191 of 443

Chevrolet Tahoe/Suburban Owner Manual (GMNA-Localizing-U.S./Canada/
Mexico-16416971) - 2023 - CRC - 4/25/22
190 Climate Controls
5. AUTO (Automatic Operation)
If the dual automatic climate control system
rear climate control lockout feature is
locked, the rear climate control settings can
only be adjusted from the front seat.
Rear Climate Display, Uplevel Shown
1. Rear Climate Temperature Setting
2. Fan Control
3. Sync (Synchronized Temperatures)
4. Rear Control Lockout
5. Auto (Automatic Operation)
6. Air Delivery Mode Control
7. On/Off (Power)
8. Rear Climate Selection 9. Rear Climate Temperature Control
Automatic Operation
AUTO :
Press AUTO to automatically control
the temperature, air delivery, and fan speed
for rear seat passengers. AUTO is indicated
in the display when automatic operation is
active.
If any of the rear climate control settings
are manually adjusted, full automatic
operation is canceled. Press AUTO to return
to full automatic operation.
The display only indicates climate control
functions when the system is in rear
independent mode.
Manual Operation
9: Turn clockwise or counterclockwise to
increase or decrease the fan speed. Turn
completely counterclockwise to turn the
fan/power off.
TEMP : Turn clockwise or counterclockwise
to increase or decrease the airflow
temperature into the passenger area. If the
SYNC button is pressed on the front climate
controls, the rear climate temperature is
linked to the driver temperature setting. MODE :
Press to change the direction of the
airflow in the vehicle. Repeatedly press the
button until the desired mode appears on
the display. Multiple presses will cycle
through the delivery selections.
MorL: If equipped, pressMorLto
heat the left or right outboard seat cushion.
See Heated Rear Seats 048.
Air Vents
Adjustable air vents are in the center and on
the side of the instrument panel.
Move the slider knobs to change the
direction of the airflow. To close the vent,
adjust slider knob away from you.
Page 204 of 443
Chevrolet Tahoe/Suburban Owner Manual (GMNA-Localizing-U.S./Canada/
Mexico-16416971) - 2023 - CRC - 5/16/22
Driving and Operating 203
Winter Driving
Driving on Snow or IceCaution
To avoid damage to the wheels and
brake components, always clear snow and
ice from inside the wheels and
underneath the vehicle before driving.
Snow or ice between the tires and the road
creates less traction or grip, so drive
carefully. Wet ice can occur at about 0 °C
(32 °F) when freezing rain begins to fall.
Avoid driving on wet ice or in freezing rain
until roads can be treated.
For Slippery Road Driving:
.Accelerate gently. Accelerating too quickly
causes the wheels to spin and makes the
surface under the tires slick.
.Turn on Traction Control. See Traction
Control/Electronic Stability Control 0225.
.The Antilock Brake System (ABS) improves
vehicle stability during hard stops, but
the brakes should be applied sooner than
when on dry pavement. See Antilock
Brake System (ABS) 0223.
.Allow greater following distance and
watch for slippery spots. Icy patches can
occur on otherwise clear roads in shaded
areas. The surface of a curve or an
overpass can remain icy when the
surrounding roads are clear. Avoid sudden
steering maneuvers and braking while
on ice.
.Turn off cruise control.
Cold Weather Mode
In very low temperatures, a cold weather
message may display on the Driver
Information Center (DIC). The engine speed,
transmission shift patterns, and cabin fan
speed may operate differently to enable the
vehicle to warm up quicker. You can
manually override the cabin fan speed in
cold weather mode.
Blizzard Conditions
Stop the vehicle in a safe place and signal
for help. Stay with the vehicle unless there
is help nearby. If possible, use Roadside
Assistance. See Roadside Assistance Program
0 414. To get help and keep everyone in the
vehicle safe:
.Turn on the hazard warning flashers.
.Tie a red cloth to an outside mirror.
{Warning
Snow can trap engine exhaust under the
vehicle. This may cause exhaust gases to
get inside. Engine exhaust contains
carbon monoxide (CO), which cannot be
seen or smelled. It can cause
unconsciousness and even death.
If the vehicle is stuck in snow:
.Clear snow from the base of the
vehicle, especially any blocking the
exhaust pipe.
.Open a window about 5 cm (2 in) on
the vehicle side that is away from the
wind, to bring in fresh air.
.Fully open the air outlets on or under
the instrument panel.
.Adjust the climate control system to
circulate the air inside the vehicle and
set the fan speed to the highest
setting. See “Climate Control Systems.”
For more information about CO, see
Engine Exhaust 0214.
Page 227 of 443
Chevrolet Tahoe/Suburban Owner Manual (GMNA-Localizing-U.S./Canada/
Mexico-16416971) - 2023 - CRC - 5/16/22
226 Driving and Operating
stuck in sand, mud, ice, or snow. SeeIf the
Vehicle Is Stuck 0204 and “Turning the
Systems Off and On” later in this section.
When the transfer case (if equipped) is in
Four-Wheel Drive Low, the TCS and
StabiliTrak/ESC are automatically disabled,
g
comes on, and the appropriate message will
appear on the Driver Information
Center (DIC).
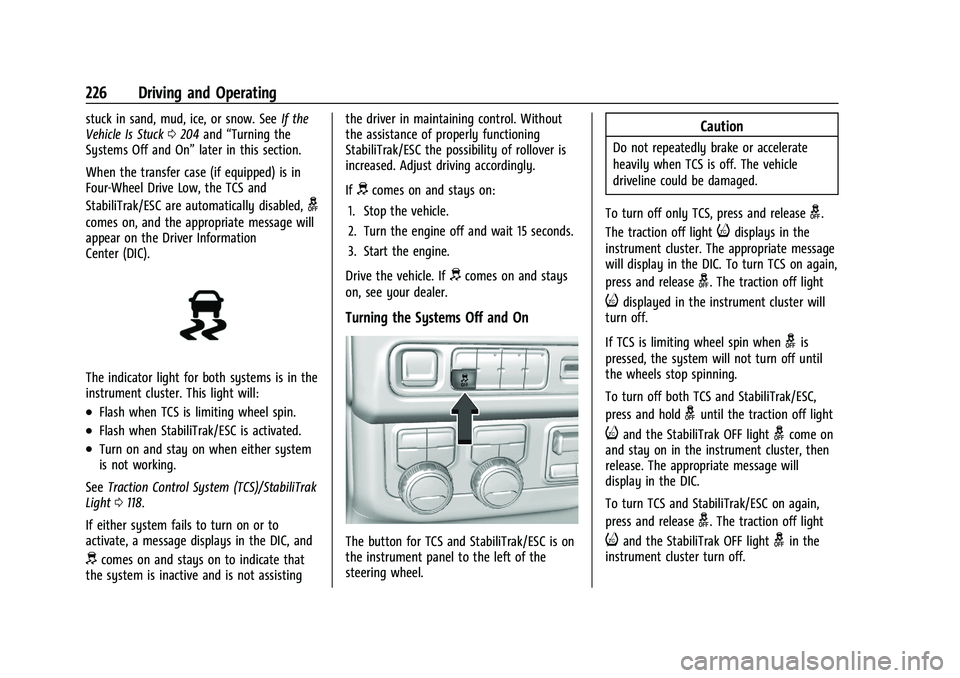
The indicator light for both systems is in the
instrument cluster. This light will:
.Flash when TCS is limiting wheel spin.
.Flash when StabiliTrak/ESC is activated.
.Turn on and stay on when either system
is not working.
See Traction Control System (TCS)/StabiliTrak
Light 0118.
If either system fails to turn on or to
activate, a message displays in the DIC, and
dcomes on and stays on to indicate that
the system is inactive and is not assisting the driver in maintaining control. Without
the assistance of properly functioning
StabiliTrak/ESC the possibility of rollover is
increased. Adjust driving accordingly.
If
dcomes on and stays on:
1. Stop the vehicle.
2. Turn the engine off and wait 15 seconds.
3. Start the engine.
Drive the vehicle. If
dcomes on and stays
on, see your dealer.
Turning the Systems Off and On
The button for TCS and StabiliTrak/ESC is on
the instrument panel to the left of the
steering wheel.
Caution
Do not repeatedly brake or accelerate
heavily when TCS is off. The vehicle
driveline could be damaged.
To turn off only TCS, press and release
g.
The traction off light
idisplays in the
instrument cluster. The appropriate message
will display in the DIC. To turn TCS on again,
press and release
g. The traction off light
idisplayed in the instrument cluster will
turn off.
If TCS is limiting wheel spin when
gis
pressed, the system will not turn off until
the wheels stop spinning.
To turn off both TCS and StabiliTrak/ESC,
press and hold
guntil the traction off light
iand the StabiliTrak OFF lightgcome on
and stay on in the instrument cluster, then
release. The appropriate message will
display in the DIC.
To turn TCS and StabiliTrak/ESC on again,
press and release
g. The traction off light
iand the StabiliTrak OFF lightgin the
instrument cluster turn off.
Page 228 of 443
Chevrolet Tahoe/Suburban Owner Manual (GMNA-Localizing-U.S./Canada/
Mexico-16416971) - 2023 - CRC - 5/16/22
Driving and Operating 227
For vehicles without four corner air
suspension StabiliTrak/ESC will automatically
turn on if the vehicle exceeds 56 km/h
(35 mph). Traction control will remain off.
For vehicles with four corner air suspension
StabiliTrak/ESC will automatically turn on if
the vehicle exceeds 32 km/h (20 mph).
The vehicle has a Trailer Sway Control (TSC)
feature and a Hill Start Assist (HSA) feature.
SeeTrailer Sway Control (TSC) 0305 or
Hill Start Assist (HSA) 0225.
Adding accessories can affect the vehicle
performance. See Accessories and
Modifications 0319.
Hill Descent Control (HDC)
If equipped, Hill Descent Control (HDC) sets
and maintains vehicle speed while driving
down steep grades in a forward or reverse
gear. The HDC switch is on the instrument
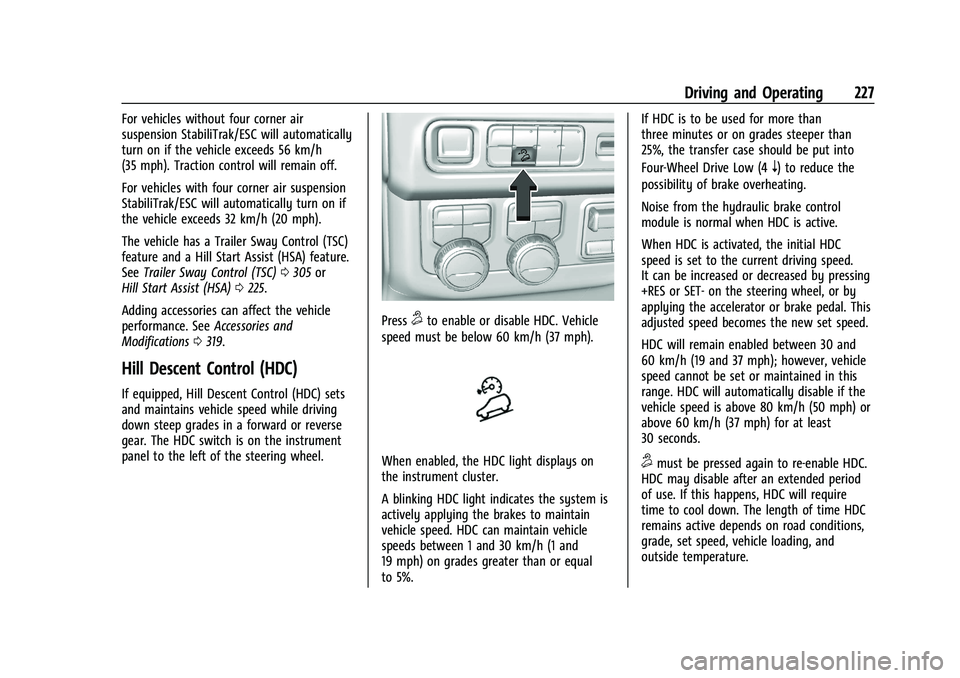
panel to the left of the steering wheel.
Press5to enable or disable HDC. Vehicle
speed must be below 60 km/h (37 mph).
When enabled, the HDC light displays on
the instrument cluster.
A blinking HDC light indicates the system is
actively applying the brakes to maintain
vehicle speed. HDC can maintain vehicle
speeds between 1 and 30 km/h (1 and
19 mph) on grades greater than or equal
to 5%. If HDC is to be used for more than
three minutes or on grades steeper than
25%, the transfer case should be put into
Four-Wheel Drive Low (4
n) to reduce the
possibility of brake overheating.
Noise from the hydraulic brake control
module is normal when HDC is active.
When HDC is activated, the initial HDC
speed is set to the current driving speed.
It can be increased or decreased by pressing
+RES or SET- on the steering wheel, or by
applying the accelerator or brake pedal. This
adjusted speed becomes the new set speed.
HDC will remain enabled between 30 and
60 km/h (19 and 37 mph); however, vehicle
speed cannot be set or maintained in this
range. HDC will automatically disable if the
vehicle speed is above 80 km/h (50 mph) or
above 60 km/h (37 mph) for at least
30 seconds.
5must be pressed again to re-enable HDC.
HDC may disable after an extended period
of use. If this happens, HDC will require
time to cool down. The length of time HDC
remains active depends on road conditions,
grade, set speed, vehicle loading, and
outside temperature.
Page 233 of 443
Chevrolet Tahoe/Suburban Owner Manual (GMNA-Localizing-U.S./Canada/
Mexico-16416971) - 2023 - CRC - 5/16/22
232 Driving and Operating
Changing Ride Height
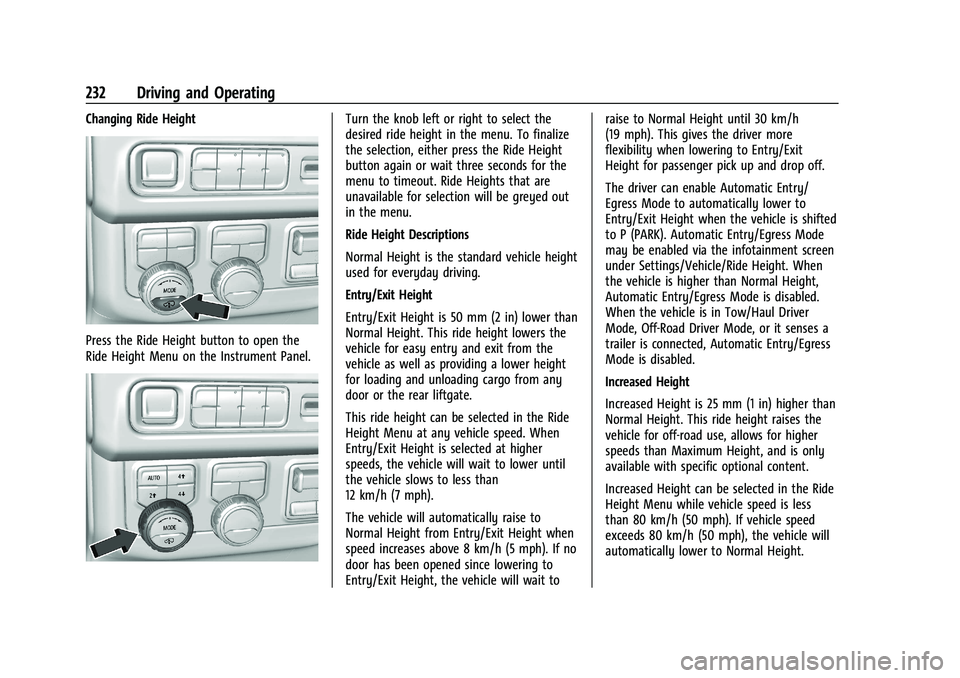
Press the Ride Height button to open the
Ride Height Menu on the Instrument Panel.
Turn the knob left or right to select the
desired ride height in the menu. To finalize
the selection, either press the Ride Height
button again or wait three seconds for the
menu to timeout. Ride Heights that are
unavailable for selection will be greyed out
in the menu.
Ride Height Descriptions
Normal Height is the standard vehicle height
used for everyday driving.
Entry/Exit Height
Entry/Exit Height is 50 mm (2 in) lower than
Normal Height. This ride height lowers the
vehicle for easy entry and exit from the
vehicle as well as providing a lower height
for loading and unloading cargo from any
door or the rear liftgate.
This ride height can be selected in the Ride
Height Menu at any vehicle speed. When
Entry/Exit Height is selected at higher
speeds, the vehicle will wait to lower until
the vehicle slows to less than
12 km/h (7 mph).
The vehicle will automatically raise to
Normal Height from Entry/Exit Height when
speed increases above 8 km/h (5 mph). If no
door has been opened since lowering to
Entry/Exit Height, the vehicle will wait toraise to Normal Height until 30 km/h
(19 mph). This gives the driver more
flexibility when lowering to Entry/Exit
Height for passenger pick up and drop off.
The driver can enable Automatic Entry/
Egress Mode to automatically lower to
Entry/Exit Height when the vehicle is shifted
to P (PARK). Automatic Entry/Egress Mode
may be enabled via the infotainment screen
under Settings/Vehicle/Ride Height. When
the vehicle is higher than Normal Height,
Automatic Entry/Egress Mode is disabled.
When the vehicle is in Tow/Haul Driver
Mode, Off-Road Driver Mode, or it senses a
trailer is connected, Automatic Entry/Egress
Mode is disabled.
Increased Height
Increased Height is 25 mm (1 in) higher than
Normal Height. This ride height raises the
vehicle for off-road use, allows for higher
speeds than Maximum Height, and is only
available with specific optional content.
Increased Height can be selected in the Ride
Height Menu while vehicle speed is less
than 80 km/h (50 mph). If vehicle speed
exceeds 80 km/h (50 mph), the vehicle will
automatically lower to Normal Height.
Page 290 of 443
Chevrolet Tahoe/Suburban Owner Manual (GMNA-Localizing-U.S./Canada/
Mexico-16416971) - 2023 - CRC - 5/16/22
Driving and Operating 289
transmission downshifts too often, a
lower gear may be selected using Manual
Mode. SeeManual Mode 0218.
If equipped, the following driver assistance
features should be turned off when towing
a trailer:
.Park Assist
.Automatic Parking Assist (APA)
.Reverse Automatic Braking (RAB)
If equipped, the following driver assistance
features should be turned to alert or off
when towing a trailer, unless equipped with
Super Cruise:
.Automatic Emergency Braking (AEB)
.Front Pedestrian Braking (FPB)
If equipped with Lane Change Alert (LCA),
the LCA detection zones that extend back
from the side of the vehicle do not move
further back when a trailer is towed. Use
caution while changing lanes when towing a
trailer.
If equipped with Rear Cross Traffic Alert RIM
(RCTA, RTCB, and RAB), these features will be
disabled when towing a trailer.
{Warning
When towing a trailer, exhaust gases
may collect at the rear of the vehicle and
enter if the liftgate, trunk/hatch,
or rear-most window is open.
When towing a trailer:
.Do not drive with the liftgate, trunk/
hatch, or rear-most window open.
.Fully open the air outlets on or under
the instrument panel.
.Also adjust the climate control system
to a setting that brings in only outside
air. See “Climate Control Systems” in
the Index.
For more information about carbon
monoxide, see Engine Exhaust 0214.
Towing a trailer requires experience. The
combination of the vehicle and trailer is
longer and not as responsive as the vehicle
itself. Get used to the handling and braking
of the combination by driving on a level
road surface before driving on public roads.
The trailer structure, the tires, and the
brakes must be all be rated to carry the
intended cargo. Inadequate trailer equipment can cause the combination to
operate in an unexpected or unsafe manner.
Before driving, inspect all trailer hitch parts
and attachments, safety chains, electrical
connectors, lamps, tires, and mirrors. See
Towing Equipment
0296. If the trailer has
electric brakes, start the combination
moving and then manually apply the trailer
brake controller to check the trailer brakes
work. During the trip, occasionally check
that the cargo and trailer are secure and
that the lamps and any trailer brakes are
working.Towing with a Stability Control System
When towing, the stability control system
might be heard. The system reacts to
vehicle movement caused by the trailer,
which mainly occurs during cornering. This is
normal when towing heavier trailers.
Following Distance
Stay at least twice as far behind the vehicle
ahead as you would when driving without a
trailer. This can help to avoid heavy braking
and sudden turns.
Page 303 of 443
Chevrolet Tahoe/Suburban Owner Manual (GMNA-Localizing-U.S./Canada/
Mexico-16416971) - 2023 - CRC - 5/16/22
302 Driving and Operating
towing a trailer, the arrows on the
instrument cluster illuminate even if the
trailer is not properly connected or the bulbs
are burned out.
Tow/Haul Mode
For instructions on how to enter Tow/Haul
mode, seeDriver Mode Control 0228.
Tow/Haul assists when pulling a heavy
trailer or a large or heavy load.
Tow/Haul Mode is designed to be most
effective when the vehicle and trailer
combined weight is at least 75% of the
vehicle's Gross Combined Weight Rating
(GCWR). See “Maximum Trailer Weight”
under Trailer Towing 0292.
Tow/Haul Mode is most useful when towing
a heavy trailer or carrying a large or
heavy load:
.through rolling terrain
.in stop-and-go traffic
.in busy parking lots
Operating the vehicle in Tow/Haul Mode
when lightly loaded or not towing will not
cause damage; however, it is not
recommended and may result in unpleasant
engine and transmission driving
characteristics and reduced fuel economy.
Integrated Trailer Brake Control System
The vehicle may have an Integrated Trailer
Brake Control (ITBC) system for use with
electric trailer brakes or most electric over
hydraulic trailer brake systems. These
instructions apply to both types of electric
trailer brakes.
This symbol is on the Trailer Brake Control
Panel on vehicles with an ITBC system. The
power output to the trailer brakes is
proportional to the amount of vehicle
braking. This available power output to the
trailer brakes can be adjusted to a wide
range of trailering situations.
The ITBC system is integrated with the
vehicle’s brake, anti-lock brake, and
StabiliTrak/Electronic Stability Control (ESC)
systems. In trailering conditions that cause
the vehicle’s anti-lock brake or StabiliTrak/
ESC systems to activate, power sent to the
trailer's brakes will be automatically adjusted to minimize trailer wheel lock-up.
This does not imply that the trailer has
StabiliTrak/ESC.
If the vehicle’s brake, anti-lock brake,
or StabiliTrak/ESC systems are not
functioning properly, the ITBC system may
not function fully or at all. Make sure all of
these systems are fully operational to allow
the ITBC system to function properly.
The ITBC system is powered through the
vehicle's electrical system. Turning the
ignition off will also turn off the ITBC
system. The ITBC system is fully functional
only when the ignition is in ON/RUN.
{Warning
Connecting a trailer that has an air brake
system may result in reduced or
complete loss of trailer braking, including
increased stopping distance or trailer
instability which could result in serious
injury, death, or property damage. Only
use the ITBC system with electric or
electric over hydraulic trailer brake
systems.
Page 304 of 443

Chevrolet Tahoe/Suburban Owner Manual (GMNA-Localizing-U.S./Canada/
Mexico-16416971) - 2023 - CRC - 5/16/22
Driving and Operating 303
Trailer Brake Control Panel
1. Manual Trailer Brake Apply Lever
2. Trailer Symbol
3. Trailer Gain Adjustment Buttons
The ITBC control panel is on the instrument
panel to the left of the steering column. The
control panel allows adjustment to the
amount of output, referred to as Trailer
Gain, available to the trailer brakes and
allows manual application of the trailer
brakes. Use the ITBC control panel and the
DIC trailer brake display page to adjust and
display power output to the trailer brakes.Trailer Brake DIC Display Page
The ITBC display page indicates:
.Trailer Gain setting
.Output to the trailer brakes
.Trailer connection
.System operational status.
To display:
.Scroll through the DIC menu pages
.Press a Trailer Gain (+) or (−) button
.Activate the Manual Trailer Brake Apply
Lever
TRAILER GAIN:
Press a Trailer Gain button to recall the
current Trailer Gain setting. Each press and
release of the gain buttons will then change
the Trailer Gain setting. Press the Trailer
Gain (+) or (−) to adjust. Press and hold to
continuously adjust the Trailer Gain. To turn
the output to the trailer off, adjust the
Trailer Gain setting to 0.0. This setting can
be adjusted from 0.0 to 10.0 with a trailer
connected or disconnected.
TRAILER OUTPUT: This displays anytime a
trailer with electric brakes is connected.
Output to the trailer brakes is based on the
amount of vehicle braking present and relative to the Trailer Gain setting. Output is
displayed from 0 to 100% for each gain
setting.
The Trailer Output will indicate
“- - - - - -”on
the Trailer Brake Display Page whenever the
following occur:
.No trailer is connected.
.A trailer without electric brakes is
connected, no DIC message will display
.A trailer with electric brakes has become
disconnected, a CHECK TRAILER WIRING
message displays on the DIC
.There is a fault present in the wiring to
the trailer brakes, a CHECK TRAILER
WIRING message displays on the DIC
.The ITBC system is not working due to a
fault, a SERVICE TRAILER BRAKE SYSTEM
message displays in the DIC
Manual Trailer Brake Apply Lever
Slide this lever right to apply the trailer’s
electric brakes independent of the vehicle’s
brakes. Use this lever to adjust Trailer Gain
to achieve the proper power output to the
trailer brakes. This lever may also be used
to request additional trailer braking at any
time. The trailer's and the vehicle's brake