2023 CHEVROLET SILVERADO 2500 steering
[x] Cancel search: steeringPage 250 of 441
Chevrolet Silverado 2500 HD/3500 HD Owner Manual (GMNA-Localizing-U.
S./Canada/Mexico-15546003) - 2022 - CRC - 5/5/21
Driving and Operating 249
Noise from the Electronic Brake Control
Module (EBCM) is normal when HDC is
active.
When HDC is activated, the initial HDC
speed is set to the current driving speed.
It can be increased or decreased by pressing
+RES or SET- on the steering wheel, or by
applying the accelerator or brake pedal. This
adjusted speed becomes the new set speed.
HDC will remain enabled between 30 and
60 km/h (19 and 37 mph); however, vehicle
speed cannot be set or maintained in this
range. HDC will automatically disable if the
vehicle speed is above 80 km/h (50 mph) or
above 60 km/h (37 mph) for at least
30 seconds.
5must be pressed again to re-enable HDC.
HDC may disable after an extended period
of use. If this happens, HDC will require
time to cool down. The length of time HDC
remains active depends on road conditions,
grade, set speed, vehicle loading, and
outside temperature.
When enabled, if the vehicle speed is above
30 km/h (19 mph) and below 60 km/h
(37 mph), a DIC message will display.
Driver Mode Control
Driver Mode Control (DMC) allows the driver
to adjust the overall driving experience to
better suit preference by adjusting multiple
systems to fit specific driving needs. Drive
mode availability and affected vehicle
subsystems are dependent upon vehicle trim
level, region, and optional features.
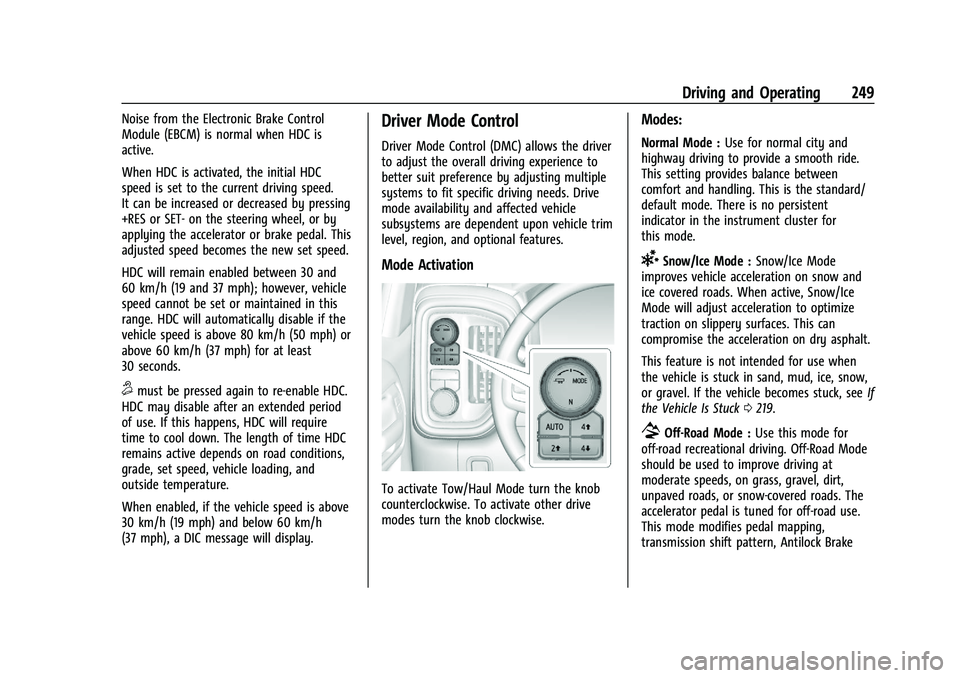
Mode Activation
To activate Tow/Haul Mode turn the knob
counterclockwise. To activate other drive
modes turn the knob clockwise.
Modes:
Normal Mode : Use for normal city and
highway driving to provide a smooth ride.
This setting provides balance between
comfort and handling. This is the standard/
default mode. There is no persistent
indicator in the instrument cluster for
this mode.
6Snow/Ice Mode : Snow/Ice Mode
improves vehicle acceleration on snow and
ice covered roads. When active, Snow/Ice
Mode will adjust acceleration to optimize
traction on slippery surfaces. This can
compromise the acceleration on dry asphalt.
This feature is not intended for use when
the vehicle is stuck in sand, mud, ice, snow,
or gravel. If the vehicle becomes stuck, see If
the Vehicle Is Stuck 0219.
7Off-Road Mode : Use this mode for
off-road recreational driving. Off-Road Mode
should be used to improve driving at
moderate speeds, on grass, gravel, dirt,
unpaved roads, or snow-covered roads. The
accelerator pedal is tuned for off-road use.
This mode modifies pedal mapping,
transmission shift pattern, Antilock Brake
Page 251 of 441
Chevrolet Silverado 2500 HD/3500 HD Owner Manual (GMNA-Localizing-U.
S./Canada/Mexico-15546003) - 2022 - CRC - 5/5/21
250 Driving and Operating
System (ABS), StabiliTrak/Electronic Stability
Control (ESC), and Traction Control System
(TCS) performance.
For more information on off-road driving see
Off-Road Driving0214.
_Tow/Haul Mode : Use this mode
when hauling heavy loads to provide
increased performance and vehicle control.
Tow/Haul Mode adjusts the transmission
shift pattern, trailer sway, and steering.
If the vehicle is turned off with Tow/Haul
Mode active and then restarted within four
hours or less, Tow/Haul will remain active.
Otherwise, the vehicle will start in
Normal Mode.
If the vehicle has a diesel engine, exhaust
braking is automatically activated when
Tow/Haul Mode is selected. It maintains
vehicle speed by automatically
implementing a shift pattern that uses the
engine and the transmission to slow the
vehicle. The system will command
downshifts and use the turbocharger on the
engine to reduce vehicle speed when the
brake is applied. The normal tow/haul shift
pattern will return once the vehicle is on a
low grade or when the accelerator pedal is
pressed. While in the Electronic Range Select (ERS)
Mode, grade breaking is deactivated,
allowing the driver to select a range and
limiting the highest gear available. See
Manual Mode
0238.
For more information on trailer weight
specifications, see Towing Equipment 0281.
Locking Rear Axle
Vehicles with a locking rear axle can give
more traction on snow, mud, ice, sand,
or gravel. It works like a standard axle most
of the time, but when traction is low, this
feature will allow the rear wheel with the
most traction to move the vehicle.
Cruise Control
{
Warning
Cruise control can be dangerous where
you cannot drive safely at a steady
speed. Do not use cruise control on
winding roads or in heavy traffic.
Cruise control can be dangerous on
slippery roads. On such roads, fast
changes in tire traction can cause (Continued)
Warning (Continued)
excessive wheel slip, and you could lose
control. Do not use cruise control on
slippery roads.
If equipped with cruise control, a speed of
about 40 km/h (25 mph) or more can be
maintained without keeping your foot on
the accelerator. Cruise control does not work
at speeds below about 40 km/h (25 mph).
If the cruise control is being used and the
Traction Control System (TCS) or StabiliTrak/
Electronic Stability Control (ESC) begins to
limit wheel spin, the cruise control will
automatically disengage. See Traction
Control/Electronic Stability Control 0247. If a
collision alert occurs when cruise control is
activated, cruise control is disengaged. See
Forward Collision Alert (FCA) System 0263.
When road conditions allow you to safely
use it again, cruise control can be turned
back on.
Turning off the TCS or StabiliTrak/ESC
system will disengage the cruise control.
If the brakes are applied, cruise control
disengages.
Page 257 of 441
Chevrolet Silverado 2500 HD/3500 HD Owner Manual (GMNA-Localizing-U.
S./Canada/Mexico-15546003) - 2022 - CRC - 5/5/21
256 Driving and Operating
If equipped, the front view camera
also displays when the Park Assist
system detects an object within
30 cm (12 in).
To access this view when in a forward
gear above 12 km/h (8 mph), select
CAMERA on the infotainment display
and select Rear Standard View. The
view will close after 8 seconds and
can be closed early by selecting X,
Home or Back.
2. Front/Rear Top-Down View
Displays a front or rear overhead view
of the vehicle. To view, select Front/
Rear Top-Down View on the
infotainment display when the camera
app is active.
3. Front/Rear side View
Displays a view that shows objects
next to the front or rear sides of the
vehicle. To select, touch Front/Rear
Side View on the infotainment display
when a camera view is active. Touch
the button to toggle between front
and rear camera views. Park Assist and
RCTA overlays are not available when
Front/Rear Side View is active.
4. Hitch View
Displays a zoomed-in view of the hitch
area to assist with aligning the
vehicle’s hitch ball with the trailer
coupler and monitoring the trailer
connection. To view, select Hitch View
on the infotainment display when the
Camera App is active. To access this
view when in a forward gear above
12 km/h (8 mph), select CAMERA on
the infotainment display and select
Hitch View. The view will close after
eight seconds and can be closed early
by selecting X, Home or Back. Shifting
into P (Park) while in this view will
automatically engage the Electric
Parking Brake (EPB).
5. Surround View
Displays an image of the area
surrounding the vehicle. Surround
View is displayed alongside the
currently selected view when below 12
kph (8 mph). Surround View is
disabled when above 12 kph (8 mph).
6. Camera App Guidance Lines
The Camera App supports three
possible guidance modes: No
Guidance, Vehicle Guidance and
Trailering Guidance. To changeguidance mode, select the appropriate
guidance icon. Depending on the
guidance mode and view selected,
different guidance lines may appear.
A grayed-out icon indicates that
guidance lines are not available.
Certain views do not support Guidance
lines.
.Standard Guidance Lines are
available in Front/Rear Standard
Views, Front/Rear Top-Down Views
and Surround View when the
vehicle guidance mode is selected.
Standard Guidance Lines show
current and intended vehicle path.
.Hitch Guidance Line is available in
Rear Standard View or Cargo Bed
View when the Trailering Guidance
mode is selected. Hitch Guidance
displays a single centered guidance
line on the infotainment display to
assist with aligning the vehicle’s
hitch with a trailer coupler. Align
the Hitch Guidance Line with the
trailer coupler by continuously
steering the vehicle to keep the
guidance line centered on the
coupler when backing. Park Assist
overlays will not display when the
Hitch Guidance Line is active.
Page 262 of 441
Chevrolet Silverado 2500 HD/3500 HD Owner Manual (GMNA-Localizing-U.
S./Canada/Mexico-15546003) - 2022 - CRC - 5/5/21
Driving and Operating 261
Troubleshooting
The Transparent Trailer calibration may take
longer than expected or not calibrate if:
.The vehicle is driven too fast during
calibration. Speed should be maintained
below 50 km/h (31 mph).
.The vehicle is not driven straight during
calibration. Steering should be maintained
as straight as possible, excessive steering
during calibration may extend
calibration time.
.The calibration is attempted in low light.
Calibration should be attempted when
there is enough light.
.The calibration is attempted during
adverse weather conditions. Calibration
during conditions such as snow or heavy
rain should be avoided.
.The road surface is not ideal for
calibration. Calibration should be
attempted on an alternate road surface.
.The accessory trailer cameras are
swapped at the hitch connector. Ensure
that the camera mounted to the rear of
the trailer is connected to the rear trailer
camera input.
.The accessory trailer camera is mounted,
angled or rotated outside of the defined
mounting location (see camera
installation instructions).
Distortion may be observed in the calibrated
Transparent Trailer View if:
.The accessory trailer camera is mounted,
angled or rotated outside of the defined
mounting location (see camera
installation instructions).
The Transparent Trailer icon may appear
grayed out if:
.A compatible trailer profile is not
configured or a non-compatible trailer
profile is selected.
.The vehicle is in R (Reverse).
.The trailer is not connected.
.The accessory rear trailer camera is not
connected or connected to the incorrect
input.
The preview may not be provided or the
wrong preview may be provided if:
.The accessory cameras are not recognized.
Ensure that the accessory camera(s) are
connected and power cycle the vehicle.
.The accessory trailer cameras are
swapped at the hitch connector. Ensure
that the accessory camera(s) are
connected to the correct input.
.The accessory trailer camera(s) are
connected to the correct camera input.
.The accessory trailer camera(s) are not
installed according to the installation
instructions.
A feature may be unavailable or not
activating as expected if:
.The customization is disabled. Check the
customization settings where applicable.
.The accessory trailer cameras are
swapped at the hitch connector. Ensure
that the accessory camera(s) are
connected to the correct camera input.
A view may switch automatically if:
.The vehicle is shifted to another gear.
Park Assist
If the vehicle has Rear Park Assist (RPA) or
Front and Rear Park Assist (FRPA), as the
vehicle moves at speeds of less than 8 km/h
(5 mph) the sensors on the bumpers may
detect objects up to 1.2 m (4 ft) in front and
2.5 m (8 ft) behind the vehicle within a zone
25 cm (10 in) high off the ground and below
Page 265 of 441
Chevrolet Silverado 2500 HD/3500 HD Owner Manual (GMNA-Localizing-U.
S./Canada/Mexico-15546003) - 2022 - CRC - 5/5/21
264 Driving and Operating
{Warning
FCA does not provide a warning to help
avoid a crash, unless it detects a vehicle.
FCA may not detect a vehicle ahead if
the FCA sensor is blocked by dirt, snow,
or ice, or if the windshield is damaged.
It may also not detect a vehicle on
winding or hilly roads, or in conditions
that can limit visibility such as fog, rain,
or snow, or if the headlamps or
windshield are not cleaned or in proper
condition. Keep the windshield,
headlamps, and FCA sensors clean and in
good repair.
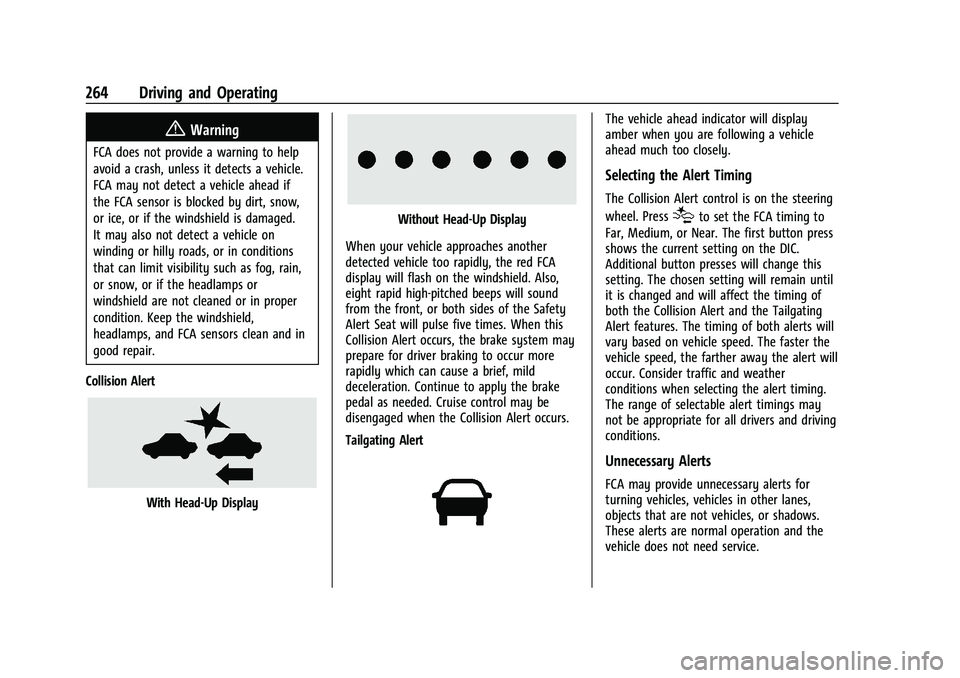
Collision Alert
With Head-Up Display
Without Head-Up Display
When your vehicle approaches another
detected vehicle too rapidly, the red FCA
display will flash on the windshield. Also,
eight rapid high-pitched beeps will sound
from the front, or both sides of the Safety
Alert Seat will pulse five times. When this
Collision Alert occurs, the brake system may
prepare for driver braking to occur more
rapidly which can cause a brief, mild
deceleration. Continue to apply the brake
pedal as needed. Cruise control may be
disengaged when the Collision Alert occurs.
Tailgating Alert
The vehicle ahead indicator will display
amber when you are following a vehicle
ahead much too closely.
Selecting the Alert Timing
The Collision Alert control is on the steering
wheel. Press
[to set the FCA timing to
Far, Medium, or Near. The first button press
shows the current setting on the DIC.
Additional button presses will change this
setting. The chosen setting will remain until
it is changed and will affect the timing of
both the Collision Alert and the Tailgating
Alert features. The timing of both alerts will
vary based on vehicle speed. The faster the
vehicle speed, the farther away the alert will
occur. Consider traffic and weather
conditions when selecting the alert timing.
The range of selectable alert timings may
not be appropriate for all drivers and driving
conditions.
Unnecessary Alerts
FCA may provide unnecessary alerts for
turning vehicles, vehicles in other lanes,
objects that are not vehicles, or shadows.
These alerts are normal operation and the
vehicle does not need service.
Page 269 of 441
Chevrolet Silverado 2500 HD/3500 HD Owner Manual (GMNA-Localizing-U.
S./Canada/Mexico-15546003) - 2022 - CRC - 5/5/21
268 Driving and Operating
If the LCA displays do not light up when
moving vehicles are in the side blind zone or
are rapidly approaching this zone and the
system is clean, the system may need
service. Take the vehicle to your dealer.
Radio Frequency Information
SeeRadio Frequency Statement 0417.
Lane Departure Warning (LDW)
If equipped, LDW may help avoid crashes
due to unintentional lane departures. LDW
uses a camera sensor to detect the lane
markings at speeds of 56 km/h (35 mph) or
greater. It may provide an alert if the
vehicle is crossing a lane without using a
turn signal in that direction. LDW light will
not alert if the turn signal is active in the
direction of lane departure, or if LDW
detects that you are accelerating, braking or
actively steering.
{Warning
The LDW system does not steer the
vehicle. The LDW system may not:
.Provide enough time to avoid a crash.
.Detect lane markings under poor
weather or visibility conditions. This
can occur if the windshield or
headlamps are blocked by dirt, snow,
or ice; if they are not in proper
condition; or if the sun shines directly
into the camera.
.Detect road edges.
.Detect lanes on winding or hilly roads.
If LDW only detects lane markings on one
side of the road, it will only warn you
when departing the lane on the side
where it has detected a lane marking.
Always keep your attention on the road
and maintain proper vehicle position
within the lane, or vehicle damage,
injury, or death could occur. Always keep
the windshield, headlamps, and camera
sensors clean and in good repair. Do not
use LDW in bad weather conditions.
How the System Works
LDW utilizes a camera sensor installed on
the windshield ahead of the rearview mirror
to detect lane markings.
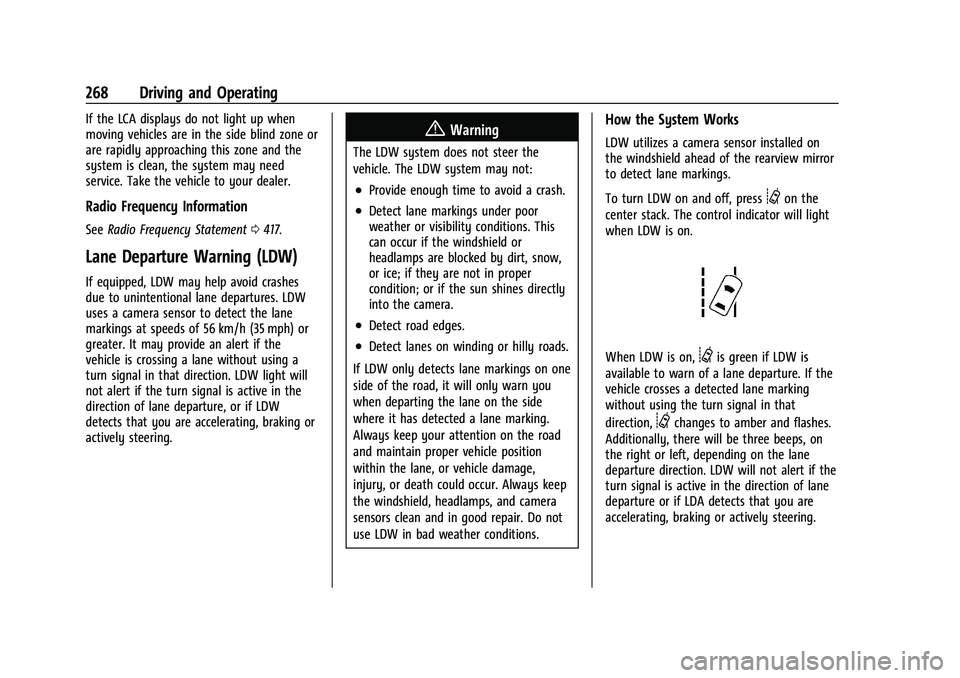
To turn LDW on and off, press
@on the
center stack. The control indicator will light
when LDW is on.
When LDW is on,@is green if LDW is
available to warn of a lane departure. If the
vehicle crosses a detected lane marking
without using the turn signal in that
direction,
@changes to amber and flashes.
Additionally, there will be three beeps, on
the right or left, depending on the lane
departure direction. LDW will not alert if the
turn signal is active in the direction of lane
departure or if LDA detects that you are
accelerating, braking or actively steering.
Page 276 of 441

Chevrolet Silverado 2500 HD/3500 HD Owner Manual (GMNA-Localizing-U.
S./Canada/Mexico-15546003) - 2022 - CRC - 5/5/21
Driving and Operating 275
{Warning
To prevent serious injury or death from
carbon monoxide (CO), when towing a
trailer:
.Do not drive with the liftgate, trunk/
hatch, or rear-most window open.
.Fully open the air outlets on or under
the instrument panel.
.Adjust the climate control system to a
setting that brings in only outside air.
See“Climate Control Systems” in the
Index.
For more information about carbon
monoxide, see Engine Exhaust 0235.
Towing a trailer requires experience. The
combination of the vehicle and trailer is
longer and not as responsive as the vehicle
itself. Get used to the handling and braking
of the combination by driving on a level
road surface before driving on public roads.
The trailer structure, the tires, and the
brakes must all be rated to carry the
intended cargo. Inadequate trailer
equipment can cause the combination to
operate in an unexpected or unsafe manner.
Before driving, inspect all trailer hitch parts and attachments, safety chains, electrical
connectors, lamps, tires, and mirrors. See
Towing Equipment
0281. If the trailer has
electric brakes, start the combination
moving and then manually apply the trailer
brake controller to check that the trailer
brakes work. During the trip, occasionally
check that the cargo and trailer are secure
and that the lamps and any trailer brakes
are working.Towing with a Stability Control System
When towing, the stability control system
might be heard. The system reacts to
vehicle movement caused by the trailer,
which mainly occurs during cornering. This is
normal when towing heavier trailers.
Following Distance
Stay at least twice as far behind the vehicle
ahead as you would when driving without a
trailer. This can help to avoid heavy braking
and sudden turns.
Passing
More passing distance is needed when
towing a trailer. The combination of the
vehicle and trailer will not accelerate as
quickly and is much longer than the vehicle
alone. It is necessary to go much farther beyond the passed vehicle before returning
to the lane. Pass on level roadways. Avoid
passing on hills if possible.
Backing Up
Hold the bottom of the steering wheel with
one hand. To move the trailer to the left,
move that hand to the left. To move the
trailer to the right, move that hand to the
right. Always back up slowly and, if possible,
have someone guide you.
Making Turns
Caution
Turn more slowly and make wider arcs
when towing a trailer to prevent damage
to your vehicle. Making very sharp turns
could cause the trailer to contact the
vehicle.
Make wider turns than normal when towing,
so the trailer will not go over soft shoulders,
over curbs, or strike road signs, trees,
or other objects. Always signal turns well in
advance. Do not steer or brake suddenly.
Page 289 of 441
Chevrolet Silverado 2500 HD/3500 HD Owner Manual (GMNA-Localizing-U.
S./Canada/Mexico-15546003) - 2022 - CRC - 5/5/21
288 Driving and Operating
Tow/Haul Mode is most useful when towing
a heavy trailer or carrying a large or
heavy load:
.Through rolling terrain.
.In stop-and-go traffic.
.In busy parking lots.
Operating the vehicle in Tow/Haul Mode
when lightly loaded or not towing will not
cause damage; however, it is not
recommended and may result in unpleasant
engine and transmission driving
characteristics, heavy or light steering
efforts, and reduced fuel economy.
Integrated Trailer Brake Control System
The vehicle may have an Integrated Trailer
Brake Control (ITBC) system for use with
electric trailer brakes or most electric over
hydraulic trailer brake systems. These
instructions apply to both types of electric
trailer brakes.
This symbol is on the Trailer Brake Control
Panel on vehicles with an ITBC system. The
power output to the trailer brakes is
proportional to the amount of vehicle
braking. This available power output to the
trailer brakes can be adjusted to a wide
range of trailering situations.
The ITBC system is integrated with the
vehicle’s brake, antilock brake, and
StabiliTrak/Electronic Stability Control (ESC)
systems. In trailering conditions that cause
the vehicle’s antilock brake or StabiliTrak/
ESC systems to activate, power sent to the
trailer's brakes will be automatically
adjusted to minimize trailer wheel lock-up.
This does not imply that the trailer has
StabiliTrak/ESC.
If the vehicle’s brake, antilock brake,
or StabiliTrak/ESC systems are not
functioning properly, the ITBC system may
not function fully or at all. Make sure all of
these systems are fully operational to allow
the ITBC system to function properly.
The ITBC system is powered through the
vehicle's electrical system. Turning the
ignition off will also turn off the ITBC
system. The ITBC system is fully functional
only when the ignition is in on.{Warning
Connecting a trailer that has an air brake
system may result in reduced or
complete loss of trailer braking, including
increased stopping distance or trailer
instability which could result in serious
injury, death, or property damage. Only
use the ITBC system with electric or
electric over hydraulic trailer brake
systems.
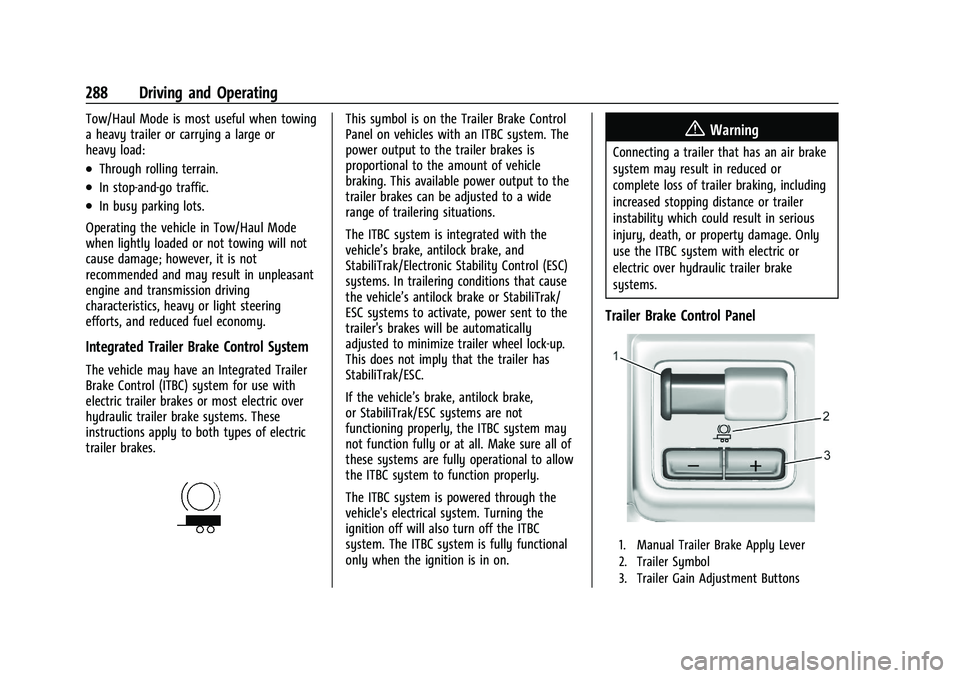
Trailer Brake Control Panel
1. Manual Trailer Brake Apply Lever
2. Trailer Symbol
3. Trailer Gain Adjustment Buttons