2023 CHEVROLET SILVERADO 1500 coolant level
[x] Cancel search: coolant levelPage 98 of 463

Chevrolet Silverado 1500 Owner Manual (GMNA-Localizing-U.S./Canada/
Mexico/Paraguay-16515119) - 2023 - CRC - 6/2/22
Instruments and Controls 97
Instruments and Controls
Controls
Steering Wheel Adjustment . . . . . . . . . . . . 98
Heated Steering Wheel . . . . . . . . . . . . . . . . . 99
Horn . . . . . . . . . . . . . . . . . . . . . . . . . . . . . . . . . . . 99
Windshield Wiper/Washer . . . . . . . . . . . . . 99
Compass . . . . . . . . . . . . . . . . . . . . . . . . . . . . . . 100
Clock . . . . . . . . . . . . . . . . . . . . . . . . . . . . . . . . . . 100
Power Outlets . . . . . . . . . . . . . . . . . . . . . . . . . 101
Wireless Charging . . . . . . . . . . . . . . . . . . . . . 103
Warning Lights, Gauges, and Indicators
Warning Lights, Gauges, andIndicators . . . . . . . . . . . . . . . . . . . . . . . . . . . . 105
Instrument Cluster (Base Level) . . . . . . . . 106
Instrument Cluster (Uplevel) . . . . . . . . . . . 107
Speedometer . . . . . . . . . . . . . . . . . . . . . . . . . . 110
Odometer . . . . . . . . . . . . . . . . . . . . . . . . . . . . . . 110
Trip Odometer . . . . . . . . . . . . . . . . . . . . . . . . . 110
Tachometer . . . . . . . . . . . . . . . . . . . . . . . . . . . . 110
Fuel Gauge . . . . . . . . . . . . . . . . . . . . . . . . . . . . 110
Engine Oil Pressure Gauge . . . . . . . . . . . . . 111
Engine Coolant Temperature Gauge . . . . 112
Transmission Temperature Gauge (Uplevel only) . . . . . . . . . . . . . . . . . . . . . . . . 113
Voltmeter Gauge . . . . . . . . . . . . . . . . . . . . . . . 113
Seat Belt Reminders . . . . . . . . . . . . . . . . . . . 114
Airbag Readiness Light . . . . . . . . . . . . . . . . . 115
Passenger Airbag Status Indicator . . . . . . 115 Charging System Light . . . . . . . . . . . . . . . . . 116
Malfunction Indicator Lamp (Check
Engine Light) . . . . . . . . . . . . . . . . . . . . . . . . . 116
Brake System Warning Light . . . . . . . . . . . 118
Electric Parking Brake Light . . . . . . . . . . . . 118
Service Electric Parking Brake Light . . . . 119
Antilock Brake System (ABS) Warning Light . . . . . . . . . . . . . . . . . . . . . . . . . . . . . . . . . 119
Four-Wheel-Drive Light . . . . . . . . . . . . . . . . . 119
Tow/Haul Mode Light . . . . . . . . . . . . . . . . . 120
Hill Descent Control Light . . . . . . . . . . . . . 120
Lane Keep Assist (LKA) Light . . . . . . . . . . . 120
Automatic Emergency Braking (AEB) Disabled Light . . . . . . . . . . . . . . . . . . . . . . . 120
Vehicle Ahead Indicator . . . . . . . . . . . . . . . . 121
Pedestrian Ahead Indicator . . . . . . . . . . . . . 121
Traction Off Light . . . . . . . . . . . . . . . . . . . . . . 121
StabiliTrak OFF Light . . . . . . . . . . . . . . . . . . . 121
Traction Control System (TCS)/ StabiliTrak Light . . . . . . . . . . . . . . . . . . . . . . 122
Engine Coolant Temperature Warning Light . . . . . . . . . . . . . . . . . . . . . . . . . . . . . . . . . 122
Driver Mode Control Light . . . . . . . . . . . . . 122
Tire Pressure Light . . . . . . . . . . . . . . . . . . . . . 123
Engine Oil Pressure Light (Uplevel Cluster) . . . . . . . . . . . . . . . . . . . . . . . . . . . . . . 123
Low Fuel Warning Light . . . . . . . . . . . . . . . 124
Security Light . . . . . . . . . . . . . . . . . . . . . . . . . . 124
High-Beam On Light . . . . . . . . . . . . . . . . . . . 124
Front Fog Lamp Light . . . . . . . . . . . . . . . . . . 125 Lamps On Reminder . . . . . . . . . . . . . . . . . . . 125
Cruise Control Light . . . . . . . . . . . . . . . . . . . . 125
Door Ajar Light . . . . . . . . . . . . . . . . . . . . . . . . 126
Information Displays
Driver Information Center (DIC) (Base
Level) . . . . . . . . . . . . . . . . . . . . . . . . . . . . . . . . 126
Driver Information Center (DIC) (Uplevel) . . . . . . . . . . . . . . . . . . . . . . . . . . . . . 127
Head-Up Display (HUD) . . . . . . . . . . . . . . . . 129
Vehicle Messages
Vehicle Messages . . . . . . . . . . . . . . . . . . . . . . 133
Engine Power Messages . . . . . . . . . . . . . . . 133
Vehicle Speed Messages . . . . . . . . . . . . . . . 134
Universal Remote System
Universal Remote System . . . . . . . . . . . . . . 134
Universal Remote System Programming . . . . . . . . . . . . . . . . . . . . . . . . 134
Universal Remote System Operation . . . 136
Page 107 of 463
Chevrolet Silverado 1500 Owner Manual (GMNA-Localizing-U.S./Canada/
Mexico/Paraguay-16515119) - 2023 - CRC - 6/2/22
106 Instruments and Controls
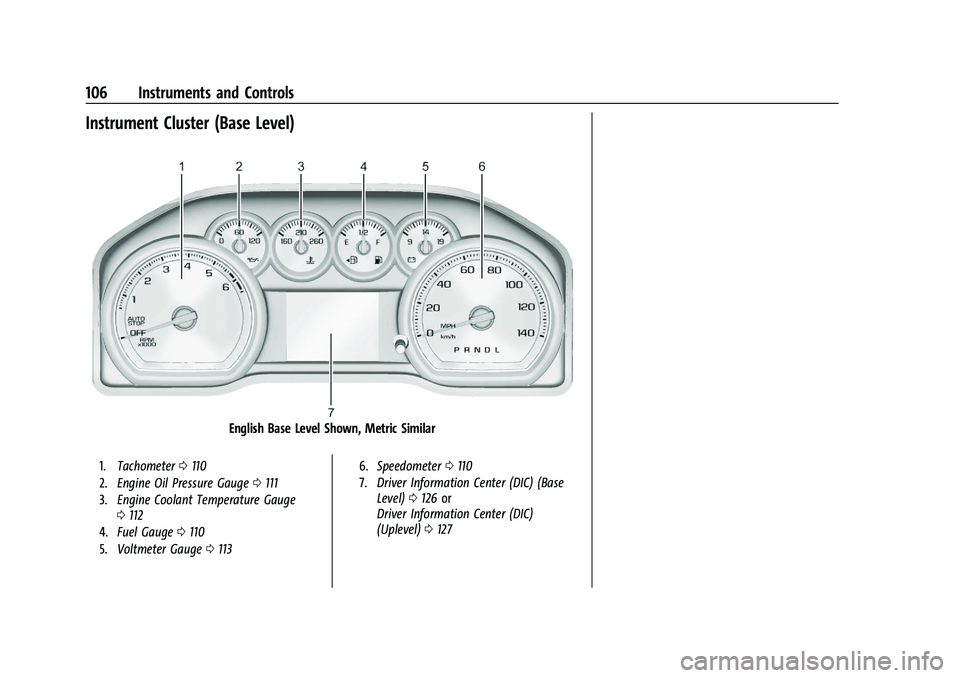
Instrument Cluster (Base Level)
English Base Level Shown, Metric Similar
1.Tachometer 0110
2. Engine Oil Pressure Gauge 0111
3. Engine Coolant Temperature Gauge
0112
4. Fuel Gauge 0110
5. Voltmeter Gauge 0113 6.
Speedometer 0110
7. Driver Information Center (DIC) (Base
Level) 0126 or
Driver Information Center (DIC)
(Uplevel) 0127
Page 108 of 463
Chevrolet Silverado 1500 Owner Manual (GMNA-Localizing-U.S./Canada/
Mexico/Paraguay-16515119) - 2023 - CRC - 6/2/22
Instruments and Controls 107
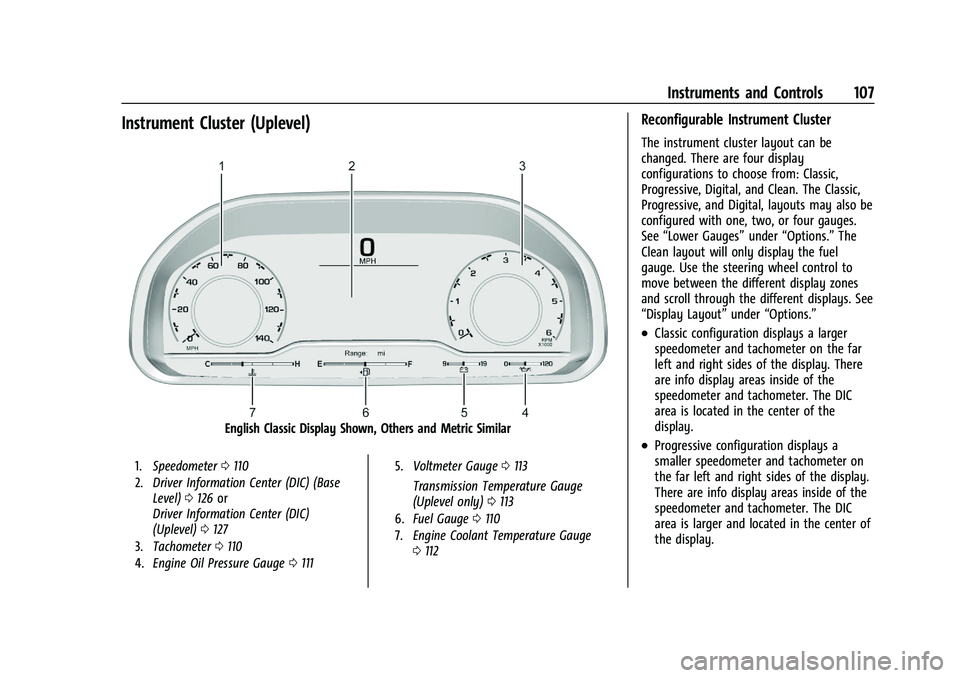
Instrument Cluster (Uplevel)
English Classic Display Shown, Others and Metric Similar
1.Speedometer 0110
2. Driver Information Center (DIC) (Base
Level) 0126 or
Driver Information Center (DIC)
(Uplevel) 0127
3. Tachometer 0110
4. Engine Oil Pressure Gauge 0111 5.
Voltmeter Gauge 0113
Transmission Temperature Gauge
(Uplevel only) 0113
6. Fuel Gauge 0110
7. Engine Coolant Temperature Gauge
0112
Reconfigurable Instrument Cluster
The instrument cluster layout can be
changed. There are four display
configurations to choose from: Classic,
Progressive, Digital, and Clean. The Classic,
Progressive, and Digital, layouts may also be
configured with one, two, or four gauges.
See “Lower Gauges” under“Options.” The
Clean layout will only display the fuel
gauge. Use the steering wheel control to
move between the different display zones
and scroll through the different displays. See
“Display Layout” under“Options.”
.Classic configuration displays a larger
speedometer and tachometer on the far
left and right sides of the display. There
are info display areas inside of the
speedometer and tachometer. The DIC
area is located in the center of the
display.
.Progressive configuration displays a
smaller speedometer and tachometer on
the far left and right sides of the display.
There are info display areas inside of the
speedometer and tachometer. The DIC
area is larger and located in the center of
the display.
Page 110 of 463
Chevrolet Silverado 1500 Owner Manual (GMNA-Localizing-U.S./Canada/
Mexico/Paraguay-16515119) - 2023 - CRC - 6/2/22
Instruments and Controls 109
Audio
Browse music, select from the favorites,
or change the audio source. Use the
thumbwheel to change the station or go to
the next or previous track.
Navigation
If there is an active route, the Turn-by-Turn
directions will appear on the Navigation
Page, if there is no active route a compass
will be displayed.
Phone
If there is no active phone call, view recent
calls, or scroll through contacts.
Options
Use the thumbwheel to scroll through items
in the Options menu.
Display Layout :Choose Classic, Progressive,
Digital, and Clean layout by pressing the
thumbwheel while the desired item is
highlighted. Exit the Layout menu by
pressing
o.
Left/Right Side Info : Press the thumbwheel
to select the items to be displayed in the
display areas. See "Left/Right Side Info"
previously in this section. Lower Gauges :
Choose one of three gauge
configurations by pressing the thumbwheel
while the desired item is highlighted. The
selected configuration will be displayed at
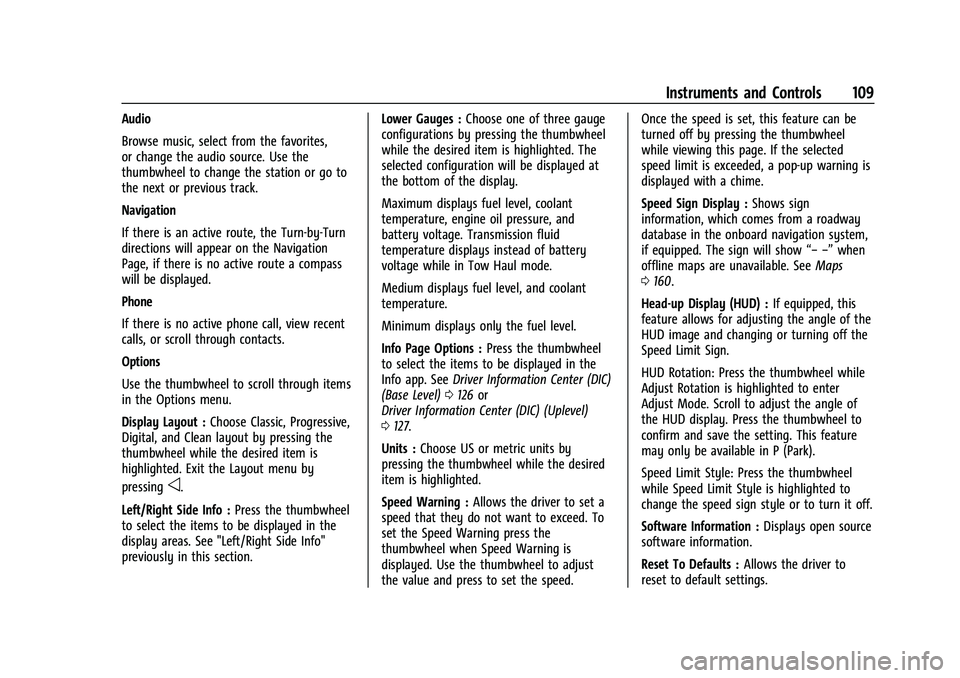
the bottom of the display.
Maximum displays fuel level, coolant
temperature, engine oil pressure, and
battery voltage. Transmission fluid
temperature displays instead of battery
voltage while in Tow Haul mode.
Medium displays fuel level, and coolant
temperature.
Minimum displays only the fuel level.
Info Page Options : Press the thumbwheel
to select the items to be displayed in the
Info app. See Driver Information Center (DIC)
(Base Level) 0126 or
Driver Information Center (DIC) (Uplevel)
0 127.
Units : Choose US or metric units by
pressing the thumbwheel while the desired
item is highlighted.
Speed Warning : Allows the driver to set a
speed that they do not want to exceed. To
set the Speed Warning press the
thumbwheel when Speed Warning is
displayed. Use the thumbwheel to adjust
the value and press to set the speed. Once the speed is set, this feature can be
turned off by pressing the thumbwheel
while viewing this page. If the selected
speed limit is exceeded, a pop-up warning is
displayed with a chime.
Speed Sign Display :
Shows sign
information, which comes from a roadway
database in the onboard navigation system,
if equipped. The sign will show “− −”when
offline maps are unavailable. See Maps
0 160.
Head-up Display (HUD) : If equipped, this
feature allows for adjusting the angle of the
HUD image and changing or turning off the
Speed Limit Sign.
HUD Rotation: Press the thumbwheel while
Adjust Rotation is highlighted to enter
Adjust Mode. Scroll to adjust the angle of
the HUD display. Press the thumbwheel to
confirm and save the setting. This feature
may only be available in P (Park).
Speed Limit Style: Press the thumbwheel
while Speed Limit Style is highlighted to
change the speed sign style or to turn it off.
Software Information : Displays open source
software information.
Reset To Defaults : Allows the driver to
reset to default settings.
Page 113 of 463
Chevrolet Silverado 1500 Owner Manual (GMNA-Localizing-U.S./Canada/
Mexico/Paraguay-16515119) - 2023 - CRC - 6/2/22
112 Instruments and Controls
The engine oil pressure gauge shows the
engine oil pressure in kPa (kilopascals)
or psi (pounds per square inch) when the
engine is running.
Oil pressure can vary with engine speed,
outside temperature, coolant temperature,
and oil viscosity.
On some models, the oil pump will vary
engine oil pressure according to engine
needs. Oil pressure may change quickly as
the engine speed or load varies. This is
normal. If the oil pressure warning light or
Driver Information Center (DIC) message
indicates oil pressure outside the normal
operating range, check the engine oil as
soon as possible.
SeeEngine Oil 0338.
Caution
Lack of proper engine oil maintenance
can damage the engine. Driving with the
engine oil low can also damage the
engine. The repairs would not be covered
by the vehicle warranty. Check the oil
level as soon as possible. Add oil if
required, but if the oil level is within the
operating range and the oil pressure is
(Continued)
Caution (Continued)
still low, have the vehicle serviced.
Always follow the maintenance schedule
for changing engine oil.
If the vehicle has a diesel engine, see the
Duramax diesel supplement.
Uplevel
This gauge displays while the lower gauges
are configured to display four gauges. To
change gauge configurations, see “Options”
under Instrument Cluster (Base Level) 0106
or
Instrument Cluster (Uplevel) 0107.
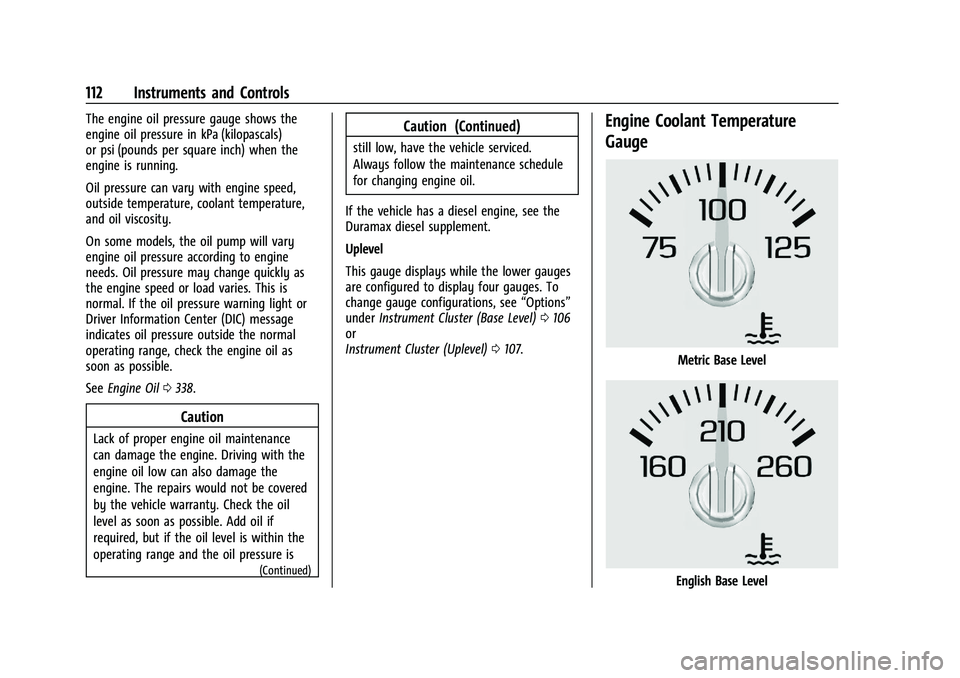
Engine Coolant Temperature
Gauge
Metric Base Level
English Base Level
Page 114 of 463
Chevrolet Silverado 1500 Owner Manual (GMNA-Localizing-U.S./Canada/
Mexico/Paraguay-16515119) - 2023 - CRC - 6/2/22
Instruments and Controls 113
Metric Uplevel
English Uplevel
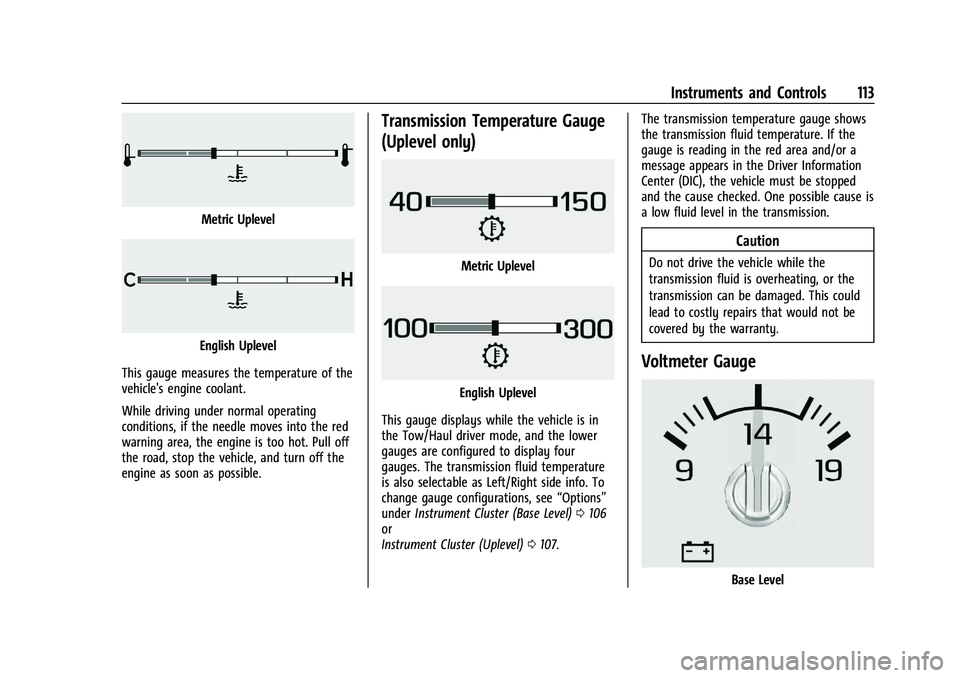
This gauge measures the temperature of the
vehicle's engine coolant.
While driving under normal operating
conditions, if the needle moves into the red
warning area, the engine is too hot. Pull off
the road, stop the vehicle, and turn off the
engine as soon as possible.
Transmission Temperature Gauge
(Uplevel only)
Metric Uplevel
English Uplevel
This gauge displays while the vehicle is in
the Tow/Haul driver mode, and the lower
gauges are configured to display four
gauges. The transmission fluid temperature
is also selectable as Left/Right side info. To
change gauge configurations, see “Options”
under Instrument Cluster (Base Level) 0106
or
Instrument Cluster (Uplevel) 0107. The transmission temperature gauge shows
the transmission fluid temperature. If the
gauge is reading in the red area and/or a
message appears in the Driver Information
Center (DIC), the vehicle must be stopped
and the cause checked. One possible cause is
a low fluid level in the transmission.
Caution
Do not drive the vehicle while the
transmission fluid is overheating, or the
transmission can be damaged. This could
lead to costly repairs that would not be
covered by the warranty.
Voltmeter Gauge
Base Level
Page 123 of 463
Chevrolet Silverado 1500 Owner Manual (GMNA-Localizing-U.S./Canada/
Mexico/Paraguay-16515119) - 2023 - CRC - 6/2/22
122 Instruments and Controls
Traction Control System (TCS)/
StabiliTrak Light
This light comes on briefly when the vehicle
is turned on to show that the light is
working. If it does not come on then, have
it fixed so it will be ready to warn you if
there is a problem.
If the light is on and not flashing, the TCS
and potentially the StabiliTrak/ESC system
are not fully operational and may not assist
in maintaining control. Adjust driving
accordingly. If the condition persists, see
your dealer as soon as possible. A Driver
Information Center (DIC) message may
display.
The light flashes when the TCS and/or the
StabiliTrak/ESC system is actively working.
SeeTraction Control/Electronic Stability
Control 0237.
The light may also flash when ABS is active.
See Antilock Brake System (ABS) 0234.
Trailer Sway Control Light (Uplevel
Cluster)
This light will flash when Trailer Sway
Control is active. See Trailer Sway Control
(TSC) 0316.
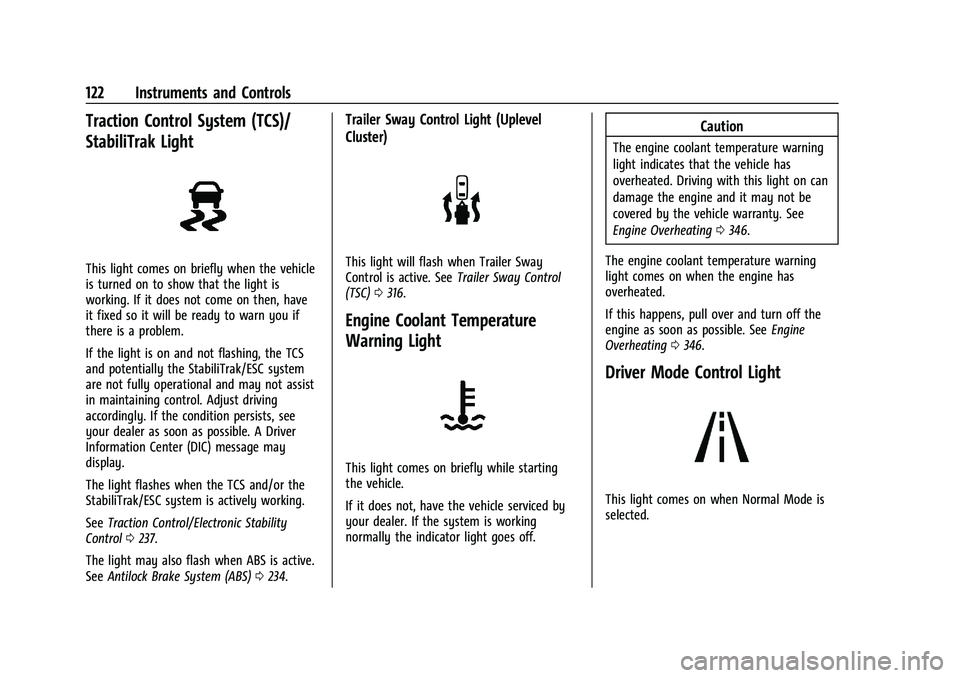
Engine Coolant Temperature
Warning Light
This light comes on briefly while starting
the vehicle.
If it does not, have the vehicle serviced by
your dealer. If the system is working
normally the indicator light goes off.
Caution
The engine coolant temperature warning
light indicates that the vehicle has
overheated. Driving with this light on can
damage the engine and it may not be
covered by the vehicle warranty. See
Engine Overheating 0346.
The engine coolant temperature warning
light comes on when the engine has
overheated.
If this happens, pull over and turn off the
engine as soon as possible. See Engine
Overheating 0346.
Driver Mode Control Light
This light comes on when Normal Mode is
selected.
Page 302 of 463
Chevrolet Silverado 1500 Owner Manual (GMNA-Localizing-U.S./Canada/
Mexico/Paraguay-16515119) - 2023 - CRC - 6/2/22
Driving and Operating 301
Driving on Grades
Reduce speed and shift to a lower gear
before starting down a long or steep
downhill grade. If the transmission is not
shifted down, the brakes may overheat and
result in reduced braking efficiency.
The vehicle can tow in D (Drive). Shift the
transmission to a lower gear if the
transmission shifts too often under heavy
loads and/or hilly conditions.
When towing at higher altitudes, engine
coolant will boil at a lower temperature
than at lower altitudes. If the engine is
turned off immediately after towing at high
altitude on steep uphill grades, the vehicle
could show signs similar to engine
overheating. To avoid this, let the engine
run, preferably on level ground, with the
transmission in P (Park) for a few minutes
before turning the engine off. If the
overheat warning comes on, seeEngine
Overheating 0346.
Viewing Systems
If equipped, the viewing systems on the
vehicle can improve visibility while hitching,
backing, and driving with a trailer. See
Driver Assistance Systems 0272.
Parking on Hills
{Warning
To prevent serious injury or death,
always park your vehicle and trailer on a
level surface when possible.
When parking your vehicle and your trailer
on a hill: 1. Press and hold the brake pedal, but do not shift into P (Park). Turn the wheels
toward the curb if facing downhill or
into traffic if facing uphill.
2. Have someone place chocks under the trailer wheels.
3. Gradually release the brake pedal to allow the chocks to absorb the load of
the trailer.
4. Reapply the brake pedal. Then apply the parking brake and shift into P (Park).
5. Release the brake pedal.
Leaving After Parking on a Hill
1. Apply and hold the brake pedal.
.Start the vehicle.
.Shift into the desired gear.
.Release the parking brake. 2. Let up on the brake pedal.
3. Drive slowly until the trailer is clear of
the chocks.
4. Stop and have someone pick up and store the chocks.
Launching and Retrieving a Boat
Backing the Trailer into the Water
{Warning
.Have all passengers get out of the
vehicle before backing onto the sloped
part of the ramp. Lower the driver and
passenger side windows before
backing onto the ramp. This will
provide a means of escape in the
unlikely event the vehicle slides into
the water.
.If the boat launch surface is slippery,
have the driver remain in the vehicle
with the brake pedal applied while the
boat is being launched. The boat
launch can be especially slippery at
low tide when part of the ramp was
previously submerged at high tide. Do
not back onto the ramp to launch the
boat if you are not sure the vehicle
can maintain traction.
(Continued)