2023 CHEVROLET SILVERADO 1500 warning light
[x] Cancel search: warning lightPage 212 of 463
Chevrolet Silverado 1500 Owner Manual (GMNA-Localizing-U.S./Canada/
Mexico/Paraguay-16515119) - 2023 - CRC - 6/2/22
Driving and Operating 211
Caution (Continued)
.Do not drive at any one constant
speed, fast or slow, for the first
800 km (500 mi). Do not make
full-throttle starts. Avoid downshifting
to brake or slow the vehicle.
.Avoid making hard stops for the first
300 km (200 mi) or so. During this
time the new brake linings are not yet
broken in. Hard stops with new linings
can mean premature wear and earlier
replacement. Follow this breaking-in
guideline every time you get new
brake linings.
.Do not tow a trailer during break-in.
SeeTrailer Towing 0302 for the
trailer towing capabilities of the
vehicle and more information.
Following break-in, engine speed and load
can be gradually increased.
On new vehicles, the various mechanical and
electrical systems experience a “break-in”
period during the first 6 400 km (4,000 mi)
of routine driving. As the vehicle is driven,
the mechanical systems adjust to provide
optimal fuel economy and transmission shift
performance. Electrical systems will adapt and calibrate
during the break-in period. A one-time
occurrence of clicks and similar vehicle
noises is normal during this process.
Normal driving charges the vehicle’s battery
to achieve the best operation of the vehicle,
including fuel economy and the Stop/Start
System. See
Stop/Start System 0213.
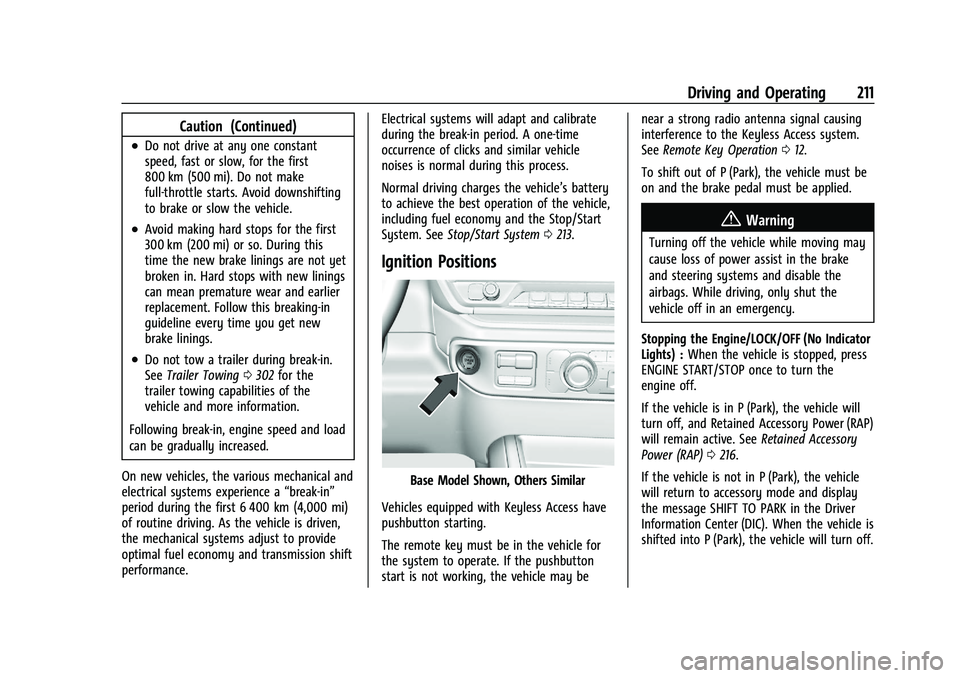
Ignition Positions
Base Model Shown, Others Similar
Vehicles equipped with Keyless Access have
pushbutton starting.
The remote key must be in the vehicle for
the system to operate. If the pushbutton
start is not working, the vehicle may be near a strong radio antenna signal causing
interference to the Keyless Access system.
See
Remote Key Operation 012.
To shift out of P (Park), the vehicle must be
on and the brake pedal must be applied.
{Warning
Turning off the vehicle while moving may
cause loss of power assist in the brake
and steering systems and disable the
airbags. While driving, only shut the
vehicle off in an emergency.
Stopping the Engine/LOCK/OFF (No Indicator
Lights) : When the vehicle is stopped, press
ENGINE START/STOP once to turn the
engine off.
If the vehicle is in P (Park), the vehicle will
turn off, and Retained Accessory Power (RAP)
will remain active. See Retained Accessory
Power (RAP) 0216.
If the vehicle is not in P (Park), the vehicle
will return to accessory mode and display
the message SHIFT TO PARK in the Driver
Information Center (DIC). When the vehicle is
shifted into P (Park), the vehicle will turn off.
Page 213 of 463
Chevrolet Silverado 1500 Owner Manual (GMNA-Localizing-U.S./Canada/
Mexico/Paraguay-16515119) - 2023 - CRC - 6/2/22
212 Driving and Operating
The vehicle may have an electric steering
column lock. The lock is activated when the
ignition is turned off and driver door is
opened. A sound may be heard as the lock
actuates or releases. The steering column
lock may not release with the wheels turned
off center. If this happens, the vehicle may
not start. Move the steering wheel from left
to right while attempting to start the
vehicle. If this does not work, the vehicle
needs service.
Unless an emergency exists, do not turn the
engine off when the vehicle is moving. This
will cause a loss of power assist in the brake
and steering systems and disable the
airbags.
If the vehicle must be shut off in an
emergency:1. If the vehicle cannot be pulled over, and must be shut off while driving, press and
hold ENGINE START/STOP button for
longer than two seconds, or press twice
in five seconds.
2. Brake using a firm and steady pressure. Do not pump the brakes repeatedly. This
may deplete power assist, requiring
increased brake pedal force. 3. Shift the vehicle to N (Neutral). This can
be done while the vehicle is moving.
After shifting to N (Neutral), firmly apply
the brakes and steer the vehicle to a
safe location.
4. Come to a complete stop, shift to P (Park), and make sure engine is off.
The shift lever must be in P (Park) to
turn the vehicle off.
5. Set the parking brake. See Electric
Parking Brake 0235.
{Warning
Turning off the vehicle while moving may
cause loss of power assist in the brake
and steering systems and disable the
airbags. While driving, only shut the
vehicle off in an emergency.
Accessory Mode (Amber Indicator Light) :
This mode allows some electrical accessories
to be used when the engine is off.
With the vehicle off, pressing the ENGINE
START/STOP button one time without the
brake pedal applied will place the vehicle in
accessory mode. The vehicle will switch from accessory mode
to off after five minutes to prevent battery
rundown.
ON/RUN/START (Green Indicator Light) :
This
mode is for driving and starting. With the
vehicle off, and the brake pedal applied,
pressing ENGINE START/STOP button once
will turn the ignition on. Once engine
cranking begins, release the button. Engine
cranking will continue until the engine
starts. See Starting the Engine 0213.
Service Mode
This power mode is available for service and
diagnostics, and to verify the proper
operation of the malfunction indicator lamp
as may be required for emission inspection
purposes. With the vehicle off, and the
brake pedal not applied, pressing and
holding the ENGINE START/STOP button for
more than five seconds will place the vehicle
in Service Mode. The instruments and audio
systems will operate as they do when the
vehicle is on, but the vehicle will not be able
to be driven. The engine will not start in
Service Mode. Press the ENGINE START/STOP
button again to turn the vehicle off.
Page 214 of 463
Chevrolet Silverado 1500 Owner Manual (GMNA-Localizing-U.S./Canada/
Mexico/Paraguay-16515119) - 2023 - CRC - 6/2/22
Driving and Operating 213
Starting the Engine
If the vehicle has a diesel engine, see the
Duramax diesel supplement.
Caution
If you add electrical parts or accessories,
you could change the way the engine
operates. Any resulting damage would
not be covered by the vehicle warranty.
SeeAdd-On Electrical Equipment 0328.
Move the shift lever to P (Park) or
N (Neutral). To restart the engine when the
vehicle is already moving, use
N (Neutral) only.
Caution
Do not try to shift to P (Park) if the
vehicle is moving. If you do, you could
damage the transmission. Shift to P (Park)
only when the vehicle is stopped.
Starting Procedure
1. The remote key must be in the vehicle. Press ENGINE START/STOP with the brake
pedal applied. When the engine begins
cranking, let go of the button. The driver may observe a minor, and
temporary, brake pedal kickback when
starting the vehicle. This is normal.
The idle speed will go down as the
engine gets warm. Do not race the
engine immediately after starting it.
Operate the engine and transmission
gently to allow the oil to warm up and
lubricate all moving parts.
When the low fuel warning light is on
and the FUEL LEVEL LOW message is
displayed in the Driver Information
Center (DIC), press ENGINE START/STOP
to continue engine cranking.
Caution
Cranking the engine for long periods of
time, by returning the ignition to the
START position immediately after
cranking has ended, can overheat and
damage the cranking motor, and drain
the battery. Wait at least 15 seconds
between each try, to let the cranking
motor cool down.
2. If the engine does not start after five to 10 seconds, especially in very cold
weather (below −18 °C or 0 °F), it could
be flooded with too much gasoline. Try pushing the accelerator pedal all the way
to the floor and holding it there while
pressing ENGINE START/STOP for up to a
maximum of 15 seconds. Wait at least
15 seconds between each try, to allow
the cranking motor to cool down. When
the engine starts, let go of the button
and accelerator. If the vehicle starts
briefly but then stops again, do the
same thing. This clears the extra gasoline
from the engine. Do not race the engine
immediately after starting it. Operate
the engine and transmission gently until
the oil warms up and lubricates all
moving parts.Stop/Start System
If equipped and enabled, the Stop/Start
system will shut off the engine to help
conserve fuel. It has components designed
for the increased number of starts.
{Warning
The automatic engine Stop/Start feature
causes the engine to shut off while the
vehicle is still on. Do not exit the vehicle
before shifting to P (Park). The vehicle
(Continued)
Page 236 of 463
Chevrolet Silverado 1500 Owner Manual (GMNA-Localizing-U.S./Canada/
Mexico/Paraguay-16515119) - 2023 - CRC - 6/2/22
Driving and Operating 235
If there is a problem with ABS, this warning
light stays on. SeeAntilock Brake System
(ABS) Warning Light 0119.
ABS does not change the time needed to
get a foot on the brake pedal and does not
always decrease stopping distance. If you
get too close to the vehicle ahead, there will
not be enough time to apply the brakes if
that vehicle suddenly slows or stops. Always
leave enough room ahead to stop, even
with ABS.
Using ABS
Do not pump the brakes. Just hold the brake
pedal down firmly. Hearing or feeling ABS
operate is normal.
Braking in Emergencies
ABS allows steering and braking at the same
time. In many emergencies, steering can
help even more than braking.
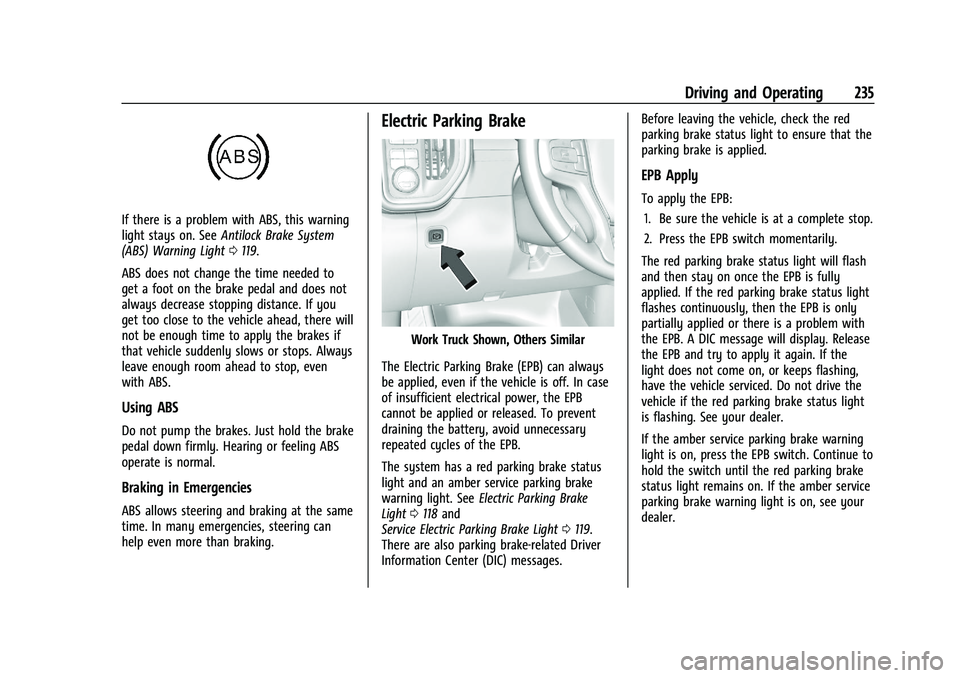
Electric Parking Brake
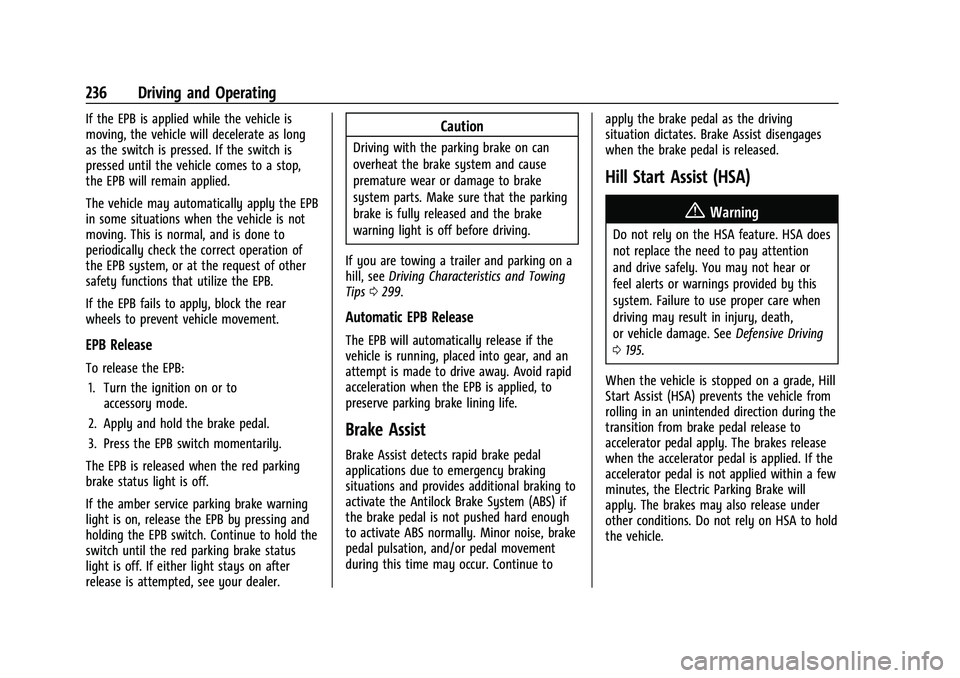
Work Truck Shown, Others Similar
The Electric Parking Brake (EPB) can always
be applied, even if the vehicle is off. In case
of insufficient electrical power, the EPB
cannot be applied or released. To prevent
draining the battery, avoid unnecessary
repeated cycles of the EPB.
The system has a red parking brake status
light and an amber service parking brake
warning light. See Electric Parking Brake
Light 0118 and
Service Electric Parking Brake Light 0119.
There are also parking brake-related Driver
Information Center (DIC) messages. Before leaving the vehicle, check the red
parking brake status light to ensure that the
parking brake is applied.
EPB Apply
To apply the EPB:
1. Be sure the vehicle is at a complete stop.
2. Press the EPB switch momentarily.
The red parking brake status light will flash
and then stay on once the EPB is fully
applied. If the red parking brake status light
flashes continuously, then the EPB is only
partially applied or there is a problem with
the EPB. A DIC message will display. Release
the EPB and try to apply it again. If the
light does not come on, or keeps flashing,
have the vehicle serviced. Do not drive the
vehicle if the red parking brake status light
is flashing. See your dealer.
If the amber service parking brake warning
light is on, press the EPB switch. Continue to
hold the switch until the red parking brake
status light remains on. If the amber service
parking brake warning light is on, see your
dealer.
Page 237 of 463
Chevrolet Silverado 1500 Owner Manual (GMNA-Localizing-U.S./Canada/
Mexico/Paraguay-16515119) - 2023 - CRC - 6/2/22
236 Driving and Operating
If the EPB is applied while the vehicle is
moving, the vehicle will decelerate as long
as the switch is pressed. If the switch is
pressed until the vehicle comes to a stop,
the EPB will remain applied.
The vehicle may automatically apply the EPB
in some situations when the vehicle is not
moving. This is normal, and is done to
periodically check the correct operation of
the EPB system, or at the request of other
safety functions that utilize the EPB.
If the EPB fails to apply, block the rear
wheels to prevent vehicle movement.
EPB Release
To release the EPB:1. Turn the ignition on or to accessory mode.
2. Apply and hold the brake pedal.
3. Press the EPB switch momentarily.
The EPB is released when the red parking
brake status light is off.
If the amber service parking brake warning
light is on, release the EPB by pressing and
holding the EPB switch. Continue to hold the
switch until the red parking brake status
light is off. If either light stays on after
release is attempted, see your dealer.
Caution
Driving with the parking brake on can
overheat the brake system and cause
premature wear or damage to brake
system parts. Make sure that the parking
brake is fully released and the brake
warning light is off before driving.
If you are towing a trailer and parking on a
hill, see Driving Characteristics and Towing
Tips 0299.
Automatic EPB Release
The EPB will automatically release if the
vehicle is running, placed into gear, and an
attempt is made to drive away. Avoid rapid
acceleration when the EPB is applied, to
preserve parking brake lining life.
Brake Assist
Brake Assist detects rapid brake pedal
applications due to emergency braking
situations and provides additional braking to
activate the Antilock Brake System (ABS) if
the brake pedal is not pushed hard enough
to activate ABS normally. Minor noise, brake
pedal pulsation, and/or pedal movement
during this time may occur. Continue to apply the brake pedal as the driving
situation dictates. Brake Assist disengages
when the brake pedal is released.
Hill Start Assist (HSA)
{Warning
Do not rely on the HSA feature. HSA does
not replace the need to pay attention
and drive safely. You may not hear or
feel alerts or warnings provided by this
system. Failure to use proper care when
driving may result in injury, death,
or vehicle damage. See
Defensive Driving
0 195.
When the vehicle is stopped on a grade, Hill
Start Assist (HSA) prevents the vehicle from
rolling in an unintended direction during the
transition from brake pedal release to
accelerator pedal apply. The brakes release
when the accelerator pedal is applied. If the
accelerator pedal is not applied within a few
minutes, the Electric Parking Brake will
apply. The brakes may also release under
other conditions. Do not rely on HSA to hold
the vehicle.
Page 246 of 463
Chevrolet Silverado 1500 Owner Manual (GMNA-Localizing-U.S./Canada/
Mexico/Paraguay-16515119) - 2023 - CRC - 6/2/22
Driving and Operating 245
Uplevel Shown, Other Models Similar
Caution
Do not lock the axle while the tires are
spinning. The vehicle drivetrain could be
damaged. The repairs would not be
covered by the vehicle warranty.
Caution
If the vehicle’s axle is locked while driving
on pavement, the drivetrain could be
damaged. Repairs would not be covered
by the vehicle warranty. Do not use the
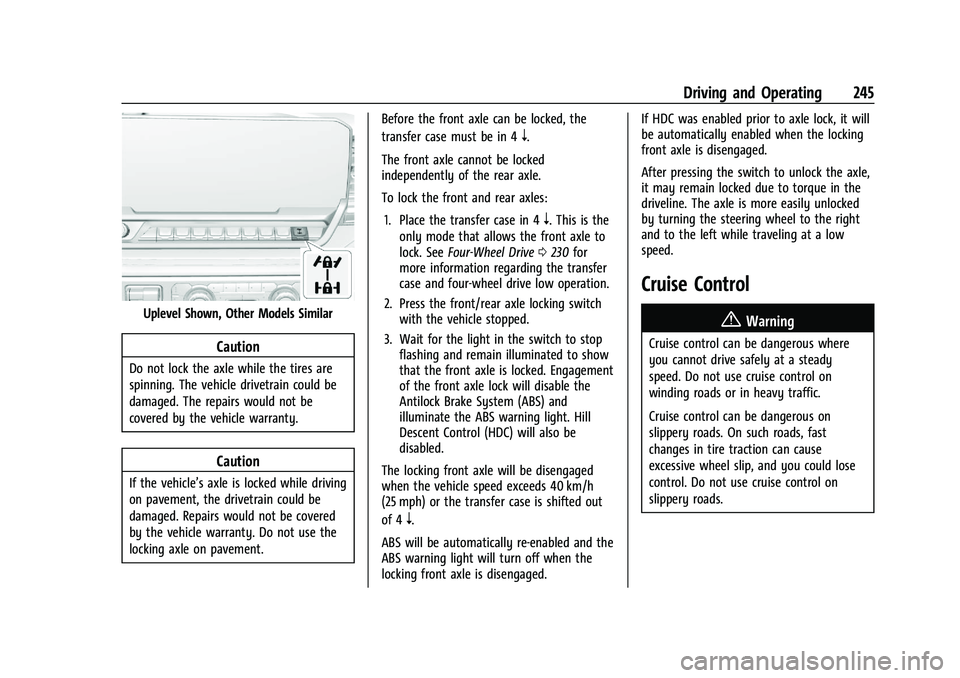
locking axle on pavement.Before the front axle can be locked, the
transfer case must be in 4
n.
The front axle cannot be locked
independently of the rear axle.
To lock the front and rear axles: 1. Place the transfer case in 4
n. This is the
only mode that allows the front axle to
lock. See Four-Wheel Drive 0230 for
more information regarding the transfer
case and four-wheel drive low operation.
2. Press the front/rear axle locking switch with the vehicle stopped.
3. Wait for the light in the switch to stop flashing and remain illuminated to show
that the front axle is locked. Engagement
of the front axle lock will disable the
Antilock Brake System (ABS) and
illuminate the ABS warning light. Hill
Descent Control (HDC) will also be
disabled.
The locking front axle will be disengaged
when the vehicle speed exceeds 40 km/h
(25 mph) or the transfer case is shifted out
of 4
n.
ABS will be automatically re-enabled and the
ABS warning light will turn off when the
locking front axle is disengaged. If HDC was enabled prior to axle lock, it will
be automatically enabled when the locking
front axle is disengaged.
After pressing the switch to unlock the axle,
it may remain locked due to torque in the
driveline. The axle is more easily unlocked
by turning the steering wheel to the right
and to the left while traveling at a low
speed.
Cruise Control
{
Warning
Cruise control can be dangerous where
you cannot drive safely at a steady
speed. Do not use cruise control on
winding roads or in heavy traffic.
Cruise control can be dangerous on
slippery roads. On such roads, fast
changes in tire traction can cause
excessive wheel slip, and you could lose
control. Do not use cruise control on
slippery roads.
Page 256 of 463
Chevrolet Silverado 1500 Owner Manual (GMNA-Localizing-U.S./Canada/
Mexico/Paraguay-16515119) - 2023 - CRC - 6/2/22
Driving and Operating 255
automatically applies the Electric Parking
Brake (EPB) to hold the vehicle. The EPB
status light will turn on. SeeElectric Parking
Brake 0235. To release the EPB, press the
accelerator pedal.
A DIC warning message may display
indicating to shift to P (Park) before exiting
the vehicle. See Vehicle Messages 0133.
{Warning
If ACC has stopped the vehicle, and if ACC
is disengaged, turned off, or canceled, the
vehicle will no longer be held at a stop.
The vehicle can move. When ACC is
holding the vehicle at a stop, always be
prepared to manually apply the brakes.
{Warning
Leaving the vehicle without placing it in
P (Park) can be dangerous. Do not leave
the vehicle while it is being held at a
stop by ACC. Always place the vehicle in
P (Park) and turn off the ignition before
leaving the vehicle. ACC Override
If using the accelerator pedal while ACC is
active, the ACC indicator turns blue on the
instrument cluster and in the HUD,
if equipped, to indicate that automatic
braking will not occur. ACC will resume
operation when the accelerator pedal is not
being pressed.
{Warning
The ACC will not automatically apply the
brakes if your foot is resting on the
accelerator pedal. You could crash into a
vehicle ahead of you.
Curves in the Road
{Warning
On curves, ACC may not detect a vehicle
ahead in your lane. You could be startled
if the vehicle accelerates up to the set
speed, especially when following a vehicle
exiting or entering exit ramps. You could
lose control of the vehicle or crash. Do
not use ACC while driving on an entrance
or exit ramp. Always be ready to use the
brakes if necessary.
{Warning
On curves, ACC may respond to a vehicle
in another lane, or may not have time to
react to a vehicle in your lane. You could
crash into a vehicle ahead of you, or lose
control of your vehicle. Give extra
attention in curves and be ready to use
the brakes if necessary. Select an
appropriate speed while driving in curves.
ACC may operate differently in a sharp
curve. It may reduce the vehicle speed if the
curve is too sharp.
If equipped, the curve speed control
indicator
bmay illuminate green when
ACC is actively controlling the vehicle speed
and detects a sharp curve on the road
ahead.
ACC automatically slows the vehicle down
while navigating the curve and may increase
speed out of the curve, but will not exceed
the set speed.
Page 258 of 463
Chevrolet Silverado 1500 Owner Manual (GMNA-Localizing-U.S./Canada/
Mexico/Paraguay-16515119) - 2023 - CRC - 6/2/22
Driving and Operating 257
When towing a trailer with ACC, it is
important to properly set the Trailer Gain.
See“Integrated Trailer Brake Control
System” inTowing Equipment 0307 for
Trailer Gain Adjustment Procedure.
Use Tow/Haul mode when driving down
steep hills or mountain grades, or when
hauling heavy loads. See Driver Mode
Control 0240.
Disengaging ACC
There are three ways to disengage ACC:
.Step lightly on the brake pedal.
.Press*.
.PressJ.
Erasing Speed Memory
The ACC set speed is erased from memory if
Jis pressed or if the ignition is turned off.
Weather Conditions Affecting ACC
If the interior temperature is extremely
high, the instrument cluster may indicate
that ACC is temporarily unavailable. This can
be caused by extreme hot weather
conditions with direct sunlight on the front
camera. ACC will return to normal operation
once the cabin temperature is lower. Conditions that are associated with low
visibility, such as fog, rain, snow, or road
spray, may limit ACC performance. Water
droplets from rain or snow that remain on
the windshield may also limit ACC’s ability
to detect objects.
System operation may be limited under
snow, heavy rain, or road spray conditions.
{Warning
Camera visibility may be limited and the
ACC system may not work properly if the
windshield is not clear. Do not use ACC if
moisture is present on the inside of the
windshield or the windshield washer is
used in cold weather. Turn on the front
defroster and make sure the windshield is
clear before using ACC. Before driving,
check that the windshield wipers are in
good condition and replace them if worn.
Lighting Conditions Affecting ACC
The ACC front camera can be affected by
poor lighting conditions, and ACC may have
limited performance when:
.There are changes in brightness, such as
entering and exiting tunnels, bridges, and
overpasses.
.Low sun angles cause the camera to not
detect objects, or it is more difficult to
detect objects in the same traffic lane.
.Lighting is poor in the evening or early
morning
.There are multiple changes in brightness
or shadows along the vehicle roadway.
.In a tunnel without the headlamps on,
or in a tunnel when there is a vehicle in
front that does not have its taillamps on.
.Subjected to strong light from opposing
lane traffic in the front of the vehicle,
such as high-beam headlamps from
oncoming traffic.
Accessory Installations and Vehicle
Modifications
Do not install or place any object around
the front camera windshield area that would
obstruct the front camera view.
Do not install objects on top of the vehicle
that overhang and obstruct the front
camera, such as a canoe, kayak, or other
items that can be transported on the
vehicle roof.
Do not modify the hood, headlamps, or fog
lamps, as this may limit the camera’s ability
to detect an object.