2023 CHEVROLET SILVERADO 1500 page 21
[x] Cancel search: page 21Page 264 of 463
Chevrolet Silverado 1500 Owner Manual (GMNA-Localizing-U.S./Canada/
Mexico/Paraguay-16515119) - 2023 - CRC - 6/2/22
Driving and Operating 263
Warning (Continued)
Cruise Lane Change feature. Only request
a lane change when traffic conditions are
safe for a lane change, and always be
ready to manually steer the vehicle. See
“Steering Manually and Changing Lanes”
listed previously in this section.
Take Over Alert
{Warning
Super Cruise will not maintain the
vehicle’s speed while the steering wheel
light bar is flashing red. If the steering
wheel light bar flashes red, immediately
resume manual steering to prevent
serious injury or death. If you do not
resume manual steering, the vehicle will
begin to slow in the same lane and
eventually come to a complete stop on
the road.
Any time the steering wheel light bar
flashes red, resume manual steering. To begin steering manually, hold the
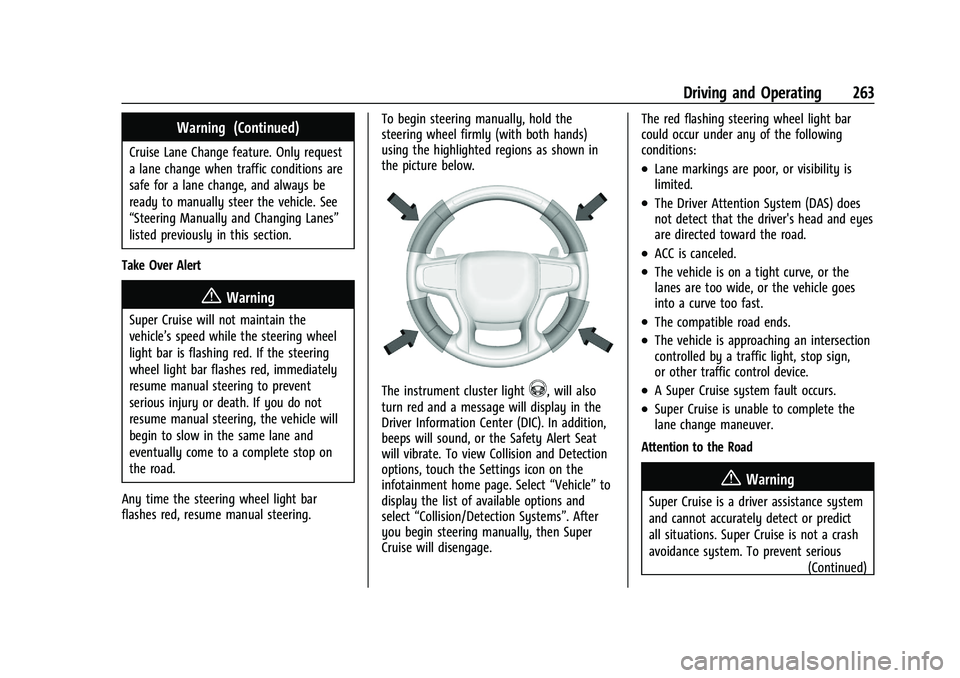
steering wheel firmly (with both hands)
using the highlighted regions as shown in
the picture below.
The instrument cluster light^, will also
turn red and a message will display in the
Driver Information Center (DIC). In addition,
beeps will sound, or the Safety Alert Seat
will vibrate. To view Collision and Detection
options, touch the Settings icon on the
infotainment home page. Select “Vehicle”to
display the list of available options and
select “Collision/Detection Systems”. After
you begin steering manually, then Super
Cruise will disengage. The red flashing steering wheel light bar
could occur under any of the following
conditions:
.Lane markings are poor, or visibility is
limited.
.The Driver Attention System (DAS) does
not detect that the driver's head and eyes
are directed toward the road.
.ACC is canceled.
.The vehicle is on a tight curve, or the
lanes are too wide, or the vehicle goes
into a curve too fast.
.The compatible road ends.
.The vehicle is approaching an intersection
controlled by a traffic light, stop sign,
or other traffic control device.
.A Super Cruise system fault occurs.
.Super Cruise is unable to complete the
lane change maneuver.
Attention to the Road
{Warning
Super Cruise is a driver assistance system
and cannot accurately detect or predict
all situations. Super Cruise is not a crash
avoidance system. To prevent serious (Continued)
Page 266 of 463
Chevrolet Silverado 1500 Owner Manual (GMNA-Localizing-U.S./Canada/
Mexico/Paraguay-16515119) - 2023 - CRC - 6/2/22
Driving and Operating 265
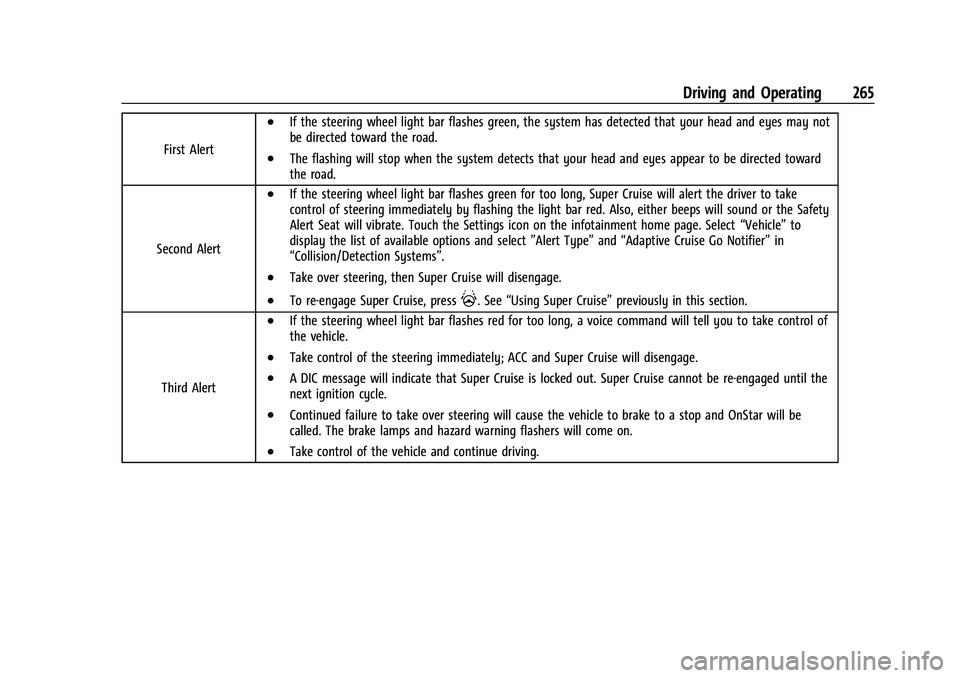
First Alert
.If the steering wheel light bar flashes green, the system has detected that your head and eyes may not
be directed toward the road.
.The flashing will stop when the system detects that your head and eyes appear to be directed toward
the road.
Second Alert
.If the steering wheel light bar flashes green for too long, Super Cruise will alert the driver to take
control of steering immediately by flashing the light bar red. Also, either beeps will sound or the Safety
Alert Seat will vibrate. Touch the Settings icon on the infotainment home page. Select “Vehicle”to
display the list of available options and select ”Alert Type”and“Adaptive Cruise Go Notifier” in
“Collision/Detection Systems”.
.Take over steering, then Super Cruise will disengage.
.To re-engage Super Cruise, press]. See “Using Super Cruise” previously in this section.
Third Alert
.If the steering wheel light bar flashes red for too long, a voice command will tell you to take control of
the vehicle.
.Take control of the steering immediately; ACC and Super Cruise will disengage.
.A DIC message will indicate that Super Cruise is locked out. Super Cruise cannot be re-engaged until the
next ignition cycle.
.Continued failure to take over steering will cause the vehicle to brake to a stop and OnStar will be
called. The brake lamps and hazard warning flashers will come on.
.Take control of the vehicle and continue driving.
Page 315 of 463
Chevrolet Silverado 1500 Owner Manual (GMNA-Localizing-U.S./Canada/
Mexico/Paraguay-16515119) - 2023 - CRC - 6/2/22
314 Driving and Operating
The ITBC system is powered through the
vehicle electrical system. Turning the vehicle
off will also turn off the ITBC system. The
ITBC system is fully functional only when
the vehicle is on.
{Warning
Connecting a trailer that has an air brake
system may result in reduced or
complete loss of trailer braking, including
increased stopping distance or trailer
instability which could result in serious
injury, death, or property damage. Only
use the ITBC system with electric or
electric over hydraulic trailer brake
systems.
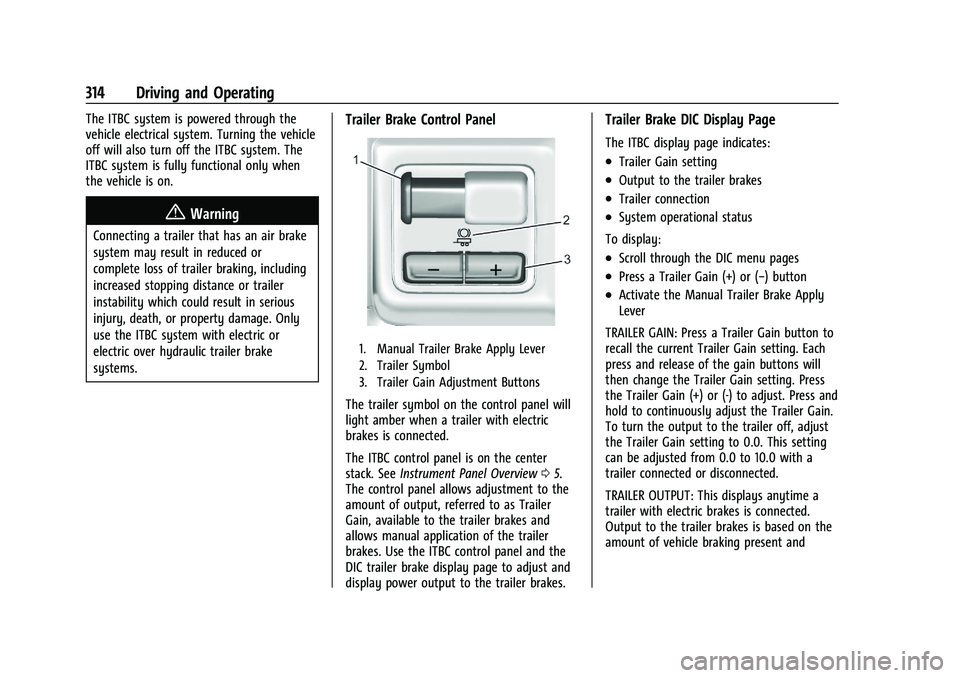
Trailer Brake Control Panel
1. Manual Trailer Brake Apply Lever
2. Trailer Symbol
3. Trailer Gain Adjustment Buttons
The trailer symbol on the control panel will
light amber when a trailer with electric
brakes is connected.
The ITBC control panel is on the center
stack. SeeInstrument Panel Overview 05.
The control panel allows adjustment to the
amount of output, referred to as Trailer
Gain, available to the trailer brakes and
allows manual application of the trailer
brakes. Use the ITBC control panel and the
DIC trailer brake display page to adjust and
display power output to the trailer brakes.
Trailer Brake DIC Display Page
The ITBC display page indicates:
.Trailer Gain setting
.Output to the trailer brakes
.Trailer connection
.System operational status
To display:
.Scroll through the DIC menu pages
.Press a Trailer Gain (+) or (−) button
.Activate the Manual Trailer Brake Apply
Lever
TRAILER GAIN: Press a Trailer Gain button to
recall the current Trailer Gain setting. Each
press and release of the gain buttons will
then change the Trailer Gain setting. Press
the Trailer Gain (+) or (-) to adjust. Press and
hold to continuously adjust the Trailer Gain.
To turn the output to the trailer off, adjust
the Trailer Gain setting to 0.0. This setting
can be adjusted from 0.0 to 10.0 with a
trailer connected or disconnected.
TRAILER OUTPUT: This displays anytime a
trailer with electric brakes is connected.
Output to the trailer brakes is based on the
amount of vehicle braking present and
Page 316 of 463
Chevrolet Silverado 1500 Owner Manual (GMNA-Localizing-U.S./Canada/
Mexico/Paraguay-16515119) - 2023 - CRC - 6/2/22
Driving and Operating 315
relative to the Trailer Gain setting. Output is
displayed from 0 to 100% for each gain
setting.
The Trailer Output will indicate“- - - - - -”on
the Trailer Brake Display Page whenever the
following occur:
.No trailer is connected.
.A trailer without electric brakes is
connected. No DIC message displays.
.A trailer with electric brakes has become
disconnected. A CHECK TRAILER WIRING
message displays on the DIC.
.There is a fault present in the wiring to
the trailer brakes. A CHECK TRAILER
WIRING message displays on the DIC.
.The ITBC system is not working due to a
fault. A SERVICE TRAILER BRAKE SYSTEM
message displays in the DIC.
Manual Trailer Brake Apply Lever
Slide this lever to apply the trailer's electric
brakes independent of the vehicle brakes.
Use this lever to adjust Trailer Gain to
achieve the proper power output to the
trailer brakes. This lever may also be used
to request additional trailer braking at any
time. The trailer and the vehicle brake lamps will come on when either vehicle brakes or
manual trailer brakes are applied and
properly connected.
Trailer Gain Adjustment Procedure
Trailer Gain should be set for a specific
trailering condition and it must be
readjusted anytime vehicle loading, trailer
loading, or road surface conditions change.
{Warning
Trailer brakes that are over-gained or
under-gained may not stop the vehicle
and the trailer as intended and can result
in a crash. Always follow the instructions
to set the Trailer Gain for the proper
trailer stopping performance.
To adjust Trailer Gain for each towing
condition: 1. Drive the vehicle with the trailer attached on a level road surface
representative of the towing condition
and free of traffic at about 32–40 km/h
(20–25 mph) and fully apply the Manual
Trailer Brake Apply Lever.
Adjusting Trailer Gain at speeds lower
than 32–40 km/h (20–25 mph) may result
in an incorrect gain setting. 2. Adjust the Trailer Gain, using the Trailer
Gain (+) or (−) adjustment buttons, to
just below the point of trailer wheel
lock-up, indicated by trailer wheel squeal
or tire smoke when a trailer wheel locks.
Trailer wheel lock-up may not occur if
towing a heavily loaded trailer. Adjust
the Trailer Gain to the highest allowable
setting for the towing condition.
3. Readjust Trailer Gain anytime vehicle loading, trailer loading, or road surface
conditions change or if trailer wheel
lock-up is noticed at any time while
towing.
Other ITBC-Related DIC Messages
TRAILER BRAKES CONNECTED: This message
will briefly display when a trailer with
electric brakes is first connected to the
vehicle. This message will automatically turn
off in about 10 seconds. This message can
be acknowledged before it automatically
turns off.
CHECK TRAILER WIRING: This message will
display if:
.The ITBC system first determines
connection to a trailer with electric brakes
and then the trailer harness becomes
disconnected from the vehicle.
Page 320 of 463
Chevrolet Silverado 1500 Owner Manual (GMNA-Localizing-U.S./Canada/
Mexico/Paraguay-16515119) - 2023 - CRC - 6/2/22
Driving and Operating 319
The Trailering App welcome page appears
when the Trailering App is opened for the
first time from the infotainment home
screen.
When a trailer is electrically connected and
a trailer profile has not been created, there
will be an option to create a profile, use a
guest profile, or select Accessory/No trailer.
When a trailer is electrically connected and
after a Trailer Profile has been created, the
trailer detection pop-up appears with a list
of all of the custom Trailer Profiles made on
the vehicle. To load an existing Trailer
Profile, select one of the Trailer Profiles
listed, or load the Guest Trailer Profile by
selecting GUEST TRAILER. Touching
Accessory/No trailer will select Accessory/No
trailer as the active Trailer Profile and will
dismiss the pop- up. Shifting the vehicle
from P (Park) will select Guest Trailer as the
active Trailer Profile and will dismiss the
pop-up.
Create a Trailer Profile
Touch Add Trailer on the trailer detection
pop-up or touch + Add Trailer in the
Trailering App.
Follow on-screen instructions to set up
profile.After a profile is created, set up for
additional features may become available,
such as Tow/Haul Mode reminder, Trailer
Tire Pressure Monitoring System (TTPMS),
maintenance reminders, or towing assist.
Import a Trailer Profile
Touch Import on the trailer detection pop-up
or touch Import in the Trailering App.
Follow on-screen instructions to import a
profile.
After a profile is imported, it can be selected
from the trailer list. The Tow/Haul Mode
reminder, Brake Gain Setting and Trailer Tire
Pressure sensor learning, if equipped, do not
import.
Trailer Feature Setup
Tow/Haul Mode Reminder
To turn the Tow/Haul Mode Reminder
setting on, touch Yes. To turn it off,
touch No.
Trailer Tire Pressure Setup
If the Trailer TTPMS is detected, touch the
Tire Pressure Monitoring icon to set up tire
pressure monitoring.
The trailer tire pressure sensors can transmit
up to 7 m (23 feet) from the hitch receiver of
the vehicle.
A trailer must be electrically connected to
the vehicle before starting the
sensor-to-vehicle learn process.
After selecting Start from the Learn Sensors
screen, use the Tool Method or the Manual
Method (described below) to learn each tire
sensor, during which the current tire number
will be highlighted.
Each sensor has a maximum of two minutes
to learn. After a sensor is learned, a
checkmark appears next to the tire, the
vehicle horn sounds, the vehicle brake lamps
flash, and all working trailer lamps flash.
It then moves to the next sensor.
Touch Stop to cancel the process.
The recommended tire pressure must be
entered for the trailer tires. This allows the
vehicle to alert when the tire pressure is
high or low.
TTPMS must learn the location of the
installed tire sensors to show correct air
pressure and temperature for each tire. To
set up, use one of the following options or
Page 442 of 463
Chevrolet Silverado 1500 Owner Manual (GMNA-Localizing-U.S./Canada/
Mexico/Paraguay-16515119) - 2023 - CRC - 6/2/22
OnStar 441
OnStar
OnStar Overview
OnStar Overview . . . . . . . . . . . . . . . . . . . . . . 441
OnStar Services
Emergency . . . . . . . . . . . . . . . . . . . . . . . . . . . . 442
Security . . . . . . . . . . . . . . . . . . . . . . . . . . . . . . . 442
OnStar Additional Information
OnStar Additional Information . . . . . . . . 442
OnStar Overview
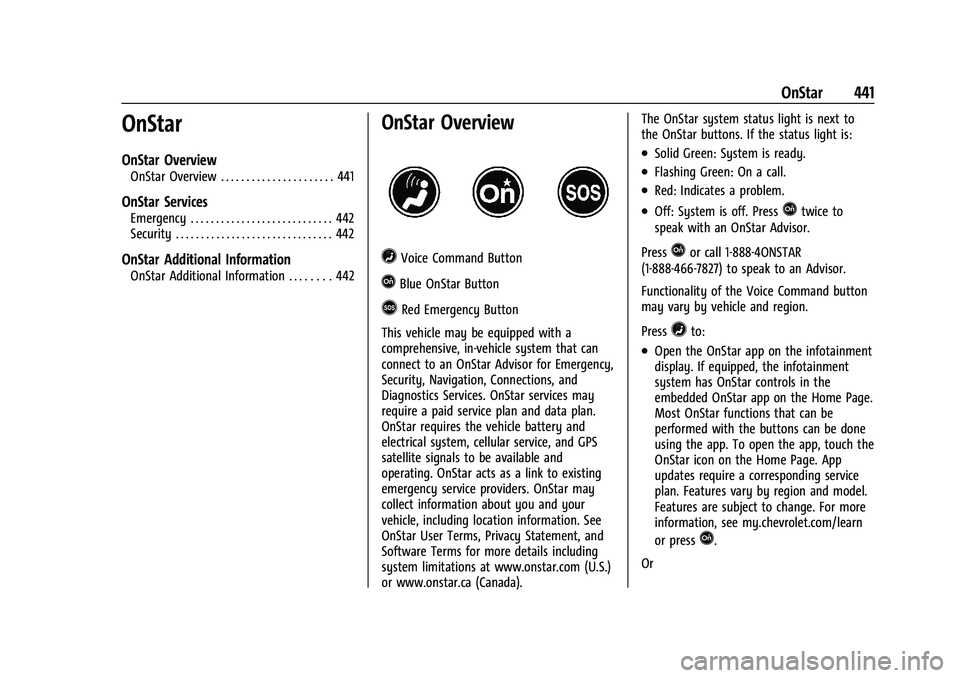
=Voice Command Button
QBlue OnStar Button
>Red Emergency Button
This vehicle may be equipped with a
comprehensive, in-vehicle system that can
connect to an OnStar Advisor for Emergency,
Security, Navigation, Connections, and
Diagnostics Services. OnStar services may
require a paid service plan and data plan.
OnStar requires the vehicle battery and
electrical system, cellular service, and GPS
satellite signals to be available and
operating. OnStar acts as a link to existing
emergency service providers. OnStar may
collect information about you and your
vehicle, including location information. See
OnStar User Terms, Privacy Statement, and
Software Terms for more details including
system limitations at www.onstar.com (U.S.)
or www.onstar.ca (Canada). The OnStar system status light is next to
the OnStar buttons. If the status light is:
.Solid Green: System is ready.
.Flashing Green: On a call.
.Red: Indicates a problem.
.Off: System is off. PressQtwice to
speak with an OnStar Advisor.
Press
Qor call 1-888-4ONSTAR
(1-888-466-7827) to speak to an Advisor.
Functionality of the Voice Command button
may vary by vehicle and region.
Press
=to:
.Open the OnStar app on the infotainment
display. If equipped, the infotainment
system has OnStar controls in the
embedded OnStar app on the Home Page.
Most OnStar functions that can be
performed with the buttons can be done
using the app. To open the app, touch the
OnStar icon on the Home Page. App
updates require a corresponding service
plan. Features vary by region and model.
Features are subject to change. For more
information, see my.chevrolet.com/learn
or press
Q.
Or