2023 CHEVROLET SILVERADO 1500 change
[x] Cancel search: changePage 127 of 463
Chevrolet Silverado 1500 Owner Manual (GMNA-Localizing-U.S./Canada/
Mexico/Paraguay-16515119) - 2023 - CRC - 6/2/22
126 Instruments and Controls
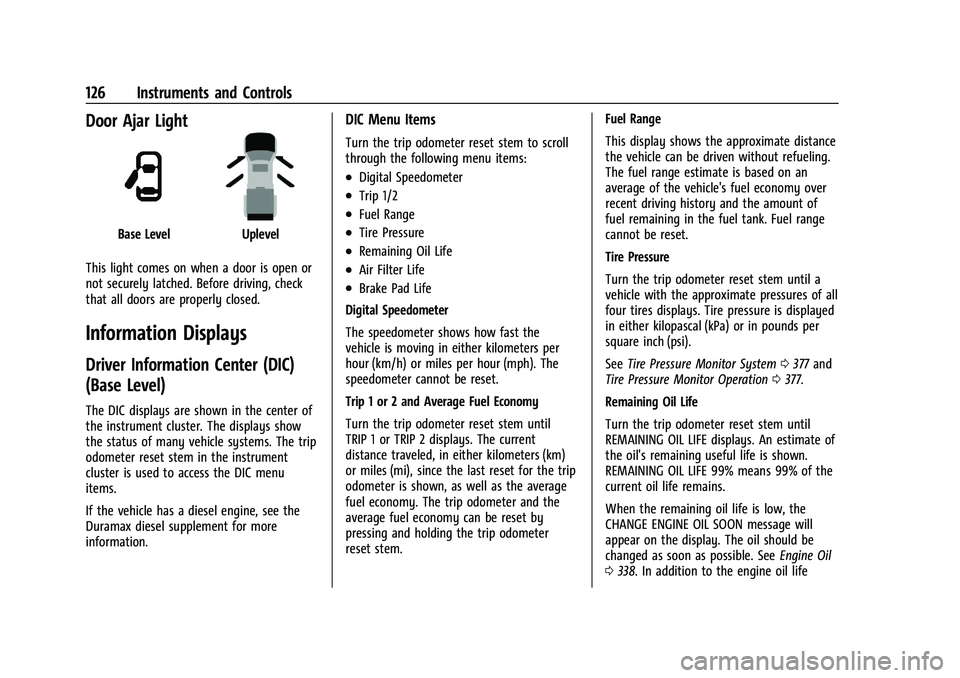
Door Ajar Light
Base LevelUplevel
This light comes on when a door is open or
not securely latched. Before driving, check
that all doors are properly closed.
Information Displays
Driver Information Center (DIC)
(Base Level)
The DIC displays are shown in the center of
the instrument cluster. The displays show
the status of many vehicle systems. The trip
odometer reset stem in the instrument
cluster is used to access the DIC menu
items.
If the vehicle has a diesel engine, see the
Duramax diesel supplement for more
information.
DIC Menu Items
Turn the trip odometer reset stem to scroll
through the following menu items:
.Digital Speedometer
.Trip 1/2
.Fuel Range
.Tire Pressure
.Remaining Oil Life
.Air Filter Life
.Brake Pad Life
Digital Speedometer
The speedometer shows how fast the
vehicle is moving in either kilometers per
hour (km/h) or miles per hour (mph). The
speedometer cannot be reset.
Trip 1 or 2 and Average Fuel Economy
Turn the trip odometer reset stem until
TRIP 1 or TRIP 2 displays. The current
distance traveled, in either kilometers (km)
or miles (mi), since the last reset for the trip
odometer is shown, as well as the average
fuel economy. The trip odometer and the
average fuel economy can be reset by
pressing and holding the trip odometer
reset stem. Fuel Range
This display shows the approximate distance
the vehicle can be driven without refueling.
The fuel range estimate is based on an
average of the vehicle's fuel economy over
recent driving history and the amount of
fuel remaining in the fuel tank. Fuel range
cannot be reset.
Tire Pressure
Turn the trip odometer reset stem until a
vehicle with the approximate pressures of all
four tires displays. Tire pressure is displayed
in either kilopascal (kPa) or in pounds per
square inch (psi).
See
Tire Pressure Monitor System 0377 and
Tire Pressure Monitor Operation 0377.
Remaining Oil Life
Turn the trip odometer reset stem until
REMAINING OIL LIFE displays. An estimate of
the oil's remaining useful life is shown.
REMAINING OIL LIFE 99% means 99% of the
current oil life remains.
When the remaining oil life is low, the
CHANGE ENGINE OIL SOON message will
appear on the display. The oil should be
changed as soon as possible. See Engine Oil
0 338. In addition to the engine oil life
Page 128 of 463
Chevrolet Silverado 1500 Owner Manual (GMNA-Localizing-U.S./Canada/
Mexico/Paraguay-16515119) - 2023 - CRC - 6/2/22
Instruments and Controls 127
system monitoring the oil life, additional
maintenance is recommended. See
Maintenance Schedule0417.
The Oil Life display must be reset after each
oil change. It will not reset itself. Do not
reset the Oil Life display at any time other
than when the oil has just been changed.
It cannot be reset accurately until the next
oil change. To reset, see Engine Oil Life
System 0340.
Air Filter Life
Turn the trip odometer reset stem until AIR
FILTER LIFE displays. This displays an
estimate of the engine air filter’s remaining
useful life and the state of the system.
Engine Air Filter Life 95% means 95% of the
current air filter life remains. Messages will
display based on the engine air filter life
and the state of the system.
When the REPLACE AT NEXT OIL CHANGE
message displays, the engine air filter
should be replaced at the time of the next
oil change. When the REPLACE SOON
message displays, the engine air filter
should be replaced at the earliest
convenience. The Air Filter Life display must be reset after
the engine air filter replacement. To reset,
see
Engine Air Filter Life System 0341.
Brake Pad Life
This displays an estimate of the remaining
life of the front and rear brake pads.
Messages will display based on brake pad
wear and the state of the system. Reset the
Brake Pad Life display after replacing the
brake pads. See Brake Pad Life System
0 349.
Driver Information Center (DIC)
(Uplevel)
The DIC displays are shown in the center of
the instrument cluster in the Info app. See
Instrument Cluster (Base Level) 0106 or
Instrument Cluster (Uplevel) 0107. The
displays show the status of many vehicle
systems.
If the vehicle has a diesel engine, see the
Duramax diesel supplement.
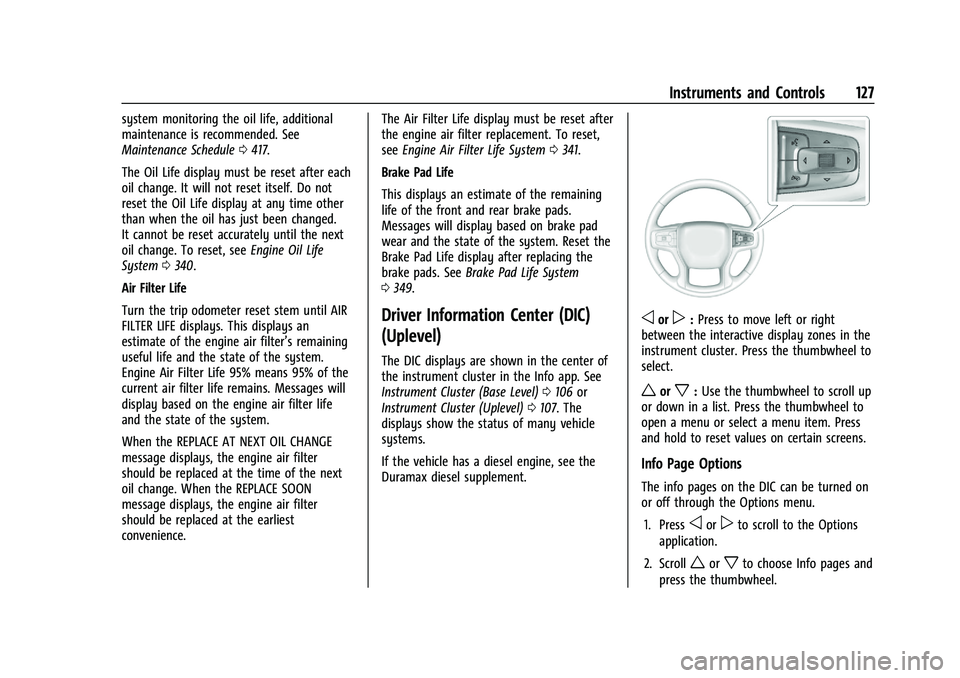
oorp: Press to move left or right
between the interactive display zones in the
instrument cluster. Press the thumbwheel to
select.
worx: Use the thumbwheel to scroll up
or down in a list. Press the thumbwheel to
open a menu or select a menu item. Press
and hold to reset values on certain screens.
Info Page Options
The info pages on the DIC can be turned on
or off through the Options menu.
1. Press
oorpto scroll to the Options
application.
2. Scroll
worxto choose Info pages and
press the thumbwheel.
Page 129 of 463
Chevrolet Silverado 1500 Owner Manual (GMNA-Localizing-U.S./Canada/
Mexico/Paraguay-16515119) - 2023 - CRC - 6/2/22
128 Instruments and Controls
3. Scrollworxto move through the list
of possible information displays.
4. Press the thumbwheel, while an item is highlighted, to select or deselect
that item.
The info pages can also be turned on or off
through the DIC page Info Page Options.
Info Pages
The following is the list of all possible DIC
info page displays. Some may not be
available for your particular vehicle. Some
items may not be turned on by default but
can be turned on through the Options app.
See “Info Page Options” earlier in this
section.
Speed : Shows the vehicle speed in either
kilometers per hour (km/h) or miles per
hour (mph).
Drive Summary : Displays the current
distance traveled, in either kilometers (km)
or miles (mi).
It also includes the Average Fuel Economy.
Average Fuel Economy shows the
approximate average liters per
100 kilometers (L/100 km), kilometers per
liter (km/L), or miles per gallon (mpg). This
number only reflects the approximate Average Fuel Economy that the vehicle has
at that moment, and changes as driving
conditions change.
The timer shows the time in the current
drive cycle.
All values in the Drive Summary are
automatically reset each time the vehicle is
started.
Trip 1 or Trip 2, Average Fuel Economy, and
Average Speed :
Shows the current distance
traveled, in either kilometers (km) or
miles (mi), since the trip odometer was last
reset.
The Average Fuel Economy display shows
the approximate average liters per
100 kilometers (L/100 km), kilometers per
liter (km/L), or miles per gallon (mpg). This
number is calculated based on the value
recorded since the last time this menu item
was reset. This number reflects only the
approximate average fuel economy that the
vehicle has at that moment, and changes as
driving conditions change.
Average Speed shows the average speed of
the vehicle in kilometers per hour (km/h) or
miles per hour (mph). This average is
calculated based on various vehicle speeds
recorded since the last reset of this value. Press the thumbwheel while this display is
active to reset the values.
Timer :
To start the timer, press the
thumbwheel while this display is active. The
display will show the amount of time that
has passed since the timer was last reset. To
stop the timer, press the thumbwheel
briefly while this display is active and the
timer is running.
Press the thumbwheel while this display is
active to reset the timer.
Tire Pressure : Shows the approximate
pressures of all four tires. Tire pressure is
displayed in either kilopascal (kPa) or in
pounds per square inch (psi). If the pressure
is low, the value for that tire is shown in
amber. See Tire Pressure Monitor System
0 377 and
Tire Pressure Monitor Operation 0377.
Fuel Economy : Displays average fuel
economy, the best fuel economy over the
selected distance, and a bar graph showing
instantaneous fuel economy.
Press the thumbwheel to change the
selected distance. This display can be reset
by selecting Reset in the menu.
Page 130 of 463
Chevrolet Silverado 1500 Owner Manual (GMNA-Localizing-U.S./Canada/
Mexico/Paraguay-16515119) - 2023 - CRC - 6/2/22
Instruments and Controls 129
Driver Assistance :If equipped, shows
information for Adaptive Cruise Control
(ACC), Lane Keep Assist (LKA), Forward
Collision Alert (FCA), and Follow Distance
Indicator(FDI).
Oil Life : Shows an estimate of the
remaining oil life. If REMAINING OIL LIFE
99% is displayed, that means 99% of the
current oil life remains.
When the remaining oil life is low, the
CHANGE ENGINE OIL SOON message will
appear on the display. The oil should be
changed as soon as possible. See Engine Oil
0 338. In addition to the engine oil life
system monitoring the oil life, additional
maintenance is recommended. See
Maintenance Schedule 0417.
The Oil Life display must be reset after each
oil change. It will not reset itself. Do not
reset the Oil Life display at any time other
than when the oil has just been changed.
It cannot be reset accurately until the next
oil change. To reset, see Engine Oil Life
System 0340.
Brake Pad Life : Displays an estimate of the
remaining life of the front and rear brake
pads. Messages will display based on brake
pad wear and the state of the system. Reset the Brake Pad Life display after replacing the
brake pads. See
Brake Pad Life System
0 349.
Air Filter Life : Shows an estimate of the
remaining engine air filter’s life and the
state of the system. Engine Air Filter Life
95% means 95% of the current air filter life
remains. Messages will display based on the
engine air filter life and the state of the
system. When the REPLACE SOON message
displays, the engine air filter should be
replaced at the earliest convenience.
The Air Filter Life display must be reset after
the engine air filter replacement. To reset,
see Engine Air Filter Life System 0341.
Trailer Brake : On vehicles with the
Integrated Trailer Brake Control (ITBC)
system, the trailer brake display appears in
the DIC.
TRAILER GAIN shows the trailer gain setting.
This setting can be adjusted from 0.0 to 10.0
with either a trailer connected or
disconnected.
OUTPUT shows the power output to the
trailer any time a trailer with electric brakes
is connected. Output is displayed as a bar
graph. Dotted lines may appear in the
OUTPUT display if a trailer is not connected. Off Road :
If equipped, displays vehicle pitch
and roll information, road wheel angle, and
four-wheel drive (4WD) status. If the vehicle
has low traction, a low traction indicator
and the wheels affected will display amber
in the Off-Road page.
Engine Hours (Hourmeter) : Shows the total
number of hours the engine has run. This
display also shows the engine idle hours.
Transmission Fluid Temperature : Shows the
temperature of the automatic transmission
fluid in either degrees Celsius (°C) or degrees
Fahrenheit (°F).
Info Page Options : Scroll to choose which
info pages appear on the DIC. Press the
thumbwheel to select or deselect.
Blank Page : Shows no information.
Head-Up Display (HUD)
{Warning
If the HUD image is too bright or too
high in your field of view, it may take
you more time to see things you need to
see when it is dark outside. Be sure to
keep the HUD image dim and placed low
in your field of view.
Page 131 of 463
Chevrolet Silverado 1500 Owner Manual (GMNA-Localizing-U.S./Canada/
Mexico/Paraguay-16515119) - 2023 - CRC - 6/2/22
130 Instruments and Controls
If equipped with HUD, some information
about the operation of the vehicle is
projected onto the windshield. The image is
projected through the HUD lens on top of
the instrument panel. The information
appears as an image focused out toward the
front of the vehicle.
Caution
If you try to use the HUD image as a
parking aid, you may misjudge the
distance and damage your vehicle. Do not
use the HUD image as a parking aid.
The HUD information can be displayed in
various languages. The speedometer reading
and other numerical values can be displayed
in either English or metric units.
The language selection is changed through
the radio, and the units of measurement are
changed through the instrument cluster. See
Settings (Uplevel Radio) 0177 or
Settings (Base Radio) 0175 and “Options”
under Instrument Cluster (Base Level) 0106
or
Instrument Cluster (Uplevel) 0107.
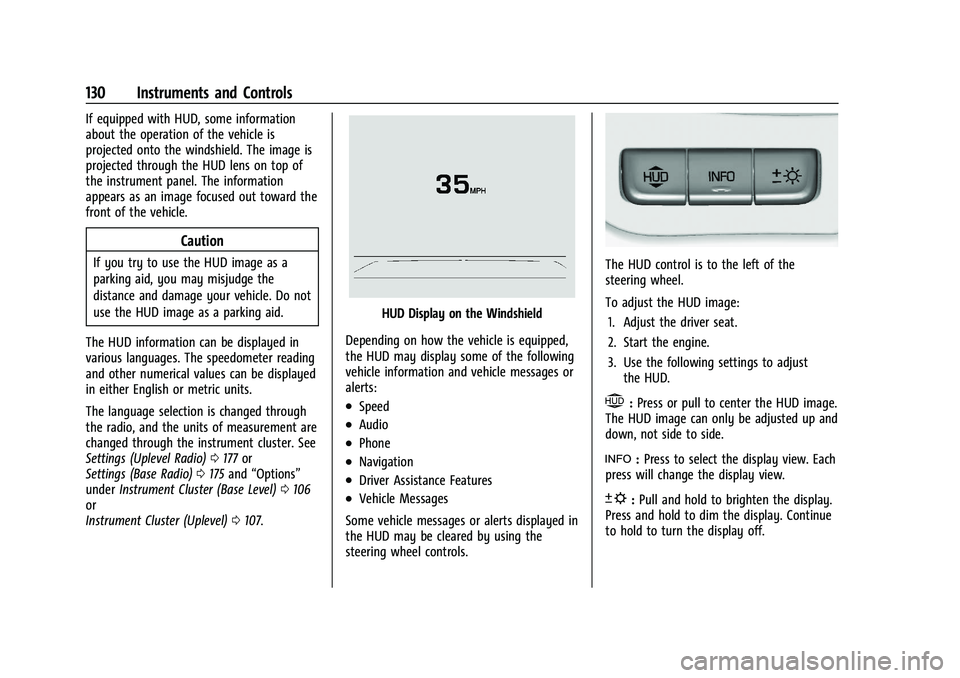
HUD Display on the Windshield
Depending on how the vehicle is equipped,
the HUD may display some of the following
vehicle information and vehicle messages or
alerts:
.Speed
.Audio
.Phone
.Navigation
.Driver Assistance Features
.Vehicle Messages
Some vehicle messages or alerts displayed in
the HUD may be cleared by using the
steering wheel controls.
The HUD control is to the left of the
steering wheel.
To adjust the HUD image: 1. Adjust the driver seat.
2. Start the engine.
3. Use the following settings to adjust the HUD.
$:Press or pull to center the HUD image.
The HUD image can only be adjusted up and
down, not side to side.
!: Press to select the display view. Each
press will change the display view.
D: Pull and hold to brighten the display.
Press and hold to dim the display. Continue
to hold to turn the display off.
Page 132 of 463
Chevrolet Silverado 1500 Owner Manual (GMNA-Localizing-U.S./Canada/
Mexico/Paraguay-16515119) - 2023 - CRC - 6/2/22
Instruments and Controls 131
The HUD image will automatically dim and
brighten to compensate for outside lighting.
Use
Dto adjust as needed.
The HUD image can temporarily light up
depending on the angle and position of
sunlight on the HUD display. This is normal.
Polarized sunglasses could make the HUD
image harder to see.
Head-Up Display (HUD) Rotation Option
If equipped, this feature under the Options
menu of the instrument cluster allows for
adjusting the angle of the HUD image and
changing or turning off the Speed
Limit Sign.
HUD Rotation: Press the thumbwheel while
Adjust Rotation is highlighted to enter
Adjust Mode. Scroll to adjust the angle of
the HUD display. Press the thumbwheel to
confirm and save the setting. This feature
may only be available in P (Park).
Speed Limit Style Adjustment
If equipped, the speed limit style can be
changed to a speed limit bar or speed limit
sign from the Options menu in the
instrument cluster. Press the thumbwheel
while Speed Limit Style is highlighted to
change the speed sign style or to turn it off. HUD Views
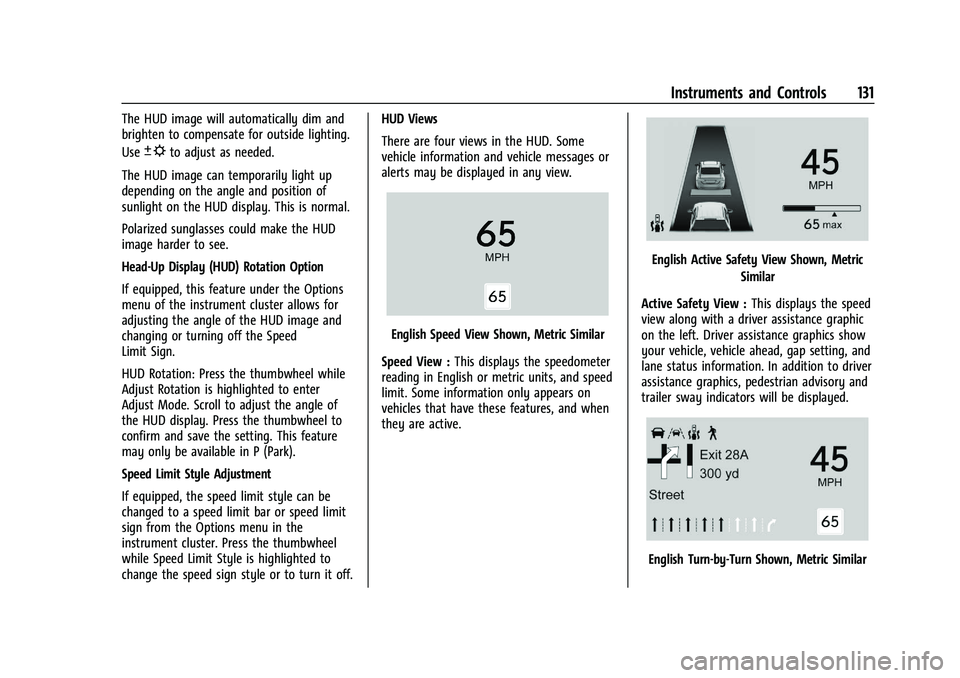
There are four views in the HUD. Some
vehicle information and vehicle messages or
alerts may be displayed in any view.
English Speed View Shown, Metric Similar
Speed View : This displays the speedometer
reading in English or metric units, and speed
limit. Some information only appears on
vehicles that have these features, and when
they are active.
English Active Safety View Shown, Metric
Similar
Active Safety View : This displays the speed
view along with a driver assistance graphic
on the left. Driver assistance graphics show
your vehicle, vehicle ahead, gap setting, and
lane status information. In addition to driver
assistance graphics, pedestrian advisory and
trailer sway indicators will be displayed.
English Turn-by-Turn Shown, Metric Similar
Page 136 of 463
Chevrolet Silverado 1500 Owner Manual (GMNA-Localizing-U.S./Canada/
Mexico/Paraguay-16515119) - 2023 - CRC - 6/2/22
Instruments and Controls 135
The hand-held transmitter was supplied
by the manufacturer of the garage door
opener receiver.
2. Press and release one of the three Universal Remote system buttons to be
programmed. Press and hold the
hand-held transmitter button. Do not
release the hand-held transmitter button
until the indicator light changes from a
slow to a rapid flash or continuous light.
Then release the hand-held transmitter
button.
Some garage door openers may require
substitution of Step 2 with the procedure
under “Radio Signals for Some Gate
Operators” later in this section.
3. Press and hold the newly programmed Universal Remote system button for
five seconds while watching the indicator
light and garage door activation.
.If the indicator light stays on
continuously or the garage door
moves when the button is pressed,
then programming is complete. There
is no need to complete Steps 4–6.
.If the indicator light does not come
on or the garage door does not
move, a second button press may be
required. For a second time, press and hold the newly programmed
button for five seconds. If the
indicator light stays on continuously
or the garage door moves when the
button is pressed, then programming
is complete. There is no need to
complete Steps 4–6.
.If the garage door does not move,
continue with programming
Steps 4–6.
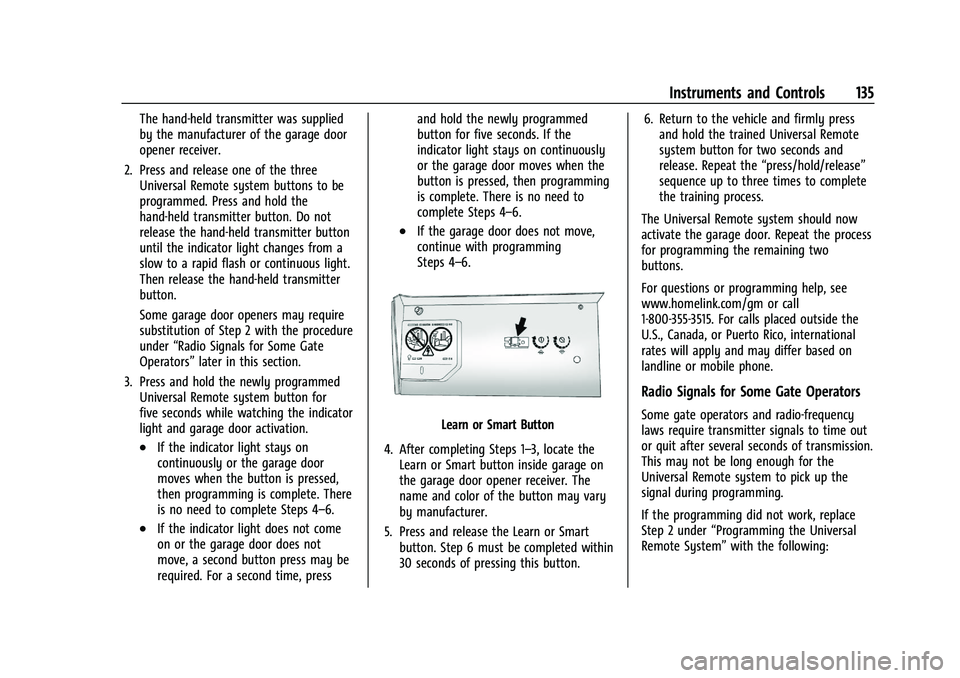
Learn or Smart Button
4. After completing Steps 1–3, locate the Learn or Smart button inside garage on
the garage door opener receiver. The
name and color of the button may vary
by manufacturer.
5. Press and release the Learn or Smart button. Step 6 must be completed within
30 seconds of pressing this button. 6. Return to the vehicle and firmly press
and hold the trained Universal Remote
system button for two seconds and
release. Repeat the “press/hold/release”
sequence up to three times to complete
the training process.
The Universal Remote system should now
activate the garage door. Repeat the process
for programming the remaining two
buttons.
For questions or programming help, see
www.homelink.com/gm or call
1-800-355-3515. For calls placed outside the
U.S., Canada, or Puerto Rico, international
rates will apply and may differ based on
landline or mobile phone.
Radio Signals for Some Gate Operators
Some gate operators and radio-frequency
laws require transmitter signals to time out
or quit after several seconds of transmission.
This may not be long enough for the
Universal Remote system to pick up the
signal during programming.
If the programming did not work, replace
Step 2 under “Programming the Universal
Remote System” with the following:
Page 137 of 463
Chevrolet Silverado 1500 Owner Manual (GMNA-Localizing-U.S./Canada/
Mexico/Paraguay-16515119) - 2023 - CRC - 6/2/22
136 Instruments and Controls
Press and hold the Universal Remote system
button while pressing and releasing the
hand-held transmitter button every
two seconds until the signal has been
successfully accepted by the Universal
Remote system. The Universal Remote
system indicator light will flash slowly at
first and then change to a rapid flash or
continuous solid-light. Proceed with Step 3
under“Programming the Universal Remote
System” to complete.
Universal Remote System
Operation
Using the Universal Remote System
Press and hold the appropriate Universal
Remote system button for at least one-half
second. The indicator light will come on
while the signal is being transmitted.
Erasing Universal Remote System
Buttons
Erase all programmed buttons when vehicle
ownership is terminated.
To erase:
1. Press and hold the two outside buttons until the indicator light begins to flash.
This should take about 10 seconds. 2. Release both buttons.
Reprogramming a Single Universal
Remote System Button
To reprogram any of the system buttons:
1. Press and hold any one of the buttons. Do not release the button.
2. The indicator light will begin to flash after 20 seconds. Without releasing the
button, proceed with Step 1 under
“Programming the Universal Remote
System.”