2023 CHEVROLET SILVERADO 1500 tires
[x] Cancel search: tiresPage 206 of 463
Chevrolet Silverado 1500 Owner Manual (GMNA-Localizing-U.S./Canada/
Mexico/Paraguay-16515119) - 2023 - CRC - 6/2/22
Driving and Operating 205
Warning (Continued)
Overloading can also reduce stopping
performance, damage the tires, and
shorten the life of the vehicle.
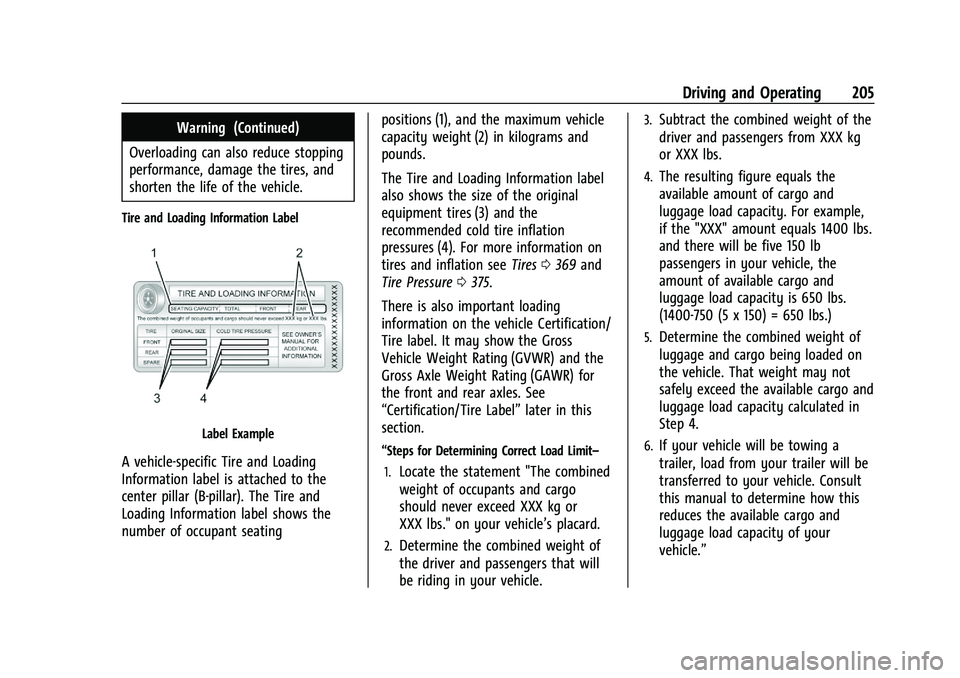
Tire and Loading Information Label
Label Example
A vehicle-specific Tire and Loading
Information label is attached to the
center pillar (B-pillar). The Tire and
Loading Information label shows the
number of occupant seating positions (1), and the maximum vehicle
capacity weight (2) in kilograms and
pounds.
The Tire and Loading Information label
also shows the size of the original
equipment tires (3) and the
recommended cold tire inflation
pressures (4). For more information on
tires and inflation see
Tires0369 and
Tire Pressure 0375.
There is also important loading
information on the vehicle Certification/
Tire label. It may show the Gross
Vehicle Weight Rating (GVWR) and the
Gross Axle Weight Rating (GAWR) for
the front and rear axles. See
“Certification/Tire Label” later in this
section.“Steps for Determining Correct Load Limit–
1.
Locate the statement "The combined
weight of occupants and cargo
should never exceed XXX kg or
XXX lbs." on your vehicle’s placard.
2.Determine the combined weight of
the driver and passengers that will
be riding in your vehicle.
3.Subtract the combined weight of the
driver and passengers from XXX kg
or XXX lbs.
4.The resulting figure equals the
available amount of cargo and
luggage load capacity. For example,
if the "XXX" amount equals 1400 lbs.
and there will be five 150 lb
passengers in your vehicle, the
amount of available cargo and
luggage load capacity is 650 lbs.
(1400-750 (5 x 150) = 650 lbs.)
5.Determine the combined weight of
luggage and cargo being loaded on
the vehicle. That weight may not
safely exceed the available cargo and
luggage load capacity calculated in
Step 4.
6.If your vehicle will be towing a
trailer, load from your trailer will be
transferred to your vehicle. Consult
this manual to determine how this
reduces the available cargo and
luggage load capacity of your
vehicle.”
Page 208 of 463
Chevrolet Silverado 1500 Owner Manual (GMNA-Localizing-U.S./Canada/
Mexico/Paraguay-16515119) - 2023 - CRC - 6/2/22
Driving and Operating 207
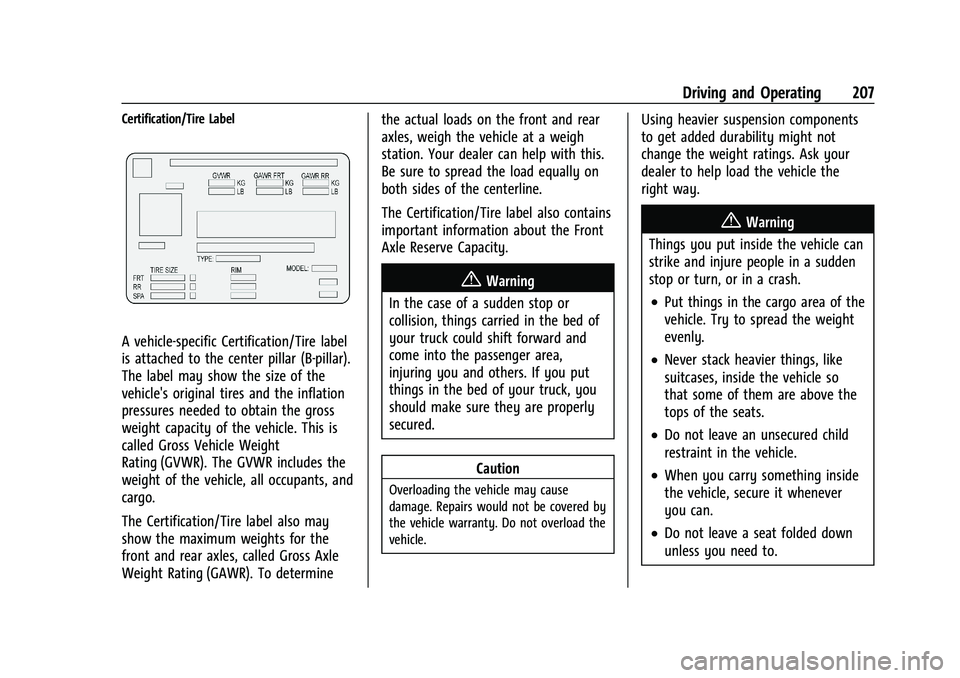
Certification/Tire Label
A vehicle-specific Certification/Tire label
is attached to the center pillar (B-pillar).
The label may show the size of the
vehicle's original tires and the inflation
pressures needed to obtain the gross
weight capacity of the vehicle. This is
called Gross Vehicle Weight
Rating (GVWR). The GVWR includes the
weight of the vehicle, all occupants, and
cargo.
The Certification/Tire label also may
show the maximum weights for the
front and rear axles, called Gross Axle
Weight Rating (GAWR). To determinethe actual loads on the front and rear
axles, weigh the vehicle at a weigh
station. Your dealer can help with this.
Be sure to spread the load equally on
both sides of the centerline.
The Certification/Tire label also contains
important information about the Front
Axle Reserve Capacity.
{Warning
In the case of a sudden stop or
collision, things carried in the bed of
your truck could shift forward and
come into the passenger area,
injuring you and others. If you put
things in the bed of your truck, you
should make sure they are properly
secured.
Caution
Overloading the vehicle may cause
damage. Repairs would not be covered by
the vehicle warranty. Do not overload the
vehicle.
Using heavier suspension components
to get added durability might not
change the weight ratings. Ask your
dealer to help load the vehicle the
right way.
{Warning
Things you put inside the vehicle can
strike and injure people in a sudden
stop or turn, or in a crash.
.Put things in the cargo area of the
vehicle. Try to spread the weight
evenly.
.Never stack heavier things, like
suitcases, inside the vehicle so
that some of them are above the
tops of the seats.
.Do not leave an unsecured child
restraint in the vehicle.
.When you carry something inside
the vehicle, secure it whenever
you can.
.Do not leave a seat folded down
unless you need to.
Page 223 of 463
Chevrolet Silverado 1500 Owner Manual (GMNA-Localizing-U.S./Canada/
Mexico/Paraguay-16515119) - 2023 - CRC - 6/2/22
222 Driving and Operating
Caution
A transmission hot message may display
if the automatic transmission fluid is too
hot. Driving under this condition can
damage the vehicle. Stop and idle the
engine to cool the automatic
transmission fluid. This message clears
when the transmission fluid has cooled
sufficiently.
D : This position is for normal driving.
It provides the best fuel economy. If more
power is needed for passing, press the
accelerator pedal down.
.When going less than about 55 km/h
(35 mph), push the accelerator pedal
about halfway down.
.When going about 55 km/h (35 mph) or
more, push the accelerator all the
way down.
By doing this, the vehicle shifts down to
the next gear and has more power.
Use D (Drive) and Tow/Haul Mode when
towing a trailer, carrying a heavy load,
driving on steep hills, or driving off-road.
Shift the transmission to a lower gear if the
transmission shifts too often. Downshifting the transmission in slippery
road conditions could result in skidding. See
“Skidding”
underLoss of Control 0197.
The vehicle has a shift stabilization feature
that adjusts the transmission shifting to the
current driving conditions in order to reduce
rapid upshifts and downshifts. This shift
stabilization feature is designed to
determine, before making an upshift, if the
engine is able to maintain vehicle speed by
analyzing things such as vehicle speed,
throttle position, and vehicle load. If the
shift stabilization feature determines that a
current vehicle speed cannot be maintained,
the transmission does not upshift and
instead holds the current gear. In some
cases, this could appear to be a delayed
shift, however the transmission is operating
normally.
The transmission uses adaptive shift
controls. The adaptive shift control process
continually compares key shift parameters
to pre-programmed ideal shifts stored in the
transmission’s computer. The transmission
constantly makes adjustments to improve
vehicle performance according to how the
vehicle is being used, such as with a heavy
load or when the temperature changes. During this adaptive shift control process,
shifting might feel different as the
transmission determines the best settings.
When temperatures are very cold, the
transmission's gear shifting could be delayed
providing more stable shifts until the engine
warms up. Shifts could be more noticeable
with a cold transmission. This difference in
shifting is normal.
If equipped with the 2.7L L4 engine, engine
speeds may be increased while driving at
highway speeds while the engine is still
warming up.
L :
This position allows selection of a range
of gears appropriate for current driving
conditions. If equipped, see “Range Selection
Mode” underManual Mode (Mechanical
Shifter) 0227 or
Manual Mode (Electronic Shifter) 0229.
Caution
Spinning the tires or holding the vehicle
in one place on a hill using only the
accelerator pedal may damage the
transmission. The repair will not be
covered by the vehicle warranty. If the
(Continued)
Page 224 of 463
Chevrolet Silverado 1500 Owner Manual (GMNA-Localizing-U.S./Canada/
Mexico/Paraguay-16515119) - 2023 - CRC - 6/2/22
Driving and Operating 223
Caution (Continued)
vehicle is stuck, do not spin the tires.
When stopping on a hill, use the brakes
to hold the vehicle in place.
Automatic Transmission (Electronic
Shifter)
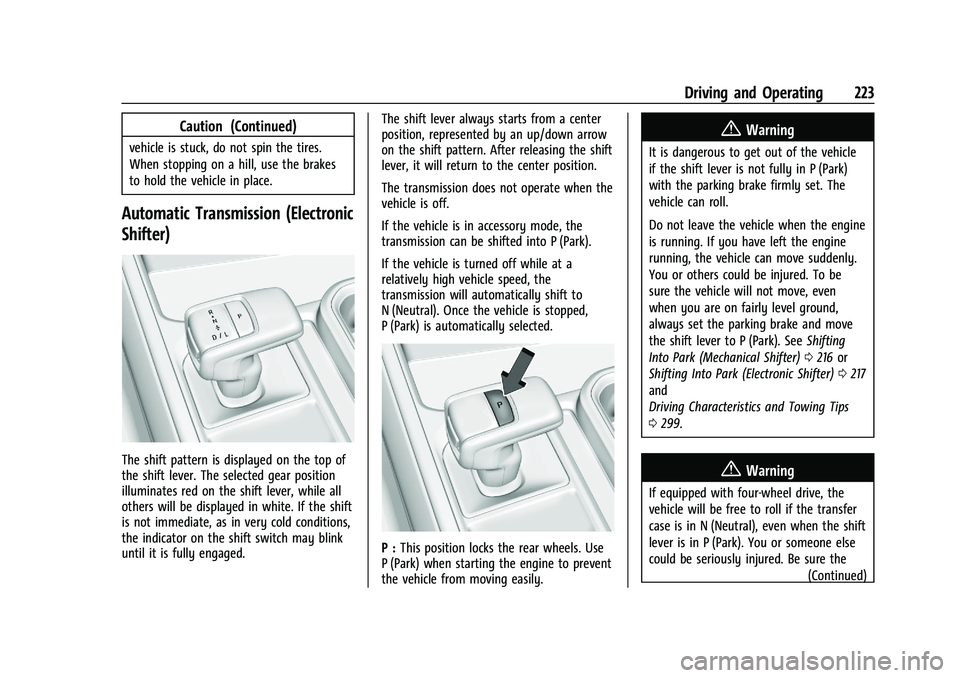
The shift pattern is displayed on the top of
the shift lever. The selected gear position
illuminates red on the shift lever, while all
others will be displayed in white. If the shift
is not immediate, as in very cold conditions,
the indicator on the shift switch may blink
until it is fully engaged.The shift lever always starts from a center
position, represented by an up/down arrow
on the shift pattern. After releasing the shift
lever, it will return to the center position.
The transmission does not operate when the
vehicle is off.
If the vehicle is in accessory mode, the
transmission can be shifted into P (Park).
If the vehicle is turned off while at a
relatively high vehicle speed, the
transmission will automatically shift to
N (Neutral). Once the vehicle is stopped,
P (Park) is automatically selected.
P :
This position locks the rear wheels. Use
P (Park) when starting the engine to prevent
the vehicle from moving easily.
{Warning
It is dangerous to get out of the vehicle
if the shift lever is not fully in P (Park)
with the parking brake firmly set. The
vehicle can roll.
Do not leave the vehicle when the engine
is running. If you have left the engine
running, the vehicle can move suddenly.
You or others could be injured. To be
sure the vehicle will not move, even
when you are on fairly level ground,
always set the parking brake and move
the shift lever to P (Park). See Shifting
Into Park (Mechanical Shifter) 0216 or
Shifting Into Park (Electronic Shifter) 0217
and
Driving Characteristics and Towing Tips
0 299.
{Warning
If equipped with four-wheel drive, the
vehicle will be free to roll if the transfer
case is in N (Neutral), even when the shift
lever is in P (Park). You or someone else
could be seriously injured. Be sure the
(Continued)
Page 227 of 463
Chevrolet Silverado 1500 Owner Manual (GMNA-Localizing-U.S./Canada/
Mexico/Paraguay-16515119) - 2023 - CRC - 6/2/22
226 Driving and Operating
3. Open the door.
4. Shift to N (Neutral).
5. Turn off the engine and release thebrake pedal.
6. The indicator should continue to show N. If it does not, repeat Steps 2–5.
7. Exit the vehicle and close the door. The vehicle is now ready for the car wash.
8. The vehicle may automatically shift to P (Park) upon re-entry.
Car Wash Mode (Engine On –Driver in
Vehicle)
To place the vehicle in N (Neutral) with the
engine on and the vehicle occupied:
1. Drive to the entrance of the car wash.
2. Apply the brake pedal.
3. Shift to N (Neutral).
4. Release the brake pedal. The vehicle is now ready for the car wash.
Car Wash Mode (Engine On –Driver Out of
Vehicle)
To place the vehicle in N (Neutral) with the
engine on and the vehicle unoccupied:
1. Drive to the entrance of the car wash.
2. Apply the brake pedal. 3. Open the door.
4. Shift to N (Neutral), then release the
brake pedal.
5. The indicator should continue to show N. If it does not, repeat Steps 2–4.
6. Exit the vehicle and close the door. The vehicle is now ready for the car wash.
7. The vehicle may automatically shift to P (Park) upon re-entry.
Caution
A transmission hot message may display
if the automatic transmission fluid is too
hot. Driving under this condition can
damage the vehicle. Stop and idle the
engine to cool the automatic
transmission fluid. This message clears
when the transmission fluid has cooled
sufficiently.
D : This position is for normal driving.
If more power is needed for passing, press
the accelerator pedal down.
To shift into D (Drive):
1. Bring the vehicle to a complete stop. 2. From the center position, move the shift
lever back.
.If the vehicle is in P (Park) press the
shift lock release button while pulling
the shift lever back.
.D will illuminate in red.
.After releasing the shift lever, it will
return to the center position.
To shift out of D (Drive): 1. Bring the vehicle to a complete stop.
2. Shift to the desired gear.
3. After releasing the shift lever, it will return to the center position.
Downshifting the transmission on a slippery
road could result in skidding. See “Skidding”
under Loss of Control 0197.
Caution
Spinning the tires or holding the vehicle
in one place on a hill using only the
accelerator pedal may damage the
transmission. The repair will not be
covered by the vehicle warranty. If the
vehicle is stuck, do not spin the tires.
When stopping on a hill, use the brakes
to hold the vehicle in place.
Page 231 of 463
Chevrolet Silverado 1500 Owner Manual (GMNA-Localizing-U.S./Canada/
Mexico/Paraguay-16515119) - 2023 - CRC - 6/2/22
230 Driving and Operating
For vehicles without Driver Mode Control,
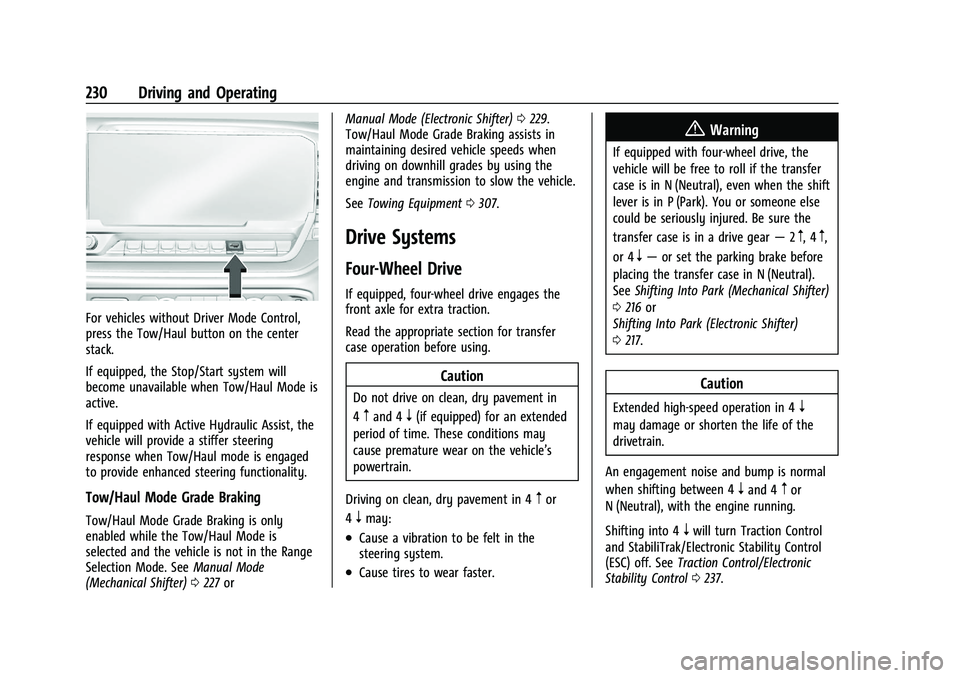
press the Tow/Haul button on the center
stack.
If equipped, the Stop/Start system will
become unavailable when Tow/Haul Mode is
active.
If equipped with Active Hydraulic Assist, the
vehicle will provide a stiffer steering
response when Tow/Haul mode is engaged
to provide enhanced steering functionality.
Tow/Haul Mode Grade Braking
Tow/Haul Mode Grade Braking is only
enabled while the Tow/Haul Mode is
selected and the vehicle is not in the Range
Selection Mode. SeeManual Mode
(Mechanical Shifter) 0227 or Manual Mode (Electronic Shifter)
0229.
Tow/Haul Mode Grade Braking assists in
maintaining desired vehicle speeds when
driving on downhill grades by using the
engine and transmission to slow the vehicle.
See Towing Equipment 0307.
Drive Systems
Four-Wheel Drive
If equipped, four-wheel drive engages the
front axle for extra traction.
Read the appropriate section for transfer
case operation before using.
Caution
Do not drive on clean, dry pavement in
4
mand 4n(if equipped) for an extended
period of time. These conditions may
cause premature wear on the vehicle’s
powertrain.
Driving on clean, dry pavement in 4
mor
4
nmay:
.Cause a vibration to be felt in the
steering system.
.Cause tires to wear faster.
{Warning
If equipped with four-wheel drive, the
vehicle will be free to roll if the transfer
case is in N (Neutral), even when the shift
lever is in P (Park). You or someone else
could be seriously injured. Be sure the
transfer case is in a drive gear —2
m, 4m,
or 4
n— or set the parking brake before
placing the transfer case in N (Neutral).
See Shifting Into Park (Mechanical Shifter)
0 216 or
Shifting Into Park (Electronic Shifter)
0 217.
Caution
Extended high-speed operation in 4n
may damage or shorten the life of the
drivetrain.
An engagement noise and bump is normal
when shifting between 4
nand 4mor
N (Neutral), with the engine running.
Shifting into 4
nwill turn Traction Control
and StabiliTrak/Electronic Stability Control
(ESC) off. See Traction Control/Electronic
Stability Control 0237.
Page 245 of 463
Chevrolet Silverado 1500 Owner Manual (GMNA-Localizing-U.S./Canada/
Mexico/Paraguay-16515119) - 2023 - CRC - 6/2/22
244 Driving and Operating
vehicles with the limited-slip differential,
driven under severe conditions, the rear axle
fluid should be changed. SeeMaintenance
Schedule 0417.
Locking Rear Axle
If equipped, the locking rear axle can give
the vehicle additional traction from the rear
wheels when traveling in off-road situations
such as mud, snow, steep hills, and uneven
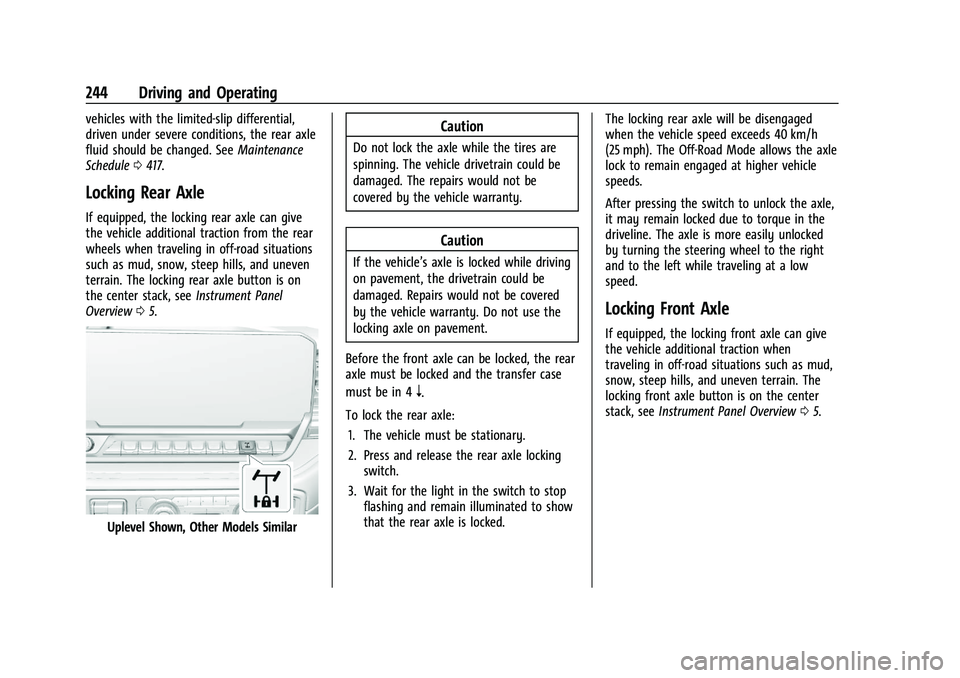
terrain. The locking rear axle button is on
the center stack, see Instrument Panel
Overview 05.
Uplevel Shown, Other Models Similar
Caution
Do not lock the axle while the tires are
spinning. The vehicle drivetrain could be
damaged. The repairs would not be
covered by the vehicle warranty.
Caution
If the vehicle’s axle is locked while driving
on pavement, the drivetrain could be
damaged. Repairs would not be covered
by the vehicle warranty. Do not use the
locking axle on pavement.
Before the front axle can be locked, the rear
axle must be locked and the transfer case
must be in 4
n.
To lock the rear axle: 1. The vehicle must be stationary.
2. Press and release the rear axle locking switch.
3. Wait for the light in the switch to stop flashing and remain illuminated to show
that the rear axle is locked. The locking rear axle will be disengaged
when the vehicle speed exceeds 40 km/h
(25 mph). The Off-Road Mode allows the axle
lock to remain engaged at higher vehicle
speeds.
After pressing the switch to unlock the axle,
it may remain locked due to torque in the
driveline. The axle is more easily unlocked
by turning the steering wheel to the right
and to the left while traveling at a low
speed.
Locking Front Axle
If equipped, the locking front axle can give
the vehicle additional traction when
traveling in off-road situations such as mud,
snow, steep hills, and uneven terrain. The
locking front axle button is on the center
stack, see
Instrument Panel Overview 05.
Page 246 of 463
Chevrolet Silverado 1500 Owner Manual (GMNA-Localizing-U.S./Canada/
Mexico/Paraguay-16515119) - 2023 - CRC - 6/2/22
Driving and Operating 245
Uplevel Shown, Other Models Similar
Caution
Do not lock the axle while the tires are
spinning. The vehicle drivetrain could be
damaged. The repairs would not be
covered by the vehicle warranty.
Caution
If the vehicle’s axle is locked while driving
on pavement, the drivetrain could be
damaged. Repairs would not be covered
by the vehicle warranty. Do not use the
locking axle on pavement.Before the front axle can be locked, the
transfer case must be in 4
n.
The front axle cannot be locked
independently of the rear axle.
To lock the front and rear axles: 1. Place the transfer case in 4
n. This is the
only mode that allows the front axle to
lock. See Four-Wheel Drive 0230 for
more information regarding the transfer
case and four-wheel drive low operation.
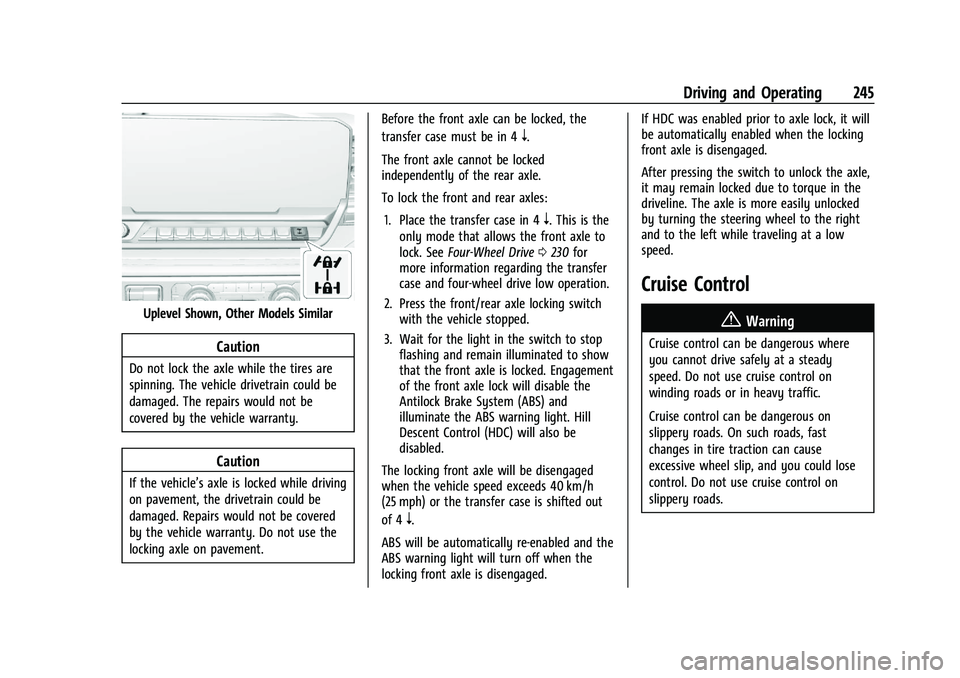
2. Press the front/rear axle locking switch with the vehicle stopped.
3. Wait for the light in the switch to stop flashing and remain illuminated to show
that the front axle is locked. Engagement
of the front axle lock will disable the
Antilock Brake System (ABS) and
illuminate the ABS warning light. Hill
Descent Control (HDC) will also be
disabled.
The locking front axle will be disengaged
when the vehicle speed exceeds 40 km/h
(25 mph) or the transfer case is shifted out
of 4
n.
ABS will be automatically re-enabled and the
ABS warning light will turn off when the
locking front axle is disengaged. If HDC was enabled prior to axle lock, it will
be automatically enabled when the locking
front axle is disengaged.
After pressing the switch to unlock the axle,
it may remain locked due to torque in the
driveline. The axle is more easily unlocked
by turning the steering wheel to the right
and to the left while traveling at a low
speed.
Cruise Control
{
Warning
Cruise control can be dangerous where
you cannot drive safely at a steady
speed. Do not use cruise control on
winding roads or in heavy traffic.
Cruise control can be dangerous on
slippery roads. On such roads, fast
changes in tire traction can cause
excessive wheel slip, and you could lose
control. Do not use cruise control on
slippery roads.