2023 CHEVROLET SILVERADO 1500 engine overheat
[x] Cancel search: engine overheatPage 344 of 463
Chevrolet Silverado 1500 Owner Manual (GMNA-Localizing-U.S./Canada/
Mexico/Paraguay-16515119) - 2023 - CRC - 6/2/22
Vehicle Care 343
Cooling System
If the vehicle has the Duramax diesel
engine, see the Duramax diesel supplement.
The cooling system allows the engine to
maintain the correct working temperature.
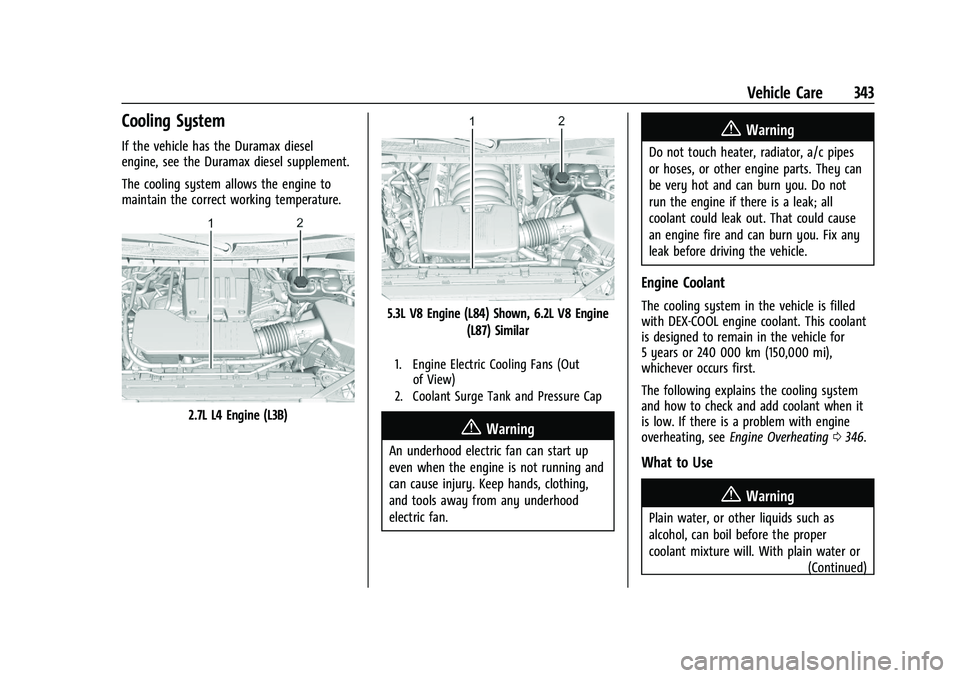
2.7L L4 Engine (L3B)
5.3L V8 Engine (L84) Shown, 6.2L V8 Engine(L87) Similar
1. Engine Electric Cooling Fans (Outof View)
2. Coolant Surge Tank and Pressure Cap
{Warning
An underhood electric fan can start up
even when the engine is not running and
can cause injury. Keep hands, clothing,
and tools away from any underhood
electric fan.
{Warning
Do not touch heater, radiator, a/c pipes
or hoses, or other engine parts. They can
be very hot and can burn you. Do not
run the engine if there is a leak; all
coolant could leak out. That could cause
an engine fire and can burn you. Fix any
leak before driving the vehicle.
Engine Coolant
The cooling system in the vehicle is filled
with DEX-COOL engine coolant. This coolant
is designed to remain in the vehicle for
5 years or 240 000 km (150,000 mi),
whichever occurs first.
The following explains the cooling system
and how to check and add coolant when it
is low. If there is a problem with engine
overheating, see Engine Overheating 0346.
What to Use
{Warning
Plain water, or other liquids such as
alcohol, can boil before the proper
coolant mixture will. With plain water or
(Continued)
Page 345 of 463
Chevrolet Silverado 1500 Owner Manual (GMNA-Localizing-U.S./Canada/
Mexico/Paraguay-16515119) - 2023 - CRC - 6/2/22
344 Vehicle Care
Warning (Continued)
the wrong mixture, the engine could get
too hot but there would not be an
overheat warning. The engine could catch
fire and you or others could be burned.
Use a 50/50 mixture of clean, drinkable
water and DEX-COOL coolant. This mixture:
.Gives freezing protection down to −37 °C
(−34 °F), outside temperature.
.Gives boiling protection up to 129 °C
(265 °F), engine temperature.
.Protects against rust and corrosion.
.Will not damage aluminum parts.
.Helps keep the proper engine
temperature.
Caution
Do not use anything other than a mix of
DEX-COOL coolant that meets GM
Standard GMW3420 and clean, drinkable
water. Anything else can cause damage
to the engine cooling system and the
vehicle, which would not be covered by
the vehicle warranty. Never dispose of engine coolant by putting
it in the trash, or by pouring it on the
ground, or into sewers, streams, or bodies of
water. Have the coolant changed by an
authorized service center, familiar with legal
requirements regarding used coolant
disposal. This will help protect the
environment and your health.
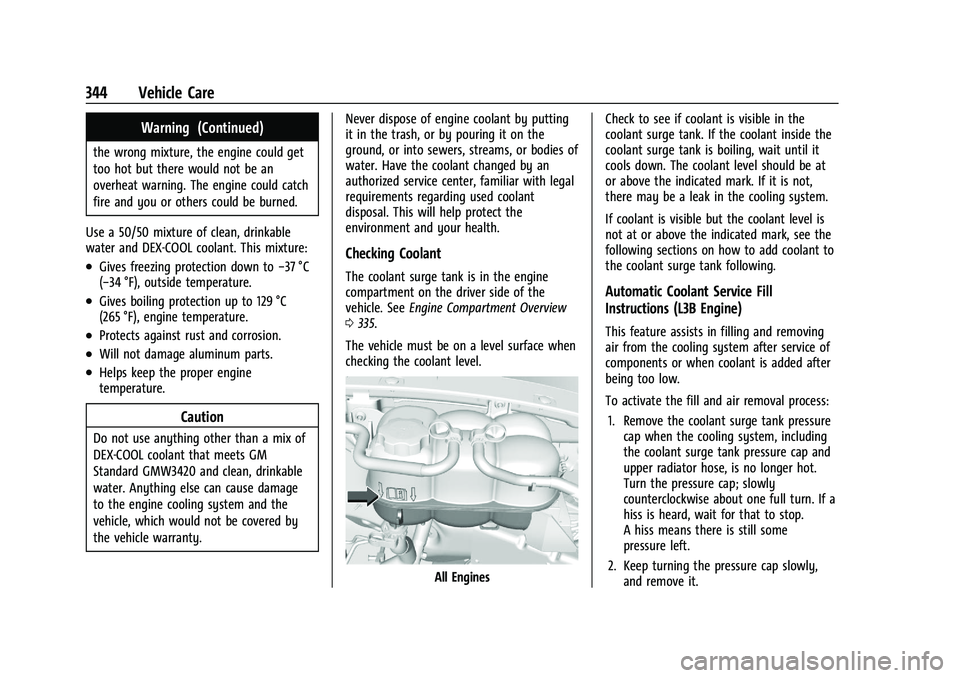
Checking Coolant
The coolant surge tank is in the engine
compartment on the driver side of the
vehicle. See
Engine Compartment Overview
0 335.
The vehicle must be on a level surface when
checking the coolant level.
All Engines Check to see if coolant is visible in the
coolant surge tank. If the coolant inside the
coolant surge tank is boiling, wait until it
cools down. The coolant level should be at
or above the indicated mark. If it is not,
there may be a leak in the cooling system.
If coolant is visible but the coolant level is
not at or above the indicated mark, see the
following sections on how to add coolant to
the coolant surge tank following.
Automatic Coolant Service Fill
Instructions (L3B Engine)
This feature assists in filling and removing
air from the cooling system after service of
components or when coolant is added after
being too low.
To activate the fill and air removal process:
1. Remove the coolant surge tank pressure cap when the cooling system, including
the coolant surge tank pressure cap and
upper radiator hose, is no longer hot.
Turn the pressure cap; slowly
counterclockwise about one full turn. If a
hiss is heard, wait for that to stop.
A hiss means there is still some
pressure left.
2. Keep turning the pressure cap slowly, and remove it.
Page 346 of 463
Chevrolet Silverado 1500 Owner Manual (GMNA-Localizing-U.S./Canada/
Mexico/Paraguay-16515119) - 2023 - CRC - 6/2/22
Vehicle Care 345
3. Fill the coolant surge tank with theproper mixture to the indicated mark.
4. Connect the vehicle to a battery charger.
5. Set the ignition to service mode, see Ignition Positions 0211.
6. Turn off the air conditioning.
7. Set the parking brake.
8. At the same time, press the accelerator and the brake for automatic vehicles for
two seconds, then release.
9. Listen for pump activation and movement of the control valves while
watching the level of the coolant in the
surge tank. Add fluid as the level drops
below the indicated mark on the surge
tank. Allow 15 minutes for the fill and air
removal process to complete.
10. Reinstall the surge tank cap.
If the tank empties, turn the ignition off,
allow the Electronic Control Module (ECM) to
go to sleep, about two minutes, refill to the
indicated mark, and repeat Steps 5–9.How to Add Coolant to the Coolant
Surge Tank for Gasoline Engines
Except L3B
If the vehicle has a diesel engine, see
“Cooling System” in the Duramax diesel
supplement for the proper coolant fill
procedure.
{Warning
Spilling coolant on hot engine parts can
burn you. Coolant contains ethylene
glycol and it will burn if the engine parts
are hot enough.
{Warning
Plain water, or other liquids such as
alcohol, can boil before the proper
coolant mixture will. With plain water or
the wrong mixture, the engine could get
too hot but there would not be an
overheat warning. The engine could catch
fire and you or others could be burned.
{Warning
Steam and scalding liquids from a hot
cooling system are under pressure.
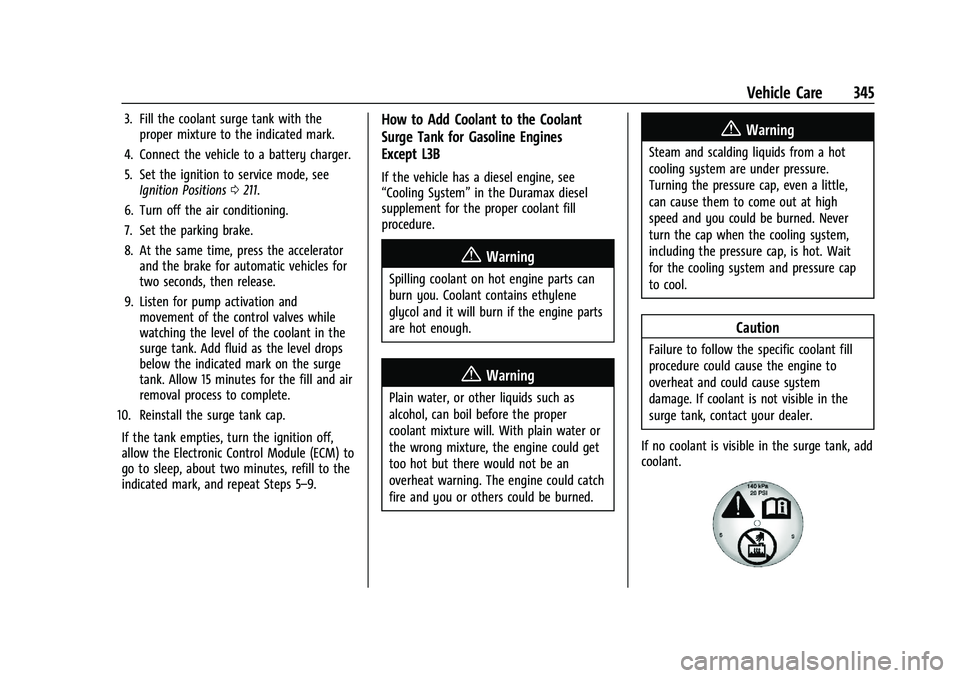
Turning the pressure cap, even a little,
can cause them to come out at high
speed and you could be burned. Never
turn the cap when the cooling system,
including the pressure cap, is hot. Wait
for the cooling system and pressure cap
to cool.
Caution
Failure to follow the specific coolant fill
procedure could cause the engine to
overheat and could cause system
damage. If coolant is not visible in the
surge tank, contact your dealer.
If no coolant is visible in the surge tank, add
coolant.
Page 347 of 463
Chevrolet Silverado 1500 Owner Manual (GMNA-Localizing-U.S./Canada/
Mexico/Paraguay-16515119) - 2023 - CRC - 6/2/22
346 Vehicle Care
1. Remove the coolant surge tank pressurecap when the cooling system, including
the coolant surge tank pressure cap and
upper radiator hose, is no longer hot.
Turn the pressure cap slowly
counterclockwise about one full turn. If a
hiss is heard, wait for that to stop.
A hiss means there is still some
pressure left.
2. Keep turning the pressure cap slowly, and remove it.
3. Fill the coolant surge tank with the proper mixture to the full cold mark.
4. With the coolant surge tank pressure cap off, start the engine and let it run until
the engine coolant temperature gauge
indicates approximately 90 °C (195 °F).
By this time, the coolant level inside the
coolant surge tank may be lower. If the
level is lower, add more of the proper
mixture to the coolant surge tank until
the level reaches the indicated mark.
5. Replace the pressure cap tightly.
6. Verify coolant level after the engine is shut off and the coolant is cold.
If necessary, repeat coolant fill procedure
Steps 1–6.Caution
If the pressure cap is not tightly installed,
coolant loss and engine damage may
occur. Be sure the cap is properly and
tightly secured.
Engine Overheating
If the vehicle has the Duramax diesel
engine, see the Duramax diesel supplement.
Caution
Do not run the engine if there is a leak
in the engine cooling system. This can
cause a loss of all coolant and can
damage the system and vehicle. Have
any leaks fixed right away.
The vehicle has several indicators to warn of
engine overheating.
There is a coolant temperature gauge in the
vehicle's instrument cluster. See Engine
Coolant Temperature Gauge 0112.
In addition, there are ENGINE OVERHEATED
STOP ENGINE, ENGINE OVERHEATED IDLE
ENGINE, and ENGINE POWER IS REDUCED
messages in the Driver Information
Center (DIC). If the decision is made not to lift the hood
when this warning appears, get service help
right away. See
Roadside Assistance Program
0 433.
If the decision is made to lift the hood,
make sure the vehicle is parked on a level
surface.
2.7L L4, 5.3L V8, and 6.2L V8 Engines
Check to see if the engine cooling fans are
running. If the engine is overheating, the
fans should be running. If they are not, do
not continue to run the engine and have the
vehicle serviced.
If the engine or transmission detects an
impending hot fluid condition, then the
transmission may force upshifts to limit
temperatures. Downshifts may also be
prevented in this instance. Normal operation
may continue unless the display indicates
there is a hot condition and engine should
be idled.
Page 348 of 463
Chevrolet Silverado 1500 Owner Manual (GMNA-Localizing-U.S./Canada/
Mexico/Paraguay-16515119) - 2023 - CRC - 6/2/22
Vehicle Care 347
If Steam is Coming from the Engine
Compartment
{Warning
Steam and scalding liquids from a hot
cooling system are under pressure.
Turning the pressure cap, even a little,
can cause them to come out at high
speed and you could be burned. Never
turn the cap when the cooling system,
including the pressure cap, is hot. Wait
for the cooling system and pressure cap
to cool.
If No Steam is Coming from the Engine
Compartment
The ENGINE OVERHEATED STOP ENGINE or
the ENGINE OVERHEATED IDLE ENGINE
message, along with a low coolant
condition, can indicate a serious problem.
The 2.7L L4 engine will shut down
automatically if the ENGINE OVERHEATED
STOP ENGINE message displays.
If there is an engine overheat warning, but
no steam is seen or heard, the problem may
not be too serious. Sometimes the engine
can get a little too hot when the vehicle:
.Climbs a long hill on a hot day.
.Stops after high-speed driving.
.Idles for long periods in traffic.
.Tows a trailer; seeTrailer Towing0302.
If the ENGINE OVERHEATED STOP ENGINE or
the ENGINE OVERHEATED IDLE ENGINE
message appears with no sign of steam, try
this for a minute or so: 1. Turn the air conditioning off.
2. Turn the heater on to the highest temperature and to the highest fan
speed. Open the windows as necessary.
3. When it is safe to do so, pull off the road, shift to P (Park) or N (Neutral) and
let the engine idle.
If the temperature overheat gauge is no
longer in the overheat zone or an overheat
warning no longer displays, the vehicle can
be driven. Continue to drive the vehicle
slowly for about 10 minutes. Keep a safe
vehicle distance from the vehicle in front.
If the warning does not come back on,
continue to drive normally and have the
cooling system checked for proper fill and
function.
If the warning continues, pull over, stop, and
park the vehicle right away. If there is still no sign of steam and the
vehicle is equipped with an engine driven
cooling fan, push down the accelerator until
the engine speed is about twice as fast as
normal idle speed for at least five minutes
while the vehicle is parked. If the warning is
still there, turn off the engine and get
everyone out of the vehicle until it
cools down.
If there is no sign of steam, idle the engine
for five minutes while parked. If the warning
is still displayed, turn off the engine until it
cools down.
Overheated Engine Protection
Operating Mode
If an overheated engine condition exists and
the ENGINE POWER IS REDUCED message
displays, an overheat protection mode which
alternates firing groups of cylinders helps to
prevent engine damage. In this mode, a loss
in power and engine performance will be
noticed. This operating mode allows the
vehicle to be driven to a safe place in an
emergency. Driving extended distances and/
or towing a trailer in the overheat
protection mode should be avoided.
Page 349 of 463
Chevrolet Silverado 1500 Owner Manual (GMNA-Localizing-U.S./Canada/
Mexico/Paraguay-16515119) - 2023 - CRC - 6/2/22
348 Vehicle Care
If the engine or transmission detects an
impending hot fluid condition, then the
transmission may force upshifts to limit
temperatures. Downshifts may also be
prevented in this instance. Normal operation
may continue unless the display indicates
there is a hot condition and engine should
be idled.
Caution
After driving in the overheated engine
protection operating mode, the engine oil
will be severely degraded. Any repairs
performed before the engine is cool may
cause engine damage. Allow the engine
to cool before attempting any repair.
Repair the cause of coolant loss, change
the oil, and reset the oil life system. See
Engine Oil0338.
Engine Fan
If the vehicle has the Duramax diesel
engine, see the Duramax diesel supplement.
The vehicle has electric cooling fan(s). The
fans may be heard spinning at low speed
during most everyday driving. The fans may
turn off if no cooling is required. Under
heavy vehicle loading, trailer towing, high outside temperatures, or operation of the air
conditioning system, the fans may change
to high speed and an increase in fan noise
may be heard. This is normal and indicates
that the cooling system is functioning
properly. The fans will change to low speed
when additional cooling is no longer
required.
The electric engine cooling fans may run
after the engine has been turned off. This is
normal and no service is required.
Washer Fluid
What to Use
When windshield washer fluid needs to be
added, be sure to read the manufacturer's
instructions before use. Use a fluid that has
sufficient protection against freezing in an
area where the temperature may fall below
freezing.
Adding Washer Fluid
The vehicle has a low washer fluid message
on the DIC that comes on when the washer
fluid is low. The message is displayed for
15 seconds at the start of each ignition cycle.
When the WASHER FLUID LOW ADD FLUID
message displays, washer fluid will need to
be added to the windshield washer fluid
reservoir.
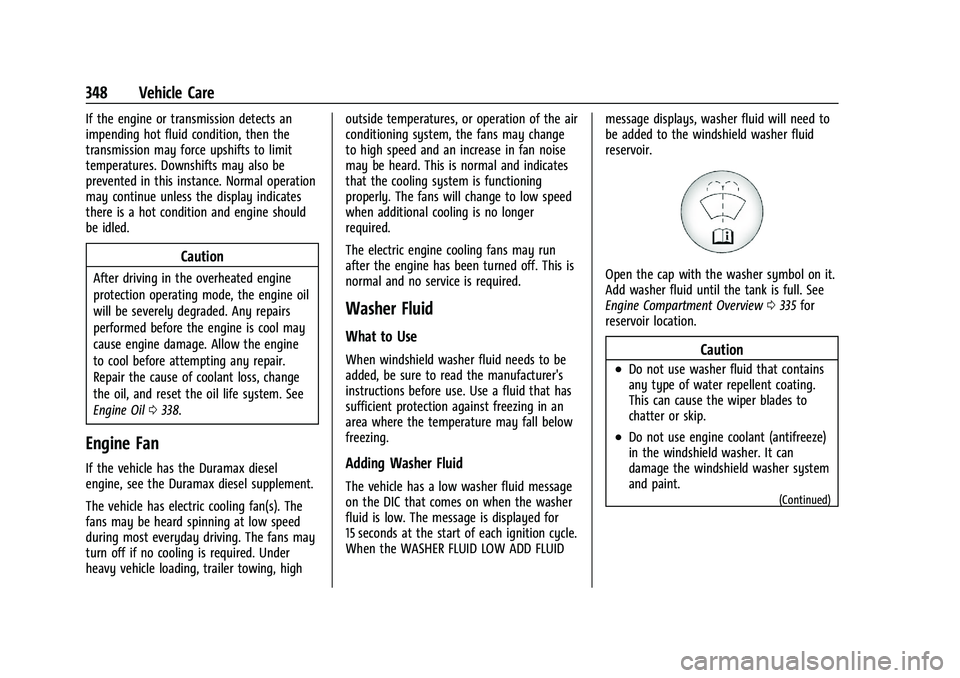
Open the cap with the washer symbol on it.
Add washer fluid until the tank is full. See
Engine Compartment Overview
0335 for
reservoir location.
Caution
.Do not use washer fluid that contains
any type of water repellent coating.
This can cause the wiper blades to
chatter or skip.
.Do not use engine coolant (antifreeze)
in the windshield washer. It can
damage the windshield washer system
and paint.
(Continued)
Page 377 of 463
Chevrolet Silverado 1500 Owner Manual (GMNA-Localizing-U.S./Canada/
Mexico/Paraguay-16515119) - 2023 - CRC - 6/2/22
376 Vehicle Care
{Warning
Neither tire underinflation nor
overinflation is good. Underinflated
tires, or tires that do not have
enough air, can result in:
.Tire overloading and overheating,
which could lead to a blowout
.Premature or irregular wear
.Poor handling
.Reduced fuel economy for
internal combustion engine
vehicles
.Reduced range for electric vehicles
Overinflated tires, or tires that have
too much air, can result in:
.Unusual wear
.Poor handling
.Rough ride
.Needless damage from road
hazards The Tire and Loading Information label
on the vehicle indicates the original
equipment tires and the correct cold
tire inflation pressures. The
recommended pressure is the minimum
air pressure needed to support the
vehicle's maximum load carrying
capacity.
For additional information regarding
how much weight the vehicle can carry,
and an example of the Tire and Loading
Information label, see
Vehicle Load
Limits 0204. How the vehicle is loaded
affects vehicle handling and ride
comfort. Never load the vehicle with
more weight than it was designed to
carry.
When to Check
Check the pressure of the tires once a
month or more.
Do not forget the spare, if the vehicle
has one. See Full-Size Spare Tire 0399
for additional information. How to Check
Use a good quality pocket-type gauge
to check tire pressure. Proper tire
inflation cannot be determined by
looking at the tire. Check the tire
inflation pressure when the tires are
cold, meaning the vehicle has not been
driven for at least three hours or no
more than 1.6 km (1 mi).
Remove the valve cap from the tire
valve stem. Press the tire gauge firmly
onto the valve to get a pressure
measurement. If the cold tire inflation
pressure matches the recommended
pressure on the Tire and Loading
Information label, no further adjustment
is necessary. If the inflation pressure is
low, add air until the recommended
pressure is reached. If the inflation
pressure is high, press on the metal
stem in the center of the tire valve to
release air.
Re-check the tire pressure with the tire
gauge.
Page 453 of 463
Chevrolet Silverado 1500 Owner Manual (GMNA-Localizing-U.S./Canada/-
Mexico/Paraguay-16515119) - 2023 - CRC - 6/2/22
452 Index
DiagnosticsConnected Services . . . . . . . . . . . . . . . . . . . . 448
Differential, Limited-Slip . . . . . . . . . . . . . . . . . 243
Disabled Vehicle Transporting . . . . . . . . . . . . . . . . . . . . . . . . . . . 402
Distracted Driving . . . . . . . . . . . . . . . . . . . . . . . . 195
Dome Lamps . . . . . . . . . . . . . . . . . . . . . . . . . . . . . 144
Door Ajar Light . . . . . . . . . . . . . . . . . . . . . . . . . . . . . . 126
Delayed Locking . . . . . . . . . . . . . . . . . . . . . . . . 20
Locks . . . . . . . . . . . . . . . . . . . . . . . . . . . . . . . . . . . 19
Power Locks . . . . . . . . . . . . . . . . . . . . . . . . . . . . 20
Drive Belt Routing, Engine . . . . . . . . . . . . . . . 429
Drive Systems Four-Wheel Drive . . . . . . . . . . . . . . . . . . . . . . 353
Driver
Assistance Systems . . . . . . . . . . . . . . . . . . . . 272
Information Center (DIC) . . . . . . . . . . . 126, 127
Mode Control . . . . . . . . . . . . . . . . . . . . . . . . . . 240
Mode Control Light . . . . . . . . . . . . . . . . . . . . 122
Teen . . . . . . . . . . . . . . . . . . . . . . . . . . . . . . . . . . . 179
Driving Assistance Systems . . . . . . . . . . . . . . . . . . . . 284
Better Fuel Economy . . . . . . . . . . . . . . . . . . . 194
Characteristics and Towing Tips . . . . . . . . 299
Defensive . . . . . . . . . . . . . . . . . . . . . . . . . . . . . . 195
Distracted . . . . . . . . . . . . . . . . . . . . . . . . . . . . . 195
Hill and Mountain Roads . . . . . . . . . . . . . . 202 Driving (cont'd)
If the Vehicle is Stuck . . . . . . . . . . . . . . . . . 203
Impaired . . . . . . . . . . . . . . . . . . . . . . . . . . . . . . . 195
Loss of Control . . . . . . . . . . . . . . . . . . . . . . . . 197
Off-Road . . . . . . . . . . . . . . . . . . . . . . . . . . . . . . . 197
Off-Road Recovery . . . . . . . . . . . . . . . . . . . . . 197
Vehicle Load Limits . . . . . . . . . . . . . . . . . . . . 204
Wet Roads . . . . . . . . . . . . . . . . . . . . . . . . . . . . . 201
Winter . . . . . . . . . . . . . . . . . . . . . . . . . . . . . . . . . 202
Dual Automatic Climate Control System . . . . 187
E
ElectricBrake Boost . . . . . . . . . . . . . . . . . . . . . . . . . . . . 234
Parking Brake . . . . . . . . . . . . . . . . . . . . . . . . . . 235
Parking Brake Light . . . . . . . . . . . . . . . . . . . . . 118
Electrical Equipment, Add-On . . . . . . . . . . . . . . . . . . . . 328
System Overload . . . . . . . . . . . . . . . . . . . . . . 360
Electrical System Engine Compartment Fuse Block . . . . . . . 362
Fuses and Circuit Breakers . . . . . . . . . . . . . 361
Instrument Panel Fuse Block . . . . . . 365, 367
Emergency OnStar . . . . . . . . . . . . . . . . . . . . . . . . . . . . . . . . . 442
Engine Air Cleaner/Filter . . . . . . . . . . . . . . . . . . . . . . 341 Engine (cont'd)
Air Filter Life System . . . . . . . . . . . . . . . . . . 341
Check Light (Malfunction Indicator) . . . . . 116
Compartment Overview . . . . . . . . . . . . . . . . 335
Coolant Temperature Gauge . . . . . . . . . . . . 112
Coolant Temperature Warning Light . . . 122
Cooling System . . . . . . . . . . . . . . . . . . . . . . . . 343
Drive Belt Routing . . . . . . . . . . . . . . . . . . . . . 429
Exhaust . . . . . . . . . . . . . . . . . . . . . . . . . . . . . . . . 220
Fan . . . . . . . . . . . . . . . . . . . . . . . . . . . . . . . . . . . . 348
Heater . . . . . . . . . . . . . . . . . . . . . . . . . . . . . . . . . 214
Oil Life System . . . . . . . . . . . . . . . . . . . . . . . . 340
Oil Pressure Gauge . . . . . . . . . . . . . . . . . . . . . 111
Oil Pressure Light . . . . . . . . . . . . . . . . . . . . . . 123
Overheated Protection
Operating Mode . . . . . . . . . . . . . . . . . . . . . 347
Overheating . . . . . . . . . . . . . . . . . . . . . . . . . . . 346
Power Messages . . . . . . . . . . . . . . . . . . . . . . . 133
Running While Parked . . . . . . . . . . . . . . . . . 220
Starting . . . . . . . . . . . . . . . . . . . . . . . . . . . . . . . . 213
Entry Lighting . . . . . . . . . . . . . . . . . . . . . . . . . . . .145
Equipment, Towing . . . . . . . . . . . . . . . . . . . . . . 307
Event Data Recorders . . . . . . . . . . . . . . . . . . . . 440
Exit Lighting . . . . . . . . . . . . . . . . . . . . . . . . . . . . . .145
Extended Mirrors . . . . . . . . . . . . . . . . . . . . . . . . . .32
Extended Parking . . . . . . . . . . . . . . . . . . . . . . . . 219
Extender, Seat Belt . . . . . . . . . . . . . . . . . . . . . . . 58