2023 CHEVROLET SILVERADO 1500 transmission fluid
[x] Cancel search: transmission fluidPage 332 of 463
Chevrolet Silverado 1500 Owner Manual (GMNA-Localizing-U.S./Canada/
Mexico/Paraguay-16515119) - 2023 - CRC - 6/2/22
Vehicle Care 331
Vehicle Care
General Information
General Information . . . . . . . . . . . . . . . . . . . 332
California Perchlorate MaterialsRequirements . . . . . . . . . . . . . . . . . . . . . . . . 332
Accessories and Modifications . . . . . . . . . 332
Vehicle Checks
Doing Your Own Service Work . . . . . . . . . 333
Hood . . . . . . . . . . . . . . . . . . . . . . . . . . . . . . . . . . 333
Engine Compartment Overview . . . . . . . . 335
Engine Oil . . . . . . . . . . . . . . . . . . . . . . . . . . . . . 338
Engine Oil Life System . . . . . . . . . . . . . . . . 340
Automatic Transmission Fluid . . . . . . . . . 340
Engine Air Filter Life System . . . . . . . . . . . 341
Engine Air Cleaner/Filter . . . . . . . . . . . . . . . 341
Cooling System . . . . . . . . . . . . . . . . . . . . . . . . 343
Engine Overheating . . . . . . . . . . . . . . . . . . . 346
Overheated Engine Protection Operating Mode . . . . . . . . . . . . . . . . . . . . . 347
Engine Fan . . . . . . . . . . . . . . . . . . . . . . . . . . . . 348
Washer Fluid . . . . . . . . . . . . . . . . . . . . . . . . . . 348
Brakes . . . . . . . . . . . . . . . . . . . . . . . . . . . . . . . . 349
Brake Pad Life System . . . . . . . . . . . . . . . . 349
Brake Fluid . . . . . . . . . . . . . . . . . . . . . . . . . . . . 350
Battery - North America . . . . . . . . . . . . . . . 351
Four-Wheel Drive . . . . . . . . . . . . . . . . . . . . . . 353
Front Axle . . . . . . . . . . . . . . . . . . . . . . . . . . . . . 354
Rear Axle . . . . . . . . . . . . . . . . . . . . . . . . . . . . . . 354 Automatic Transmission Shift Lock
Control Function Check (Mechanical
Shifter) . . . . . . . . . . . . . . . . . . . . . . . . . . . . . . 354
Park Brake and P (Park) Mechanism Check . . . . . . . . . . . . . . . . . . . . . . . . . . . . . . . . 354
Wiper Blade Replacement . . . . . . . . . . . . . 355
Glass Replacement . . . . . . . . . . . . . . . . . . . . . 355
Windshield Replacement . . . . . . . . . . . . . . . 355
Gas Strut(s) . . . . . . . . . . . . . . . . . . . . . . . . . . . 356Headlamp Aiming
Front Headlamp Aiming . . . . . . . . . . . . . . . 356
Bulb Replacement
Bulb Replacement . . . . . . . . . . . . . . . . . . . . . 357
Halogen Bulbs . . . . . . . . . . . . . . . . . . . . . . . . . 357
LED Lighting . . . . . . . . . . . . . . . . . . . . . . . . . . . 357
Headlamps, Front Turn Signal, Sidemarker, and Parking Lamps . . . . . . 357
Taillamps, Turn Signal, Stoplamps, and Back-Up Lamps . . . . . . . . . . . . . . . . . . . . . . 358
Center High-Mounted Stoplamp (CHMSL) and Cargo Lamp . . . . . . . . . . . . 359
License Plate Lamp . . . . . . . . . . . . . . . . . . . . 359
Electrical System
Electrical System Overload . . . . . . . . . . . . 360
Fuses and Circuit Breakers . . . . . . . . . . . . . 361
Engine Compartment Fuse Block . . . . . . 362
Instrument Panel Fuse Block (Left) . . . . 365
Instrument Panel Fuse Block (Right) . . . 367
Wheels and Tires
Tires . . . . . . . . . . . . . . . . . . . . . . . . . . . . . . . . . . 369
All-Season Tires . . . . . . . . . . . . . . . . . . . . . . . 370
Winter Tires . . . . . . . . . . . . . . . . . . . . . . . . . . . 370
All-Terrain Tires . . . . . . . . . . . . . . . . . . . . . . . 370
Tire Sidewall Labeling . . . . . . . . . . . . . . . . . . 371
Tire Designations . . . . . . . . . . . . . . . . . . . . . . 372
Tire Terminology and Definitions . . . . . . 374
Tire Pressure . . . . . . . . . . . . . . . . . . . . . . . . . . 375
Tire Pressure Monitor System . . . . . . . . . 377
Tire Pressure Monitor Operation . . . . . . . 377
Tire Inspection . . . . . . . . . . . . . . . . . . . . . . . . . 381
Tire Rotation . . . . . . . . . . . . . . . . . . . . . . . . . . 382
When It Is Time for New Tires . . . . . . . . 383
Buying New Tires . . . . . . . . . . . . . . . . . . . . . 383
Different Size Tires and Wheels . . . . . . . 385
Uniform Tire Quality Grading . . . . . . . . . 385
Wheel Alignment and Tire Balance . . . . 386
Wheel Replacement . . . . . . . . . . . . . . . . . . . 386
Tire Chains . . . . . . . . . . . . . . . . . . . . . . . . . . . . 387
If a Tire Goes Flat . . . . . . . . . . . . . . . . . . . . . 387
Tire Changing . . . . . . . . . . . . . . . . . . . . . . . . . 389
Full-Size Spare Tire . . . . . . . . . . . . . . . . . . . . 399
Jump Starting
Jump Starting - North America . . . . . . . . 399
Towing the Vehicle
Transporting a Disabled Vehicle . . . . . . . 402
Recreational Vehicle Towing . . . . . . . . . . . 403
Page 341 of 463
Chevrolet Silverado 1500 Owner Manual (GMNA-Localizing-U.S./Canada/
Mexico/Paraguay-16515119) - 2023 - CRC - 6/2/22
340 Vehicle Care
Engine Oil Life System
When to Change Engine Oil
This vehicle has a computer system that
indicates when to change the engine oil and
filter. This is based on a combination of
factors which include engine revolutions,
engine temperature, and miles driven. Based
on driving conditions, the mileage at which
an oil change is indicated can vary
considerably. For the oil life system to work
properly, the system must be reset every
time the oil is changed.
On some vehicles, when the system has
calculated that oil life has been diminished,
a CHANGE ENGINE OIL SOON message comes
on to indicate that an oil change is
necessary. Change the oil as soon as
possible within the next 1 000 km (600 mi).
It is possible that, if driving under the best
conditions, the oil life system might indicate
that an oil change is not necessary for up to
a year. The engine oil and filter must be
changed at least once a year and, at this
time, the system must be reset. For vehicles
without the CHANGE ENGINE OIL SOON
message, an oil change is needed when the
REMAINING OIL LIFE percentage is near 0%.
Your dealer has trained service people whowill perform this work and reset the system.
It is also important to check the oil regularly
over the course of an oil drain interval and
keep it at the proper level.
If the system is ever reset accidentally, the
oil must be changed at 5 000 km (3,000 mi)
since the last oil change. Remember to reset
the oil life system whenever the oil is
changed.
How to Reset the Engine Oil Life System
Reset the system whenever the engine oil is
changed so that the system can calculate
the next engine oil change. Always reset the
engine oil life to 100% after every oil
change. It will not reset itself. To reset the
engine oil life system:
1. Display the oil life percentage on the DIC. See Driver Information Center (DIC)
(Base Level) 0126 or
Driver Information Center (DIC) (Uplevel)
0 127.
2. Press the thumbwheel on the steering wheel, or the trip odometer reset stem if
the vehicle does not have DIC controls,
for several seconds. When the
confirmation message displays, select
YES. The oil life will change to 100%. The oil life system can also be reset as
follows:
1. Display the oil life percentage on the DIC. See Driver Information Center (DIC)
(Base Level) 0126 or
Driver Information Center (DIC) (Uplevel)
0 127.
2. Fully press the accelerator pedal slowly three times within five seconds.
3. If the display changes to 100%, the system is reset.
If the vehicle has a CHANGE ENGINE OIL
SOON message and it comes back on when
the vehicle is started and/or the oil
life percentage is near 0%, the engine oil
life system has not been reset. Repeat the
procedure.
Automatic Transmission Fluid
When to Check and Change Automatic
Transmission Fluid
It is usually not necessary to check the
transmission fluid level. The only reason for
fluid loss is a transmission leak or
overheated transmission. This vehicle is not
equipped with a transmission fluid level
dipstick. There is a special procedure for
checking and changing the transmission fluid
Page 342 of 463
Chevrolet Silverado 1500 Owner Manual (GMNA-Localizing-U.S./Canada/
Mexico/Paraguay-16515119) - 2023 - CRC - 6/2/22
Vehicle Care 341
in these vehicles. Because this procedure is
difficult, this should be done at the dealer.
Contact the dealer for additional information
or the procedure can be found in the service
manual. SeePublication Ordering
Information 0437.
Caution
Use of the incorrect automatic
transmission fluid may damage the
vehicle, and the damage may not be
covered by the vehicle warranty. Always
use the correct automatic transmission
fluid. See Recommended Fluids and
Lubricants 0421.
Change the fluid and filter at the scheduled
maintenance intervals listed in Maintenance
Schedule 0417. Be sure to use the
transmission fluid listed in Recommended
Fluids and Lubricants 0421.
Engine Air Filter Life System
If equipped, this feature provides the engine
air filter’s remaining life and best timing for
a change. The timing to change an engine
air filter depends on driving and
environmental conditions.
When to Change the Engine Air Filter
When the Driver Information Center (DIC)
displays a message to replace the engine air
filter at the next oil change, follow this
timing.
When the DIC displays a message to replace
the engine air filter soon, replace the engine
air filter at the earliest convenience.
The system must be reset after the engine
air filter is changed.
If the DIC displays a message to check the
engine air filter system, see your dealer.
How to Reset the Engine Air Filter Life
System
To reset:
1. Place the vehicle in P (Park).
2. Display the Air Filter Life on the DIC. See Driver Information Center (DIC) (Base
Level) 0126 or
Driver Information Center (DIC) (Uplevel)
0 127.
3. Press
Ton the steering wheel, or press
the trip odometer reset stem if the
vehicle does not have DIC controls, to
move to the Reset/Disable display area. Select Reset then press the thumbwheel
or press the reset stem for several
seconds.
4. Press the thumbwheel or the reset stem to confirm the reset.
Engine Air Cleaner/Filter
The engine air cleaner/filter is on the driver
side of the engine compartment. See Engine
Compartment Overview 0335.
When to Inspect the Engine Air Cleaner/
Filter
If the vehicle is not equipped with the
engine air filter life system see Maintenance
Schedule 0417 for intervals on inspecting
and replacing the engine air cleaner filter.
How to Inspect/Replace the Engine Air
Cleaner/Filter
Do not start or run the engine with the
engine air cleaner/filter housing open.
Before removing the engine air cleaner/
filter, clear any dirt and debris away from
the engine air cleaner/filter housing and
nearby components. Remove the engine air
cleaner/filter. Lightly tap and shake the
engine air cleaner/filter (away from the
vehicle), to release loose dust and dirt.
Page 347 of 463
Chevrolet Silverado 1500 Owner Manual (GMNA-Localizing-U.S./Canada/
Mexico/Paraguay-16515119) - 2023 - CRC - 6/2/22
346 Vehicle Care
1. Remove the coolant surge tank pressurecap when the cooling system, including
the coolant surge tank pressure cap and
upper radiator hose, is no longer hot.
Turn the pressure cap slowly
counterclockwise about one full turn. If a
hiss is heard, wait for that to stop.
A hiss means there is still some
pressure left.
2. Keep turning the pressure cap slowly, and remove it.
3. Fill the coolant surge tank with the proper mixture to the full cold mark.
4. With the coolant surge tank pressure cap off, start the engine and let it run until
the engine coolant temperature gauge
indicates approximately 90 °C (195 °F).
By this time, the coolant level inside the
coolant surge tank may be lower. If the
level is lower, add more of the proper
mixture to the coolant surge tank until
the level reaches the indicated mark.
5. Replace the pressure cap tightly.
6. Verify coolant level after the engine is shut off and the coolant is cold.
If necessary, repeat coolant fill procedure
Steps 1–6.Caution
If the pressure cap is not tightly installed,
coolant loss and engine damage may
occur. Be sure the cap is properly and
tightly secured.
Engine Overheating
If the vehicle has the Duramax diesel
engine, see the Duramax diesel supplement.
Caution
Do not run the engine if there is a leak
in the engine cooling system. This can
cause a loss of all coolant and can
damage the system and vehicle. Have
any leaks fixed right away.
The vehicle has several indicators to warn of
engine overheating.
There is a coolant temperature gauge in the
vehicle's instrument cluster. See Engine
Coolant Temperature Gauge 0112.
In addition, there are ENGINE OVERHEATED
STOP ENGINE, ENGINE OVERHEATED IDLE
ENGINE, and ENGINE POWER IS REDUCED
messages in the Driver Information
Center (DIC). If the decision is made not to lift the hood
when this warning appears, get service help
right away. See
Roadside Assistance Program
0 433.
If the decision is made to lift the hood,
make sure the vehicle is parked on a level
surface.
2.7L L4, 5.3L V8, and 6.2L V8 Engines
Check to see if the engine cooling fans are
running. If the engine is overheating, the
fans should be running. If they are not, do
not continue to run the engine and have the
vehicle serviced.
If the engine or transmission detects an
impending hot fluid condition, then the
transmission may force upshifts to limit
temperatures. Downshifts may also be
prevented in this instance. Normal operation
may continue unless the display indicates
there is a hot condition and engine should
be idled.
Page 349 of 463
Chevrolet Silverado 1500 Owner Manual (GMNA-Localizing-U.S./Canada/
Mexico/Paraguay-16515119) - 2023 - CRC - 6/2/22
348 Vehicle Care
If the engine or transmission detects an
impending hot fluid condition, then the
transmission may force upshifts to limit
temperatures. Downshifts may also be
prevented in this instance. Normal operation
may continue unless the display indicates
there is a hot condition and engine should
be idled.
Caution
After driving in the overheated engine
protection operating mode, the engine oil
will be severely degraded. Any repairs
performed before the engine is cool may
cause engine damage. Allow the engine
to cool before attempting any repair.
Repair the cause of coolant loss, change
the oil, and reset the oil life system. See
Engine Oil0338.
Engine Fan
If the vehicle has the Duramax diesel
engine, see the Duramax diesel supplement.
The vehicle has electric cooling fan(s). The
fans may be heard spinning at low speed
during most everyday driving. The fans may
turn off if no cooling is required. Under
heavy vehicle loading, trailer towing, high outside temperatures, or operation of the air
conditioning system, the fans may change
to high speed and an increase in fan noise
may be heard. This is normal and indicates
that the cooling system is functioning
properly. The fans will change to low speed
when additional cooling is no longer
required.
The electric engine cooling fans may run
after the engine has been turned off. This is
normal and no service is required.
Washer Fluid
What to Use
When windshield washer fluid needs to be
added, be sure to read the manufacturer's
instructions before use. Use a fluid that has
sufficient protection against freezing in an
area where the temperature may fall below
freezing.
Adding Washer Fluid
The vehicle has a low washer fluid message
on the DIC that comes on when the washer
fluid is low. The message is displayed for
15 seconds at the start of each ignition cycle.
When the WASHER FLUID LOW ADD FLUID
message displays, washer fluid will need to
be added to the windshield washer fluid
reservoir.
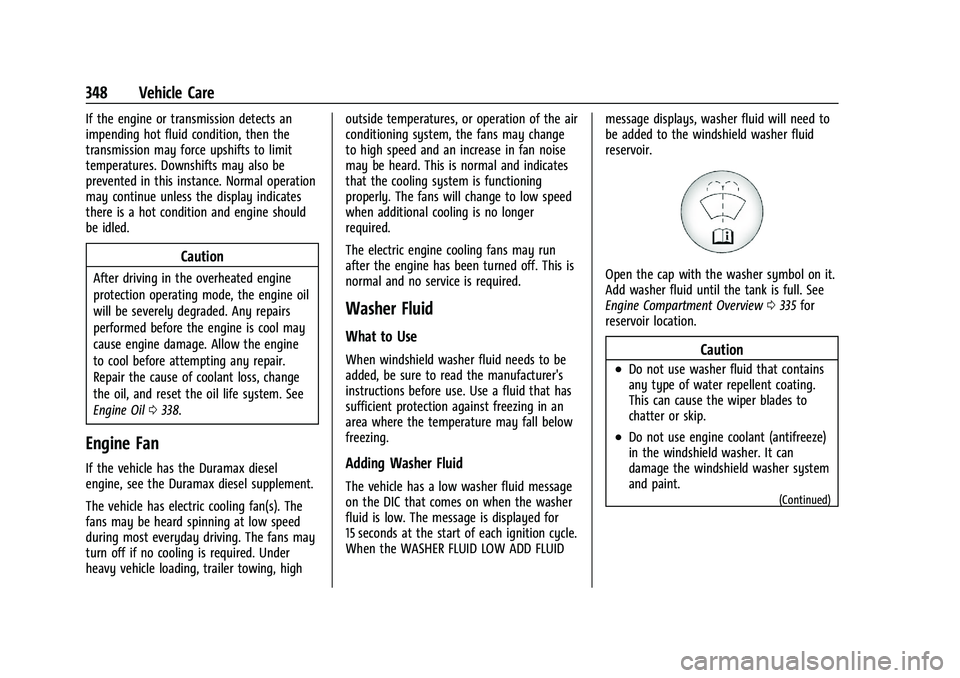
Open the cap with the washer symbol on it.
Add washer fluid until the tank is full. See
Engine Compartment Overview
0335 for
reservoir location.
Caution
.Do not use washer fluid that contains
any type of water repellent coating.
This can cause the wiper blades to
chatter or skip.
.Do not use engine coolant (antifreeze)
in the windshield washer. It can
damage the windshield washer system
and paint.
(Continued)
Page 355 of 463
Chevrolet Silverado 1500 Owner Manual (GMNA-Localizing-U.S./Canada/
Mexico/Paraguay-16515119) - 2023 - CRC - 6/2/22
354 Vehicle Care
What to Use
Refer toRecommended Fluids and Lubricants
0 421 to determine what kind of lubricant
to use.
Front Axle
When to Check Lubricant
It is not necessary to regularly check the
front axle fluid unless a leak is suspected or
an unusual noise is heard. A fluid loss could
indicate a problem. Have it inspected and
repaired. This service can be complex. See
your dealer.
Do not directly power wash the transfer
case and/or front/rear axle output seals.
High pressure water can overcome the seals
and contaminate the fluid. Contaminated
fluid will decrease the life of the transfer
case and/or drive axles and should be
replaced.
Rear Axle
When to Check Lubricant
It is not necessary to regularly check the
rear axle fluid unless a leak is suspected or
an unusual noise is heard. A fluid loss could indicate a problem. Have it inspected and
repaired. This service can be complex. See
your dealer.
Do not directly power wash the transfer
case and/or front/rear axle output seals.
High pressure water can overcome the seals
and contaminate the fluid. Contaminated
fluid will decrease the life of the transfer
case and/or drive axles and should be
replaced.
Automatic Transmission Shift Lock
Control Function Check
(Mechanical Shifter)
{Warning
When you are doing this inspection, the
vehicle could move suddenly. If the
vehicle moves, you or others could be
injured.
1. Before starting this check, be sure there is enough room around the vehicle.
It should be parked on a level surface.
2. Apply the parking brake. Be ready to apply the regular brake immediately if
the vehicle begins to move. 3. With the engine off, turn the ignition on,
but do not start the engine. Without
applying the regular brake, try to move
the shift lever out of P (Park) with
normal effort. If the shift lever moves
out of P (Park), contact your dealer for
service.
Park Brake and P (Park)
Mechanism Check
{Warning
When you are doing this check, the
vehicle could begin to move. You or
others could be injured and property
could be damaged. Make sure there is
room in front of the vehicle in case it
begins to roll. Be ready to apply the
regular brake at once should the vehicle
begin to move.
Park on a fairly steep hill, with the vehicle
facing downhill. Keeping your foot on the
regular brake, set the parking brake.
.To check the parking brake's holding
ability: With the engine running and the
transmission in N (Neutral), slowly remove
Page 402 of 463
Chevrolet Silverado 1500 Owner Manual (GMNA-Localizing-U.S./Canada/
Mexico/Paraguay-16515119) - 2023 - CRC - 6/2/22
Vehicle Care 401
one battery, using the battery that is
closer to the starter will reduce electrical
resistance. This is located on the
passenger side, in the rear of the engine
compartment.
3. Get the vehicles close enough so the jumper cables can reach, but be sure the
vehicles are not touching each other.
If they are, it could cause an unwanted
ground connection. You would not be
able to start your vehicle, and the bad
grounding could damage the electrical
systems.
To avoid the possibility of the vehicles
rolling, set the parking brake firmly on
both vehicles involved in the jump start
procedure. Put the automatic
transmission in P (Park) before setting
the parking brake. If you have a
four-wheel-drive vehicle, be sure the
transfer case is in a drive gear, not in
N (Neutral).
Caution
If any accessories are left on or plugged
in during the jump starting procedure,
they could be damaged. The repairs
would not be covered by the vehicle
(Continued)
Caution (Continued)
warranty. Whenever possible, turn off or
unplug all accessories on either vehicle
when jump starting.
4. Turn the ignition off on both vehicles. Unplug unnecessary accessories plugged
into the accessory power outlets. Turn
off the radio and all the lamps that are
not needed. This will avoid sparks and
help save both batteries. And it could
save the radio!
5. Open the hood on the other vehicle and locate the positive (+) and negative (−)
terminal locations on that vehicle.
{Warning
An electric fan can start up even when
the engine is not running and can injure
you. Keep hands, clothing, and tools
away from any underhood electric fan.
{Warning
Using a match near a battery can cause
battery gas to explode. People have been
hurt doing this, and some have been
blinded. Use a flashlight if you need
more light.
Battery fluid contains acid that can burn
you. Do not get it on you. If you
accidentally get it in your eyes or on
your skin, flush the place with water and
get medical help immediately.
{Warning
Fans or other moving engine parts can
injure you badly. Keep your hands away
from moving parts once the engine is
running.
6. Check that the jumper cables do not have loose or missing insulation. If they
do, you could get a shock. The vehicles
could be damaged too.
Before you connect the cables, here are
some basic things you should know.
Positive (+) will go to positive (+) or to a
remote positive (+) terminal if the
Page 420 of 463
Chevrolet Silverado 1500 Owner Manual (GMNA-Localizing-U.S./Canada/
Mexico/Paraguay-16515119) - 2023 - CRC - 6/2/22
Service and Maintenance 419
.Vehicles that are regularly used for short
trips of 6 km (4 mi) or less.
The oil life indicator will show you when
to change the oil and filter. Under severe
conditions the indicator may come on
before 12 000 km (7,500 mi).
* Footnote: Under extreme driving
conditions listed above, it may be
necessary to replace your spark plugs at
more frequent intervals. For further
assistance in determining the most
suitable service maintenance intervals for
your vehicle, please contact your
authorized GM Dealer.
Extreme service is for vehicles mainly
driven off-road in four-wheel drive or used
in farming, mining, forestry, or snow
plowing.
Additional Required Services—Severe
Service
Every 72 000 km (45,000 mi)
.Change automatic transmission fluid and
filter.
Every 80 500 km (50,000 mi)
.Change transfer case fluid, if equipped
with 4WD. Do not directly power wash
the transfer case and/or front/rear axle output seals. High pressure water can
overcome the seals and contaminate the
transfer case fluid. Contaminated fluid will
decrease the life of the transfer case and/
or axles and should be replaced.
Owner Checks and Services
Every Five Years
.Replace brake fluid.
Every Seven Years
.Replace Air Conditioning Desiccant every
seven years. The air conditioning system
requires maintenance every seven years.
This service requires replacement of the
desiccant to help the longevity and
efficient operation of the air conditioning
system. This service can be complex. See
your dealer.
Multi-Point Vehicle
Inspection (MPVI)
A Multi Point Vehicle Inspection (MPVI)
completed by a GM dealer technician is a
maintenance assessment of your vehicle.
The benefit of the MPVI is to identify and
inform the customer of service items that
require immediate attention and those that
may require attention in the future. The technician will perform the following
checks on your vehicle. For a complete list
of checks, inspections, and services, see your
dealer.
Some items may not apply to your vehicle
and/or region.
Diagnostics
.OnStar active, if equipped
.Service history/recall check
Engine Oil and Filter
.Engine oil
.Oil life monitor
‐
Reset oil life monitor
Exterior Lights
.Visual inspection
Windshield and Wipers
.Visual inspection
Battery
.Battery visual inspection
.Battery test results
.Battery cables and connections