2023 CHEVROLET MALIBU fog light
[x] Cancel search: fog lightPage 14 of 332
Chevrolet Malibu Owner Manual (GMNA-Localizing-U.S./Canada-
16273584) - 2023 - CRC - 9/28/22
Keys, Doors, and Windows 13
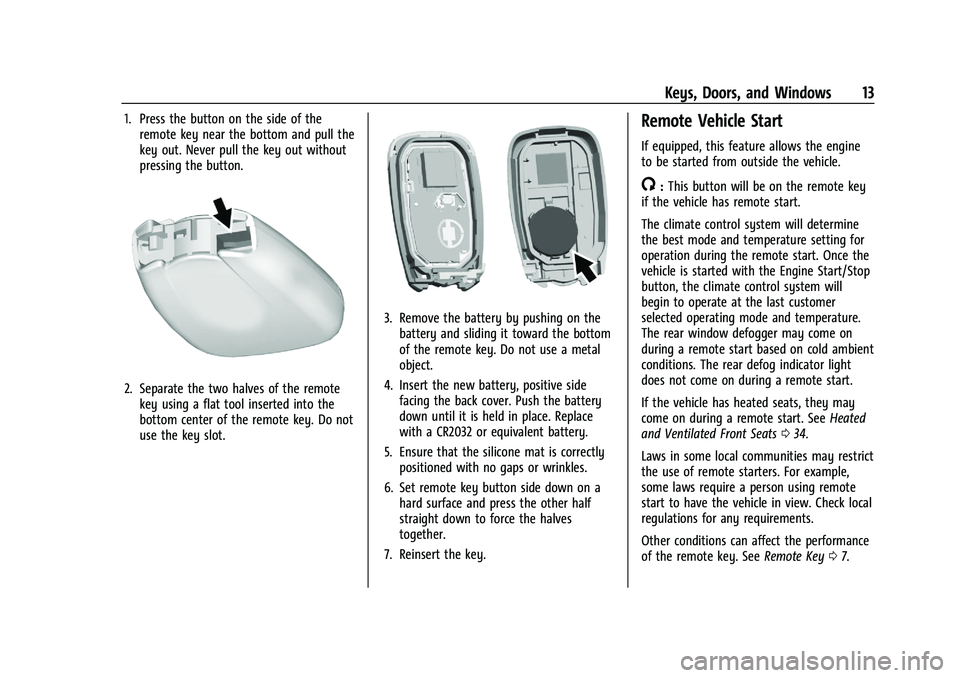
1. Press the button on the side of theremote key near the bottom and pull the
key out. Never pull the key out without
pressing the button.
2. Separate the two halves of the remotekey using a flat tool inserted into the
bottom center of the remote key. Do not
use the key slot.
3. Remove the battery by pushing on thebattery and sliding it toward the bottom
of the remote key. Do not use a metal
object.
4. Insert the new battery, positive side facing the back cover. Push the battery
down until it is held in place. Replace
with a CR2032 or equivalent battery.
5. Ensure that the silicone mat is correctly positioned with no gaps or wrinkles.
6. Set remote key button side down on a hard surface and press the other half
straight down to force the halves
together.
7. Reinsert the key.
Remote Vehicle Start
If equipped, this feature allows the engine
to be started from outside the vehicle.
/: This button will be on the remote key
if the vehicle has remote start.
The climate control system will determine
the best mode and temperature setting for
operation during the remote start. Once the
vehicle is started with the Engine Start/Stop
button, the climate control system will
begin to operate at the last customer
selected operating mode and temperature.
The rear window defogger may come on
during a remote start based on cold ambient
conditions. The rear defog indicator light
does not come on during a remote start.
If the vehicle has heated seats, they may
come on during a remote start. See Heated
and Ventilated Front Seats 034.
Laws in some local communities may restrict
the use of remote starters. For example,
some laws require a person using remote
start to have the vehicle in view. Check local
regulations for any requirements.
Other conditions can affect the performance
of the remote key. See Remote Key07.
Page 23 of 332
Chevrolet Malibu Owner Manual (GMNA-Localizing-U.S./Canada-
16273584) - 2023 - CRC - 9/28/22
22 Keys, Doors, and Windows
Power Mirrors
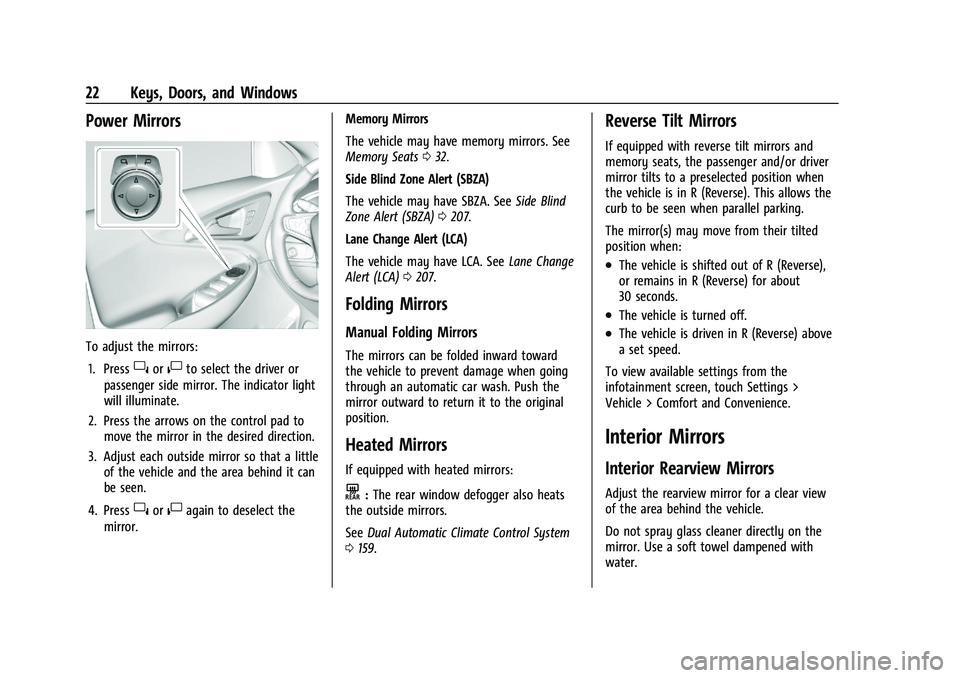
To adjust the mirrors:1. Press
}or|to select the driver or
passenger side mirror. The indicator light
will illuminate.
2. Press the arrows on the control pad to move the mirror in the desired direction.
3. Adjust each outside mirror so that a little of the vehicle and the area behind it can
be seen.
4. Press
}or|again to deselect the
mirror. Memory Mirrors
The vehicle may have memory mirrors. See
Memory Seats
032.
Side Blind Zone Alert (SBZA)
The vehicle may have SBZA. See Side Blind
Zone Alert (SBZA) 0207.
Lane Change Alert (LCA)
The vehicle may have LCA. See Lane Change
Alert (LCA) 0207.
Folding Mirrors
Manual Folding Mirrors
The mirrors can be folded inward toward
the vehicle to prevent damage when going
through an automatic car wash. Push the
mirror outward to return it to the original
position.
Heated Mirrors
If equipped with heated mirrors:
K:The rear window defogger also heats
the outside mirrors.
See Dual Automatic Climate Control System
0 159.
Reverse Tilt Mirrors
If equipped with reverse tilt mirrors and
memory seats, the passenger and/or driver
mirror tilts to a preselected position when
the vehicle is in R (Reverse). This allows the
curb to be seen when parallel parking.
The mirror(s) may move from their tilted
position when:
.The vehicle is shifted out of R (Reverse),
or remains in R (Reverse) for about
30 seconds.
.The vehicle is turned off.
.The vehicle is driven in R (Reverse) above
a set speed.
To view available settings from the
infotainment screen, touch Settings >
Vehicle > Comfort and Convenience.
Interior Mirrors
Interior Rearview Mirrors
Adjust the rearview mirror for a clear view
of the area behind the vehicle.
Do not spray glass cleaner directly on the
mirror. Use a soft towel dampened with
water.
Page 104 of 332
Chevrolet Malibu Owner Manual (GMNA-Localizing-U.S./Canada-
16273584) - 2023 - CRC - 9/28/22
Lighting 103
To enable the IntelliBeam system, press
bon the turn signal lever when the
exterior lamp control is in the AUTO or
5
position.
Driving with IntelliBeam
The system only activates the high beams
when driving over 40 km/h (25 mph).
The blue high-beam on light appears on the
instrument cluster when the high beams
are on.
There is a sensor near the top center of the
windshield that automatically controls the
system. Keep this area of the windshield
clear of debris to allow for best system
performance.
The high-beam headlamps remain on, under
the automatic control, until one of the
following situations occurs:
.The system detects an approaching
vehicle's headlamps.
.The system detects a preceding vehicle's
taillamps.
.The outside light is bright enough that
high-beam headlamps are not required.
.The vehicle's speed drops below 20 km/h
(12 mph).
.The IntelliBeam system is disabled by the
button on the turn signal lever. If this
happens, press
bon the turn signal
lever when the exterior lamp control is in
the AUTO or
5position. The instrument
cluster light will come on to indicate the
IntelliBeam system is reactivated.
The high beams may not turn off
automatically if the system cannot detect
another vehicle's lamps because of any of
the following:
.The other vehicle's lamps are missing,
damaged, obstructed from view,
or otherwise undetected.
.The other vehicle's lamps are covered
with dirt, snow, and/or road spray.
.The other vehicle's lamps cannot be
detected due to dense exhaust, smoke,
fog, snow, road spray, mist, or other
airborne obstructions.
.The vehicle's windshield is dirty, cracked,
or obstructed by something that blocks
the view of the light sensor.
.The vehicle is loaded such that the front
end points upward, causing the light
sensor to aim high and not detect
headlamps and taillamps.
.Driving on winding or hilly roads. The IntelliBeam system may need to be
disabled if any of the above conditions exist.
Exterior Lamps Off Reminder
A warning chime sounds if the driver door is
opened while the ignition is off and the
exterior lamps are on.
Headlamp High/Low-Beam
Changer
3:
Push the turn signal lever away from
you and release, to turn the high beams on.
To return to low beams, push the lever
again or pull it toward you and release.
This indicator light turns on in the
instrument cluster when the high-beam
headlamps are on.
Flash-to-Pass
To flash the high beams, pull the turn signal
lever toward you, and release.
Page 108 of 332
Chevrolet Malibu Owner Manual (GMNA-Localizing-U.S./Canada-
16273584) - 2023 - CRC - 9/28/22
Lighting 107
Some exterior lamps also turn on when
pressing
Kon the remote key or opening
any doors. Low-Beam lamps will only turn
on briefly at night, or in areas with limited
lighting.
All lamps will gradually fade out after about
30 seconds.
Entry lighting can be disabled manually by
closing all doors, pressing
Qon the remote
key, or starting the vehicle.
This feature can be changed. On the
infotainment home page, select the Settings
icon
TVehicleTVehicle Locator Lights.
Exit Lighting
Some exterior lamps and interior lamps turn
on when the driver door is opened after the
vehicle is turned off.
The exterior and interior lamps remain on
for a set amount of time, then automatically
turn off.
The interior lights turn on when the vehicle
is turned off.
The exterior lamps turn off immediately by
turning the exterior lamp control off. This feature can be changed. On the
infotainment home screen, select the
Settings icon
TVehicleTExit Lighting.
Battery Load Management
The vehicle has Electric Power Management
(EPM) that estimates the battery's
temperature and state of charge. It then
adjusts the voltage for best performance
and extended life of the battery.
When the battery's state of charge is low,
the voltage is raised slightly to quickly bring
the charge back up. When the state of
charge is high, the voltage is lowered
slightly to prevent overcharging. If the
vehicle has a voltmeter gauge or a voltage
display on the Driver Information Center
(DIC), you may see the voltage move up or
down. This is normal. If there is a problem,
an alert will be displayed.
The battery can be discharged at idle if the
electrical loads are very high. This is true for
all vehicles. This is because the generator
(alternator) may not be spinning fast
enough at idle to produce all of the power
needed for very high electrical loads.
A high electrical load occurs when several of
the following are on, such as: headlamps,
high beams, rear window defogger, climate
control fan at high speed, heated seats,
engine cooling fans, trailer loads, and loads
plugged into accessory power outlets.
EPM works to prevent excessive discharge
of the battery. It does this by balancing
the generator's output and the vehicle's
electrical needs. It can increase engine idle
speed to generate more power whenever
needed. It can temporarily reduce the power
demands of some accessories.
Normally, these actions occur in steps or
levels, without being noticeable. In rare
cases at the highest levels of corrective
action, this action may be noticeable to the
driver. If so, a DIC message might be
displayed and it is recommended that the
driver reduce the electrical loads as much as
possible.
Battery Power Protection
This feature helps prevent the battery from
being drained, if the interior courtesy lamps
or reading lamps are accidentally left on.
If any of these lamps are left on, they
automatically turn off after 10 minutes,
Page 158 of 332
Chevrolet Malibu Owner Manual (GMNA-Localizing-U.S./Canada-
16273584) - 2023 - CRC - 9/28/22
Climate Controls 157
Climate Controls
Climate Control Systems
Climate Control Systems . . . . . . . . . . . . . . . 157
Dual Automatic Climate ControlSystem . . . . . . . . . . . . . . . . . . . . . . . . . . . . . . 159
Air Vents
Air Vents . . . . . . . . . . . . . . . . . . . . . . . . . . . . . . 162
Maintenance
Passenger Compartment Air Filter . . . . . 163
Service . . . . . . . . . . . . . . . . . . . . . . . . . . . . . . . . 164
Climate Control Systems
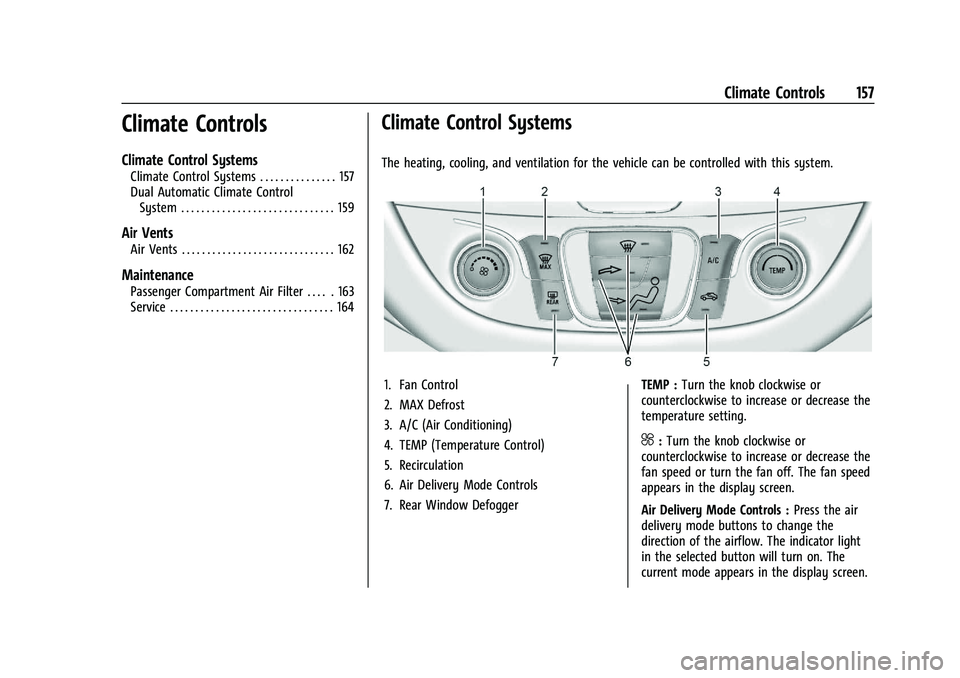
The heating, cooling, and ventilation for the vehicle can be controlled with this system.
1. Fan Control
2. MAX Defrost
3. A/C (Air Conditioning)
4. TEMP (Temperature Control)
5. Recirculation
6. Air Delivery Mode Controls
7. Rear Window Defogger TEMP :
Turn the knob clockwise or
counterclockwise to increase or decrease the
temperature setting.
^: Turn the knob clockwise or
counterclockwise to increase or decrease the
fan speed or turn the fan off. The fan speed
appears in the display screen.
Air Delivery Mode Controls : Press the air
delivery mode buttons to change the
direction of the airflow. The indicator light
in the selected button will turn on. The
current mode appears in the display screen.
Page 159 of 332
Chevrolet Malibu Owner Manual (GMNA-Localizing-U.S./Canada-
16273584) - 2023 - CRC - 9/28/22
158 Climate Controls
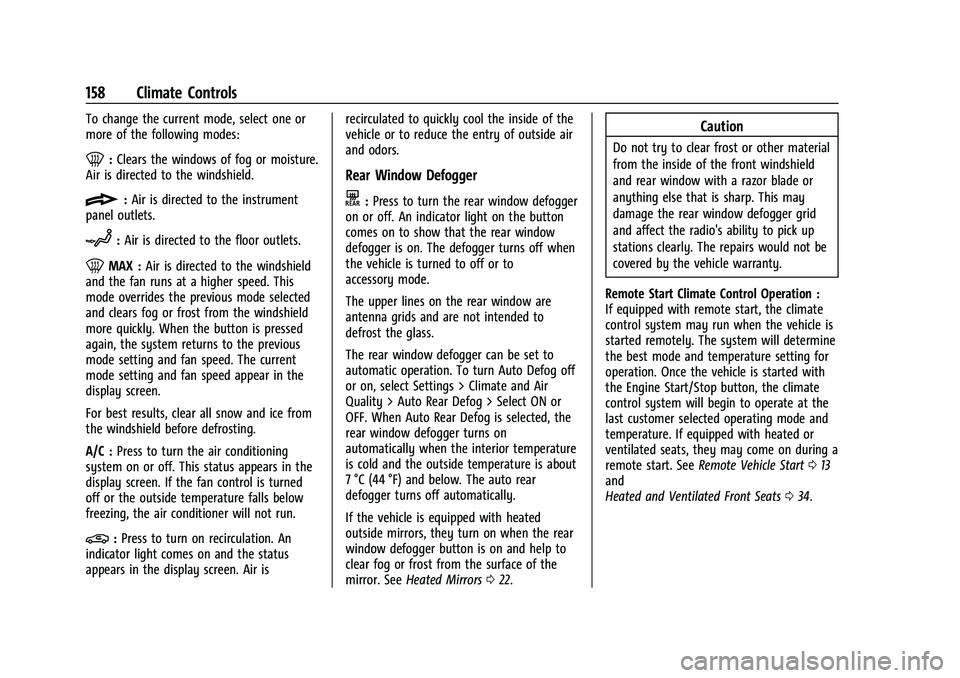
To change the current mode, select one or
more of the following modes:
0:Clears the windows of fog or moisture.
Air is directed to the windshield.
{: Air is directed to the instrument
panel outlets.
z: Air is directed to the floor outlets.
0MAX : Air is directed to the windshield
and the fan runs at a higher speed. This
mode overrides the previous mode selected
and clears fog or frost from the windshield
more quickly. When the button is pressed
again, the system returns to the previous
mode setting and fan speed. The current
mode setting and fan speed appear in the
display screen.
For best results, clear all snow and ice from
the windshield before defrosting.
A/C : Press to turn the air conditioning
system on or off. This status appears in the
display screen. If the fan control is turned
off or the outside temperature falls below
freezing, the air conditioner will not run.
@: Press to turn on recirculation. An
indicator light comes on and the status
appears in the display screen. Air is recirculated to quickly cool the inside of the
vehicle or to reduce the entry of outside air
and odors.
Rear Window Defogger
K:
Press to turn the rear window defogger
on or off. An indicator light on the button
comes on to show that the rear window
defogger is on. The defogger turns off when
the vehicle is turned to off or to
accessory mode.
The upper lines on the rear window are
antenna grids and are not intended to
defrost the glass.
The rear window defogger can be set to
automatic operation. To turn Auto Defog off
or on, select Settings > Climate and Air
Quality > Auto Rear Defog > Select ON or
OFF. When Auto Rear Defog is selected, the
rear window defogger turns on
automatically when the interior temperature
is cold and the outside temperature is about
7 °C (44 °F) and below. The auto rear
defogger turns off automatically.
If the vehicle is equipped with heated
outside mirrors, they turn on when the rear
window defogger button is on and help to
clear fog or frost from the surface of the
mirror. See Heated Mirrors 022.
Caution
Do not try to clear frost or other material
from the inside of the front windshield
and rear window with a razor blade or
anything else that is sharp. This may
damage the rear window defogger grid
and affect the radio's ability to pick up
stations clearly. The repairs would not be
covered by the vehicle warranty.
Remote Start Climate Control Operation :
If equipped with remote start, the climate
control system may run when the vehicle is
started remotely. The system will determine
the best mode and temperature setting for
operation. Once the vehicle is started with
the Engine Start/Stop button, the climate
control system will begin to operate at the
last customer selected operating mode and
temperature. If equipped with heated or
ventilated seats, they may come on during a
remote start. See Remote Vehicle Start 013
and
Heated and Ventilated Front Seats 034.
Page 162 of 332
Chevrolet Malibu Owner Manual (GMNA-Localizing-U.S./Canada-
16273584) - 2023 - CRC - 9/28/22
Climate Controls 161
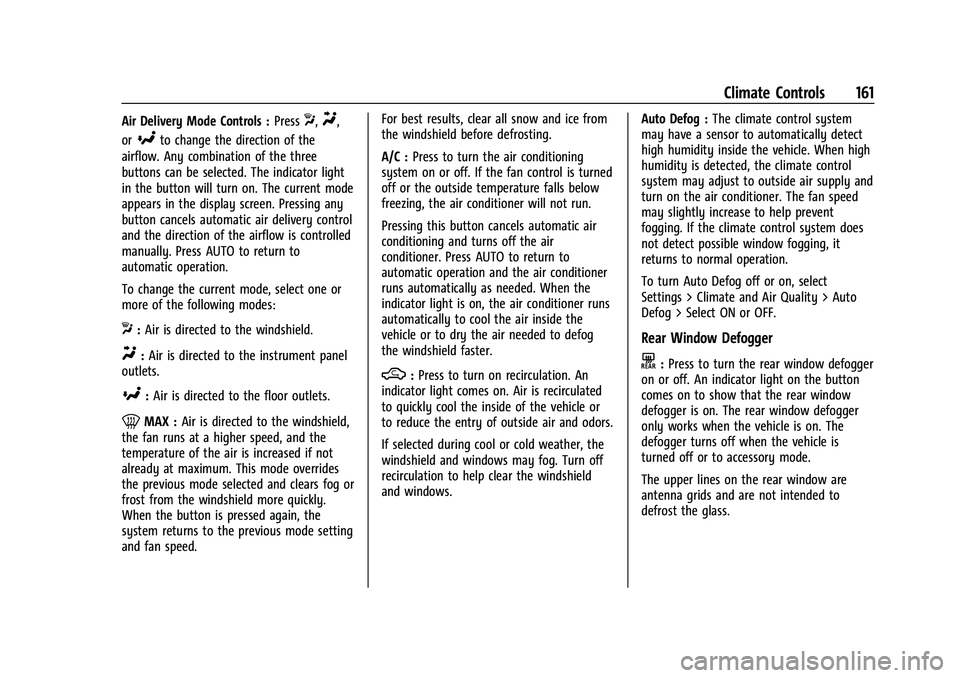
Air Delivery Mode Controls :PressX,Y,
or
[to change the direction of the
airflow. Any combination of the three
buttons can be selected. The indicator light
in the button will turn on. The current mode
appears in the display screen. Pressing any
button cancels automatic air delivery control
and the direction of the airflow is controlled
manually. Press AUTO to return to
automatic operation.
To change the current mode, select one or
more of the following modes:
X: Air is directed to the windshield.
Y:Air is directed to the instrument panel
outlets.
[: Air is directed to the floor outlets.
0MAX : Air is directed to the windshield,
the fan runs at a higher speed, and the
temperature of the air is increased if not
already at maximum. This mode overrides
the previous mode selected and clears fog or
frost from the windshield more quickly.
When the button is pressed again, the
system returns to the previous mode setting
and fan speed. For best results, clear all snow and ice from
the windshield before defrosting.
A/C :
Press to turn the air conditioning
system on or off. If the fan control is turned
off or the outside temperature falls below
freezing, the air conditioner will not run.
Pressing this button cancels automatic air
conditioning and turns off the air
conditioner. Press AUTO to return to
automatic operation and the air conditioner
runs automatically as needed. When the
indicator light is on, the air conditioner runs
automatically to cool the air inside the
vehicle or to dry the air needed to defog
the windshield faster.
M: Press to turn on recirculation. An
indicator light comes on. Air is recirculated
to quickly cool the inside of the vehicle or
to reduce the entry of outside air and odors.
If selected during cool or cold weather, the
windshield and windows may fog. Turn off
recirculation to help clear the windshield
and windows. Auto Defog :
The climate control system
may have a sensor to automatically detect
high humidity inside the vehicle. When high
humidity is detected, the climate control
system may adjust to outside air supply and
turn on the air conditioner. The fan speed
may slightly increase to help prevent
fogging. If the climate control system does
not detect possible window fogging, it
returns to normal operation.
To turn Auto Defog off or on, select
Settings > Climate and Air Quality > Auto
Defog > Select ON or OFF.
Rear Window Defogger
K: Press to turn the rear window defogger
on or off. An indicator light on the button
comes on to show that the rear window
defogger is on. The rear window defogger
only works when the vehicle is on. The
defogger turns off when the vehicle is
turned off or to accessory mode.
The upper lines on the rear window are
antenna grids and are not intended to
defrost the glass.
Page 191 of 332
Chevrolet Malibu Owner Manual (GMNA-Localizing-U.S./Canada-
16273584) - 2023 - CRC - 9/28/22
190 Driving and Operating
Ending Cruise Control
There are four ways to end cruise control:
.Step lightly on the brake pedal.
.Press*.
.Shift the transmission to N (Neutral).
.Press5to turn cruise control system off
completely.
Erasing Speed Memory
The cruise control set speed is erased from
memory if
5is pressed or if the vehicle is
turned off.
Adaptive Cruise Control
(Advanced)
If equipped with Adaptive Cruise Control
(ACC), it allows you to select the cruise
control set speed and following gap. Read
this entire section before using this system.
The following gap is the following time
between your vehicle and a vehicle detected
directly ahead in your path moving in the
same direction. If no vehicle is detected in
your path, ACC works like regular cruise
control. ACC uses camera and radar sensors.
See Radio Frequency Statement 0308. If a vehicle is detected in your path, ACC can
apply acceleration or limited, moderate
braking to maintain the selected following
gap. To disengage ACC, apply the brake.
If ACC is controlling your vehicle speed
when the Traction Control System (TCS) or
StabiliTrak/Electronic Stability Control (ESC)
system activates, the ACC may automatically
disengage. See
Traction Control/Electronic
Stability Control 0186. When road
conditions allow ACC to be safely used, the
ACC can be turned back on.
Disabling the TCS or StabiliTrak/ESC system
will disengage and prevent engagement
of ACC.
ACC can reduce the need for you to
frequently brake and accelerate, especially
when used on expressways, freeways, and
interstate highways. When used on other
roads, you may need to take over the
control of braking or acceleration more
often.
{Warning
ACC has limited braking ability and may
not have time to slow the vehicle down
enough to avoid a collision with another
vehicle you are following. This can occur
(Continued)
Warning (Continued)
when vehicles suddenly slow or stop
ahead, or enter your lane. Also see
“Alerting the Driver”in this section.
Complete attention is always required
while driving and you should be ready to
take action and apply the brakes. See
Defensive Driving 0166.
{Warning
ACC will not detect or brake for children,
pedestrians, animals, or other objects.
Do not use ACC when:
.On winding and hilly roads or when
the sensors are blocked by snow, ice,
or dirt. The system may not detect a
vehicle ahead. Keep the entire front of
the vehicle clean.
.Visibility is low, such as in fog, rain,
or snow conditions. ACC performance
is limited under these conditions.
.On slippery roads where fast changes
in tire traction can cause excessive
wheel slip.