2023 CHEVROLET EQUINOX wheel
[x] Cancel search: wheelPage 214 of 360
Chevrolet Equinox Owner Manual (GMNA-Localizing-U.S./Canada-
16540728) - 2023 - crc - 6/16/22
Driving and Operating 213
Reducing Speed While ACC Is at a Set Speed
If ACC is already activated, do one of the
following:
.Use the brake to get to the desired lower
speed. Release the brake and press SET–.
The vehicle will now cruise at the lower
speed.
.Press and hold SET–until the desired
lower speed is reached, then release it.
.To decrease the vehicle speed in smaller
increments, press SET− briefly. For each
press, the vehicle goes about 1 km/h
(1 mph) slower.
.To decrease the vehicle speed in larger
increments, hold SET−. While holding SET
−, the vehicle speed decreases to the next
5 km/h (5 mph) step, then continues to
decrease by 5 km/h (5 mph) at a time.
The set speed can also be decreased while
the vehicle is stopped.
.If stopped with the brake applied, press
or hold SET− until the desired set speed is
displayed. Selecting the Follow Distance Gap
When a slower moving vehicle is detected
ahead within the selected following gap,
ACC will adjust the vehicle's speed and
attempt to maintain the follow distance gap
selected.
Press
[on the steering wheel to adjust
the following gap. Each press cycles the gap
button through three settings: Far, Medium,
or Near.
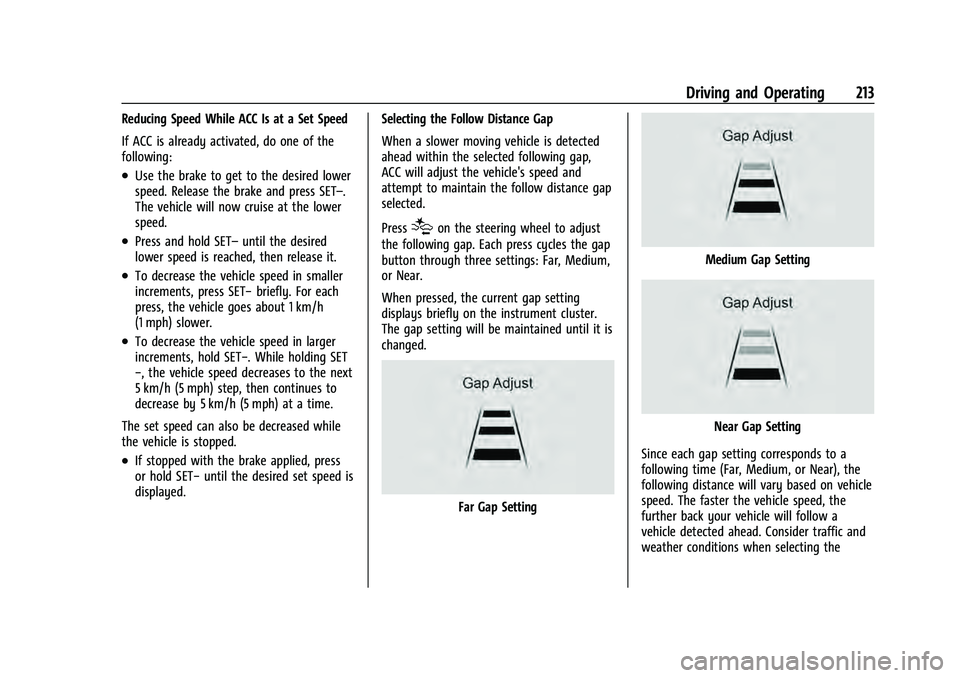
When pressed, the current gap setting
displays briefly on the instrument cluster.
The gap setting will be maintained until it is
changed.
Far Gap Setting
Medium Gap Setting
Near Gap Setting
Since each gap setting corresponds to a
following time (Far, Medium, or Near), the
following distance will vary based on vehicle
speed. The faster the vehicle speed, the
further back your vehicle will follow a
vehicle detected ahead. Consider traffic and
weather conditions when selecting the
Page 226 of 360
Chevrolet Equinox Owner Manual (GMNA-Localizing-U.S./Canada-
16540728) - 2023 - crc - 6/16/22
Driving and Operating 225
How to Activate Automatic Parking
To activate APA, press the soft-touch button
or hard switch
Ofor the system to begin
searching for a parking space while driving
forward at no greater than
30 km/h (18 mph). By default, APA searches
for parallel parking spaces to the right of
the vehicle up to the sensors’ range of 1.5 m
(5 ft). To search for a parking space to the
left, turn on the left turn signal or,
if available, change the side selection in the
infotainment display. To switch the parking
mode between parallel and perpendicular
press and hold
Owhile searching for a
valid parking spot or, if available, change the
parking mode in the infotainment display.
APA cannot park in all empty parking spots.
The parking spot must:
.Be sufficiently large to fit the vehicle
comfortably.
.Have an adjacent vehicle, wall, or pillar
for the system to align to.
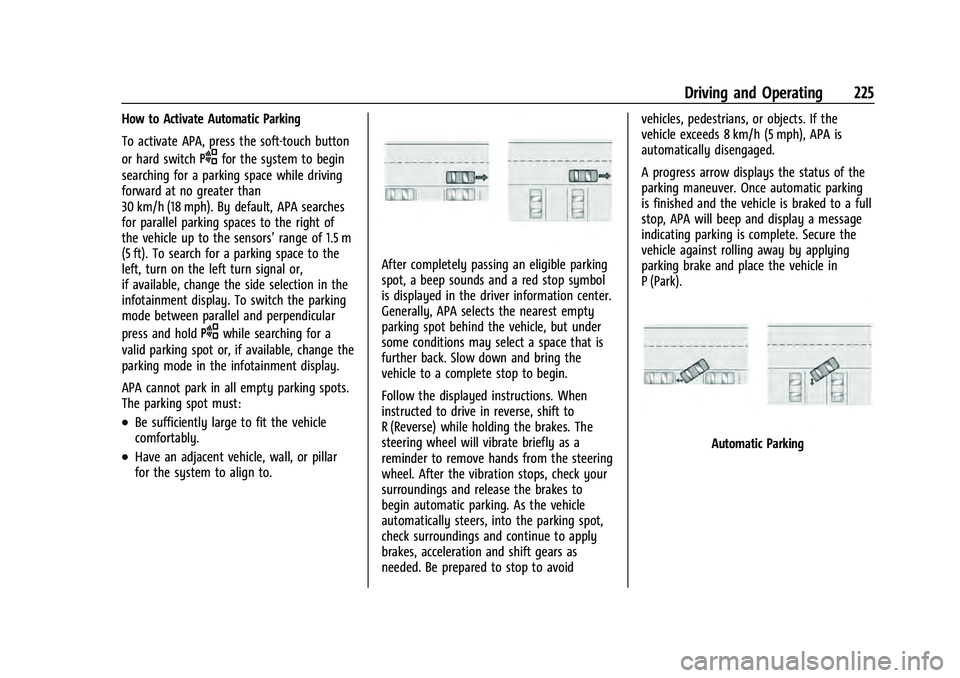
After completely passing an eligible parking
spot, a beep sounds and a red stop symbol
is displayed in the driver information center.
Generally, APA selects the nearest empty
parking spot behind the vehicle, but under
some conditions may select a space that is
further back. Slow down and bring the
vehicle to a complete stop to begin.
Follow the displayed instructions. When
instructed to drive in reverse, shift to
R (Reverse) while holding the brakes. The
steering wheel will vibrate briefly as a
reminder to remove hands from the steering
wheel. After the vibration stops, check your
surroundings and release the brakes to
begin automatic parking. As the vehicle
automatically steers, into the parking spot,
check surroundings and continue to apply
brakes, acceleration and shift gears as
needed. Be prepared to stop to avoid vehicles, pedestrians, or objects. If the
vehicle exceeds 8 km/h (5 mph), APA is
automatically disengaged.
A progress arrow displays the status of the
parking maneuver. Once automatic parking
is finished and the vehicle is braked to a full
stop, APA will beep and display a message
indicating parking is complete. Secure the
vehicle against rolling away by applying
parking brake and place the vehicle in
P (Park).
Automatic Parking
Page 229 of 360
Chevrolet Equinox Owner Manual (GMNA-Localizing-U.S./Canada-
16540728) - 2023 - crc - 6/16/22
228 Driving and Operating
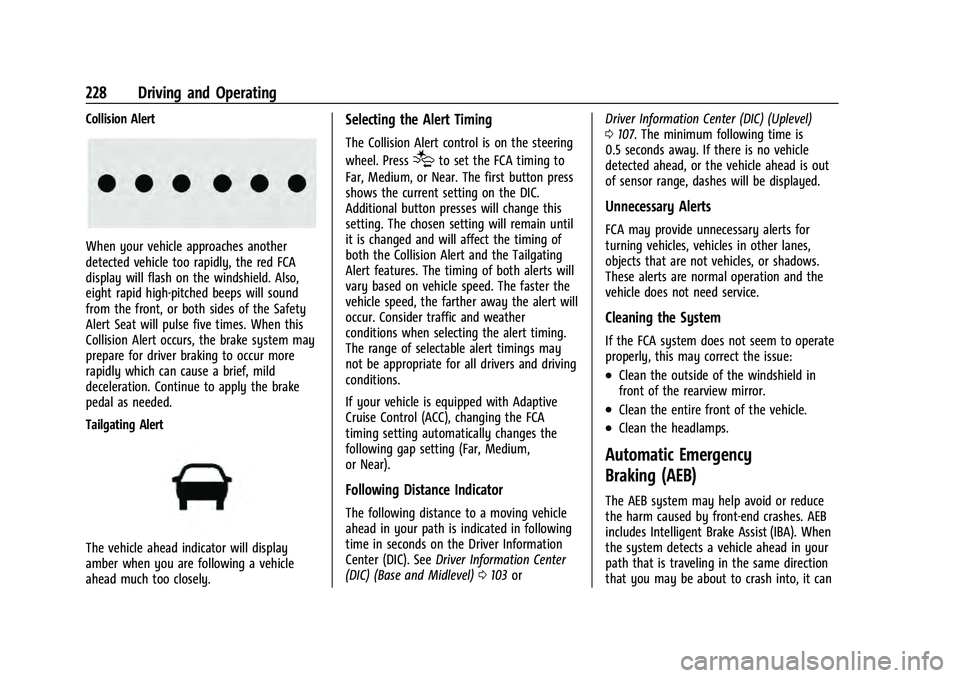
Collision Alert
When your vehicle approaches another
detected vehicle too rapidly, the red FCA
display will flash on the windshield. Also,
eight rapid high-pitched beeps will sound
from the front, or both sides of the Safety
Alert Seat will pulse five times. When this
Collision Alert occurs, the brake system may
prepare for driver braking to occur more
rapidly which can cause a brief, mild
deceleration. Continue to apply the brake
pedal as needed.
Tailgating Alert
The vehicle ahead indicator will display
amber when you are following a vehicle
ahead much too closely.
Selecting the Alert Timing
The Collision Alert control is on the steering
wheel. Press
[to set the FCA timing to
Far, Medium, or Near. The first button press
shows the current setting on the DIC.
Additional button presses will change this
setting. The chosen setting will remain until
it is changed and will affect the timing of
both the Collision Alert and the Tailgating
Alert features. The timing of both alerts will
vary based on vehicle speed. The faster the
vehicle speed, the farther away the alert will
occur. Consider traffic and weather
conditions when selecting the alert timing.
The range of selectable alert timings may
not be appropriate for all drivers and driving
conditions.
If your vehicle is equipped with Adaptive
Cruise Control (ACC), changing the FCA
timing setting automatically changes the
following gap setting (Far, Medium,
or Near).
Following Distance Indicator
The following distance to a moving vehicle
ahead in your path is indicated in following
time in seconds on the Driver Information
Center (DIC). See Driver Information Center
(DIC) (Base and Midlevel) 0103 or Driver Information Center (DIC) (Uplevel)
0
107. The minimum following time is
0.5 seconds away. If there is no vehicle
detected ahead, or the vehicle ahead is out
of sensor range, dashes will be displayed.
Unnecessary Alerts
FCA may provide unnecessary alerts for
turning vehicles, vehicles in other lanes,
objects that are not vehicles, or shadows.
These alerts are normal operation and the
vehicle does not need service.
Cleaning the System
If the FCA system does not seem to operate
properly, this may correct the issue:
.Clean the outside of the windshield in
front of the rearview mirror.
.Clean the entire front of the vehicle.
.Clean the headlamps.
Automatic Emergency
Braking (AEB)
The AEB system may help avoid or reduce
the harm caused by front-end crashes. AEB
includes Intelligent Brake Assist (IBA). When
the system detects a vehicle ahead in your
path that is traveling in the same direction
that you may be about to crash into, it can
Page 234 of 360
Chevrolet Equinox Owner Manual (GMNA-Localizing-U.S./Canada-
16540728) - 2023 - crc - 6/16/22
Driving and Operating 233
When the vehicle is started, both outside
mirror LCA displays will briefly come on to
indicate the system is operating. When the
vehicle is in a forward gear, the left or right
side mirror display will light up if a moving
vehicle is detected in the next lane over in
that blind zone or rapidly approaching that
zone. If the turn signal is activated in the
same direction as a detected vehicle, this
display will flash as an extra warning not to
change lanes.
LCA can be disabled through settings. To
view available settings from the
infotainment screen, touch Settings >
Vehicle > Collision/Detection Systems. If LCA
is disabled by the driver, the LCA mirror
displays will not light up.
When the System Does Not Seem to
Work Properly
The LCA system requires some driving for
the system to calibrate to maximum
performance. This calibration may occur
more quickly if the vehicle is driving on a
straight highway road with traffic and
roadside objects (e.g., guardrails, barriers).
LCA displays may not come on when
passing a vehicle quickly, for a stopped
vehicle, or when towing a trailer. The LCAdetection zones that extend back from the
side of the vehicle do not move further back
when a trailer is towed. Use caution while
changing lanes when towing a trailer. LCA
may alert to objects attached to the vehicle,
such as a trailer, bicycle, or object extending
out to either side of the vehicle. Attached
objects may also interfere with the
detection of vehicles. This is normal system
operation; the vehicle does not need service.
LCA may not always alert the driver to
vehicles in the next lane over, especially in
wet conditions or when driving on sharp
curves. The system does not need to be
serviced. The system may light up due to
guardrails, signs, trees, shrubs, and other
non-moving objects. This is normal system
operation; the vehicle does not need service.
LCA may not operate when the LCA sensors
in the left or right corners of the rear
bumper are covered with mud, dirt, snow,
ice, or slush, or in heavy rainstorms. For
cleaning instructions, see "Washing the
Vehicle" under
Exterior Care0306. If the
DIC still displays the system unavailable
message after cleaning both sides of the
vehicle toward the rear corners of the
vehicle, see your dealer. If the LCA displays do not light up when
moving vehicles are in the side blind zone or
are rapidly approaching this zone and the
system is clean, the system may need
service. Take the vehicle to your dealer.
Radio Frequency Information
See
Radio Frequency Statement 0335.
Lane Keep Assist (LKA)
If equipped, LKA may help avoid crashes due
to unintentional lane departures. This
system uses a camera to detect lane
markings. The LKA may be ready to assist at
speeds between 60 km/h (37 mph) and 180
km/h (112 mph). On some vehicles, the
system will instead operate above 50 km/h
(31 mph). LKA may assist by gently turning
the steering wheel if the vehicle approaches
a detected lane marking. It may also provide
a Lane Departure Warning (LDW) alert if the
vehicle crosses a detected lane marking. This
system is not intended to keep the vehicle
centered in the lane. LKA will not assist and
alert if the turn signal is active in the
direction of lane departure, or if it detects
that you are accelerating, braking or actively
steering. LKA can be overridden by turning
the steering wheel. If the system detects
you are steering intentionally across a lane
Page 235 of 360
Chevrolet Equinox Owner Manual (GMNA-Localizing-U.S./Canada-
16540728) - 2023 - crc - 6/16/22
234 Driving and Operating
marker, the LDW will not be given. Do not
expect the LDW to occur when you are
intentionally crossing a lane marker.
{Warning
The LKA system does not continuously
steer the vehicle. It may not keep the
vehicle in the lane or give a Lane
Departure Warning (LDW) alert, even if a
lane marking is detected.
The LKA and LDW systems may not:
.Provide an alert or enough steering
assist to avoid a lane departure or
crash.
.Detect lane markings under poor
weather or visibility conditions. This
can occur if the windshield or
headlamps are blocked by dirt, snow,
or ice; if they are not in proper
condition; or if the sun shines directly
into the camera.
.Detect road edges.
.Detect lanes on winding or hilly roads.
If LKA only detects lane markings on one
side of the road, it will only assist or
provide an LDW alert when approaching (Continued)
Warning (Continued)
the lane on the side where it has
detected a lane marking. Even with LKA
and LDW, you must steer the vehicle.
Always keep your attention on the road
and maintain proper vehicle position
within the lane, or vehicle damage,
injury, or death could occur. Always keep
the windshield, headlamps, and camera
sensors clean and in good repair. Do not
use LKA in bad weather conditions or on
roads with unclear lane markings, such as
construction zones.
{Warning
Using LKA on slippery roads could cause
loss of control of the vehicle and a crash.
Turn the system off.
{Warning
LKA will not alert the driver if a towed
trailer crosses into an adjacent lane of
travel. Serious injury or property damage
may occur if the trailer moves into(Continued)
Warning (Continued)
another lane. Always monitor the trailer
position while towing to make sure it is
within the same lane as the tow vehicle.
How the System Works
LKA uses a camera sensor installed on the
windshield ahead of the rearview mirror to
detect lane markings. It may provide brief
steering assist if it detects an unintended
lane departure. It may further provide an
audible alert or the driver seat may pulse
indicating that a lane marking has been
crossed. The system does not provide a Lane
Departure Warning (LDW) when
intentionally steering across a lane marker.
To turn LKA on and off, press
Aon the
steering wheel. If equipped, the indicator
light on the button comes on when LKA is
on and turns off when LKA is disabled. In
some vehicles, a long press of over
three seconds is required to turn LKA off.
When on,
Ais white, if equipped,
indicating that the system is not ready to
assist.
Ais green if LKA is ready to
assist. LKA may assist by gently turning the
steering wheel if the vehicle approaches a
Page 241 of 360
Chevrolet Equinox Owner Manual (GMNA-Localizing-U.S./Canada-
16540728) - 2023 - crc - 6/16/22
240 Driving and Operating
equipment can cause the combination to
operate in an unexpected or unsafe manner.
Before driving, inspect all trailer hitch parts
and attachments, safety chains, electrical
connectors, lamps, tires, and mirrors. See
Towing Equipment0244. If the trailer has
electric brakes, start the combination
moving and then manually apply the trailer
brake controller to check that the trailer
brakes work. During the trip, occasionally
check that the cargo and trailer are secure
and that the lamps and any trailer brakes
are working.
Towing with a Stability Control System
When towing, the stability control system
might be heard. The system reacts to
vehicle movement caused by the trailer,
which mainly occurs during cornering. This is
normal when towing heavier trailers.
Following Distance
Stay at least twice as far behind the vehicle
ahead as you would when driving without a
trailer. This can help to avoid heavy braking
and sudden turns.
Passing
More passing distance is needed when
towing a trailer. The combination of the
vehicle and trailer will not accelerate as
quickly and is much longer than the vehicle
alone. It is necessary to go much farther
beyond the passed vehicle before returning
to the lane. Pass on level roadways. Avoid
passing on hills if possible.
Backing Up
Hold the bottom of the steering wheel with
one hand. To move the trailer to the left,
move that hand to the left. To move the
trailer to the right, move that hand to the
right. Always back up slowly and, if possible,
have someone guide you.
Making Turns
Caution
Turn more slowly and make wider arcs
when towing a trailer to prevent damage
to your vehicle. Making very sharp turns
could cause the trailer to contact the
vehicle. Make wider turns than normal when towing,
so trailer will not go over soft shoulders,
over curbs, or strike road signs, trees,
or other objects. Always signal turns well in
advance. Do not steer or brake suddenly.
Driving on Grades
Reduce speed and shift to a lower gear
before starting down a long or steep
downhill grade. If the transmission is not
shifted down, the brakes may overheat and
result in reduced braking efficiency.
The vehicle can tow in D (Drive). Shift the
transmission to a lower gear if the
transmission shifts too often under heavy
loads and/or hilly conditions.
When towing at higher altitudes, engine
coolant will boil at a lower temperature
than at lower altitudes. If the engine is
turned off immediately after towing at high
altitude on steep uphill grades, the vehicle
could show signs similar to engine
overheating. To avoid this, let the engine
run, preferably on level ground, with the
transmission in P (Park) for a few minutes
before turning the engine off. If the
overheat warning comes on, see
Engine
Overheating 0259.
Page 242 of 360
Chevrolet Equinox Owner Manual (GMNA-Localizing-U.S./Canada-
16540728) - 2023 - crc - 6/16/22
Driving and Operating 241
Parking on Hills
{Warning
To prevent serious injury or death,
always park your vehicle and trailer on a
level surface when possible.
When parking your vehicle and your trailer
on a hill: 1. Press the brake pedal, but do not shift into P (Park) yet. Turn the wheels into
the curb if facing downhill or into traffic
if facing uphill.
2. Have someone place chocks under the trailer wheels.
3. When the wheel chocks are in place, gradually release the brake pedal to
allow the chocks to absorb the load of
the trailer.
4. Reapply the brake pedal. Then apply the parking brake and shift into P (Park).
5. Release the brake pedal.
Leaving After Parking on a Hill
1. Apply and hold the brake pedal.
.Start the engine.
.Shift into a gear.
.Release the parking brake. 2. Let up on the brake pedal.
3. Drive slowly until the trailer is clear of
the chocks.
4. Stop and have someone pick up and store the chocks.
Maintenance When Trailer Towing
The vehicle needs service more often when
used to tow trailers. See Maintenance
Schedule 0316. It is especially important to
check the automatic transmission fluid,
engine oil, axle lubricant, belts, cooling
system, and brake system before and during
each trip.
Check periodically that all nuts and bolts on
the trailer hitch are tight.
Engine Cooling When Trailer Towing
The cooling system may temporarily
overheat during severe operating conditions.
See Engine Overheating 0259.
Trailer Towing
Caution
Towing a trailer improperly can damage
the vehicle and result in costly repairs
not covered by the vehicle warranty. To
(Continued)
Caution (Continued)
tow a trailer correctly, follow the
directions in this section and see your
dealer for important information about
towing a trailer with the vehicle.
Trailer Weight
{Warning
Never exceed the towing capacity for
your vehicle.
Safe trailering requires monitoring the
weight, speed, altitude, road grades, outside
temperature, dimensions of the front of the
trailer, and how frequently the vehicle is
used to tow a trailer.
Trailer Weight Ratings
When towing a trailer, the combined weight
of the vehicle, vehicle contents, trailer, and
trailer contents must be below all of the
maximum weight ratings for the vehicle,
including:
.Gross Combined Weight Rating (GCWR)
.Gross Vehicle Weight Rating (GVWR)
.Maximum Trailer Weight Rating
.Maximum Trailer Tongue Weight Rating
Page 248 of 360
Chevrolet Equinox Owner Manual (GMNA-Localizing-U.S./Canada-
16540728) - 2023 - crc - 6/16/22
Vehicle Care 247
Vehicle Care
General Information
General Information . . . . . . . . . . . . . . . . . . . 248
California Perchlorate MaterialsRequirements . . . . . . . . . . . . . . . . . . . . . . . . 248
Accessories and Modifications . . . . . . . . . 248
Vehicle Checks
Doing Your Own Service Work . . . . . . . . 248
Hood . . . . . . . . . . . . . . . . . . . . . . . . . . . . . . . . . . 249
Engine Compartment Overview . . . . . . . . 251
Engine Oil . . . . . . . . . . . . . . . . . . . . . . . . . . . . . 252
Engine Oil Life System . . . . . . . . . . . . . . . . 254
Automatic Transmission Fluid . . . . . . . . . . 255
Engine Air Filter Life System . . . . . . . . . . . 255
Engine Air Cleaner/Filter . . . . . . . . . . . . . . . 255
Cooling System . . . . . . . . . . . . . . . . . . . . . . . . 257
Engine Overheating . . . . . . . . . . . . . . . . . . . 259
Washer Fluid . . . . . . . . . . . . . . . . . . . . . . . . . . 260
Brakes . . . . . . . . . . . . . . . . . . . . . . . . . . . . . . . . . 261
Brake Fluid . . . . . . . . . . . . . . . . . . . . . . . . . . . . 262
Battery - North America . . . . . . . . . . . . . . . 263
All-Wheel Drive . . . . . . . . . . . . . . . . . . . . . . . . 263
Park Brake and P (Park) Mechanism Check . . . . . . . . . . . . . . . . . . . . . . . . . . . . . . . . 263
Wiper Blade Replacement . . . . . . . . . . . . . 264
Windshield Replacement . . . . . . . . . . . . . . 265
Gas Strut(s) . . . . . . . . . . . . . . . . . . . . . . . . . . . 265
Headlamp Aiming
Front Headlamp Aiming . . . . . . . . . . . . . . . 266
Bulb Replacement
Bulb Replacement . . . . . . . . . . . . . . . . . . . . . 266
Halogen Bulbs . . . . . . . . . . . . . . . . . . . . . . . . 266
High Intensity Discharge (HID) Lighting . . . . . . . . . . . . . . . . . . . . . . . . . . . . . 267
LED Lighting . . . . . . . . . . . . . . . . . . . . . . . . . . . 267
Headlamps . . . . . . . . . . . . . . . . . . . . . . . . . . . . 267
Front Turn Signal and Fog Lamps . . . . . 268
Taillamps . . . . . . . . . . . . . . . . . . . . . . . . . . . . . . 268
License Plate Lamp . . . . . . . . . . . . . . . . . . . . 268
Electrical System
Electrical System Overload . . . . . . . . . . . . 269
Fuses and Circuit Breakers . . . . . . . . . . . . . 271
Engine Compartment Fuse Block . . . . . . . 271
Instrument Panel Fuse Block . . . . . . . . . . . 273
Rear Compartment Fuse Block . . . . . . . . . 275
Wheels and Tires
Tires . . . . . . . . . . . . . . . . . . . . . . . . . . . . . . . . . . . 277
All-Season Tires . . . . . . . . . . . . . . . . . . . . . . . . 277
Winter Tires . . . . . . . . . . . . . . . . . . . . . . . . . . . 278
Tire Sidewall Labeling . . . . . . . . . . . . . . . . . 278
Tire Designations . . . . . . . . . . . . . . . . . . . . . . 280
Tire Terminology and Definitions . . . . . 280
Tire Pressure . . . . . . . . . . . . . . . . . . . . . . . . . . 282
Tire Pressure Monitor System . . . . . . . . . 283
Tire Pressure Monitor Operation . . . . . . 284 Tire Inspection . . . . . . . . . . . . . . . . . . . . . . . . 287
Tire Rotation . . . . . . . . . . . . . . . . . . . . . . . . . . 287
When It Is Time for New Tires . . . . . . . . 288
Buying New Tires . . . . . . . . . . . . . . . . . . . . . 289
Different Size Tires and Wheels . . . . . . . 290
Uniform Tire Quality Grading . . . . . . . . . 290
Wheel Alignment and Tire Balance . . . . 292
Wheel Replacement . . . . . . . . . . . . . . . . . . . 292
Tire Chains . . . . . . . . . . . . . . . . . . . . . . . . . . . . 292
If a Tire Goes Flat . . . . . . . . . . . . . . . . . . . . . 293
Tire Changing . . . . . . . . . . . . . . . . . . . . . . . . . 294
Compact Spare Tire . . . . . . . . . . . . . . . . . . . 299
Jump Starting
Jump Starting - North America . . . . . . . . 300
Towing the Vehicle
Transporting a Disabled Vehicle . . . . . . . 302
Recreational Vehicle Towing . . . . . . . . . . . 304
Appearance Care
Exterior Care . . . . . . . . . . . . . . . . . . . . . . . . . . 306
Interior Care . . . . . . . . . . . . . . . . . . . . . . . . . . . 310
Floor Mats . . . . . . . . . . . . . . . . . . . . . . . . . . . . . 313