2023 CHEVROLET EQUINOX lights
[x] Cancel search: lightsPage 117 of 360

Chevrolet Equinox Owner Manual (GMNA-Localizing-U.S./Canada-
16540728) - 2023 - crc - 6/16/22
116 Lighting
Flash-to-Pass
The flash-to-pass feature works with the low
beams or Daytime Running Lamps (DRL) on
or off.
To flash the high beams, pull the turn signal
lever toward you momentarily and then
release it.
Daytime Running Lamps (DRL)
DRL can make it easier for others to see the
front of your vehicle during the day.
Fully functional DRL are required on all
vehicles first sold in Canada.
The DRL come on when all of the following
conditions are met:
.The vehicle is on.
.The exterior lamp control is in AUTO.
.The light sensor determines it is daytime.
The taillamps, instrument panel lights, and
other lamps will not turn on when this
feature is activated.
The DRL turn off when the headlamps are
turned to
Oor the vehicle is off.
For vehicles first sold in Canada, the DRL can
only be turned off when the vehicle is
parked.
Automatic Headlamp System
When the exterior lamp control is set to
AUTO and it is dark enough outside, the
headlamps come on automatically.
There is a light sensor on top of the
instrument panel. Do not cover the sensor;
otherwise the headlamps will come on when
they are not needed.
The system may also turn on the headlamps
when driving through a parking garage or
tunnel.
When it is bright enough outside, the
headlamps will turn off or may change to
Daytime Running Lamps (DRL). The automatic headlamp system turns off
when the exterior lamp control is turned to
Oor the ignition is off.
Lights On with Wipers
If the windshield wipers are activated in
daylight with the engine on, and the
exterior lamp control is in AUTO, the
headlamps, parking lamps, and other
exterior lamps come on. The transition time
for the lamps coming on varies based on
wiper speed. When the wipers are not
operating, these lamps turn off. Move the
exterior lamp control to
Oor;to disable
this feature.
Page 119 of 360
Chevrolet Equinox Owner Manual (GMNA-Localizing-U.S./Canada-
16540728) - 2023 - crc - 6/16/22
118 Lighting
Some localities have laws that require the
high beams to be off when the fog lamps
are on.
Interior Lighting
Instrument Panel Illumination
Control
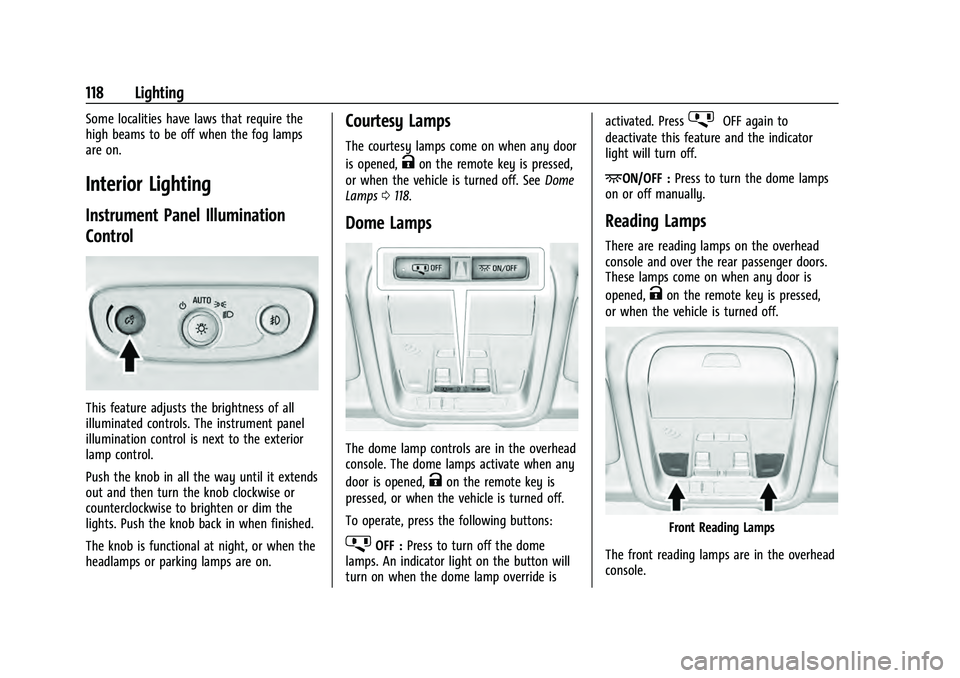
This feature adjusts the brightness of all
illuminated controls. The instrument panel
illumination control is next to the exterior
lamp control.
Push the knob in all the way until it extends
out and then turn the knob clockwise or
counterclockwise to brighten or dim the
lights. Push the knob back in when finished.
The knob is functional at night, or when the
headlamps or parking lamps are on.
Courtesy Lamps
The courtesy lamps come on when any door
is opened,
Kon the remote key is pressed,
or when the vehicle is turned off. See Dome
Lamps 0118.
Dome Lamps
The dome lamp controls are in the overhead
console. The dome lamps activate when any
door is opened,
Kon the remote key is
pressed, or when the vehicle is turned off.
To operate, press the following buttons:
jOFF : Press to turn off the dome
lamps. An indicator light on the button will
turn on when the dome lamp override is activated. Press
jOFF again to
deactivate this feature and the indicator
light will turn off.
+ON/OFF : Press to turn the dome lamps
on or off manually.
Reading Lamps
There are reading lamps on the overhead
console and over the rear passenger doors.
These lamps come on when any door is
opened,
Kon the remote key is pressed,
or when the vehicle is turned off.
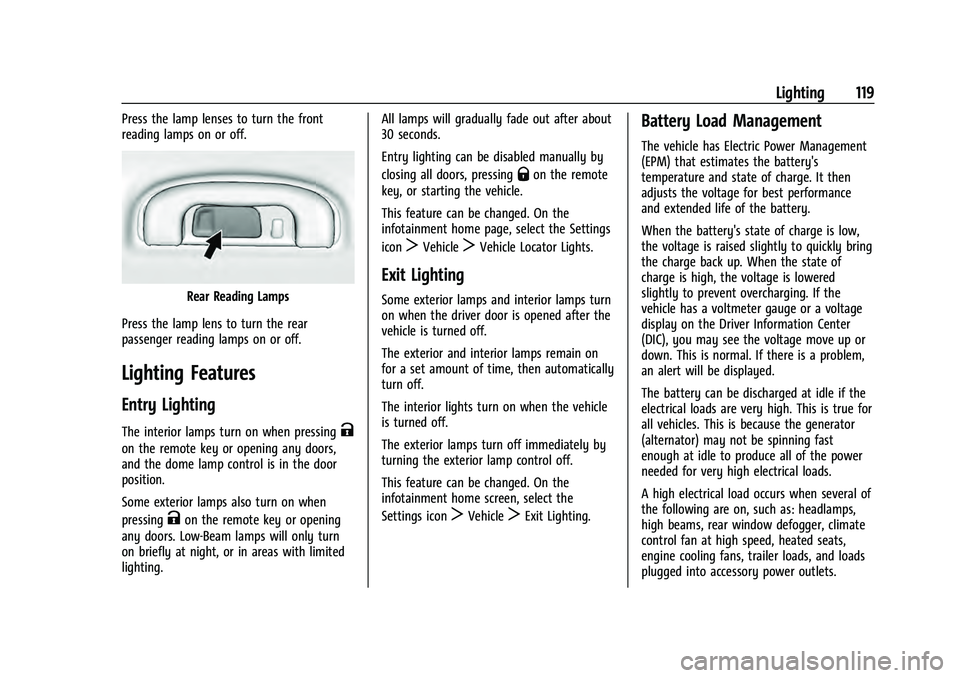
Front Reading Lamps
The front reading lamps are in the overhead
console.
Page 120 of 360
Chevrolet Equinox Owner Manual (GMNA-Localizing-U.S./Canada-
16540728) - 2023 - crc - 6/16/22
Lighting 119
Press the lamp lenses to turn the front
reading lamps on or off.
Rear Reading Lamps
Press the lamp lens to turn the rear
passenger reading lamps on or off.
Lighting Features
Entry Lighting
The interior lamps turn on when pressingK
on the remote key or opening any doors,
and the dome lamp control is in the door
position.
Some exterior lamps also turn on when
pressing
Kon the remote key or opening
any doors. Low-Beam lamps will only turn
on briefly at night, or in areas with limited
lighting. All lamps will gradually fade out after about
30 seconds.
Entry lighting can be disabled manually by
closing all doors, pressing
Qon the remote
key, or starting the vehicle.
This feature can be changed. On the
infotainment home page, select the Settings
icon
TVehicleTVehicle Locator Lights.
Exit Lighting
Some exterior lamps and interior lamps turn
on when the driver door is opened after the
vehicle is turned off.
The exterior and interior lamps remain on
for a set amount of time, then automatically
turn off.
The interior lights turn on when the vehicle
is turned off.
The exterior lamps turn off immediately by
turning the exterior lamp control off.
This feature can be changed. On the
infotainment home screen, select the
Settings icon
TVehicleTExit Lighting.
Battery Load Management
The vehicle has Electric Power Management
(EPM) that estimates the battery's
temperature and state of charge. It then
adjusts the voltage for best performance
and extended life of the battery.
When the battery's state of charge is low,
the voltage is raised slightly to quickly bring
the charge back up. When the state of
charge is high, the voltage is lowered
slightly to prevent overcharging. If the
vehicle has a voltmeter gauge or a voltage
display on the Driver Information Center
(DIC), you may see the voltage move up or
down. This is normal. If there is a problem,
an alert will be displayed.
The battery can be discharged at idle if the
electrical loads are very high. This is true for
all vehicles. This is because the generator
(alternator) may not be spinning fast
enough at idle to produce all of the power
needed for very high electrical loads.
A high electrical load occurs when several of
the following are on, such as: headlamps,
high beams, rear window defogger, climate
control fan at high speed, heated seats,
engine cooling fans, trailer loads, and loads
plugged into accessory power outlets.
Page 192 of 360
Chevrolet Equinox Owner Manual (GMNA-Localizing-U.S./Canada-
16540728) - 2023 - crc - 6/16/22
Driving and Operating 191
Stopping the Engine/Off (No Indicator
Lights)
When the vehicle is stopped, press ENGINE
START/STOP once to turn the engine off.
To shift out of P (Park), the vehicle must be
on and the brake pedal must be applied.
If the vehicle is in P (Park), the ignition will
turn off, and Retained Accessory Power
(RAP) will remain active. SeeRetained
Accessory Power (RAP) 0196.
If the vehicle is not in P (Park), the ignition
will return to accessory mode and display
the message SHIFT TO PARK in the Driver
Information Center (DIC). When the vehicle
is shifted into P (Park), the ignition system
will turn off.
The vehicle may have an electric steering
column lock. The lock is activated when the
vehicle is turned off and either front door is
opened. A sound may be heard as the lock
actuates or releases. The steering column
lock may not release with the wheels turned
off center. If this happens, the vehicle may
not start. Move the steering wheel from left
to right while attempting to start the
vehicle. If this does not work, the vehicle
needs service. Do not turn the engine off when the vehicle
is moving. This will cause a loss of power
assist in the brake and steering systems and
disable the airbags.
If the vehicle must be turned off in an
emergency:
1. Brake using a firm and steady pressure. Do not pump the brakes repeatedly. This
may deplete power assist, requiring
increased brake pedal force.
2. Shift the vehicle to N (Neutral). This can be done while the vehicle is moving.
After shifting to N (Neutral), firmly apply
the brakes and steer the vehicle to a
safe location.
3. Come to a complete stop. Shift to P (Park) and turn the ignition off.
4. Set the electric parking brake. See Electric
Parking Brake 0202.
{Warning
Turning off the vehicle while moving may
cause loss of power assist in the brake
and steering systems and disable the
airbags. While driving, only shut the
vehicle off in an emergency. If the vehicle cannot be pulled over and
must be turned off while driving, press and
hold ENGINE START/STOP for longer than
two seconds, or press twice in five seconds.
Accessory Mode (Amber Indicator Light) :
This mode allows you to use some electrical
accessories when the engine is off.
With the ignition off, pressing the button
once without the brake pedal applied will
place the ignition system in accessory mode.
The ignition will switch from accessory
mode to OFF after five minutes to prevent
battery rundown.
ON/RUN/START (Green Indicator Light) :
This
mode is for driving and starting. With the
ignition off and the brake pedal applied,
pressing the button once will place the
ignition system in ON/RUN/START. Once
engine cranking begins, release the button.
Engine cranking will continue until the
engine starts. See Starting the Engine 0192.
The ignition will then remain in ON/RUN.
Service Mode : This power mode is available
for service and diagnostics, and to verify the
proper operation of the malfunction
indicator lamp as may be required for
emission inspection purposes. With the
vehicle off and the brake pedal not applied,
Page 228 of 360
Chevrolet Equinox Owner Manual (GMNA-Localizing-U.S./Canada-
16540728) - 2023 - crc - 6/16/22
Driving and Operating 227
Assistance Systems for Driving
If equipped, when driving the vehicle in a
forward gear, Forward Collision Alert (FCA),
Lane Keep Assist (LKA), Side Blind Zone Alert
(SBZA), Lane Change Alert (LCA), Automatic
Emergency Braking (AEB), and/or the Front
Pedestrian Braking (FPB) System can help to
avoid a crash or reduce crash damage.
Forward Collision Alert (FCA)
System
If equipped, the FCA system may help to
avoid or reduce the harm caused by
front-end crashes. When approaching a
vehicle ahead too quickly, FCA provides a
red flashing alert on the windshield and
rapidly beeps or pulses the driver seat. FCA
also lights an amber visual alert if following
another vehicle much too closely.
FCA detects vehicles within a distance of
approximately 60 m (197 ft) and operates at
speeds above 8 km/h (5 mph).
{Warning
FCA is a warning system and does not
apply the brakes. When approaching a
slower-moving or stopped vehicle ahead(Continued)
Warning (Continued)
too rapidly, or when following a vehicle
too closely, FCA may not provide a
warning with enough time to help avoid
a crash. It also may not provide any
warning at all. FCA does not warn of
pedestrians, animals, signs, guardrails,
bridges, construction barrels, or other
objects. Be ready to take action and
apply the brakes. SeeDefensive Driving
0 178.
FCA can be disabled through vehicle
personalization. To view available settings
from the infotainment screen, touch Settings
> Vehicle > Collision/Detection Systems.
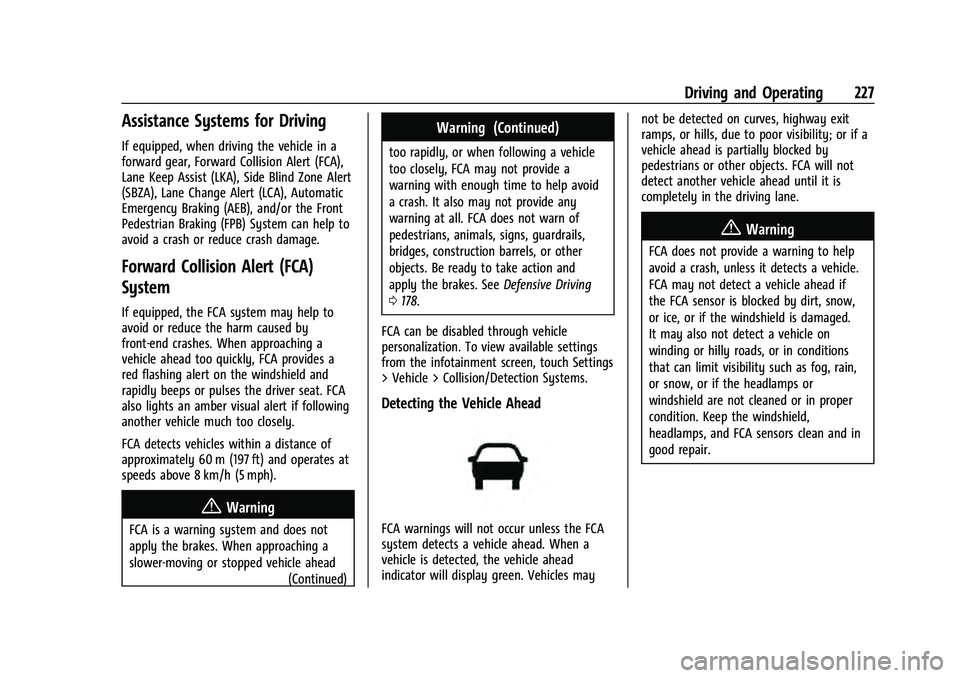
Detecting the Vehicle Ahead
FCA warnings will not occur unless the FCA
system detects a vehicle ahead. When a
vehicle is detected, the vehicle ahead
indicator will display green. Vehicles may not be detected on curves, highway exit
ramps, or hills, due to poor visibility; or if a
vehicle ahead is partially blocked by
pedestrians or other objects. FCA will not
detect another vehicle ahead until it is
completely in the driving lane.
{Warning
FCA does not provide a warning to help
avoid a crash, unless it detects a vehicle.
FCA may not detect a vehicle ahead if
the FCA sensor is blocked by dirt, snow,
or ice, or if the windshield is damaged.
It may also not detect a vehicle on
winding or hilly roads, or in conditions
that can limit visibility such as fog, rain,
or snow, or if the headlamps or
windshield are not cleaned or in proper
condition. Keep the windshield,
headlamps, and FCA sensors clean and in
good repair.
Page 233 of 360
Chevrolet Equinox Owner Manual (GMNA-Localizing-U.S./Canada-
16540728) - 2023 - crc - 6/16/22
232 Driving and Operating
Cleaning the System
If FPB does not seem to operate properly,
cleaning the outside of the windshield in
front of the rearview mirror may correct the
issue.
Side Blind Zone Alert (SBZA)
If equipped, the SBZA system is a
lane-changing aid that assists drivers with
avoiding crashes that occur with moving
vehicles in the side blind zone, or blind spot
areas. When the vehicle is in a forward gear,
the left or right side mirror display will light
up if a moving vehicle is detected in that
blind zone. If the turn signal is activated and
a vehicle is also detected on the same side,
the display will flash as an extra warning
not to change lanes. Since this system is
part of the Lane Change Alert (LCA) system,
read the entire LCA section before using this
feature.
Lane Change Alert (LCA)
If equipped, the LCA system is a
lane-changing aid that assists drivers with
avoiding lane change crashes that occur with
moving vehicles in the side blind zone (or
spot) areas or with vehicles rapidly
approaching these areas from behind. TheLCA warning display will light up in the
corresponding outside side mirror and will
flash if the turn signal is on.
{Warning
LCA does not alert the driver to vehicles
outside of the system detection zones,
pedestrians, bicyclists, or animals. It may
not provide alerts when changing lanes
under all driving conditions. Failure to use
proper care when changing lanes may
result in injury, death, or vehicle damage.
Before making a lane change, always
check mirrors, glance over your shoulder,
and use the turn signals.
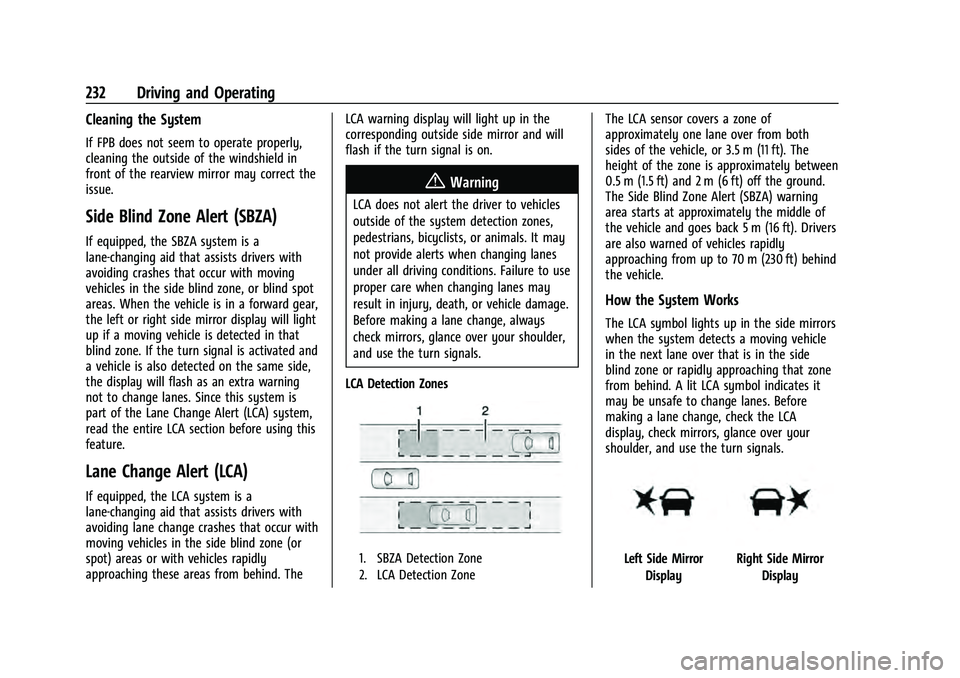
LCA Detection Zones
1. SBZA Detection Zone
2. LCA Detection Zone
The LCA sensor covers a zone of
approximately one lane over from both
sides of the vehicle, or 3.5 m (11 ft). The
height of the zone is approximately between
0.5 m (1.5 ft) and 2 m (6 ft) off the ground.
The Side Blind Zone Alert (SBZA) warning
area starts at approximately the middle of
the vehicle and goes back 5 m (16 ft). Drivers
are also warned of vehicles rapidly
approaching from up to 70 m (230 ft) behind
the vehicle.
How the System Works
The LCA symbol lights up in the side mirrors
when the system detects a moving vehicle
in the next lane over that is in the side
blind zone or rapidly approaching that zone
from behind. A lit LCA symbol indicates it
may be unsafe to change lanes. Before
making a lane change, check the LCA
display, check mirrors, glance over your
shoulder, and use the turn signals.
Left Side Mirror DisplayRight Side Mirror Display
Page 302 of 360
Chevrolet Equinox Owner Manual (GMNA-Localizing-U.S./Canada-
16540728) - 2023 - crc - 6/16/22
Vehicle Care 301
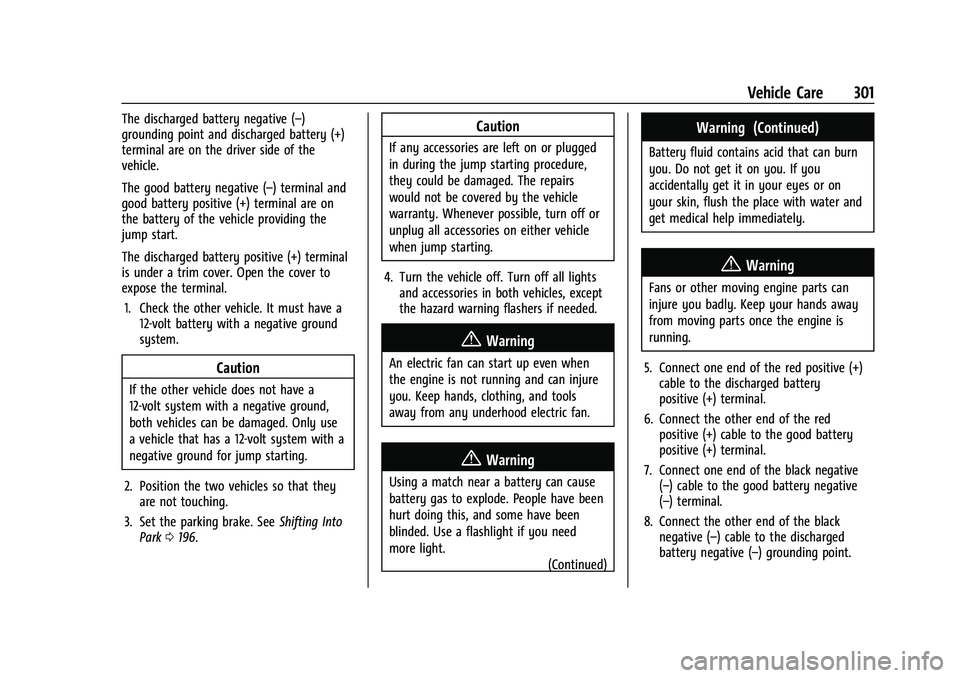
The discharged battery negative (–)
grounding point and discharged battery (+)
terminal are on the driver side of the
vehicle.
The good battery negative (–) terminal and
good battery positive (+) terminal are on
the battery of the vehicle providing the
jump start.
The discharged battery positive (+) terminal
is under a trim cover. Open the cover to
expose the terminal.1. Check the other vehicle. It must have a 12-volt battery with a negative ground
system.
Caution
If the other vehicle does not have a
12-volt system with a negative ground,
both vehicles can be damaged. Only use
a vehicle that has a 12-volt system with a
negative ground for jump starting.
2. Position the two vehicles so that they are not touching.
3. Set the parking brake. See Shifting Into
Park 0196.
Caution
If any accessories are left on or plugged
in during the jump starting procedure,
they could be damaged. The repairs
would not be covered by the vehicle
warranty. Whenever possible, turn off or
unplug all accessories on either vehicle
when jump starting.
4. Turn the vehicle off. Turn off all lights and accessories in both vehicles, except
the hazard warning flashers if needed.
{Warning
An electric fan can start up even when
the engine is not running and can injure
you. Keep hands, clothing, and tools
away from any underhood electric fan.
{Warning
Using a match near a battery can cause
battery gas to explode. People have been
hurt doing this, and some have been
blinded. Use a flashlight if you need
more light.
(Continued)
Warning (Continued)
Battery fluid contains acid that can burn
you. Do not get it on you. If you
accidentally get it in your eyes or on
your skin, flush the place with water and
get medical help immediately.
{Warning
Fans or other moving engine parts can
injure you badly. Keep your hands away
from moving parts once the engine is
running.
5. Connect one end of the red positive (+) cable to the discharged battery
positive (+) terminal.
6. Connect the other end of the red positive (+) cable to the good battery
positive (+) terminal.
7. Connect one end of the black negative (–) cable to the good battery negative
(–) terminal.
8. Connect the other end of the black negative (–) cable to the discharged
battery negative (–) grounding point.
Page 319 of 360
Chevrolet Equinox Owner Manual (GMNA-Localizing-U.S./Canada-
16540728) - 2023 - crc - 6/16/22
318 Service and Maintenance
suitable service maintenance intervals for
your vehicle, please contact your
authorized GM Dealer.
Extreme service is for vehicles mainly
driven off-road in four-wheel drive or used
in farming, mining, forestry, or snow
plowing.
Additional Required Services—Severe
Service
Every 72 000 km (45,000 mi)
.Change automatic transmission fluid.
Every 75 000 km (120,000 mi)
.Change rear axle fluid, if equipped with
AWD. Do not directly power wash the
transfer case and/or front/rear axle
output seals. High pressure water can
overcome the seals and contaminate the
transfer case fluid. Contaminated fluid will
decrease the life of the transfer case and/
or axles and should be replaced.
Owner Checks and Services
Every Five Years
.Replace brake fluid every five years. See
Brake Fluid 0262. Every Seven Years
.Replace Air Conditioning Desiccant every
seven years. The air conditioning system
requires maintenance every seven years.
This service requires replacement of the
desiccant to help the longevity and
efficient operation of the air conditioning
system. This service can be complex. See
your dealer.
Multi-Point Vehicle
Inspection (MPVI)
A Multi Point Vehicle Inspection (MPVI)
completed by a GM dealer technician is a
maintenance assessment of your vehicle.
The benefit of the MPVI is to identify and
inform the customer of service items that
require immediate attention and those that
may require attention in the future.
The technician will perform the following
checks on your vehicle. For a complete list
of checks, inspections, and services, see your
dealer.
Some items may not apply to your vehicle
and/or region.
Diagnostics
.OnStar active, if equipped
.Service history/recall check
Engine Oil and Filter
.Engine oil
.Oil life monitor
‐
Reset oil life monitor
Exterior Lights
.Visual inspection
Windshield and Wipers
.Visual inspection
Battery
.Battery visual inspection
.Battery test results
.Battery cables and connections
Systems, Fluids, and Visible Leak
Inspection
.Engine oil
.Transmission
.Drive axle
.Transfer case
.Engine cooling system
.Power steering, if equipped