2023 ALFA ROMEO STELVIO belt
[x] Cancel search: beltPage 5 of 268

3
Rollover Warning
Utility vehicles have a significantly higher rollover rate than other types of vehicles. This vehicle has a higher ground clearance and a higher center of gravity
than many passenger vehicles. It is capable of performing better in a wide variety of off-road applications. Driven in an unsafe manner, all vehicles can go
out of control. Because of the higher center of gravity, if this vehicle is out of control it may roll over while some other vehicles may not.
Do not attempt sharp turns, abrupt maneuvers, or other unsafe driving actions that can cause loss of vehicle control. Failure to operate this
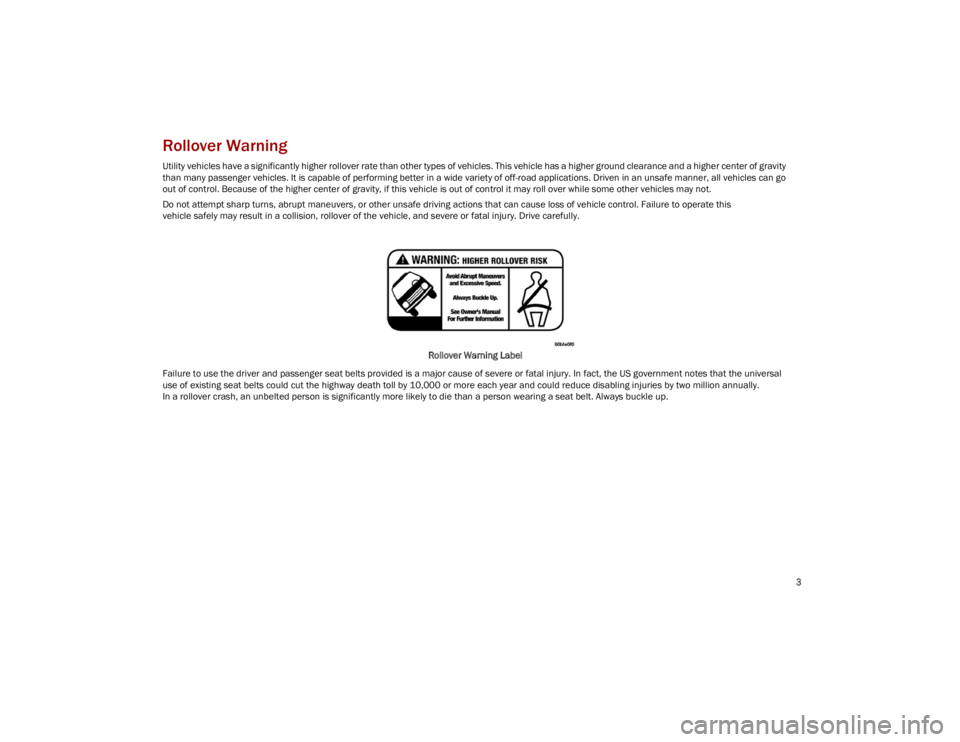
vehicle safely may result in a collision, rollover of the vehicle, and severe or fatal injury. Drive carefully.Rollover Warning Label
Failure to use the driver and passenger seat belts provided is a major cause of severe or fatal injury. In fact, the US government notes that the universal
use of existing seat belts could cut the highway death toll by 10,000 or more each year and could reduce disabling injuries by two million annually.
In a rollover crash, an unbelted person is significantly more likely to die than a person wearing a seat belt. Always buckle up.
23_GU_OM_EN_USC_t.book Page 3
Page 13 of 268

11
LANE DEPARTURE WARNING (LDW)
SYSTEM ................................................. 123
Lane Departure Warning
Operation ..............................................123 Turning Lane Departure Warning On
Or Off .................................................... 124 Lane Departure Warning Message.....124
Changing Lane Departure Warning
Status ................................................... 125
LANE KEEPING ASSIST (LKA) SYSTEM —
IF EQUIPPED .......................................... 125
Turning Lane Keeping
Assist On Or Off ....................................126 Lane Keeping Assist Warning
Message ...............................................126
REAR BACK UP CAMERA / DYNAMIC
GRIDLINES ............................................ 128
REFUELING THE VEHICLE ..................... 129
Refueling Capacity ............................... 129
Refueling Procedure ...........................130
VEHICLE LOADING ................................ 132
Certification Label................................ 132
TRAILER TOWING................................... 133
Common Towing Definitions ...............133
Trailer Hitch Classification .................. 134
Trailer Towing Weights
(Maximum Trailer Weight Ratings) .....134 Trailer And Tongue Weight ................. 135
Towing Requirements..........................135
Towing Tips ......................................... 137
Installing The Receiver ....................... 137
Connecting The Electrical System...... 138
Removing The Receiver ...................... 138
SUGGESTIONS FOR DRIVING................ 138
Saving Fuel .......................................... 138
Driving Style......................................... 139
Conditions Of Use................................ 139
Performance — Quadrifoglio ............... 139
SAFETY
ACTIVE SAFETY SYSTEMS ..................... 140
Anti-Lock Brake System (ABS) ........... 140
Active Torque Vectoring (ATV)
System — If Equipped ......................... 140 Dynamic Steering Torque (DST)
System ................................................. 141 Drive Train Control (DTC) System....... 141
Electronic Stability Control (ESC)
System ................................................. 141 Hill Descent Control (HDC) System —
If Equipped .......................................... 142 Hill Start Assist (HSA) System ............ 143
Panic Brake Assist (PBA) System ....... 143
Traction Control System (TCS)............ 144
AUXILIARY DRIVING SYSTEMS .............. 144
Blind Spot Monitoring (BSM) System —
If Equipped ........................................... 144 Active Blind Spot Assist (ABSA)
System — If Equipped ......................... 146 Driver Attention Assist (DAA) System —
If Equipped ........................................... 149 Forward Collision Warning
Plus (FCW+) System —
If Equipped .......................................... 151 Tire Pressure Monitoring
System (TPMS) .................................... 155
OCCUPANT RESTRAINT SYSTEMS ....... 157
Occupant Restraint Systems
Features .............................................. 157 Important Safety Precautions............. 157
Seat Belt Systems .............................. 158
Supplemental Restraint
Systems (SRS) ..................................... 162 Child Restraints ................................... 170
SAFETY TIPS .......................................... 180
Transporting Passengers .................... 180
Transporting Pets ............................... 180
Connected Vehicles ............................. 180
Safety Checks You Should Make
Inside The Vehicle .............................. 180 Periodic Safety Checks You
Should Make Outside The Vehicle ..... 182 Exhaust Gas ......................................... 182
Carbon Monoxide Warnings................ 182
23_GU_OM_EN_USC_t.book Page 11
Page 16 of 268

SYMBOL GLOSSARY
14
SYMBOL GLOSSARY
Some car components have colored labels with symbols indicating
precautions to be observed when using this component. It is important to
follow all warnings when operating your vehicle. See below for the definition
of each symbol
Ú
page 74.
NOTE:
Warning and Indicator lights are different based upon equipment options
and current vehicle status. Some telltales are optional and may not appear.
Red Warning Lights
Air Bag Warning Light
Ú
page 75
Brake Warning Light
Ú
page 75
Electronic Braking Force Distribution (EBD) Failure
Ú
page 76
Oil Temperature Warning Light
Ú
page 76
Seat Belt Reminder Warning Light
Ú
page 76
Amber Warning Lights
Anti-Lock Brake System (ABS) Warning Light
Ú
page 76
Electronic Stability Control (ESC) Indicator Light
Ú
page 76
Electronic Stability Control (ESC) OFF Indicator Light
Ú
page 76
Engine Check/Malfunction Indicator Light (MIL)
Ú
page 77
Forward Collision Warning (FCW) System
Ú
page 77
Fuel Reserve/Limited Range
Ú
page 77
Rear Fog Lights
Ú
page 77
Tire Pressure Low Warning Light
Ú
page 77
Tire Pressure Monitoring System (TPMS) Warning Light
Ú
page 77
Amber Warning Lights
23_GU_OM_EN_USC_t.book Page 14
Page 33 of 268

31
The memory setting switch is located on the
driver’s side door trim panel, near the door
handle. The switch consists of three buttons, one
for each memory profile.Memory Setting Switch Location
PROGRAMMING THE MEMORY FEATURE
To create a new memory profile, perform the
following:
1. Place the vehicle’s ignition in the ACC posi -
tion (do not start the engine), and make sure
the driver’s door is closed.
NOTE:
A memory profile can also be set for three
minutes after the driver’s door has been opened.
2. Adjust all memory profile settings to desired preferences, driver’s seat and mirror posi -
tions.
3. Push and hold the memory button you want to program for 1.5 seconds. A chime will
sound to indicate that the memory profile has
been saved successfully.
NOTE:
When a new profile as been set, the previously set
profile for that button will be overwritten.
MEMORY POSITION RECALL
To recall a previously set position, push and
release the memory profile button assigned to
the desired positions.
NOTE:
Memory position recall can be done for approxi -
mately three minutes after the doors have been
opened, and for approximately one minute after
the ignition is placed in the OFF position.
SEATS
Seats are a part of the Occupant Restraint system
of the vehicle.
SPARCO RACING SEATS (QUADRIFOGLIO
V
EHICLES) — IF EQUIPPED
Manual Seat Adjustment
Adjusting The Seat Forward Or Rearward
The adjustment lever is at the front of the seat,
near the floor. Pull the bar upward to move the
seat forward or rearward. Release the bar once
the seat is in the desired position. Using body
pressure, move forward and rearward on the seat
to be sure that the seat adjusters have latched.
Adjusting The Seat Up Or Down
Push the height adjustment button upward or
downward to obtain your desired height.
5 — Driver Memory Settings Buttons
WARNING!
It is dangerous to ride in a cargo area, inside
or outside of a vehicle. In a collision, people
riding in these areas are more likely to be
seriously injured or killed.
Do not allow people to ride in any area of your
vehicle that is not equipped with seats and
seat belts. In a collision, people riding in
these areas are more likely to be seriously
injured or killed.
Be sure everyone in your vehicle is in a seat
and using a seat belt properly.
1 — Adjustment Lever
2 — Height Adjustment Button
3 — Recline Lever
23_GU_OM_EN_USC_t.book Page 31
Page 34 of 268

GETTING TO KNOW YOUR VEHICLE
32
Reclining The Seatback
To adjust the seatback, lift the recline lever
located on the outboard side of the seat, lean
back to the desired position and release the
lever. To return the seatback, lift the lever, lean
forward and release the lever.
SPLIT FOLDING REAR SEAT
The rear seat is a 40/20/40 seat that allows the
luggage compartment to be partially or totally
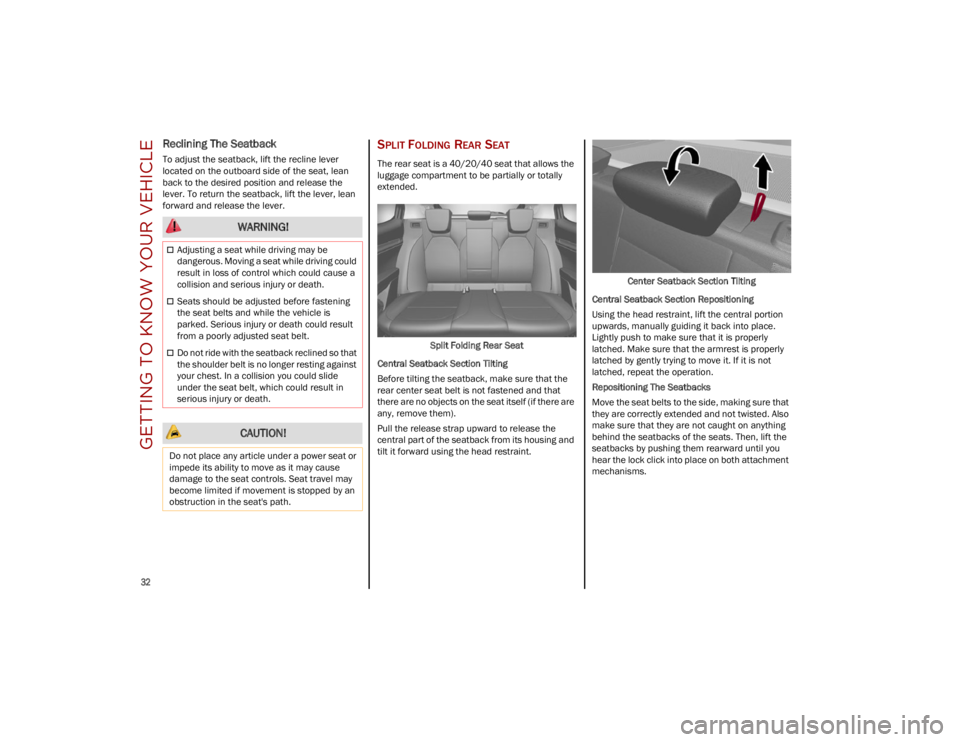
extended.Split Folding Rear Seat
Central Seatback Section Tilting
Before tilting the seatback, make sure that the
rear center seat belt is not fastened and that
there are no objects on the seat itself (if there are
any, remove them).
Pull the release strap upward to release the
central part of the seatback from its housing and
tilt it forward using the head restraint. Center Seatback Section Tilting
Central Seatback Section Repositioning
Using the head restraint, lift the central portion
upwards, manually guiding it back into place.
Lightly push to make sure that it is properly
latched. Make sure that the armrest is properly
latched by gently trying to move it. If it is not
latched, repeat the operation.
Repositioning The Seatbacks
Move the seat belts to the side, making sure that
they are correctly extended and not twisted. Also
make sure that they are not caught on anything
behind the seatbacks of the seats. Then, lift the
seatbacks by pushing them rearward until you
hear the lock click into place on both attachment
mechanisms.
WARNING!
Adjusting a seat while driving may be
dangerous. Moving a seat while driving could
result in loss of control which could cause a
collision and serious injury or death.
Seats should be adjusted before fastening
the seat belts and while the vehicle is
parked. Serious injury or death could result
from a poorly adjusted seat belt.
Do not ride with the seatback reclined so that
the shoulder belt is no longer resting against
your chest. In a collision you could slide
under the seat belt, which could result in
serious injury or death.
CAUTION!
Do not place any article under a power seat or
impede its ability to move as it may cause
damage to the seat controls. Seat travel may
become limited if movement is stopped by an
obstruction in the seat's path.
23_GU_OM_EN_USC_t.book Page 32
Page 35 of 268

33
Extending The Luggage Compartment
The rear seatbacks can be folded forward to
provide an additional storage area.
Extending the right side of the luggage
compartment allows you to carry two passengers
on the left part of the rear seat, while extending
the left side allows you to carry one passenger.
Proceed as follows:
1. Completely lower the rear seat head restraints
Ú
page 36.
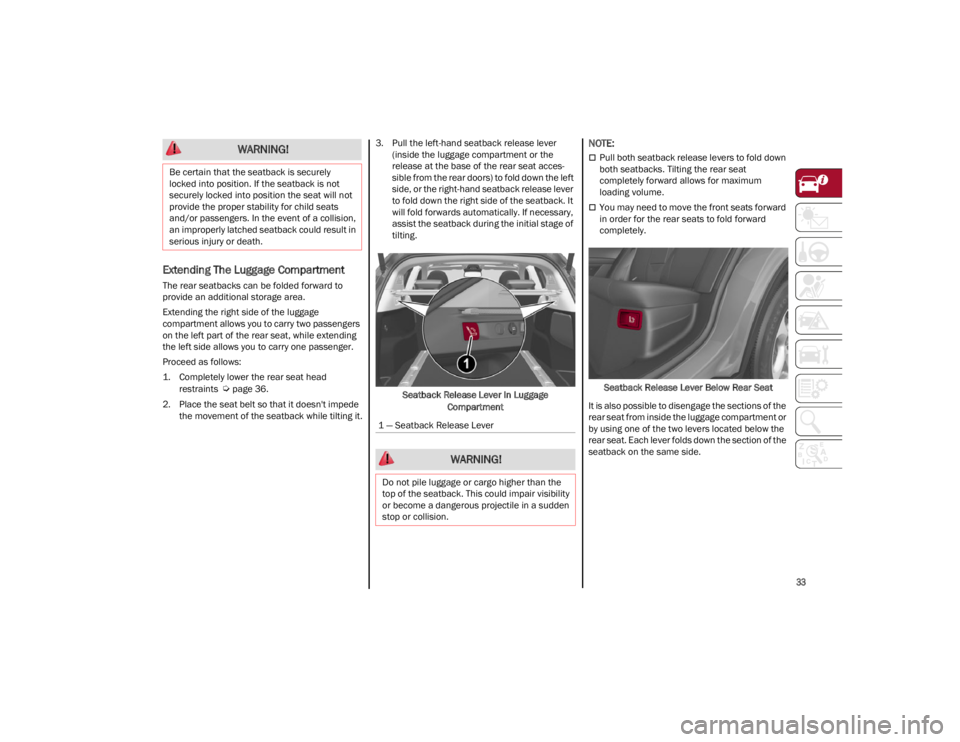
2. Place the seat belt so that it doesn't impede the movement of the seatback while tilting it. 3. Pull the left-hand seatback release lever
(inside the luggage compartment or the
release at the base of the rear seat acces -
sible from the rear doors) to fold down the left
side, or the right-hand seatback release lever
to fold down the right side of the seatback. It
will fold forwards automatically. If necessary,
assist the seatback during the initial stage of
tilting.
Seatback Release Lever In Luggage Compartment
NOTE:
Pull both seatback release levers to fold down
both seatbacks. Tilting the rear seat
completely forward allows for maximum
loading volume.
You may need to move the front seats forward
in order for the rear seats to fold forward
completely.
Seatback Release Lever Below Rear Seat
It is also possible to disengage the sections of the
rear seat from inside the luggage compartment or
by using one of the two levers located below the
rear seat. Each lever folds down the section of the
seatback on the same side.
WARNING!
Be certain that the seatback is securely
locked into position. If the seatback is not
securely locked into position the seat will not
provide the proper stability for child seats
and/or passengers. In the event of a collision,
an improperly latched seatback could result in
serious injury or death.
1 — Seatback Release Lever
WARNING!
Do not pile luggage or cargo higher than the
top of the seatback. This could impair visibility
or become a dangerous projectile in a sudden
stop or collision.
23_GU_OM_EN_USC_t.book Page 33
Page 36 of 268

GETTING TO KNOW YOUR VEHICLE
34
(Continued)
POWER ADJUSTMENT (FRONT SEATS)
NOTE:
The seat layout may vary according to the vehicle
options.
The power seat switches are located on the
outboard side of the seat near the floor. Use
these switches to move the driver's seat up,
down, forward, and rearward, or to recline the
seatback.Power Seat Adjustment
Adjusting The Seat Forward Or Rearward
The seat can be adjusted both forward and
rearward by using the seat adjustment switch.
The seat will move in the direction of the switch.
Release the switch when the desired position has
been reached.
Adjusting The Seat Up Or Down
The height of the seats can be adjusted up or
down. Pull upward or push downward on the seat
switch, and the seat will move in the direction of
the switch. Release the switch when the desired
position is reached.
Tilting The Seat Up Or Down — If Equipped
The seat angle can be adjusted in four directions.
Lift or push the front part of seat switch to move
the front part of the seat in the corresponding
direction. Release the seat switch when the seat
has reached the desired position.
Reclining The Seatback
The angle of the seatback can be adjusted
forward or rearward by using the recline switch.
The seat will move in the direction of the switch.
Release the switch when the desired position
is reached.Power Lumbar
The power lumbar switch is located on the
outboard side of the power seat. Push the switch
forward or rearward to increase or decrease the
lumbar support. Push the switch upward or
downward to raise or lower the lumbar support.
1 — Seat Adjustment
2 — Recline Adjustment
3 — Lumbar Adjustment
4 — Power Adjustable Bolster Buttons
(If Equipped)
WARNING!
Adjusting a seat while driving may be
dangerous. Moving a seat while driving could
result in loss of control which could cause a
collision and serious injury or death.
Seats should be adjusted before fastening
the seat belts and while the vehicle is
parked. Serious injury or death could result
from a poorly adjusted seat belt.
Do not ride with the seatback reclined so
that the shoulder belt is no longer resting
against your chest. In a collision you could
slide under the seat belt, which could result
in serious injury or death.
CAUTION!
Do not place any article under a power seat or
impede its ability to move as it may cause
damage to the seat controls. Seat travel may
become limited if movement is stopped by an
obstruction in the seat's path.
WARNING!
23_GU_OM_EN_USC_t.book Page 34
Page 62 of 268

GETTING TO KNOW YOUR VEHICLE
60
(Continued)
POWER SUNROOF —
IF EQUIPPED
POWER SUNROOF
The power sunroof consists of a single glass
panel and is fitted with a power sunshade the full
length of the panel.
Operation of the sunroof is only possible with the
ignition in the ACC or ON/RUN position
Ú
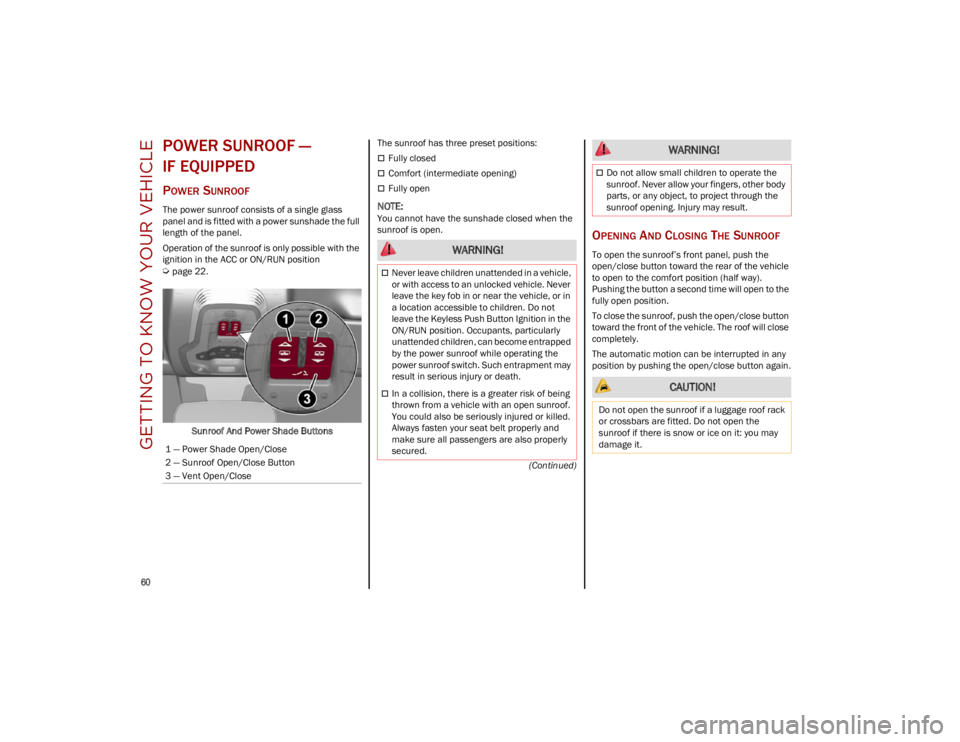
page 22.Sunroof And Power Shade Buttons The sunroof has three preset positions:
Fully closed
Comfort (intermediate opening)
Fully open
NOTE:
You cannot have the sunshade closed when the
sunroof is open.
OPENING AND CLOSING THE SUNROOF
To open the sunroof’s front panel, push the
open/close button toward the rear of the vehicle
to open to the comfort position (half way).
Pushing the button a second time will open to the
fully open position.
To close the sunroof, push the open/close button
toward the front of the vehicle. The roof will close
completely.
The automatic motion can be interrupted in any
position by pushing the open/close button again.
1 — Power Shade Open/Close
2 — Sunroof Open/Close Button
3 — Vent Open/Close WARNING!
Never leave children unattended in a vehicle,
or with access to an unlocked vehicle. Never
leave the key fob in or near the vehicle, or in
a location accessible to children. Do not
leave the Keyless Push Button Ignition in the
ON/RUN position. Occupants, particularly
unattended children, can become entrapped
by the power sunroof while operating the
power sunroof switch. Such entrapment may
result in serious injury or death.
In a collision, there is a greater risk of being
thrown from a vehicle with an open sunroof.
You could also be seriously injured or killed.
Always fasten your seat belt properly and
make sure all passengers are also properly
secured.
Do not allow small children to operate the
sunroof. Never allow your fingers, other body
parts, or any object, to project through the
sunroof opening. Injury may result.
CAUTION!
Do not open the sunroof if a luggage roof rack
or crossbars are fitted. Do not open the
sunroof if there is snow or ice on it: you may
damage it.
WARNING!
23_GU_OM_EN_USC_t.book Page 60